1
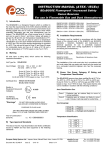
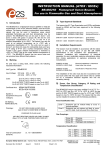
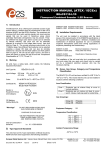
INSTRUCTION MANUAL (ATEX / IECEx)
BExBGL1D Flameproof LED Beacon
For use in Flammable Gas and Dust Atmospheres
1)
Introduction
The BExBGL1D is a flameproof LED beacon which is
certified to meet the ATEX directive 94/9/EC and the IECEx
scheme. The beacon produces visual warning signals and
can be used in hazardous areas where potentially flammable
gas and dust atmospheres may be present. The BExBGL1D
LED beacon has nine different flash patterns including a
steady ON state and can also be remotely switched to a
second and third flash pattern. The beacon can be used in
Zone 1 and Zone 2 areas with gases in groups IIA, IIB and
IIC and Temperature Classifications of T1, T2, T3, and T4. It
can also be used in a temperature classification T5, if the
upper ambient temperature is restricted to +40ºC. The unit
can be used in Zone 21 and Zone 22 areas for combustible
dusts and has an IP rating of IP 67 and a surface
temperature rating of T120ºC or T105ºC if the upper ambient
temperature is restricted to +55ºC and T95ºC if the upper
ambient temperature is restricted to +40ºC.
2)
Marking
All units have a rating label, which carries the following
important information:Unit Type No.
BExBGL1D
Input Voltage:
DC Units
AC Units
Codes:
10-50V
10-35V or 230V or 115V
Ex d IIC T4 for Ta –50ºC to +70ºC
Ex d IIC T5 for Ta –50ºC to +40ºC
Ex tD A21 T120ºC based on max. Ta of +70ºC
KEMA 00ATEX2006
IECEx KEM 10.0002
Certificate No’s
II 2G/D
Epsilon x
Equipment Group and
Category:
General Requirements
Flameproof Enclosure ‘d’
EN61241-0:2006 IEC61241-0:2004 (Ed1)
Dust General
Requirements
Dust Enclosures tD
EN61241-1:2004 IEC60079-1:2004 (Ed1)
4)
Installation Requirements
The led beacons must be installed in accordance with the
latest issues of the relevant parts of the BS EN 60079
specifications or the equivalent IEC specifications –
Selection, Installation and maintenance of electrical
apparatus for use in potentially explosive atmospheres (other
than mining applications or explosive processing and
manufacture):EN60079-14:2008
IEC60079-14:2007 (Ed4)
Electrical Installations in Hazardous
Areas (other than mines)
EN60079-10:2003
IEC60079-10:2008 (Ed1)
Classification of Hazardous Areas
The installation of the units must also be in accordance with
any local codes that may apply and should only be carried
out by a competent electrical engineer who has the
necessary training.
5)
Zones, Gas Group, Category, IP Rating and
Temperature Classification
The BExBGL1D beacons have been certified Ex d IIC T4 for
Ta –50ºC to +70ºC and Ex d IIC T5 for Ta –50ºC to +40ºC for
gas and IP67 T120ºC Ta < +70ºC, T105ºC Ta < +55ºC and
T95ºC Ta < +40ºC for dust. This means that the units can be
installed in locations with the following conditions:Area Classification Gas:
Zone 1
Zone 2
CE Marking
Notified Body No.
Warnings:
EN60079-0:2006 IEC60079-0:2004 (Ed4)
EN60079-1:2007 IEC60079-1:2007 (Ed6)
0518
DO NOT OPEN WHEN AN EXPLOSIVE
GAS OR DUST ATMOSPHERE IS PRESENT
Explosive gas air mixture likely to occur in
normal operation.
Explosive gas air mixture not likely to occur,
and if it does, it will only exist for a short time.
Gas Groupings:
Group IIA
Group IIB
Group IIC
Propane
Ethylene
Hydrogen and Acetylene
COVER BOLTS CLASS A4-80
USE HEAT RESISTING CABLES AND CABLE GLANDS
(Rated 110ºC) AT AMB. TEMPERATURES OVER 40ºC
Year of Construction /
Serial No.
3)
i.e. 10 / 1DB73000001
Type Approval Standards
The beacon has EC Type Examination and IECEx certificates
issued by KEMA and have been approved to the following
standards:-
Temperature Classification:
T1
T2
T3
T4
T5
400o C
300o C
200o C
135o C
100o C
Amb. +40ºC
_______________________________________________________________________________________________________________________________
European Safety Systems Ltd. Impress House, Mansell Road, Acton, London W3 7QH
[email protected]
Tel: +44 (0)208 743 8880
www.e-2-s.com
Fax: +44 (0)208 740 4200
Document No. IS 2468-P
Issue D
18-03-10
Sheet 1 of 4
Area Classification Dust:
Zone 21
Zone 22
Explosive dust air mixture likely to occur in
normal operation.
Explosive dust air mixture not likely to occur, and
if it does, it will only exist for a short time.
IP Rating:
IP67
Equipment Category:
4 off M6 Cover Screws
T120ºC Ta < +70ºC
T105ºC Ta < +55ºC
T95ºC Ta < +40ºC
External Earth
Terminal
2G/D
Ambient Temperature Range:
6)
Note the four M6 screws are Class A4-80 stainless steel
and only screws of this category can be used on the
beacons. It is therefore important that these screws and their
spring washers are kept in a safe place during installation.
-50°C to +70°C
(T5 = +40ºC)
Figure 2
Beacon Location and Mounting
The location of the beacons should be made with due regard
to the area over which the warning signal must be visible.
They should only be fixed to services that can carry the
weight of the unit.
The beacons should be securely bolted to a suitable surface
using the 7mm diameter boltholes in the stainless steel U
shaped mounting bracket (see figure 1). The required angle
can be achieved by loosening the two large bracket screws in
the side of the unit, which allow adjustment of the beacon in
steps of 18°. On completion of the installation the two large
bracket adjustment screws on the side of the unit must be
fully tightened to ensure that the unit cannot move in service.
On completion of the cable wiring installation the flameproof
joints should be inspected to ensure that they are clean and
that they have not been damaged during installation. Also
check that the earth bonding wire between the two casting
sections is secure and the ‘O’ ring seal is in place. When
replacing the flameproof cover casting ensure that it is square
with the flameproof chamber casting before inserting.
Carefully push the cover in place allowing time for the air to
be expelled. Only after the cover is fully in place should the
four M6 Stainless Steel A4-80 cover bolts and their spring
washer be inserted and tightened down. If the cover jams
while it is being inserted, carefully remove it and try again.
Never use the cover bolts to force the cover into position.
SAFETY WARNING:
8)
The flashdome guard must not be removed from the unit
at any time.
It is important that a suitable power supply is used to run the
beacons. The power supply selected must have the
necessary capacity to provide the input current to all of the
beacons
Flashdome
Guard
Flameproof
Chamber
Flameproof
Cover
Power Supply Selection
The following table shows the input current taken by the
various beacons:Unit Type
Nominal I/P
Voltage
Input
Current
Max.
I/P
10-50V DC
10-35V AC
230V AC
115V AC
400mA@24V
812mA@20V
65mA
135mA
50V
35V
253V
126V
Volts
BExBGL1D
BExBGL1D
BExBGL1D
BExBGL1D
Figure 1
7)
S/S Bracket
Access to the Flameproof Enclosure
In order to connect the electrical supply cables to the beacon
it is necessary to remove the flameproof cover to gain access
to the flameproof chamber. To achieve this remove the four
M6 hexagon socket head screws (see figure 2) and withdraw
the flameproof cover taking extreme care not to damage the
flameproof joints in the process.
The input current will vary according to the voltage input
level. The current levels shown above are for nominal input
voltage.
The above table also shows the maximum voltages at which
the beacons can be operated.
9)
Cable Selection
When selecting the cable size consideration must be given to
the input current that each unit draws (see table above), the
number of beacons on the line and the length of the cable
runs. The cable size selected must have the necessary
capacity to provide the input current to all of the beacons
connected to the line.
_______________________________________________________________________________________________________________________________
European Safety Systems Ltd. Impress House, Mansell Road, Acton, London W3 7QH
[email protected]
Tel: +44 (0)20 8743 8880
www.e-2-s.com
Fax: +44 (0)20 8740 4200
Document No. IS 2468-P
Issue D
18-03-10
Sheet 2 of 4
SAFETY WARNING: If the BExBGL1D beacons are used at
high ambient temperatures, i.e. over +40ºC, then the cable
entry temperature may exceed +70ºC and therefore suitable
heat resisting cables must be used, with a rated service
temperature of at least 110ºC.
10)
Earthing
SAFETY WARNING: If the BExBGL1D beacons are used at
high ambient temperatures, i.e. over +40ºC, then the cable
entry temperature may exceed +70ºC and therefore suitable
heat resisting cable glands must be used, with a rated service
temperature of at least 110ºC.
12) Cable Connections
Both AC and DC beacon units must be connected to a good
quality earth. The units are provided with internal and
external earthing terminals which are both located on the
terminal chamber section of the unit (see figures 2 and 3).
BExBGL1D Beacon Cover Internal View
Internal
Bonding Wire
Terminal
2 off M20
Cable Entries
The cable supply connections are made into the terminal
blocks on the electronic pcb assembly located in the
flameproof enclosure, see section 7 of this manual for access
to the flameproof enclosure. The AC unit has two live
terminals and two neutral terminals for the input and output
supply wiring and the DC unit has two +ve terminals and two
-ve terminals for the input and output supply wiring. Both
units have S2 and S3 terminals to remotely change the flash
pattern, see section 13 of this manual.
BExBGL1D AC LED Beacons
Flash Pattern
Pin Headers
Supply Terminals
Internal Earth Terminal
Figure 3
Stage S2 & S3
Terminals
When using the internal earth terminal ensure that the
stainless steel M4 flat washer is between the incoming earth
wire and the enclosure.
When using the external earth terminal a cable crimp lug
must be used. The cable lug should be located between the
two M5 stainless steel flat washers. The M5 stainless steel
spring washer must be fixed between the outer flat washer
and the M5 stainless steel nut to ensure that the cable lug is
secured against loosening and twisting.
The internal earth bonding wire ensures that a good quality
earth is maintained between the flameproof chamber casting
and the flameproof cover casting.
Figure 4
BExBGL1D DC LED Beacons
Flash Pattern
Pin Headers
11) Cable Glands
The BExBGL1D beacons have dual cable gland entries which
have an M20 x 1.5 entry thread as standard. Only cable
glands approved for Ex ‘d’ applications can be used, which
must be suitable for the type of cable being used and also
meet the requirements of the Ex ‘d’ flameproof installation
standard EN60079-14:2008 / IEC60079-14:2007.
When only one cable entry is used the other one must be
closed with an Ex ‘d’ flameproof blanking plug, which must be
suitably approved for the installation requirements.
For combustible dust applications, the cable entry device and
blanking elements shall be in type of explosion protection
increased safety "e" or flameproof enclosure "d" and shall
have an IP 6X rating according to EN 60529.
Supply and
Stage S2 & S3
Terminals
Figure 5
Wires having a cross sectional area of up to 2.5mm² can be
connected to each terminal way. If an input and output wire is
required a 2.5mm² wire can be connected to each terminal
way. W hen connecting wires to the terminals great care
should be taken to dress the wires so that when the cover is
_______________________________________________________________________________________________________________________________
European Safety Systems Ltd. Impress House, Mansell Road, Acton, London W3 7QH
[email protected]
Tel: +44 (0)20 8743 8880
www.e-2-s.com
Fax: +44 (0)20 8740 4200
Document No. IS 2468-P
Issue D
18-03-10
Sheet 3 of 4
PIN HEADER POSITIONS
13) Flash Pattern Selection and 2nd & 3rd Stages
The BExBGL1D LED beacons have 9 different flash patterns
including one ON state that can be selected for the first
stage. They can then be remotely switched to second and
third stage flash patterns. The flash patterns are selected by
pin headers on the pcb for both DC and AC units. The table
on page four shows the pin header positions for the nine
flash patterns and which patterns are available for the second
and third stages. To operate the led beacon on stage one
simply connect the supply voltage to the normal supply
terminals (+ve and –ve for DC units, L and N for AC units).
Pattern No. 1
Pattern No. 2
Pattern No. 3
Pattern No. 4
Pattern No. 5
Pattern No. 6
Pattern No. 7
Pattern No. 8
Pattern No. 9
PCB Edge
inserted into the chamber the wires do not exert excess
pressure on the terminal blocks. This is particularly important
when using cables with large cross sectional areas such as
2.5mm².
Pattern Selection
Pin Headers
The operation of the second and third stages is different for
DC and AC units.
BExBGL1D DC LED Beacon W iring
DC Units Second and Third Stage Selection
To change to the second stage flash pattern, simply connect
a -ve supply line to terminal S2, while maintaining the dc
supply to the +ve and –ve terminals. Similarly for the third
stage flash pattern, connect a -ve supply line to terminal S3.
The supply line to the S3 terminal will automatically override
a supply to the S2 terminal.
+
-
S2 S3
+
-
S2 S3
+
-
C S2 S3
+
Stage 2
Stage 3
AC Units Second and Third Stage Selection
To select the second and third stage flash patterns on the
BExBGL1D AC beacons the Common (C) terminal on the
three way terminal block on the pcb is connected to the S2
terminal for the second stage tone and the S3 terminal for the
third stage tone.
14) End of Line Monitoring (DC Units)
BExBGL1D AC LED Beacon W iring
L
N
C S2 S3
L
N
C S2 S3
L
N
C S2 S3
L
N
On the BExBGL1D DC beacons, dc reverse line monitoring
can be used if required. All DC beacons have a blocking
diode fitted in their supply input lines. An end of line
monitoring diode or an end of line monitoring resistor can be
connected across the +ve and –ve terminals. If an end of line
resistor is used it must have a minimum resistance value of
3k3 ohms and a minimum wattage of 0.5 watts or a minimum
resistance value of 500 ohms and a minimum wattage of 2
watts.
C
Stage 2
Stage 3
Flash Pattern Table
Stage 1
Pattern
1
2
3
4
5
6
7
8
9
LED
Flash Pattern
ON
Rotating 3 LED on Fast
Rotating 6 LED on Fast
Rotating 3 LED on Slow
Rotating 6 LED on Slow
Double strike strobe 1 Hz
Single strike strobe 2 Hz
Double strike strobe 2 Hz
Alternate side flash 1:1 2 Hz
Stage 2
Stage 3
Pattern
9
7
8
9
6
9
3
3
3
Pattern
8
1
1
1
1
1
1
1
1
_______________________________________________________________________________________________________________________________
European Safety Systems Ltd. Impress House, Mansell Road, Acton, London W3 7QH
[email protected]
Tel: +44 (0)20 8743 8880
www.e-2-s.com
Fax: +44 (0)20 8740 4200
Document No. IS 2468-P
Issue D
18-03-10
Sheet 4 of 4
INSTRUCTION MANUAL (ATEX / IECEx) (GBR)
BExBGL1D Flameproof LED Beacon
For use in Flammable Gas and Dust Atmospheres
Area Classification Gas:
2) Marking
All units have a rating label, which carries the following
important information:-
Zone 1
Zone 2
Unit Type No.
BExBGL1D
Input Voltage:
DC Units
AC Units
Codes:
10-50V
10-35V or 230V or 115V
Gas Groupings:
Group IIA
Group IIB
Group IIC
Ex d IIC T4 for Ta –50ºC to +70ºC
Ex d IIC T5 for Ta –50ºC to +40ºC
Ex tD A21 T120ºC based on max. Ta of +70ºC
KEMA 00ATEX2006
IECEx KEM 10.0002
Certificate No’s
CE Marking
Notified Body No.
T1
T2
T3
T4
T5
0518
Propane
Ethylene
Hydrogen and Acetylene
Temperature Classification:
II 2G/D
Epsilon x
Equipment Group and
Category:
Warnings:
Explosive gas air mixture likely to occur in
normal operation.
Explosive gas air mixture not likely to occur,
and if it does, it will only exist for a short time.
o
400 C
o
300 C
o
200 C
o
135 C
o
100 C
Amb. +40ºC
Area Classification Dust:
DO NOT OPEN WHEN AN EXPLOSIVE
GAS OR DUST ATMOSPHERE IS PRESENT
Zone 21
Zone 22
COVER BOLTS CLASS A4-80
USE HEAT RESISTING CABLES AND CABLE GLANDS
(Rated 110ºC) AT AMB. TEMPERATURES OVER 40ºC
IP Rating:
Explosive dust air mixture likely to occur in
normal operation.
Explosive dust air mixture not likely to occur, and
if it does, it will only exist for a short time.
IP67
4) Installation Requirements
Equipment Category:
The led beacons must be installed in accordance with the
latest issues of the relevant parts of the BS EN 60079
specifications or the equivalent IEC specifications –
Selection, Installation and maintenance of electrical
apparatus for use in potentially explosive atmospheres (other
than mining applications or explosive processing and
manufacture):EN60079-14:2008
IEC60079-14:2007 (Ed4)
Electrical Installations in Hazardous
Areas (other than mines)
EN60079-10:2003
IEC60079-10:2008 (Ed1)
Classification of Hazardous Areas
T120ºC Ta < +70ºC
T105ºC Ta < +55ºC
T95ºC Ta < +40ºC
2G/D
Ambient Temperature Range:
-50°C to +70°C
(T5 = +40ºC)
5) Beacon Location and Mounting
See drawing A
SAFETY WARNING: The flashdome guard must not be
removed from the unit at any time.
6) Access to the Flameproof Enclosure
Installation should only be carried out by competent
personnel and local codes of practice applied.
5) Zones, Gas Group, Category and Temperature
Classification
The units can be installed in locations with the following
conditions:-
See drawing B
Note the four M6 screws are Class A4-80 stainless steel
and only screws of this category can be used on the
beacons. It is therefore important that these screws and their
spring washers are kept in a safe place during installation.
_______________________________________________________________________________________________________________________________
European Safety Systems Ltd. Impress House, Mansell Road, Acton, London W3 7QH
[email protected]
Tel: +44 (0)208 743 8880
www.e-2-s.com
Fax: +44 (0)208 740 4200
Document No. BExBGL1D (Gas-Dust) English
Issue A (Four Sheets)
26-01-11
(1)
8) Power Supply Selection
The system power supply must have the necessary capacity
to provide the input current to all of the beacons connected to
the system.
The following table shows the input current taken by the
various beacons:Unit Type
Nominal I/P
Voltage
Input
Current
Max.
I/P Volts
BExBGL1D
BExBGL1D
BExBGL1D
BExBGL1D
10-50V DC
10-35V AC
230V AC
115V AC
400mA@24V
812mA@20V
65mA
135mA
50V
35V
253V
126V
The above table also shows the maximum voltages at which
the beacons can be operated.
9) Cable Selection
Cables must be capable of handling the current draw from all
of the unts on the line
SAFETY WARNING: If the BExBGL1D beacons are used at
high ambient temperatures, i.e. over +40ºC, then the cable
entry temperature may exceed +70ºC and therefore suitable
heat resisting cables must be used, with a rated service
temperature of at least 110ºC.
For combustible dust applications, the cable entry device and
blanking elements shall be in type of explosion protection
increased safety "e" or flameproof enclosure "d" and shall
have an IP 6X rating according to EN 60529.
SAFETY WARNING: If the BExBGL1D beacons are used at
high ambient temperatures, i.e. over +40ºC, then the cable
entry temperature may exceed +70ºC and therefore suitable
heat resisting cable glands must be used, with a rated service
temperature of at least 110ºC.
12) Cable Connections
See drawings C and D / wiring diagram E
13) Flash Pattern Selection and 2nd & 3rd Stages
The BExBGL1D LED beacons have 9 different flash patterns
including one ON state that can be selected for the first
stage. They can then be remotely switched to second and
third stage flash patterns. The flash patterns are selected by
pin headers on the pcb for both DC and AC units. The table
on page four shows the pin header positions for the nine
flash patterns and which patterns are available for the second
and third stages. To operate the led beacon on stage one
simply connect the supply voltage to the normal supply
terminals (+ve and –ve for DC units, L and N for AC units).
The operation of the second and third stages is different for
DC and AC units.
10) Earthing
Both AC and DC beacon units must be connected to a good
quality earth. The units are provided with internal and
external earthing terminals which are both located on the
terminal chamber section of the unit (see figures 2 and 3).
When using the internal earth terminal ensure that the
stainless steel M4 flat washer is between the incoming earth
wire and the enclosure.
When using the external earth terminal a cable crimp lug
must be used. The cable lug should be located between the
two M5 stainless steel flat washers. The M5 stainless steel
spring washer must be fixed between the outer flat washer
and the M5 stainless steel nut to ensure that the cable lug is
secured against loosening and twisting.
The internal earth bonding wire ensures that a good quality
earth is maintained between the flameproof chamber casting
and the flameproof cover casting.
11) Cable Glands
The BExBGL1D beacons have dual cable gland entries which
have an M20 x 1.5 entry thread as standard. Only cable
glands approved for Ex ‘d’ applications can be used, which
must be suitable for the type of cable being used and also
meet the requirements of the Ex ‘d’ flameproof installation
standard EN60079-14:2008 / IEC60079-14:2007.
DC Units Second and Third Stage Selection
To change to the second stage flash pattern, simply connect
a -ve supply line to terminal S2, while maintaining the dc
supply to the +ve and –ve terminals. Similarly for the third
stage flash pattern, connect a -ve supply line to terminal S3.
The supply line to the S3 terminal will automatically override
a supply to the S2 terminal.
AC Units Second and Third Stage Selection
To select the second and third stage flash patterns on the
BExBGL1D AC beacons the Common (C) terminal on the
three way terminal block on the pcb is connected to the S2
terminal for the second stage tone and the S3 terminal for the
third stage tone.
14) End of Line Monitoring (DC Units)
On the BExBGL1D DC beacons, dc reverse line monitoring
can be used if required. All DC beacons have a blocking
diode fitted in their supply input lines. An end of line
monitoring diode or an end of line monitoring resistor can be
connected across the +ve and –ve terminals. If an end of line
resistor is used it must have a minimum resistance value of
3k3 ohms and a minimum wattage of 0.5 watts or a minimum
resistance value of 500 ohms and a minimum wattage of 2
watts.
When only one cable entry is used the other one must be
closed with an Ex ‘d’ flameproof blanking plug, which must be
suitably approved for the installation requirements.
_______________________________________________________________________________________________________________________________
European Safety Systems Ltd. Impress House, Mansell Road, Acton, London W3 7QH
[email protected]
Tel: +44 (0)20 8743 8880
www.e-2-s.com
Fax: +44 (0)20 8740 4200
Document No. BExBGL1D (Gas-Dust) English
Issue A (Four Sheets)
26-01-11
(2)
Flash Pattern Table
Stage 1
Pattern
1
2
3
4
5
6
7
8
9
LED
Flash Pattern
ON
Rotating 3 LED on Fast
Rotating 6 LED on Fast
Rotating 3 LED on Slow
Rotating 6 LED on Slow
Double strike strobe 1 Hz
Single strike strobe 2 Hz
Double strike strobe 2 Hz
Alternate side flash 1:1 2 Hz
Stage 2
Stage 3
Pattern
9
7
8
9
6
9
3
3
3
Pattern
8
1
1
1
1
1
1
1
1
PIN HEADER POSITIONS
Pattern No. 2
Pattern No. 3
Pattern No. 4
Pattern No. 5
Pattern No. 6
Pattern No. 7
Pattern No. 8
Pattern No. 9
Pattern Selection
Pin Headers
PCB Edge
Pattern No. 1
_______________________________________________________________________________________________________________________________
European Safety Systems Ltd. Impress House, Mansell Road, Acton, London W3 7QH
[email protected]
Tel: +44 (0)20 8743 8880
www.e-2-s.com
Fax: +44 (0)20 8740 4200
Document No. BExBGL1D (Gas-Dust) English
Issue A (Four Sheets)
26-01-11
(3)
Drawing A
Drawing C
Flash Pattern
Pin Headers
Supply Terminals
Stage S2 & S3
Terminals
Lossen screw
to adjust
Loosen screw to adjust.
180º
Løsn skruen for at tilpasse.
Schroef losdraaien om af te stellen.
Desserrer la vis pour régler.
Zum Regulieren Schraube lockern.
Allentare la vite per poter effettuare la
regolazione.
Løsne skruen for å justere.
Desaperte o parafuso para ajustar.
Afloje el tornillo para ajustar.
Lossa skruven för att justera.
BExBGL1D AC LED
Beacons
Drawing D
Flash Pattern
Pin Headers
Tighten screw
to secure
Tighten screw to secure.
Spænd skruen for at fastgøre.
Schroef aandraaien om vast te zetten.
Serrer la vis pour une fixation sûre.
Zum Sichern Schraube anziehen.
Stringere la vite per il fissaggio.
Stram skruen for å feste.
Aperte o parafuso para fixar.
Apriete el tornillo para asegurar.
Dra åt skruven för att fästa.
Supply and
Stage S2 & S3
Terminals
BExBGL1D DC LED
Beacons
Drawing B
Wiring Diagram E
BExBGL1D DC LED Beacon Wiring
+
-
S2 S3
+
-
S2 S3
+
-
C S2 S3
+
Stage 2
Stage 3
BExBGL1D AC LED Beacon Wiring
L
N
C S2 S3
L
N
C S2 S3
L
N
C S2 S3
L
N
C
Stage 2
Stage 3
_______________________________________________________________________________________________________________________________
European Safety Systems Ltd. Impress House, Mansell Road, Acton, London W3 7QH
[email protected]
Tel: +44 (0)20 8743 8880
www.e-2-s.com
Fax: +44 (0)20 8740 4200
Document No. BExBGL1D (Gas-Dust) English
Issue A (Four Sheets)
26-01-11
(4)
TECHNISCHE HINWEISE (ATEX / IECEx) (DEU)
BExBGL1D Explosionsgeschützte LED-Leuchte
Zum Einsatz in entflammbaren Gas- und
Staubatmosphären
2) Kennzeichnung
Bereichseinteilung Gas:
Alle Geräte sind mit einem Typenschild mit den folgenden
wichtigen Informationen versehen:-
BExBGL1D
Gerätetyp-Nr.
Zone 1
Zone 2
Eingangsspannung:
Gleichstromgeräte (DC) 10-50 V
Wechselstromgeräte (AC) 10-35V; 230V; 115V
Code:
Gasgruppen:
Ex d IIC T4 für Ta –50ºC to +70ºC
Ex d IIC T5 für Ta –50ºC to +40ºC
Ex tD A21 T120ºC based on max. Ta of +70ºC
Zertifikat-Nr.
KEMA 00ATEX2006
IECEx KEM 10.0002
Epsilon x:
Gerätegruppe und
–kategorie:
CE-Kennzeichnung:
Nr. der demeldeten
Stelle:
Warnung
Bei normalem Betrieb kann mit hoher
Wahrscheinlichkeit eine explosive Gas-LuftMischung vorliegen.
Explosive Gas-Luft-Mischung unwahrscheinlich und sollte sie doch auftreten, dann nur
kurzfristig.
Gruppe IIA
Gruppe IIB
Gruppe IIC
Temperaturklassifizierung:
T1
T2
T3
T4
T5
II 2G/D
0518
Zone 21
Zone 22
WÄRMEBESTÄNDIGE KABEL UND
KABELVERSCHRAUBUNGEN VERWENDEN
(Nennleistung 110ºC) BEI UMGEB.-TEMP. ÜBER 40ºC
o
400 C
o
300 C
o
200 C
o
135 C
o
100 C
Explosionsgefährdetes Staub-/Luftgemisch,
das beim normalen Betrieb durchaus
auftreten kann
Explosionsgefährdetes Staub-/Luftgemisch,
dessen Auftreten unwahrscheinlich bzw. von
kurzer Dauer ist.
IP-Schutzklasse:
IP67
Gerätekategorie:
2G/D
4) Installationsanforderungen
Die LED-Leuchten müssen gemäß den folgenden oder
vergleichbaren Standards installiert werden.
EN60079-14:2008
IEC60079-14:2007 (Ed4)
EN60079-10:2003
Elektrische Installationen in
Gefahrenbereichen (außer
Bergwerken)
Klassifizierung von Gefahrenbereichen
IEC60079-10:2008 (Ed1)
Amb. +40ºC
Bereichseinteilung Staub:
NICHT IN EXPLOSIONSFÄHIGEN GAS- ODER
STAUBATMOSPHÄREN ÖFFNEN
ABDECKSCHRAUBEN KLASSE A4-80
Propan
Äthylen
Wasserstoff und Azetylen
T120ºC
T105ºC
T95ºC
Ta < +70ºC
Ta < +55ºC
Ta < +40ºC
Umgebungstemperaturbereich: -50°C to +70°C
(T5 = +40ºC)
6) Standort und Montage der Leuchte
Siehe Zeichnung A
Die Installation sollte nur von qualifiziertem Fachpersonal
vorgenommen werden. Örtliche anerkannte Verfahren sind
zu beachten.
SICHERHEITSHINWEIS: Der Schutz der Signalhaube darf
auf keinen Fall vom Gerät entfernt werden.
5) Zonen, Gasgruppe, Kategorie und
Temperaturklassifizierung
Siehe Zeichnung B
Die Geräte können an Standorten aufgestellt werden, an
denen die folgenden Bedingungen vorliegen:-
7) Zugang zum schwer entflammbaren Gehäuse
Hinweis: Die vier Schrauben M6 sind aus Edelstahl Klasse
A4-80 gefertigt. Für diese Leuchten sind nur Schrauben
dieser Kategorie geeignet. Diese Schrauben und die
zugehörigen Federringe sind beim Einbau daher sorgfältig
aufzubewahren.
_______________________________________________________________________________________________________________________________
European Safety Systems Ltd. Impress House, Mansell Road, Acton, London W3 7QH
[email protected]
Tel: +44 (0)20 8743 8880
www.e2s.com
Fax: +44 (0)20 8740 4200
Document No. BExBGL1D (Gas-Dust) German
Issue A (Three Sheets)
02-02-11
8) Stromversorgung
Die Stromversorgung der Anlage muss ausreichen, um alle
angeschlossenen Leuchten mit Eingangsstrom zu versorgen.
Folgende Tabelle zeigt die Eingangsstromaufnahme der
verschiedenen Leuchten:Gerätetyp
EingangsSpannung
Eingangsstrom
Max. I/P
Spannung
BExBGL1D
BExBGL1D
BExBGL1D
BExBGL1D
10-50V DC
10-35V AC
230V AC
115V AC
400mA@24V
812mA@20V
65mA
135mA
50V
35V
253V
126V
Obige Tabelle zeigt auch die maximale Spannung an, mit der
die Leuchten betrieben werden können.
9) Kabelwahl
Die Kabel müssen den Strom aller angeschlossenen Geräte
führen können.
SICHERHEITSHINWEIS: Wenn die BExBGL1 Leuchte bei
hohen Umgebungstemperaturen eingesetzt werden (d. h. bei
über +40ºC), kann die Kabeleingangstemperatur +70ºC
übersteigen. Daher sind geeignete hitzebeständige Kabel mit
einer Nennbetriebstemperatur von mindestens 110ºC zu
verwenden.
10) Erdung
Die Wechsel- und Gleichstrom-Leuchten müssen mit einer
hochwertigen Erdung verbunden werden. Die Geräte sind mit
internen und externen Erdklemmen (am Klemmkammerteil
des Geräts, siehe Abb. 2 und 3) versehen.
Bei Verwendung der internen Erdklemme ist sicherzustellen,
dass die M4-Edelstahl-Unterlegscheibe zwischen EingangsErdkabel und dem Gehäuse liegt.
Bei Verwendung der externen Erdklemme ist ein
Quetschkabelschuh zu verwenden, der zwischen den beiden
flachen M5-Edelstahl-Unterlegscheiben eingesetzt werden
sollte. Die M5-Unterlegscheiben sind zwischen der äußeren
flachen Unterlegscheibe und der M5-Edelstahlmutter
einzusetzen, um zu gewährleisten, dass der Kabelschuh sich
nicht lösen oder verdrehen kann.
Der interne Erdungs-Abbindedraht stellt sicher, dass
zwischen dem Gehäuse der drucksicheren Kammer und dem
Gehäuse der drucksicheren Abdeckung eine sichere Erdung
besteht.
11) Kabelverschraubungen
Die BExBGL1D Leuchten sind mit doppelten
Kabelverschraubungen mit Eingangsgewinden von M20 x1.5
versehen. Es dürfen nur Kabelverschraubungen verwendet
werden, die für Ex ‘d’-Anwendungen zugelassen sind. Die
Kabelverschraubungen müssen für den eingesetzten
Kabeltyp geeignet sein und zudem den Anforderungen der
Ex ‘d’-Norm zur Installation drucksicherer Geräte EN6007914:2008 / IEC60079-14:2007 entsprechen.
Wenn nur ein Kabeleingang verwendet wird, muss der
andere mit einem druckfesten Ex ‘d’ Stopfen, der für die
Installationsbedingungen zugelassen ist, verschlossen
werden.
Bei Anwendungen in brennbaren Staubbereichen sind
Kabelverschraubungen und Stopfen, die mit erhöhter
Sicherheit (Typ „e“) oder druckfester Kapselung („Typ „d“)
geschützt sind, zu installieren und müssen der Schutzklasse
IP 6X gemäß EN60529:1992 entsprechen.
SICHERHEITSHINWEIS: Wenn die BExBGL1D Leuchten bei
hohen Umgebungstemperaturen eingesetzt werden (d. h. bei
über +40ºC), kann die Kabeleingangstemperatur +70ºC
übersteigen. Daher sind geeignete hitzebeständige Kabel mit
einer Nennbetriebstemperatur von mindestens 110ºC zu
verwenden.
12) Kabelanschlüsse
Siehe Zeichnung C und D / Schaltbild E
13) Blinkmusterauswahl und 2. & 3. Stufen
Die BExBGL1D LED-Leuchten verfügen über 9
verschiedene Blinkmuster einschließlich eines ANStatus (Dauerleuchte), der als erste Alarmstufe
gewählt werden kann. Anschließend können die Stufen
2 und 3 Blitzmuster extern angesteuert werden. Die
Blitzmuster sowohl für die DC- als auch die AC-Geräte
werden über Kontaktbrücken auf der Leiterplatte
eingestellt. Die Tabelle auf Seite 3 zeigt die Positionen
der Kontaktbrücken für die verschiedenen Blinkmuster
und welche Blinkmuster als 2. und 3. Alarmstufe zur
Verfügung stehen. Um die LED-Leuchte auf Stufe 1 zu
betreiben, muss die Netzspannung an die normalen
Netzanschlussklemmen angeschlossen werden (+ und
– für DC-Geräte, L und N für AC-Geräte).
Der Betrieb der 2. und 3. Stufe ist bei DC- und ACGeräten unterschiedlich.
DC-Geräte – Auswahl der 2. und 3. Stufe
Um auf die 2. Stufe umzuschalten, muss die - minus
Klemme mit der S2 Klemme verbunden werden,
während die DC-Versorgungsleitung an den + und –
Klemmen bleibt. Um auf die 3.Stufe umzuschalten,
muss die - minus Klemme mit der S3 Klemme
verbunden werden. Die Zuleitung zur S3-Klemme hebt
automatisch den Anschluss an die S2-Klemme auf.
AC-Geräte – Auswahl der 2. und 3. Stufe
Um die Blitzmuster der Stufe 2 und 3 auf einer
BExBGL1D AC-Leuchte auszuwählen, wird die CKlemme der Drei-Wege-Anschlussleiste auf der
Leiterplatte für die zweite Stufe an die S2-Klemme und
für die dritte Stufe an die S3-Klemme angeschlossen.
_______________________________________________________________________________________________________________________________
European Safety Systems Ltd. Impress House, Mansell Road, Acton, London W3 7QH
[email protected]
Tel: +44 (0)20 8743 8880
www.e2s.com
Fax: +44 (0)20 8740 4200
Document No. BExBGL1D (Gas-Dust) German
Issue A (Three Sheets)
02-02-11
15) Überwachung des Leitungsendes
(Gleichstromgeräte)
Bei BExBGL1D-Gleichstromgeräten kann bei Bedarf eine
Wechselstrom-Sperre eingesetzt werden. Alle GleichstromLeuchten sind mit einer Sperrdiode versehen, die in die NetzEingangsleitungen eingesetzt ist. Eine Überwachungsdiode
oder ein Kontrollwiderstand für das Leitungsende können
über die Klemmen + und – angeschlossen werden. Wird ein
Widerstand für das Leitungsende verwendet, muss sein
Widerstandswert
mindestens
3k3
Ohm
und
die
Mindestleistung 0,5 Watt betragen, oder aber es muss ein
Widerstandswert von mindestens 500 Ohm und eine
Mindestleistung von 2 Watt vorliegen.
Blinkmuster-Tabelle
Stufe 1
Muster
1
2
3
4
5
6
7
8
9
LED
Blinkmuster
AN
3 LED rotierend, schnell
6 LED rotierend, schnell
3 LED rotierend, langsam
6 LED rotierend, langsam
Doppelblitz 1 Hz
Einzelblitz 2 Hz
Doppelblitz 2 Hz
Wechselblitz 2 Hz
Stufe 2
Muster
9
7
8
9
6
9
3
3
3
Stufe 3
Muster
8
1
1
1
1
1
1
1
1
Positionen der Kontaktbrücken
Pattern No. 2
Pattern No. 3
Pattern No. 4
Pattern No. 5
Pattern No. 6
Pattern No. 7
Pattern No. 8
Pattern No. 9
Pattern Selection
Pin Headers
PCB Edge
Pattern No. 1
_______________________________________________________________________________________________________________________________
European Safety Systems Ltd. Impress House, Mansell Road, Acton, London W3 7QH
[email protected]
Tel: +44 (0)20 8743 8880
www.e2s.com
Fax: +44 (0)20 8740 4200
Document No. BExBGL1D (Gas-Dust) German
Issue A (Three Sheets)
02-02-11
EC DECLARATION OF CONFORMITY
Manufacturer:
European Safety Systems Ltd.
Impress House, Mansell Road, Acton
London, W3 7QH, UK
Equipment Type:
BExBG05D, BExBG05E,
BExBG10D, BExBG10E,
BExBG15D, BExBG15E,
BExBG21D,
BExTBG05D,
BExBGL1D
Directive 94/9/EC: Electrical and Mechanical equipment for use in explosive atmospheres (ATEX)
Notified Body for EC type Examination:
KEMA Quality B.V.
Notified Body No.: 0344
Utrechtseweg 310, 6812 AR Arnhem, The Netherlands
EC-type Examination Certificate:
KEMA 00ATEX2006
Notified Body for Quality Assurance Notification:
Sira Certification Service
Notified Body No.: 0518
Rake Lane, Eccleston, Chester CH4 9JN, UK
Quality Assurance Notification:
SIRA 05 ATEX M342
Provisions fulfilled by the equipment:
ll2 G Ex d llC T3 to T6 or
ll2 G Exde llC T4 to T6
ll2 D Ex tD A21 lP66 or lP67 T85 °C to T200 °C
Standards applied:
EN 60079-0:2006
EN 60079-1:2007
EN 60079-7:2003
EN 61241-0:2006
EN61241-1:2004
Directive 2004/108/EC: Electromagnetic Compatibility Directive (EMC)
Standards applied:
EN 61000-6-1:2007
EN 61000-6-2:2005
EN 61000-6-3:2007
EN 61000-6-4:2007
The standards EN 60079-0: 2006, EN 60079-7:2003, EN 61241-0:2006 and EN 61241-1:2004 are no longer
harmonized. The requirements of these standards have been checked against the harmonized standards EN 600790:2009, EN 60079-7:2007 and EN 60079-31:2009 and there were no major technical changes affecting the latest
technical knowledge for the products listed above.
On behalf of European Safety Systems Ltd., I declare that, on the date the equipment accompanied by this declaration is
placed on the market, the equipment conforms with all technical and regulatory requirements of the above listed
directives.
Martin Streetz
Quality Assurance Manager
Telephone: +44 (0)20 8743 8880
Facsimile: +44 (0)20 8740 4200
E-mail: [email protected]
www.e2s.com
Date and Place of Issue: London, 04/07/2012
Document No:
DC-004-Issue_C
European Safety Systems Ltd
Company Registration No. 2763350
Registered Office: Impress House
Mansell Road, London, UK, W3 7QH, UK