1
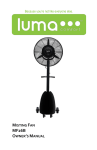
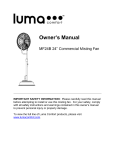
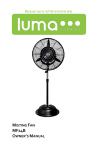
Owner’s Manual MF26B 26” Commercial Misting Fan Contents Introduction ..................................................................................................................... 1 Product Benefits .............................................................................................................. 1 Important Safety Information ........................................................................................... 1 Assembly Instructions ..................................................................................................... 2 Step 1: Removing the Water Tank ........................................................................... 2 Step 2: Installing the Water Pump ............................................................................ 3 Step 3: Assembling the Stand Pole .......................................................................... 4 Step 4: Assembling the Fan Head............................................................................ 5 Step 5: Connecting the Power Supply & Water Hoses............................................. 6 Step 6: Connecting the Power Supply (Upper Back Panel) ..................................... 7 Step 7: Connecting the Power Supply (Lower Back Panel) ..................................... 8 Step 8: Connecting the Pump & Water Output Hoses.............................................. 9 Step 9: Locking/Unlocking the Handles.................................................................. 10 Operating Instructions ................................................................................................... 11 Maintenance .................................................................................................................. 12 Technical Support ......................................................................................................... 12 Product Specifications ................................................................................................... 12 Warranty........................................................................................................................ 13 Introduction Thank you for purchasing this misting fan from Luma Comfort, the world leader in home appliances and home comfort products. This owner’s manual provides specific operating instructions for your misting fan. Use the misting fan only as instructed in this owner’s manual. Product Benefits Designed for cooling large areas such as patios, factories, manufacturing facilities, garages, athletic fields, greenhouses and more Centrifugal misting system means no clogged nozzles and no need to use filtered water Fan head constructed of heavy-gauge, anticorrosive metal for safety and durability Quiet, high-efficiency fan motor Adjustable misting flow with a fully-insulated seal around the water pump Adds moisture to dry environments and eliminates airborne dust particles Covers up to 1,000 square feet and features a 5-hour maximum run time with each full tank Important Safety Information These instructions are not meant to cover every possible condition and situation that may occur. Please read all instructions before using this misting fan. Failure to carefully read all instructions may result in possible electric shock or fire hazard, and will void the manufacturer’s warranty. 1. Use this misting fan only as instructed in this owner’s manual. Other uses may cause electric shock, injury or fire. 2. Close supervision is required if this fan is used near children or pets. 3. To protect against electric shock, do not immerse this fan or its plug and cord in water. 4. If the fan is being transported or will not be in use, disconnect it from the power supply by tightly gripping the fan’s plug and pulling it from the power outlet. Do not disconnect the power supply by pulling on the fan’s power cord. 5. Avoid contact with any of the misting fan’s moving parts. 6. Place the misting fan on a level surface. 7. This misting fan is intended to fit into a matching receptacle. Under no circumstances should the grounded plug be altered in any way. An improper connection can result in electric shock. 8. If possible, avoid using extension cords with this misting fan. If an extension cord is absolutely necessary, do not use more than one extension cord to operate more than one fan. 9. Do not insert objects or allow fingers to enter into the fan head, as this may cause electric shock or bodily injury. Do not block or tamper with the misting fan while it is in operation. 10. Do not place the fan near curtains, drapes, or any other materials that can get caught in the misting fan’s grills. 11. Do not run the power cord under mats or carpeting, and do not cover the power cord with runners. Arrange the power cord away from room traffic and where it can be tripped over. 12. Do not operate this misting fan in the presence of flammable substances or explosives. 13. Do not place the fan near an open flame or cooking/heating appliances. 14. If the fan will not be in use, empty the tank of any remaining water. 15. If the fan’s plug or power cord is damaged, do not attempt to repair the components yourself. Please contact Luma Comfort’s customer service hotline at 1-866-737-6390 or have the fan examined by an authorized service provider. SAVE THESE INSTRUCTIONS 1 Assembly Instructions DO NOT plug in the fan before assembly. This misting fan comes in 3 separate boxes. Carefully remove all packaging materials and retain for future storage/use. Make sure there is no residual foam left in any of the components. A screwdriver and wrench will be required to assemble this misting fan. Step 1: Removing the Water Tank Refer to diagram 1. Carefully remove the water tank from the tank cart. 2 Step 2: Installing the Water Pump a. Refer to diagram 2. Remove the water pump from the packaging, making sure not to pull it out by the power cord. The water pump will be attached to a metal panel. b. Position the water pump in an upright position and place it on the plastic beam located at the bottom of the water tank. A small portion of the power cord will be submerged in the tank, but most of it should be placed outside the water tank. 3 Step 3: Assembling the Stand Pole a. Refer to diagram 3. Locate the tank cart and stand pole. Remove the four M8x20 bolts, spring washers, flat washers and nuts from the tank cart. b. Position the stand pole on the tank cart and align the holes on the pole with the four holes on the cart. c. Using the bolts, washers and nuts removed in step a, screw the stand pole into the tank cart. Make sure the stand pole is securely screwed onto the tank cart before proceeding to the next step. 4 Step 4: Assembling the Fan Head a. Refer to diagram 4. Remove the fan head from box #1. b. Align the stand pole opening on the bottom of the fan head with the stand pole and connect the two pieces together. c. Use the screw located on the screw attachment to secure the two pieces together. 5 Step 5: Connecting the Power Supply & Water Hoses a. Refer to diagrams 5 and 6. Insert the power line that is connected to the fan head into the power line opening and screw in the front panel to the stand pole. b. Insert the water output hose (hose #1) and water input hose (hose #2) into the appropriate connectors on the stand pole as indicated in diagram 6. 6 Step 6: Connecting the Power Supply (Upper Back Panel) a. Refer to diagram 7. Remove the upper back panel from the top of the stand pole by unscrewing the 4 M5 screws holding it in place. b. Insert plug A into socket A and make sure the connection is secure. c. Insert plug B into socket B and make sure the connection is secure. d. Push all of the wires back into the stand pole and reattach the upper back panel onto the stand pole using the 4 M5 screws removed in step a. 7 Step 7: Connecting the Power Supply (Lower Back Panel) a. Refer to diagram 8. Place the water tank on the tank shelf. e. Take the lower back panel that is attached to the pump and locate plug C and socket C. Insert plug C into socket C and make sure the connection is secure. f. Remove the 4 M5 screws from the stand pole and screw the lower back panel onto the stand pole. 8 Step 8: Connecting the Pump & Water Output Hoses a. Refer to diagram 9. Remove the tank cover from the water tank. b. Locate the pump hose (longer hose), the water output hose (shorter hose) and the pump power cord. c. On the bottom of the stand pole, there are 2 connections – one for the water output hose and one for the pump hose. Securely connect the hoses to the appropriate connections. d. Place the tank cover back onto the water tank. 9 Step 9: Locking/Unlocking the Handles This misting fan is equipped with handles for convenient transport. The handles will be in the locked position when first assembled. Follow these steps to unlock and lock the handles. a. Refer to diagram 10. To unlock the handles, push the L type pin on the handle joint. While pushing in the L type pin, simultaneously push the handle up. b. To lock the handles, push in the L type pin on the handle joint and simultaneously push the handle down to the lock position. 10 Operating Instructions 1. This misting fan can operate with optimal output in temperatures up to 104°F. 2. Lift up the tank cover and fill the tank with clean water. Make sure the pump hose is fully submersed in water. Replace the tank cover. 3. Connect the fan to a power supply. 4. Turn on the fan by adjusting the power switch to the ON position. 5. This misting fan has 3 different fan speeds. Turn the fan speed dial to adjust the fan speed. 6. To start the misting function, turn the misting dial located on the stand pole. The pump and misting plate should power on at this time. 7. To adjust the misting volume, turn the misting dial. 8. To empty the tank of water, adjust the drainage valve located on the back of the water tank. 9. The maximum run time for a full tank on high speed is approximately 6 hours. 11 Maintenance Regular cleaning and maintenance is an essential step in maintaining the longevity of your misting fan and ensuring that it operates free of defects. Maintain your misting fan by following these steps: Always unplug the misting fan from the power supply before servicing or cleaning. Use a soft cloth and a mild soap and warm water solution to clean the fan’s exterior. Do not use harsh cleaners, gasoline, paint thinner, benzene, etc., as these substances can damage the misting fan. Thoroughly dry all of the fan’s parts with a soft cloth before reconnecting the unit to the power supply. Drain the water tank after the misting fan has been in use. Regular, scheduled cleaning of the water tank and misting plate before each use is also recommended. To clean the water tank, open the tank cover, remove the pump and then remove the tank from the tank cart. Always remember to remove the pump before cleaning the water tank. If the misting fan will not be in use for an extended period of time, cover the unit and keep it stored in a clean, dry place. Technical Support Luma Comfort is committed to providing a premier service experience. If you are experiencing any technical issues with your product related to either setup or operation, please contact our product support team at 1-866-737-6390 or [email protected]. Product Specifications Model: Product Dimensions: Product Weight: Voltage: Wattage: Fan Head Size: Coverage Area: Maximum Run Time: Tank Size: Fan Speeds: RPMs: Noise Levels (dB): Temperature Drop: Warranty: MF26B 17.3” (D) x 26” (W) x 76.6” (H) 89 pounds 110V-120V 287W 26” Up to 1,000 square feet 5 hours on high speed 4.4 gallons 3 1400/1500/1700 68/69/72 30 – 45° F 1 year manufacturer’s warranty 12 Warranty Luma Comfort products are warranted to be free from defects in workmanship or materials for one (1) year from the date of purchase. If the product is found to be defective within this period, Luma Comfort, at its sole option, will repair or replace any components that fail during normal operation. The repairs or replacement will be made at no charge to the customer for parts and labor, assuming that the customer shall be responsible for all transportation costs to and from Luma Comfort. Luma Comfort retains the right to repair or replace (with a new or newly-refurbished replacement product) the appliance at its sole discretion. This warranty does NOT apply to the following: Products without a proof of purchase Products purchased from a source other than an authorized Luma Comfort dealer Cosmetic damage such as scratches or dents Damage caused by service performed by anyone who is not an authorized service provider of Luma Comfort Damage in transit Damage caused by accident, abuse, misuse, water, flood, fire, improper installation, maintenance negligence, commercial use for a non-commercial unit, acts of God or any other acts of nature or external causes Damage to a product caused by modifications or alterations without the written permission of Luma Comfort Normal wear and tear of parts that are designed to be replaced, such as filters or batteries Power failure and improper power supply such as low voltage, defective wiring or inadequate fuses Use of force or damage caused by external influences Complete or partially dismantled appliances THE WARRANTIES AND REMEDIES CONTAINED HEREIN ARE EXCLUSIVE AND IN LIEU OF ALL OTHER WARRANTIES EXPRESS, IMPLIED, OR STATUTORY, INCLUDING ANY LIABILITY ARISING UNDER ANY WARRANTY OF MERCHANTABILITY OR FITNESS FOR A PARTICULAR PURPOSE, STATUTORY OR OTHERWISE. THIS WARRANTY GIVES YOU SPECIFIC LEGAL RIGHTS, WHICH MAY VARY FROM STATE TO STATE. IN NO EVENT SHALL LUMA COMFORT BE LIABLE FOR ANY INCIDENTAL, SPECIAL, INDIRECT, OR CONSEQUENTIAL DAMAGES, WHETHER RESULTING FROM THE USE, MISUSE, OR INABILITY TO USE THIS PRODUCT OR FROM DEFECTS IN THE PRODUCT. SOME STATES DO NOT ALLOW THE EXCLUSION OF INCIDENTAL OR CONSEQUENTIAL DAMAGES, SO THE ABOVE LIMITATIONS MAY NOT APPLY TO YOU. If you believe your product is defective, contact Luma Comfort for warranty service at 1-866-737-6390 or [email protected]. In your correspondence with Luma Comfort, please describe the problem and request a return material authorization (RMA) number. You will also need to provide the proof of purchase, return shipping address and a daytime phone number. After a Luma Comfort representative confirms that your product is defective and is still under warranty, you will receive an RMA and return shipping instructions. Products sent to our headquarters without an RMA will be refused. 13