1
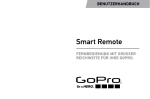
USER GUIDE
Smart Remote
LONG-RANGE REMOTE CONTROL
FOR YOUR GOPRO.
To download this user guide in a different language, visit gopro.com/support.
/ The Basics
Pour télécharger ce manuel de l’utilisateur dans une autre langue, rendez-vous sur
gopro.com/support.
Status Light
Remote Status Display
Wenn Sie dieses Benutzerhandbuch in einer anderen Sprache herunterladen
möchten, besuchen Sie gopro.com/support.
Per scaricare questo manuale utente in un’altra lingua, visita gopro.com/support.
Para descargar este manual de usuario en otro idioma, visite gopro.com/support.
Shutter/Select Button
Power/Mode Button
Settings/Tag Button
Charging Port/
Attachment Key Slot
Para baixar este manual do usuário em outro idioma, acesse gopro.com/support.
このユーザーマニュアルの他言語版をダウンロードするには、
gopro.com/supportにアクセスしてください。
若要下載其他語言版本的使用說明書,請前往:gopro.com/support。
如需下载本用户手册的其他语言版本,请访问 gopro.com/support。
이 사용자 설명서의 다른 언어 버전은gopro.com/support에서 다운로드하십시오.
2
Wrist Strap
Attachment Key Attachment Ring
USB
Charging Cable
3
/ Wearing the Smart Remote
ATTACHING THE REMOTE TO THE STRAP
The attachment strap secures the remote to your wrist, backpack straps,
ski poles, bike frames, and more.
To Attach the Remote to the Strap:
Step 1
Thread the strap through the slots
on the back of the remote.
4
Step 2
Position the remote along the strap
as shown.
ATTACHING THE REMOTE USING THE KEY + RING
The attachment key and ring secure the remote to your lanyards, straps,
car keys, zippers, and more.
To Attach the Remote Using the Key and Ring:
Step 1
Slide and hold the latch lever in
the direction of the arrow (A), then
pull the key out of the remote (B).
B
A
Step 2
Attach the ring to your lanyard,
straps, etc.
Step 3
Push the attachment key into the
key slot until it clicks.
5
/ Getting Started
The Smart Remote lets you power your GoPro on/off, start/stop recording,
and change camera settings. The display, status light, Power/Mode button
], Shutter/Select button [
], and Settings/Tag button* [
] behave
[
in the same way as those on your camera.
6
The Smart Remote is waterproof to 32’ (10m). However,
wireless connectivity does not work under water, so
the remote and cameras do not remain connected
if submerged.
CHARGING THE SMART REMOTE
We recommend charging your Smart Remote for one hour before
using it the first time. No damage occurs if it is used before being
fully charged. You can use the remote while it is charging.
The status display shows the remote’s battery level while the
remote is powering on or charging.
Note: When the remote is searching for a camera, the battery drains faster. If you are not
using the remote during charging, be sure to turn it off to conserve battery power.
* The Settings/Tag button is not available on all camera models.
7
To Charge the Remote:
B
A
Step 1
Slide and hold the latch lever in
the direction of the arrow (A), then
pull the key out of the remote (B).
Step 2
Plug the charging cable into
the charging slot until it clicks.
Step 3
Connect the other end of the cable
to a computer or other USB power
source.
The charging icon on the remote
status display shows a full battery
when charging is complete.
Note: Be sure that the computer is connected to a
power source. If the remote status display does not
indicate that the remote is charging, use a different
USB port.
8
9
POWERING THE REMOTE ON/OFF
To Power On the Remote:
].
Press the Power/Mode button [
To Power Off the Remote and Connected Cameras:
] for two seconds.
Press and hold the Power/Mode button [
Note: If the cameras are recording, this action powers off only the remote. The cameras continue recording.
PRO TIP: You can power off the remote and leave the camera powered on.
This option is useful if you want to switch from the remote to the GoPro App
to control your camera. To use this option, press and hold the Power/Mode
] and the Settings/Tag button [
] together for two seconds.
button [
RESETTING THE REMOTE
If your remote stops responding, press and hold the Power/Mode button
] for about eight seconds to reset it.
[
10
REMOTE STATUS DISPLAY
The information that appears on your Smart Remote status display
depends on whether you are connected to multiple cameras.
Smart Remote Connected to One Camera:
Remote screen displays information similar to the
image on the left. For available camera settings and
modes for your GoPro camera model, download the
user manual at gopro.com/support.
Smart Remote Connected to Multiple Cameras:
Remote screen displays the number of cameras
connected, the recording mode, and the battery
status of the remote.
11
When the remote is connected to multiple cameras, these modes
are available:
Default Startup
Modes
Sets all cameras to their default
power-up modes
Video
Sets all cameras to Video mode
Photo
Sets all cameras to Photo mode
Burst
Sets all cameras to Burst mode
Time Lapse
Sets all cameras to Time Lapse mode
SMART REMOTE SOFTWARE UPDATE
Software updates for cameras include updates for the remote, if available.
Updates are automatically installed on the remote when you connect the
remote to a camera.
12
/ Pairing the Remote and Your GoPro
You can pair the Smart Remote with any wireless-enabled GoPro camera.
The remote can control your camera from up to 600’ (180m) away in optimal
conditions. You can control multiple GoPros at a time with the remote.
Your camera recognizes only one remote at a time.
The distance from which you can control your camera with the remote
varies and depends on factors such as camera model, terrain, weather,
obstructions, and electromagnetic interference.
For information about ranges for different GoPro camera models, see
gopro.com/support.
13
TO PAIR YOUR REMOTE AND YOUR HERO4 SESSION:
1. Ensure that both camera and remote are powered off.
2.On your camera, complete these steps:
a.Press the Info/Wireless button to display the status info.
b.Press the Info/Wireless button repeatedly to cycle to RC , and
] to select it. The
then press the Shutter/Select button [
camera automatically begins pairing.
3.Power on the remote. If the remote was never paired with a camera, it
automatically begins pairing. Otherwise, press and hold the Settings/
] for four seconds to begin pairing. A checked box [
]
Tag button [
appears on both screens once the devices are paired.
14
TO PAIR YOUR HERO4 SESSION WITH AN ADDITIONAL REMOTE:
1. Ensure that both camera and remote are powered off.
2.On your camera, complete these steps:
a.Press the Info/Wireless button to display the status info.
b.Press the Info/Wireless button repeatedly to cycle to ADD NEW,
] to select it.
and then press the Shutter/Select button [
c. Press the Info/Wireless button again to highlight RC, and then
] to select it. The camera
press the Shutter/Select button [
automatically begins pairing.
3.Power on the remote. If the remote was never paired with a camera, it
automatically begins pairing. Otherwise, press and hold the Settings/
] for four seconds to begin pairing. A checked box [
]
Tag button [
appears on both screens once the devices are paired.
15
TO PAIR YOUR REMOTE AND YOUR HERO4 BLACK OR
HERO4 SILVER:
1. Ensure that both camera and remote are powered off.
2.On your camera, complete these steps:
] to power on your camera.
a.Press the Power/Mode button [
b.Press the Power/Mode button [
] to cycle to Setup mode, and
] to select it.
then press the Shutter/Select button [
] twice to open the
c. Press the Shutter/Select button [
Wireless menu.
] to cycle to PAIR, and then
d.Press the Power/Mode button [
] to select it.
press the Shutter/Select button [
e. Press the Power/Mode button [
] to cycle to WI-FI RC, and then
] to select it.
press the Shutter/Select button [
16
3.On the remote, complete these steps:
a.Power on the remote. If the remote was never paired with a camera,
it automatically begins pairing [
]. Otherwise, press and hold
] for four seconds to begin pairing.
the Settings/Tag button [
] appears on both screens once the devices
A checked box [
are paired.
b.To connect additional cameras, press the Shutter/Select button
] to select Yes, and then repeat the pairing process.
[
c. When you are finished, press the Power/Mode button [
] to cycle
] to select it.
to No, and then press the Shutter/Select button [
PRO TIP: After pairing your HERO4 Black, HERO4 Silver, HERO+ LCD, or
] on your
HERO+, you can press and hold the Settings/Tag button [
camera for two seconds to turn on Wireless while the camera is powered
off. This method conserves your camera’s battery power and is useful if
you want to control your camera with the remote or the GoPro App.
17
TO PAIR YOUR REMOTE AND YOUR HERO+ LCD OR HERO+:
1. Ensure that both camera and remote are powered off.
2.On your camera, complete these steps:
] to power on your camera.
a.Press the Power/Mode button [
b.Press the Power/Mode button [
] to cycle to Setup mode, and
] to select it.
then press the Shutter/Select button [
c. Press the Shutter/Select button [
] to select Wireless.
d.Press the Power/Mode button [
] to cycle to REM CTRL, and
] to select it.
then press the Shutter/Select button [
18
3.On the remote, complete these steps:
a.Power on the remote. If the remote was never paired with a camera,
]. Otherwise, press and hold
it automatically begins pairing [
] for four seconds to begin pairing.
the Settings/Tag button [
] appears on both screens once the devices
A checked box [
are paired.
b.To connect additional cameras, press the Shutter/Select button
] to select Yes, and then repeat the pairing process.
[
c. When you are finished, press the Power/Mode button [
] to cycle
] to select it.
to No, and then press the Shutter/Select button [
19
TO PAIR YOUR REMOTE AND YOUR HERO3+ OR HERO3:
1. Ensure that both camera and remote are powered off.
2.On your camera, complete these steps:
] to power on your camera.
a.Press the Power/Mode button [
b.Press the Wi-Fi On/Off button [
] twice to turn on Wi-Fi and
access the Wi-Fi menu.
] to open the Wi-Fi menu [
].
c. Press the Shutter/Select button [
d.Use the Power/Mode button [
] to cycle to Wi-Fi RC, and then
].
press the Shutter/Select button [
e. Use the Power/Mode button [
] to cycle to New, and then
]. This icon appears while
press the Shutter/Select button [
].
the camera searches: [
20
3.On the remote, complete these steps:
a.Power on the remote. If the remote was never paired with a camera,
it automatically begins pairing. Otherwise, press and hold the
] for four seconds to begin pairing.
Settings/Tag button [
] appears on both screens once the devices
A checked box [
are paired.
b.To connect additional cameras, press the Shutter/Select button
] to select Yes, and then repeat the pairing process.
[
c. When you are finished, press the Power/Mode button [
] to cycle
] to select it.
to No, and then press the Shutter/Select button [
21
/ Connecting the Remote and Your GoPro
After your remote and camera are paired, follow the steps below to connect
them in the future. With this procedure, your camera connects to the
remote that it connected to most recently.
TO CONNECT THE REMOTE AND YOUR HERO4 SESSION:
1. Power on the remote.
2.On your camera, complete these steps:
a.Press the Info/Wireless button to display the status info.
b.Press the Info/Wireless button repeatedly to cycle to RC, and then
] to select it.
press the Shutter/Select button [
TO CONNECT THE REMOTE AND YOUR HERO4 BLACK OR
HERO4 SILVER:
1. Power on the remote and your camera.
2.On your camera, complete these steps:
] to cycle to Setup mode,
a.Press the Power/Mode button [
] to select it.
and then press the Shutter/Select button [
b.Press the Shutter/Select button [
] twice to open the
Wireless menu.
] to cycle to MODE: RC or
c. Press the Power/Mode button [
MODE: RC+APP, and then press the Shutter/Select button [
to select it.
Note: RC and APP are combined into one option if you paired your remote with a smartphone/tablet that uses Bluetooth® LE.
d.Press the Shutter/Select button [
RC+APP.
22
]
] to select Wi-Fi RC or
23
TO CONNECT THE REMOTE AND YOUR HERO+ LCD OR HERO+:
1. Power on the remote and your camera.
2.On your camera, complete these steps:
] to cycle to Setup mode,
a.Press the Power/Mode button [
] to select it.
and then press the Shutter/Select button [
b.Press the Shutter/Select button [
] to select Wireless.
c. Press the Power/Mode button [
] to cycle to REM CTRL, and
] to select it.
then press the Shutter/Select button [
d.Press the Shutter/Select button [
] to select EXISTING.
Note: RC and APP are combined into one option if you paired your remote with a smartphone/
24
TO CONNECT THE REMOTE AND YOUR HERO3+ OR HERO3:
1. Power on the remote and your camera.
2.On your camera, complete these steps:
] twice to turn on Wireless and
a.Press the Wireless button [
open the Wireless settings.
].
b.Press the Shutter/Select button [
c. Press the Power/Mode button [
] to cycle to Wi-Fi RC, and
] to select it.
then press the Shutter/Select button [
d.Press the Shutter/Select button [
] to select Current.
tablet that uses Bluetooth® LE.
25
/ Capturing Video and Photos
Use the remote to capture video and photos with one camera or
multiple cameras.
TO START/STOP RECORDING:
] button.
Press the Shutter/Select [
PRO TIP: When you connect your remote to your HERO4, HERO+ LCD,
or HERO+ camera, you can add HiLight Tags to your video. HiLight Tags
mark specific moments to make it easier to quickly find highlights during
playback, sharing, and editing. While recording, press the Settings/Tag
] button on the remote to add a HiLight Tag. If the remote is connected
[
to multiple cameras, HiLight Tags are added to video on all cameras.
If your camera goes out of range of the remote while you are recording,
recording continues until you stop it.
Note: If your HERO4 Session goes out of range while in Burst or Photo mode, the camera status screen
remains on. If the camera is still out of range after five minutes, the camera automatically powers off.
26
27
THE FOLLOWING FEATURES ARE NOT AVAILABLE WHEN USING
THE REMOTE WITH YOUR GOPRO:
• QuikCapture / One Button mode
• Continuous photo with multiple cameras*
• Manually capturing photos while recording video with
multiple cameras*
] on the remote
• HERO3+ and HERO3: The Settings/Tag button [
(to add a HiLight Tag or enter the Settings menu)
* This feature is available on HERO4 Silver and HERO4 Black when controlling a single camera.
28
/ Changing Camera Settings
You can use the Smart Remote to change your camera settings as long as
your camera is not capturing video or photo.
Note: To change camera settings, the remote must be connected to only one camera.
TO CHANGE CAMERA SETTINGS FOR HERO4, HERO+ LCD,
AND HERO+:
1. Connect your camera to the remote.
] to cycle to the
2.On the remote, press the Power/Mode button [
mode whose settings you want to change.
] to open the settings menu for
3.Press the Settings/Tag button [
that mode.
] to cycle through the settings.
4.Use the Power/Mode button [
29
5.Press the Shutter/Select button [
] to cycle through the options
within a setting. To select an option, highlight it, and move to
another screen.
6.To go back or exit the settings menu, press the Settings/Tag
].
button [
TO CHANGE CAMERA SETTINGS FOR HERO3+ AND HERO3:
1. Be sure your camera and remote are powered on and connected.
] to cycle to Settings.
2.Press the Power/Mode button [
3.Press the Shutter/Select button [
] to select Settings.
4.Press the Power/Mode button [
] to cycle through the settings.
] to select an option.
5.Press the Shutter/Select button [
6.To exit the settings menu, press the Power/Mode button [
] to cycle
] to select it.
to EXIT, and then press the Shutter/Select button [
30
/ Safety Information
WARNING
Failure to follow these safety instructions could result in fire, electric shock,
or other injury or damage to the Smart Remote or other property.
HANDLING
The Smart Remote contains sensitive components. Do not drop, disassemble,
open, crush, bend, deform, puncture, shred, microwave, incinerate, paint
or insert foreign objects into the product. Do not use the Smart Remote if it
has been damaged—for example, if the product is cracked, punctured, or
damaged by water.
WATER RESISTANCE
Do not submerge the Smart Remote in more than 32’ (10m) of water.
Damage to the Smart Remote caused by excessive water pressure is not
covered under warranty.
31
KEEPING THE SMART REMOTE’S STATUS DISPLAY CLEAN
Clean your Smart Remote status display immediately if it comes into
contact with any contaminants that may cause stains, such as ink, dyes,
makeup, dirt, food, oils, and lotions. To clean the status display, use a soft,
slightly damp, lint-free cloth. Avoid getting moisture in openings. Don’t use
window cleaners, household cleaners, aerosol sprays, solvents, alcohol,
ammonia, or abrasives to clean the status display.
USING CONNECTORS AND PORTS
Never force a connector into a port. Check for obstructions on the port. If
the connector and port do not join with reasonable ease, they probably do
not match. Make sure that the connector matches the port and that you
positioned the connector correctly in relation to the port.
32
USE WITH OTHER ELECTRONIC DEVICES
When using GoPro products near another device, read that device’s user
guide for any safety instructions.
To limit potential interference with digital transceivers such as avalanche
beacons, consult with the transceiver’s user manual regarding the use of
other GPS or electronic devices, such as the GoPro camera, when engaged
in the avalanche beacon search mode.
Always follow any special regulations in force in any area, and power
your camera off whenever it is forbidden to use it or when it may cause
interference.
33
TEMPERATURE
Extreme temperatures may temporarily affect battery life or affect the
functionality of the Smart Remote. Avoid dramatic changes in temperature
or humidity when using the Smart Remote, as condensation may form on
or within the product. When you are using the Smart Remote or charging
the battery, it is normal for the product to get warm. The exterior of the
product functions as a cooling surface that transfers heat from inside the
unit to the cooler air outside.
34
/ Regulatory Information
To see additional information regarding country certifications, refer to the
Important Product + Safety Information included with your remote.
35
Learn more about GoPro
products at gopro.com
Please Recycle
130-14011-000 REVA


![MC92N0-G Series Regualtory Guide [English] (P/N 72-161752](http://vs1.manualzilla.com/store/data/006169698_1-94ba90fe894c8f3ea5c50783929e3a3e-150x150.png)