1
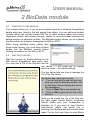
Sherwood Ability Screen
and
Sherwood Technology Aptitude Test
User manual
User manual 2.1
1
Contact details
Address:
Phone & fax:
Email:
Web address:
p.Metrics
PO Box 3802
SHEFFIELD S25 9AG
+44 (0)1909 561569
[email protected]
[email protected]
[email protected]
for General enquiries
for Technical support
for Sales and pricing
www.pmetrics.co.uk
Copyright © p.Metrics. 2000-2005
2
Sherwood SAS and STAT
CONTENTS
1
Overview
1.1 Purpose of the manual
1.2 Starting the Sherwood menu
1.3 Steps you should follow
1.4 Setting up testing stations
2 BioData module
2.1 Purpose of the module
2.2 Getting started
2.3 Adding a new student record
2.4 Sorting student records
2.5 Editing and deleting records
2.6 Finding student records
2.7 Course registrations
2.8 Exiting from the module
3 Course definition module
3.1 Purpose of the module
3.2 Getting started
3.3 Adding new courses
3.4 Editing or deleting courses
3.5 Exiting from the module
4 Test module
4.1 Purpose of the module
4.2 Getting started
4.3 Taking the test
4.4 Ending the test session
User manual 2.1
5
5
5
6
7
9
9
9
10
12
12
13
13
14
15
15
15
15
16
16
17
17
17
19
20
5
Reports module
21
5.1 Purpose of the module
21
5.2 Getting started
21
5.3 Producing reports
22
5.4 Checking your credits
23
6 Staff passwords module
25
6.1 Purpose of the module
25
6.2 Adding new user names and
passwords
25
6.3 Editing and deleting user
names and passwords
26
6.4 Exiting from the module
26
7 Semi-technical modules
27
7.1 Purpose of the modules
27
7.2 Reset network logon status 27
7.3 Submit test data to Sherwood
server
28
7.4 Choose a database server on
your network
29
8 Technical utilities
31
8.1 Purpose of the modules
31
8.2 Import student and course
registration data
31
8.3 Export your data
33
8.4 Reset a specific user’s status 33
8.5 Emergency data upload
34
8.6 Database cleardown
35
3
4
Sherwood SAS and STAT
USER MANUAL
1 Overview
1.1
PURPOSE OF THE MANUAL
This manual describes how to use the Sherwood Ability Screen and Sherwood
Technology Aptitude Test. The manual is intended for staff in Colleges or other
institutions who are responsible for managing the use of either (or both) of these
tests. It does not cover the detailed procedures for installing the tests onto your
network; separate documentation for installation is available from p.Metrics.
The manual assumes you have basic familiarity with using the Windows operating
system and common applications; however no specific technical expertise is
required.
1.2
STARTING THE SHERWOOD MENU
Launch the Sherwood applications
from the Programs folder of the
Windows Start Menu. Click on
Start (bottom left of the screen),
then move the pointer onto
Programs, then onto p.Metrics
SAS and finally onto SAS Menu. Now click on SAS Admin Menu to launch the
menu application; this gives you access to the modules described in this manual.
You can create a shortcut to SAS Admin Menu on your desktop (or elsewhere on
your system) and start the application by double-clicking on the shortcut.
You are now asked to log on to the
administration system. The User Name is
initially set to Admin and the Password to
Laser: click in each field and type these in, and
then click on OK. For security reasons, you
should change the user name and password
straight away: see section 6 (p25) for details.
Other Sherwood choices from the Programs menu
Ø
The SAS Test (Kiosk) and SAS Test choices allow you to run an
assessment session in kiosk mode or standard mode (see section 4).
Ø
The Sherwood Website choice launches your web browser and connects
you to the p.Metrics website.
User manual 2.1
5
Overview
Once you have entered your
user name and password
correctly, the main menu panel
(similar to the screenshot on the
right) will appear on your screen.
The options available in your
version may not be identical to
those shown.
The left panel contains menu
choices for various options.
Clicking on any option brings up
a fuller description in the box on
the right. Click on the Switch To
button to activate the selected
option. All the options are described in detail in this manual. Any option which is
greyed out is not available.
Clicking over the Lock Station button will show the logon
panel, thus stopping unauthorised personnel from accessing
your workstation.
You can exit from the menu system by clicking on the x at the top right of the
menu panel or by selecting Exit from the File menu.
Remember to change your user name and password
Ø
Before doing anything else, choose a new user name and password, and
delete the default settings. See section 6 for further details.
1.3
STEPS YOU SHOULD FOLLOW
The Sherwood Ability Screen system stores information in a number of linked
databases: information about students registered via the BioData module,
assessment data collected through the Testing module and information about the
test norms and how your system is set up. Thus, for each student tested, there
should be a complete set of test scores together with relevant biodata. This allows
reports to be generated for the student (or for groups of students) in comparison
to appropriate norms.
For standard usage, the biodata for a student should be entered into the system
before that student is tested. This enables more stringent guarding against
mistaken identity or impersonation as students can be identified by an
identification number not known to other students. However, the Sherwood
system also supports student testing prior to entering student biodata, using the
kiosk testing mode. Here students are requested to identify themselves by name
and date of birth, which allows a subsequent link to biodata records.
For the standard form of testing, you should proceed through the following steps.
6
Sherwood SAS and STAT
Overview
Choose a database server on your network
Before entering any data into the system, you need to say where the student data
will be stored. This may already have been done for you when the system was
installed: if it was not, then you will need to use the Choose a database server on
your network option. See section 7.6 of this manual for details.
Enter students’ details
Once the database server has been identified and named, the system is ready to
receive details of students. Select the Edit user(s) biographical data option, which
starts the BioData module. This is described in detail in section 2.
Test students
Using the standard testing procedure, a student can only be tested on the SAS or
STAT once their details have been entered via the BioData module. (The kiosk
test mode allows testing prior to entry of biodata.) Testing of students is described
in section 4 of the manual. Although a test can be run from the administrator’s
menu system (the options Test a preregistered user[ID] and Test a user in Kiosk
Mode [No ID]), it will more typically be run on an individual testing station as a
stand-alone application.
Generate reports
As soon as a student has completed the test, you can print out (or save for later
use) an individual report of the student’s performance against standard norms.
Once a number of tests have been completed, you can print out group reports
categorised by course registration.
1.4
SETTING UP TESTING STATIONS
Each testing station should be networked to the database server: information
about this will have been provided during installation. Testing stations should be
running either Windows 95, 98, Me, NT4, 2000 or XP, with a minimum screen
resolution of 800 x 600 pixels with 256 colours.
The Sherwood Ability Screen makes extensive use of sound as many of the items
include spoken materials. Most sound cards are supported: however it is worth
checking that your configuration works satisfactorily. If students are to be tested in
groups in a classroom or laboratory setting, then it is essential that headsets are
used so that students are not distracted by the speech from neighbouring testing
stations — such distraction will influence the students’ results.
Before running the SAS or STAT, ensure that the sound is set to a comfortable
listening level and that no other potentially interfering applications are running
(such as screen savers or mailing systems).
User manual 2.1
7
Overview
8
Sherwood SAS and STAT
USER MANUAL
2 BioData module
2.1
PURPOSE OF THE MODULE
This module allows you to set up and maintain records of students’ biographical
details which are linked to the test scores they obtain. You can add new student
records, which can include student ISR IDs (or other student codes) and course
registration details, edit existing records, search for records already entered and
assign learners to particular profiles. The BioData module allows you to organise
the information on students undergoing the SAS or STAT.
When using standard mode (rather than
kiosk mode) testing, you must enter student
details into the BioData module before
running the student on the SAS or STAT.
2.2
GETTING STARTED
Start the module by double-clicking on the
Edit user(s) biographical data menu item.
You may see a Tip of the Day box like the
one above ( if the Show tips at Startup
option is ticked – the default setting).
The box below tells you how to manage the
Tip of the Day facility.
Tip of the day: what you can do
Ø
If you do not wish to see the tips next
time you start the BioData module, click
on the Show Tips at Startup box so the
tick disappears.
Ø
Click on Next Tip to see another tip
Ø
Click on OK to get rid of the Tip of the
Day box
Once you’ve closed the Tip of the Day box,
the Help Agent (called Merlin) introduces
himself (make sure your loudspeaker is
switched on if you want to hear Merlin’s
instructions). Merlin can assist you in
entering your BioData and with various other
tasks. For the first time, listen to what Merlin
User manual 2.1
9
BioData module
has to say. The box gives you some hints on how to control Merlin.
Merlin: what you can do
Ø
Listen to what Merlin has to say – he only takes a few moments.
Ø
To stop Merlin while he is talking, point at him and click on the right-hand
mouse button, and then click on Hide.
Ø
To stop Merlin from appearing when you start up the module, choose the
Show Agent at Startup option from the Tools menu (at the top of the screen)
and remove the tick.
2.3
ADDING A NEW STUDENT
RECORD
You can either add a student
record with the help of a wizard
(step-by-step instructions), or, once
you are familiar with the system,
without assistance.
See a demo of the wizard
You can see a demonstration of how to use the wizard to add a new student
record by selecting Show me… and then How to add a user with the Wizard from
the Help menu.
This allows you to see the steps in adding a new record. You can pause, rewind
or stop the demonstration at any time by using
the controller shown on the left. Click on the X
box to stop the demonstration altogether. (Note
that other Show me… demonstrations are also
available.)
Using the wizard
When you are ready to add a new
student record (using the wizard), first
check that the Add user wizard item (in
the Tools menu) is ticked, and then click
on the Add button. You will see the Add
user wizard dialogue box. Click on the
Next > button and follow the instructions.
Follow the instructions in blue on the
Wizard dialogue box. The text includes hints on how to add information efficiently.
When you have filled in the information on the first page of the Wizard dialogue
box, click on the Next > button to proceed to the next dialogue box. Note that the
information you have entered appears on the main screen behind the Wizard
panel.
10
Sherwood SAS and STAT
BioData module
There are three steps (panels) to work
through. When you have filled in the third
Wizard panel, click on the Finish button.
You’ll see the details you have entered in
the left-hand side of the BioData screen.
Check the entry is correct. You can
correct any of the fields by clicking on the
field and typing in new text or selecting
from the drop-down menus.
Finally, you should save the new student
record by clicking on the Save button,
and confirming the save.
You’ll see the new record entered in the
right side of the screen. The record
includes six columns, headed System ID
(this is a unique code which the
Sherwood Ability Screen system assigns
to the student, and can be used for
identifying students and tracking their
results), ISR ID, Surname, Forename(s), and two columns labelled Com… and
Logg… These stand for Completed and Logged on, indicate whether this student
has completed the Sherwood Ability
Screen or is currently logged on. At this
stage, the entries should be N (for No).
To see the rightmost columns, you will
have to use the scroll bar at the bottom of
the panel.
Adding records without the Wizard
You can also add student records without
using the Add user Wizard. Switch off the
Wizard from the Tools menu by unticking
the Add user wizard option. You can then
add a new record by clicking on the Add
button at the top left of the lefthand panel.
Type the appropriate details into each
field or use the pull-down menus, and,
when you have entered all the
information, click on the Save button at
the top of the panel. Finally, confirm the
save.
User manual 2.1
11
BioData module
2.4
SORTING STUDENT RECORDS
Add a few more records to your biodata database. You will see that each record is
shown on the righthand side of the screen, and by default the records are ordered
by surname. To order the records by one of the other attributes (system ID, ISR ID
etc), click on the bar at the top of the appropriate column. Sorting the records will
be helpful for finding particular records.
2.5
EDITING AND DELETING RECORDS
Editing or correcting a record
To edit an existing record, first select the record in question by clicking on it in the
right panel so that the details are shown in grey on the left side of the screen. In
the screenshot, the record for Catherine Hammond is selected.
To edit the record, click on the Edit button. Note that the text in the left panel of
the screen turns black (meaning you can edit it) whilst that in the right panel turns
grey.
You can now change any of the fields on
the left panel, either by typing into the
field directly (such as with the Surname
field) or, where the value is defined by a
drop-down menu (such as with Ethnic
Origin), by clicking on the ? symbol beside the field and selecting the value from
the menu.
When you have changed the record as required, click the Save button. (If you
want to abandon the changes and revert to the original record at any time, click on
the Cancel button.) You have to confirm the Save (or Cancel) before the operation
is carried out.
Deleting a record
Deleting a record follows much the same procedure as for editing one. First select
the record in question, and then click on the Delete button. As with Save, you are
asked for a confirmation. Double-check before deleting a record: there is no
undelete!
12
Sherwood SAS and STAT
BioData module
2.6
FINDING STUDENT RECORDS
When you have a large number of records in the database,
you may find it convenient to use the Find facility to search
for details of a particular student. Select Find from the Edit
menu on the menu bar at the top of the window. A new panel
appears.
You can search for a record on the basis
of the System ID, the ISR ID or surname.
Searching by ID
To search by System or ISR ID, simply
type the ID into the appropriate field and
click on the Find button beside the field
(or Cancel to clear the field). The Find
panel disappears and the record
highlighted in the main panel is the one
with the specified ID.
Searching by surname
Searching on the basis of surname is a little different as several students may
share the same name. Type the name (or at least two letters of the name) into the
surname box, and click on the adjacent Find button. Summaries of one or more
records will appear in the lower part of
the Find user box.
If you wish to do so, you can sort the
records found by clicking on one of the
headings on the top of the columns. To
select the record that you wish to highlight, just click on it. The Find a user box
disappears and the required record is highlighted in the main panel.
Finding records: some tips
Ø
When finding by surname, you don’t have to type in all the name, just a few
letters will do (for example, ‘itc’ will find Hitch, Pritchard and Mitchell)
Ø
You can’t truncate a System ID or ISR ID - these must be typed in full
Ø
If more than ten records are found when searching by surname, use the
scroll bar on the right side of the box to browse the records
Ø
Cancel the search at any time by clicking on any of the cancel buttons.
2.7
COURSE REGISTRATIONS
You can record the courses on which students are registered. This information
can be used later to generate group reports for all students on a particular course.
Before you can specify which courses students are taking, you must enter details
of the courses into the system using the Define your courses module, described in
User manual 2.1
13
BioData module
section 3 of this manual. Once you have entered some courses, you can use the
Register courses facility of the Biodata module. Go through the following steps:
1. Select the student you wish to register on
one or more courses
2. Click on the Register Courses button
3. A Course Registration panel appears.
Note that the student’s name is
included in the top banner of the
panel. If you have already registered
the student on one or more courses,
these will be listed.
4. Click on the ? symbol at the end of
the List of available courses field.
You will see a list of the courses
which you defined using the Define
your courses module.
5. Scroll to the course (using the scroll
bar if necessary) on which you wish
to record the student’s registration;
click on the course.
6. Click on the Register button to
register the student on the course.
The course will then be listed in the
lower box (labelled List of courses
the user is registered on).
You can register a student on further courses by repeating steps 4 to 6.
If you need to remove the registration for
a course, then click on the course (in the
lower box) on which the student is no
longer registered and click on the
Remove from selected Course button.
Once you are happy that the correct
course registrations are specified, click
on the OK button. The course
registration box closes. If you click on the
Cancel button, any changes you have made to the registration for the student will
be cancelled.
2.8
EXITING FROM THE MODULE
You can leave the module by selecting Exit from the File menu, or by clicking on
the X at the top right corner of the panel. Any changes made will be saved.
14
Sherwood SAS and STAT
USER MANUAL
3 Course definition module
3.1
PURPOSE OF THE MODULE
The Sherwood System enables you to generate reports for groups of students
based on their course registrations. Thus you can see how an individual has
performed on the SAS or STAT in comparison with others on the same course, or
compare the performance of students registered on one course with that of
students registered on another.
In order to specify which student is registered on which courses, you first need to
define the courses available. This module allows you to do this. Once a list of
courses have been entered, you can specify which individuals are registered for
which course using the BioData module (see section 2.7).
3.2
GETTING STARTED
Start the module by clicking on
the Define your courses item
from the main Sherwood menu.
After a pause, you’ll see the
course definition panel as
shown on the right. If you
haven’t entered any courses
yet, the table will be blank.
3.3
ADDING NEW COURSES
The course definition panel
includes two columns which will
contain information about courses, headed Course Code and Course Definition,
and two further columns used for editing and deleting entries.
Click on the Add new course to list button. You’ll see a
dialogue box entitled Add a new course. Type the course
code and brief course description into the two fields and click
on OK. The course code can be any code or short identifier that your College
uses.
The course will be added to
the list of available courses
in the main panel. Note that
User manual 2.1
15
Course definition module
the courses are sorted into alphabetical order on the basis of the course code. As
you add more courses, the panel will fill up, as in the screenshot shown. When
you add a new course, it may be added to a part of the list which is not visible in
the panel: you may need to use the scroll bar to see the new entry.
3.4
EDITING OR DELETING COURSES
You can easily change the
details of a course definition
already entered. Simply click
on the Edit button beside the
course you wish to change.
A panel entitled Edit course details appears. Simply type in the corrections and
click on OK (or Cancel to keep the original details unchanged).
Deleting a course definition is achieved in much
the same way. Click on the Delete button next
to the course definition you wish to delete. The
confirmation box shown on the left appears.
Click on Yes to delete the course or No to retain
it.
3.5
EXITING FROM THE MODULE
You can leave the module either by selecting Exit from the File menu, or by
clicking on the X at the top right corner of the screen.
16
Sherwood SAS and STAT
USER MANUAL
4 Test module
4.1
PURPOSE OF THE MODULE
This module allows you to run the SAS or STAT with students. The students’
results are recorded and you can generate an individual or group report of the
results at a later date. The examples given in this chapter are from the Sherwood
Ability Screen (SAS), but the principles of operation are the same for the STAT.
Normally, the test module would not be run from the administration machine but
from individual test stations on which the test module has been installed. The test
module available from the administration menu is identical to that on testing
stations.
Before running the SAS test module on individual testing stations, ensure that the
audio facilities are set up for students. In a classroom setting, individual headsets
should be available for each test station (see section 1.4). Students should be
properly informed about the test which should be run under appropriate
psychometric test conditions.
4.2
GETTING STARTED
There are two ways in which you can test students. In standard mode, students
are identified by their identification numbers (either the System ID or ISR ID), and
the student’s details must already have been entered into the system via the
BioData module before testing takes place (see section 2).
Alternatively, students can be tested in kiosk mode. Here, the student can
complete the test before their details have been entered via the BioData module.
Students enter their name and date of birth before starting the test. A new record
is created in the BioData system including the entered name and date of birth,
plus an automatically-generated System ID. The administrator can add further
student details via the BioData module at a later date. The Find facility (section
2.6) may be helpful in identifying the appropriate record.
We recommend that the standard mode of testing is used wherever possible. This
is less prone to error and more secure. Under kiosk mode, there can be no check
that the name and date of birth are entered correctly, and the possibility of
impersonation is harder to counter. However it is inevitable there will be occasions
when testing needs to be conducted before the student’s biodata have been
entered: the kiosk mode is provided to meet such occasions.
User manual 2.1
17
Test module
Standard mode
Before testing any student on the SAS or STAT in standard mode, you must enter
his or her details into the BioData module. Students identify themselves to the
system either through their ISR ID or the Sherwood System ID which is generated
by the BioData module.
When you are ready to test a student in
standard mode, either launch the
Sherwood Test from an individual test
station, or click on the Test a
preregistered user [ID] menu item from
the main menu on the Administrator’s
system. You will see the login dialogue
box.
The student can register for the test either using
their Sherwood ID (System ID) or using their
College ID (ISR ID, as entered into the BioData
record). The student should type one or other ID in
the appropriate field: the tab key (or a mouse click)
moves the cursor from one field to the other. The
final step is to click on the Login button.
The student can also see a demonstration by
clicking on the help button. This show a short
animation (the animation can be run only once
for each log in attempt).
If the student enters an incorrect ID, then an
error message is shown. The student can click
on OK and
re-enter the
ID.
If the student’s ID is recognised, then the student is
asked to confirm his or her identity (their name is
found from the BioData record).
Should the name be wrong (perhaps the student
has been given the wrong ID number or
information has been entered incorrectly into the
BioData module), the student can click No, in
which case the Login panel is shown again.
Assuming the name is correct and the student has clicked on Yes, then the
student starts the test.
18
Sherwood SAS and STAT
Test module
Kiosk mode
To test students in kiosk mode, either launch the Sherwood Test (Kiosk)
application from an individual test station, or click on the Test a user in Kiosk
Mode [No ID] item from the main menu on the Administrator’s system.
The login dialogue box asks for the student’s
name and date of birth. The student should
enter these details (note that pull-down menus
are used for entering date of birth to reduce the
risk of typing errors).
The name and date of birth are added to the
biodata database, so when you next launch the
BioData module, you’ll see the names of
students who have completed (or at least
started) the test.
By clicking on the help button, the student can
see a demonstration. This show a short
animation (the animation can be run only once
for each log in attempt).
Once the student has entered the details
correctly and clicked in the Start button, the test
starts.
4.3
TAKING THE TEST
The SAS starts with two brief introductory screens followed by an animated
demonstration (to illustrate the basics of how to answer questions). The student is
then invited to answer three practice
questions. Finally, this is followed by the
main questions.
Once the student is ready to start, he or
she should click on the Next button at the
bottom right of each of the two
introductory screens. This leads into the
demonstration sequence.
The demonstration has a spoken
commentary, and illustrates the basic
steps in answering a test item. Note that
no user input is required.
User manual 2.1
19
Test module
At the end of the demonstration, the student is invited to continue to the three
practice questions. This is the time to help out any students who may be having
problem (see the grey box below).
After the three practice questions, the student is
invited to proceed with the main part of the test.
All items require the same type of response: a
selection from one of five choices at the bottom of the
screen. Clicking a choice turns the button yellow. The
choice can be changed by clicking on another button.
Once the final question has been answered, the student clicks on the Next button
to see the final screen.
Answering items: some tips
Ø
Only use the left mouse button
Ø
You can change your choice as often as you like by clicking on any of the
buttons at the bottom of the panel (the currently selected response is
highlighted)
Ø
Where audio is present, always click on the large blue icon first. This
introduces the item. The small red icons provide alternative answers.
Ø
Click on Next when you are ready to go on to the next question
Ø
The blue progress bar at the bottom of the panel indicates how many
questions have been completed
4.4
ENDING THE TEST SESSION
After the student has completed the test
items, a final screen is shown. Either the
student or the test administrator should
click on the Quit button in order to
terminate the session.
The results of the test are saved
automatically.
On kiosk mode stations, the system
returns to the kiosk login panel, ready for
the next student.
You can exit from the kiosk logon panel by pressing the Alt key and the Q key
simultaneously.
If the student fails to finish the test, then you can use a special utility to reset the
test station (see section 8.4). In this case, no results will be saved.
20
Sherwood SAS and STAT
USER MANUAL
5 Reports module
5.1
PURPOSE OF THE MODULE
This module allows you to generate individual or group reports for students who
have completed the SAS or STAT. Reports can be printed or saved for later use in
a variety of formats. The reports are norm-based: this means that an individual’s
performance is reported in comparison to results collected from a large national
population of students. An individual can be compared to different norm groups,
for example to a Key Skill level 1 group or to a Key Skill level 3 group.
This section of the User Manual introduces you to getting started with generating
reports. For further information on generating different sorts of reports, on the
more sophisticated features of the report module and on interpreting reports,
please refer to the Sherwood Reports Interpretation Guide.
If you have purchased a pay-per-use version of the Sherwood Assessment
System, note that producing some reports uses up credits. For information on how
to get more credits, see section 5.4.
5.2
GETTING STARTED
When you start the test
module
(click
on
the
Produce Reports choice),
you will see a screen similar
to the one on the left.
The screen is divided into a
number of areas. The panel
at the top left lists the types
of reports that are currently
available.
Below this (bottom left) is a
list of available reports on
aspects of management and administration.
The largest panel lists all users who have been registered through the BioData
module or who have conducted the test under kiosk mode. You can sort the
records in terms of any other attribute by clicking on the heading at the top of the
columns (System ID etc); students are initially listed in alphabetical order of
surname. You can also find particular student records by selecting the Find a user
User manual 2.1
21
Reports module
command from the Tools menu at the top of the screen. This works in exactly the
same way as Find in the BioData module (see section 2.6 for details).
Above this large panel is a single line headed Comparison group for reports: this
allows you to specify the particular norm group against which your students will be
compared.
The number of credits (number of reports you can still produce) is shown in the
bottom left of the status bar.
5.3
PRODUCING REPORTS
For full details on producing reports and on their interpretation, see the Reports
Interpretation Guide. The general procedure for producing an individual
screening report is as follows:
1. Select the student by clicking on the student name (or anywhere on the
record) in the list in the right-hand panel (or use the Find facility from the Tools
menu)
2. Select the type of report you wish to generate by clicking on one of the report
types listed in the top left-hand panel
3. Select the group against which the student is to be compared by clicking on
the ? symbol beside the Comparison group for reports field and select the
appropriate comparison group from the pull-down menu. If you are unsure
which comparison group to use, leave the selection as Composite.
4. Click on the Produce Report button. If you purchased the Unlimited Yearly
Licence version, the expiry date will be shown. If you purchased the Pay-peruse version, then the number of remaining credits will be shown. Once you
click on the Produce Report button, you will be told how many credits will be
used to produce the report. One credit will be used for each student on a
report.
Steps 1 to 3 can be made in any order.
Once you have clicked the Produce Report button and agreed to use a credit, a
window containing the report will appear. You have the option to view the report in
your web browser (“Open in Browser”), save it to your hard disk, or to print it. You
can also refresh your view. All Sherwood reports are produced in HTML enabling
you to put reports on a college intranet so that staff college-wide can view a given
student’s report.
A new feature is a text-based interpretation of the normal graphical individual
report.
To produce the new report select Screening report - text interpretation from the
reports menu.
22
Sherwood SAS and STAT
Reports module
For each sub-test there is a full paragraph of text which describes the student’s
Power and Speed scores in detail. In addition there is a summary table which
highlights any support needs.
Finally you can produce group reports, which are summary screening reports
across groups of students assigned to a specific course code. Producing group
reports across courses is very similar to the process involved in producing
graphical screening reports for individual students. The difference is that only
three sub-tests are shown, and from these you can quickly identify students who
are performing at a below average level as compared with the chosen comparison
group and other members of the same course.
For further details, refer to the Reports Interpretation Guide.
5.4
CHECKING YOUR CREDITS
If you have purchased a pay-per-use version of the
SAS or STAT, you can see how many credits you
have remaining in the panel at the bottom left of the
screen.
For further information on your licence status, choose
Check licence information from the Licence menu
option. You will a panel similar to the one below. If
your credits are low,
please contact p.Metrics to
arrange
to
purchase
additional credits.
User manual 2.1
23
Reports module
24
Sherwood SAS and STAT
USER MANUAL
6 Staff passwords module
6.1
PURPOSE OF THE MODULE
This module allows you to define, edit or delete user names and passwords for
staff so that different people can access the administration menus and reportgenerating facilities of the SAS or STAT. Note that students do not require
passwords to take part in a test. Access to the menu system is protected by
password access. When the Sherwood software is installed, the user name and
password are set to admin and laser respectively. You should change the
password as soon as possible. You can also add new user names and passwords
so that a number of staff can access the system using their own identification.
6.2
ADDING NEW USER NAMES AND PASSWORDS
Choose the Edit Password
option from the main menu.
You’ll see the Password
manager module panel. To
add a new password, click on the Add new password button.
A dialogue box appears with
the title Add a new User
Name and Assign Password.
This box has three fields into
which you should type the
user name, password and a confirmation of the password. Note that the case of
the letters is important: you must use the same capital and small letters whenever
you log on.
Enter the user name, password and
confirmation and click on OK. Note that
characters typed into the password fields are
replaced by the * character.
A new line appears in the
Password manager panel,
with the User name that you
entered.
User manual 2.1
25
Staff passwords module
6.3
EDITING AND DELETING USER NAMES AND PASSWORDS
You can also Edit or Delete an existing user name and password by clicking the
Edit or Delete buttons. To edit an existing name or password, click on the Edit
button beside the entry to be edited and then type into the resulting dialogue box
and click on OK to confirm your changes. To delete a user name altogether, click
on the appropriate Delete button and click on Yes to confirm the deletion.
6.4
EXITING FROM THE MODULE
Leave the module either by selecting Exit from the File menu, or by clicking on the
X at the top right corner of the Report Module window.
26
Sherwood SAS and STAT
USER MANUAL
7 Semi-technical modules
7.1
PURPOSE OF THE MODULES
These modules allow members of staff to carry out technical operations, such as
or submitting data back to p.Metrics, but do not require a high level of technical
expertise. However if you feel uneasy about using any of these modules, consult a
member of your technical staff.
7.2
RESET NETWORK LOGON STATUS
If users leave test sessions abnormally (for instance switching off a machine
before completing the SAS or STAT) or a test station crashes, then the system
may register the user as being still logged on. Since only a limited number of
users can be logged onto a single server at one time (depending on the version
purchased) this will reduce the number of students who can be tested during a
subsequent session. You can use this utility to reset the logon status of all users,
clearing the system of any bogus registrations.
Before using the reset utility, ensure that
no-one else is logged onto the server
(either as a user or as an administrator)
and that you do not have any other of the
Sherwood utilities running. When you
start the utility you will see the panel on
the left. Check that you are logged on as user number 1. If you are not, then some
other process is potentially accessing the database
server.
Just click on the Reset button. You’ll see a request
for confirmation. Click on Yes if you’re sure you
wish to proceed. After a pause, you’ll see a
confirmatory dialogue box.
Click on OK. This returns you to the Reset panel.
To return to the main menu, click on the X in the
top right corner of the panel.
User manual 2.1
27
Semi-technical modules
7.3
SUBMIT TEST DATA TO SHERWOOD SERVER
This utility allows you to submit your test data directly to the p.Metrics server. The
transfer is carried out automatically using the FTP protocol. You must ensure that
you have FTP access to the internet (port 21); firewalls can prevent access in
some institutions. If you unsure about this, consult your technical staff.
If you have arranged to send you test data to p.Metrics, you should make use of
this utility regularly. Your server should be connected to the internet before you
use this module, as the results are sent directly to our server.
Submitting your data
Select Submit test data to
Sherwood server from the
main menu. You’ll see a
screen like the one on the
right.
The left panel is where you
enter your details so we
know the source of the
submitted data, and the right
panel is used to show you
how the data transfer is
proceeding.
When you have typed your
details, the left panel will look something like
the screenshot on the left. Use the
Description of the data field to inform us
about any unusual features of the testing
procedure, the test users or the results
collected.
Once you are ready to submit the data, first
of all ensure that your machine is connected
to the internet and then click on the Submit
button.
You will see various messages appearing in
the lower right-hand box. An example is
shown on the next page.
The transmission may take several minutes
to complete. If it is successful, you’ll see a
confirmation message. Click on the OK
button.
28
Sherwood SAS and STAT
Semi-technical modules
If the transmission fails
If there is a transmission problem, you may
see a message in the status window (the
bottom line of the left panel). For instance
the message “Async Error (1101)” may
mean that the server failed to connect to the
internet. If you do have problems, it is often
worth trying again a few hours later, or
perhaps the next day. There may be some
temporary
problem
with
internet
connections. If the problem persists, make a
careful note of the circumstances leading up
to the problem and of any messages on the
screen, and get in touch with p.Metrics.
Closing the module
After a successful transmission, the submit
data panel remains on the screen. Select
Exit from the File menu, or click on the X at
the top right corner of the screen.
Submitting data: some tips
Ø
Make sure you are connected to the internet before starting transmission
Ø
Allow plenty of time for the results to be transferred
Ø
If you are running more than one server, you should submit data from each
server separately
Ø
Contact p.Metrics if you have any problems
7.4
CHOOSE A DATABASE SERVER ON YOUR NETWORK
Before using the Sherwood Ability Screen, you need to choose a shared server
database where the test data will be stored. You also need to give the server a
name (this may already have been done during installation). Once the SQL server
has been setup (usually through a site visit), you may need to install the SAS on
to more PCs.
For details of the procedure for setting up an ODBC link to the SQL server, please
refer to the SAS Installation Guide (page 21).
User manual 2.1
29
Semi-technical modules
30
Sherwood SAS and STAT
USER MANUAL
8 Technical utilities
8.1
PURPOSE OF THE MODULES
These modules allow members of staff to carry out technical operations, such as
importing existing registration data into the Sherwood system or exporting and
backing up your data. If you are uncertain about using any of these modules,
consult a member of your technical staff.
8.2
IMPORT STUDENT AND COURSE REGISTRATION DATA
This utility allows you to import student and course registration details from your
ISR systems.
When you select the Import student and
course registration data option form the
main menu, you will be presented with
the screen shown on the right.
Importing student details
If you select the Students button, an import screen will appear.
This screen will allow you to
import student details stored
in files elsewhere in your
system.
Before importing you must
ensure that student details
and course registration data
are saved as CSV format
files. Files need to match the
format of our templates
exactly
for
importing
purposes. A maximum of
10,000 records can be
imported using this facility.
Student details that can be imported include:
Ø
Ø
Ø
ISR ID
Date of Birth
Surname, Forename and Initials
User manual 2.1
31
Technical modules
Remember to ensure that no testing is
taking place before you begin the import
procedure.
Step 1 asks you to Choose the file
containing your student details.
When you select your student details
CSV file you will see confirmation on
screen, as shown below.
Step 2 allows you to check
the status of the data to be
imported by clicking the
Preview button.
You
are
given
the
opportunity to fix any errors
before you can go ahead and import.
Step 3 finishes the import procedure and imports the details into the Sherwood
testing system.
Importing course details or enrolment details
The other two options from the Import student and course registration data screen
allow you to import a list of your courses (click on the Courses button) or a list of
enrolments of students on courses (click on the Enroll button). These options
operate in much the same way as described above for importing student details.
For course details, you must specify:
Ø
Ø
Course code
Course description
For students enrolments you must specify:
Ø
Ø
32
ISR ID for each student
Course code
Sherwood SAS and STAT
Technical modules
8.3
EXPORT YOUR DATA
This module allows you to export up all your data to a single Microsoft Access file.
The utility works with both Access and SQL versions of the SAS and STAT.
The primary purpose of the utility is to allow you to archive data so that you can
send it to p.Metrics for further analysis. It is not intended to replace standard
backup procedures. (It is good practice to back up your database onto another
machine or some other secure medium. The critical files to back up are the three
database files: AdminData.mdb, AssessmentData.mdb and SystemData.mdb.)
Choose the Export/backup your data
option from the main menu. You will see
the control page shown on the right. Click
on STEP 1: Choose Export Target and
select a database file to be used for
storing the archived data. You will see the
normal Windows open file dialogue box.
For normal use, select the file
SASExport.mdb which can be found in
the SAS or STAT Export database folder.
Next click on STEP 2: Export Now.
Details of progress will be shown in the
bottom section of the screen, as shown.
Finally, exit from the utility and, if
required, send the file to p.Metrics.
8.4
RESET A SPECIFIC USER’S STATUS
This utility allows you to reset a user’s status if some error (such as a network
failure or power cut) occurs when one or more users are logged on. Typically in
such cases a user will not be able to log on again because the system will flag
them as logged on already. The utility provides information on a user’s status and
allows you to reset their status.
User manual 2.1
33
Technical modules
Before using the utility, ensure that no-one else is logged on (either as a user or
as an administrator) and that you do not have any other of the Sherwood utilities
running.
Choose Reset a specific users status
from the main menu. You will see a
panel similar to the one on the right.
Next you must choose the user to check.
You can use either of the two pull-down
menus: the left one specifies the
Sherwood ID and the right one the user’s
name.
When you have selected a student, click on the
Check student status button to see the current
status. Information is shown in the Status line.
In the example below, the student is flagged as
logged on but has not completed any
questions.
The system allows this user to be logged
off. If you wish to change the user status
to “logged off”, then click the Log Off
button. If the user has completed all
questions, then you also have the option
to Change status to Logged off and Test
Complete. You may also chose to delete
the student from the system altogether.
8.5
EMERGENCY DATA UPLOAD
Inevitably with modern software and network environments, sometimes test
machines will crash or networks will encounter problems. Test data in the
Sherwood Testing System is held on the test machine until a student finishes the
last question. It is only transferred to the database on the server when the test is
complete. If this upload fails for any reason, it is possible to retrieve the data using
this utility.
If you need to recover data which has not been uploaded to the server, select
Emergency data upload from the main menu. As the test machine stores data for
the current student only, it is only possible to retrieve data for the last student
tested on any test machine. The Emergency upload utility should be used on the
problem PC and is typically run from a floppy disk or CDR.
When you select the Emergency Data Upload module from the Main Menu you
will see a screen similar to the one opposite.
34
Sherwood SAS and STAT
Technical modules
The utility allows you to find out about the
following information:
Ø
Ø
Ø
Step 1: How many questions have
been answered by the student. Click
on the Check this PC button.
Step 2: Checks are run for locks on
the server (.ldb files on Access).
Click on the Check Locks button.
Step 3: Checks are run to see if any
data has been uploaded already.
Click on the Check Server button.
Below is an example screen where the
checks are running.
In this example, the check at Step 3 tells
us data has been uploaded to the server,
so there is no need to attempt an
emergency upload. However, if this is not
confirmed the utility will proceed to Step
4.
Ø
8.6
Step 4: If the student has no data
uploaded on the server, but has
completed the test, the utility will
give you the option to upload the
test data from the test machine.
DATABASE CLEARDOWN
You may find that, after testing an intake of students and subsequently producing
reports or exporting reports to other systems, you no longer need to keep the test
data on the server. With many students, the databases can be extremely large.
For example, many colleges find it useful to delete the previous year’s test data
before commencing testing again for a new intake of students.
The Database Cleardown utility allows you to delete all data from your databases.
It is accessed via the Main Menu by selecting the Database cleardown option.
WARNING
Ø Before using this module you are advised to make and store an archived
copy of your data. p.Metrics are not responsible for any accidental data
loss.
User manual 2.1
35
Technical modules
When you select Database cleardown from the
Main Menu you will be presented with the
screen on the right. You have the options of
deleting all courses registered on the system, or
deleting all students and their test data.
You may wish to keep your registered courses to use again for a new intake of
students.
As a safeguard, you will be presented with confirmation boxes which you need to
answer before any deletion will take place. After deletion, a message box will
appear confirming your action.
36
Sherwood SAS and STAT
Technical modules
User manual 2.1
37
Technical modules
38
Sherwood SAS and STAT