1
Plug replacement
• Disconnect the plug from the supply.
• Cut off the plug and dispose of
immediately. Insertion of a detatched
plug into a 5 amp socket outlet may
result in electric shock.
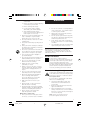
• Only fit BS1363A approved plugs fitted
with the correctly rated fuse.
• The cable wire colours, or a letter, will
be marked at the connection points of
most good quality plugs. Attach the
wires to their respective points in the
plug (see below). Brown is for “Live” (L)
and blue is for “Neutral” (N).
• Before replacing the top cover of the
mains plug ensure that the cable restraint
is holding the outer sheath on the cable
firmly and that the two leads are correctly
fixed at the terminal screws.
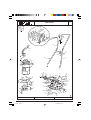
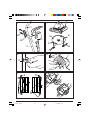
Handle assembly (Fig. A - E)
A
B
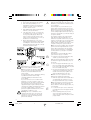
Warning! Never connect live or neutral
wires to the earth pin marked “E” or
.
Note: Do not wire an extension cable directly
into your mower yourself. Instead, take your
mower to your nearest Black & Decker
service agent.
Increased safety can be obtained by having
a qualified electrician install a high
sensitivity (30mA) circuit breaker in the
house wiring.
If you do not have such a circuit breaker
installed, or you do not wish to have one
installed, then we strongly recommend that
the electrical power to your mower be
supplied through a high sensitivity residual
current device (RCD). The RCD is designed
to provide a high degree of personal
protection against harmful electric current
should fault conditions occur.
Warning! The use of an RCD or other
circuit breaker unit does not release the
operator of your mower from the safety
instructions and safe working practices
given in this manual.
C
E
Remove all the parts from the carton and
familiarise yourself with the individual parts
of your mower.
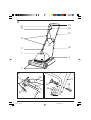
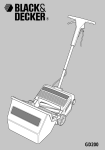
The main parts of your mower are your
mower body (1) which houses the motor.
Attached to your mower body are the front
wheels (2) which incorporate adjustment
for the cutting height and the rear roller (3).
Pivot pins are built into your mower body to
accept the handle.
The handle comprises the lower handle
tube (20), the upper handle tube (21),
switch box (22) with switch lever (23) and
safety lock-off button (24), electrical supply
cable (11), the cable clips (12) and the
handle clamp assemblies (25), which each
comprise a wing nut, spacer and bolt.
Note: The electrical supply cable should be
positioned on the right hand side of your
mower when viewed from the operating
position. Ensure that this is not damaged
or twisted before you begin to assemble
your mower.
Assemble the lower handle tube (20) to
your mower body (1), as follows:
• Compress the lower handle tube (20)
and fit oyour mower body (1).
With the lower handle tube (20) in position,
assemble the upper handle tube (21) to it,
as follows:
• Place the upper handle tube (21) over
the lower handle tube (20), aligning the
holes in the upper handle tube (21) and
the lower handle tube (20).
• Fit a bolt (26) through each hole and fit
a wing nut (27), flat washer and lock
washer to the bolt (26). Tighten each
wing nut with firm pressure only.
Note: Do not use a spanner or other
implement to tighten the wing nuts.
• With the upper and lower handle tubes
assembled, fit the switch box (22) to
the upper handle tube (21), as follows:
Note: The switch box must be positioned
on the right-hand side of your mower.
Ensure that the electrical supply cable (11)
is not twisted.
• Locate the two pins on the switch box
(22) with the holes in the upper handle
tube (21).
• Fit the retaining plate (28) over the
stem of the upper handle tube (21)
and secure in position using the screws
(29) provided.
4
GR120_UK.P65
4
09-11-2000, 14:27