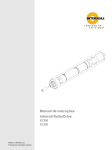
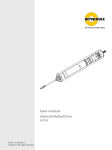
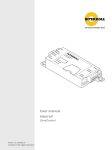
Download User manual Interroll Frequency Inverter IP55 - AS
Transcript
Input 1 Frequency Inverter Input 2 Power Trip Power In Power Out Sensor Input Communications Part ASI Data Fault User manual Interroll Frequency Inverter IP55 PD-A-400-1A5-55 PD-A-230-2A5-55 Chapter-ID: User manual Chapter-ID: Original Version instructions Chapter-ID: Version 1.1 (08/2011) en Original instructions Manufacturer Interroll Trommelmotoren GmbH Opelstr. 3 41836 Hueckelhoven/Baal Germany Phone: +49 2433 44 610 www.interroll.com Copyright The copyright of this manual remains with Interroll Group. This manual includes regulations and technical drawings which may not be copied or duplicated either in whole or in part. Unauthorized use, publication, or application of this document is prohibited. Version 1.1 (08/2011) en Original instructions Interroll Frequency Inverter IP55 Table of contents Introduction Information about the manual . . . . . . . . . . . . . . . . . . . . . . . . . . . . . . . . . . . 3 Warning notices in this manual. . . . . . . . . . . . . . . . . . . . . . . . . . . . . . . . . . 4 Additional symbols . . . . . . . . . . . . . . . . . . . . . . . . . . . . . . . . . . . . . . . . . . . 4 Safety General safety instructions . Intended use . . . . . . . . . . . Unintended use . . . . . . . . . Qualified persons . . . . . . . . Dangers . . . . . . . . . . . . . . . Interfaces to other devices . . . . . . . . . . . . . . . . . . . . . . . . . . . . . . . . . . . . . . . . . . . . . . . . . .... .... .... .... .... .... ... ... ... ... ... ... .... .... .... .... .... .... ... ... ... ... ... ... .... .... .... .... .... .... ... ... ... ... ... ... .... .... .... .... .... .... ... ... ... ... ... ... 5 5 6 7 7 7 Product information Frequency inverter components . . . . . . . . . . . . . . . . . . . . . . . . . . . . . . . . . 8 Label . . . . . . . . . . . . . . . . . . . . . . . . . . . . . . . . . . . . . . . . . . . . . . . . . . . . . 8 Product identification . . . . . . . . . . . . . . . . . . . . . . . . . . . . . . . . . . . . . . . . . 8 Technical Data . . . . . . . . . . . . . . . . . . . . . . . . . . . . . . . . . . . . . . . . . . . . . . 9 Frequency inverter dimensions . . . . . . . . . . . . . . . . . . . . . . . . . . . . . . . . 10 Connections . . . . . . . . . . . . . . . . . . . . . . . . . . . . . . . . . . . . . . . . . . . . . . . 11 Connection diagram . . . . . . . . . . . . . . . . . . . . . . . . . . . . . . . . . . . . . . . . . 13 Status LEDs . . . . . . . . . . . . . . . . . . . . . . . . . . . . . . . . . . . . . . . . . . . . . . . 14 Parameters . . . . . . . . . . . . . . . . . . . . . . . . . . . . . . . . . . . . . . . . . . . . . . . 15 Parameter group 0 – Monitoring parameters (P0-01 to P0-50) . . . . . . . . . 16 Parameter group 0 – Monitoring parameters (P0-51 to P0-80) . . . . . . . . . 20 Parameter group 1 – Basic parameters for configuration . . . . . . . . . . . . . 22 Parameter group 2 – Extended parameters . . . . . . . . . . . . . . . . . . . . . . . 24 Parameter group 4 – Parameters for high-performance motor control . . . 28 Parameter group 5 – Communication parameters . . . . . . . . . . . . . . . . . . 30 Parameter group 6 – Special parameters . . . . . . . . . . . . . . . . . . . . . . . . . 31 Parameter group 7 – Motor parameters . . . . . . . . . . . . . . . . . . . . . . . . . . 32 Parameter group 8 – Application-specific parameters. . . . . . . . . . . . . . . . 33 Options and accessories External keypad . . . . . . . . . . . . . . . . . . . . . . . . . . . . . . . . . . . . . . . . . . . . 34 OptiStick . . . . . . . . . . . . . . . . . . . . . . . . . . . . . . . . . . . . . . . . . . . . . . . . . 37 Transport and storage Transport . . . . . . . . . . . . . . . . . . . . . . . . . . . . . . . . . . . . . . . . . . . . . . . . . 38 Storage . . . . . . . . . . . . . . . . . . . . . . . . . . . . . . . . . . . . . . . . . . . . . . . . . . 38 Installation Warning information for assembly . . . . . . . . . . . . . . . . . . . . . . . . . . . . . . Installing the frequency inverter . . . . . . . . . . . . . . . . . . . . . . . . . . . . . . . . Warning information relating to the electrical installation . . . . . . . . . . . . . Electrical installation . . . . . . . . . . . . . . . . . . . . . . . . . . . . . . . . . . . . . . . . Version 1.1 (08/2011) en Original instructions 39 40 40 42 1 Interroll Frequency Inverter IP55 Table of contents Initial startup and operation Initial startup . . . . . . . . . . . . . . . . . . . . . . . . . . . . . . . . . . . . . . . . . . . . . . . 44 Operation . . . . . . . . . . . . . . . . . . . . . . . . . . . . . . . . . . . . . . . . . . . . . . . . . 44 Commissioning via the external keypad . . . . . . . . . . . . . . . . . . . . . . . . . . 45 Frequency inverter control. . . . . . . . . . . . . . . . . . . . . . . . . . . . . . . . . . . . . 47 Parametrise the digital inputs . . . . . . . . . . . . . . . . . . . . . . . . . . . . . . . . . . 48 Operation via ASi interface . . . . . . . . . . . . . . . . . . . . . . . . . . . . . . . . . . . . 50 Serial interface . . . . . . . . . . . . . . . . . . . . . . . . . . . . . . . . . . . . . . . . . . . . . 53 Register for controlling and monitoring the frequency inverter via the serial interface . . . . . . . . . . . . . . . . . . . . . . . . . . . . . . . . . . . . . . . . . . . . . . . . . . 54 Procedure in case of accident or fault . . . . . . . . . . . . . . . . . . . . . . . . . . . . 57 Abandonment and disposal Shut-down. . . . . . . . . . . . . . . . . . . . . . . . . . . . . . . . . . . . . . . . . . . . . . . . . 58 Disposal . . . . . . . . . . . . . . . . . . . . . . . . . . . . . . . . . . . . . . . . . . . . . . . . . . 58 Appendix Installation declaration . . . . . . . . . . . . . . . . . . . . . . . . . . . . . . . . . . . . . . . 59 Parameters . . . . . . . . . . . . . . . . . . . . . . . . . . . . . . . . . . . . . . . . . . . . . . . . 60 Troubleshooting . . . . . . . . . . . . . . . . . . . . . . . . . . . . . . . . . . . . . . . . . . . . 70 2 Version 1.1 (08/2011) en Original instructions Interroll Frequency Inverter IP55 Introduction Information about the manual In this manual the following frequency inverter types are described: • • Contents Validity of the manual PD-A-400-1A5-55 PD-A-230-2A5-55 This manual contains important recommendations, notes and information about the various operating phases of the frequency inverter: • Transport, assembly and start-up • Safe operation, maintenance, troubleshooting and disposal The manual describes the frequency inverter as it is delivered by Interroll. Special application designs require validation from Interroll and additional technical instructions. The manual is part of the product Version 1.1 (08/2011) en Original instructions ¾ For fault-free, safe operation and warranty claims, read the manual and follow the instructions before handling the frequency inverter. ¾ Keep the manual near to the frequency inverter. ¾ Pass the manual on to any subsequent operator or user of the frequency inverter. ¾ Interroll does not accept any liability for faults or defects due to nonobservance of this manual. ¾ If you have any questions after reading the operation manual, feel free to contact our customer service. See the last page for your local contact. 3 Interroll Frequency Inverter IP55 Introduction Warning notices in this manual The warning notices in this document refer to risks which may arise during usage of the frequency inverter. The relevant warning notices can be found in the chapter on safety (see "Safety", page 5) and at the beginning of each chapter. There are three categories of danger. The following signal words are used in the document as required: • Danger • Warning • Caution Signal word Meaning Danger Indicates a hazardous situation which, if not avoided, will result in death or serious injury. Warning Indicates a hazardous situation which, if not avoided, could result in death or serious injury. Caution Indicates a hazardous situation which, if not avoided, may result in minor or moderate injury. Structure of warning notices DANGER Nature and source of the hazard Possible consequence of non-observance ¾ Information about how to avoid the hazard. Additional symbols This symbol identifies possible material damage. ¾ Information about how to avoid damage. Important This symbol displays safety instructions. Hint This symbol marks useful and important information. ¾ This symbol marks the steps that have to be carried out. 4 Version 1.1 (08/2011) en Original instructions Interroll Frequency Inverter IP55 Safety General safety instructions The frequency inverter has been built to comply with the state of the art, nevertheless hazards may arise when it is used. • Risks of physical injury to the user or bystanders. • Adverse effects of the frequency inverter and other material. Important Disregarding the warning notices in this manual may lead to serious injury. ¾ Always read the entire manual and safety instructions before starting to work with the frequency inverter and follow the information contained therein in full. ¾ Only instructed and qualified persons may work with the frequency inverter. ¾ Always keep the user manual at hand when working with the frequency inverter so you can consult it quickly if required. ¾ Always comply with the relevant national safety regulations. ¾ Do not carry out repairs on the frequency inverter. Should repairs be necessary, notify your supplier. ¾ Never open the frequency inverter housing. ¾ Do not touch the power supply and motor connections (as well as the thermal earthing contact connections). ¾ If you have any questions after reading the operation manual, feel free to contact our customer service. See the last page for your local contact. Intended use The frequency inverter is intended for controlling a drum motor for use in industrial environments, supermarkets and airports. The drum motor serves to transport unit loads such as parts, cartons and boxes as well as bulk cargo such as granulated materials, powders and other free-flowing materials and must be integrated in a conveyor module or conveyor system. Any other use is not permitted and is deemed to be improper. Use of the frequency inverter is only allowed in the areas described in the product information chapter. Any modifications that affect the safety of the product are not permitted. The frequency inverter may only be operated within the defined operating limits. Hint The operational scope of the frequency inverter may exceed the capacity of the connected motor. To ensure proper use, the frequency inverter configuration must be adapted to the connected motor. Version 1.1 (08/2011) en Original instructions 5 Interroll Frequency Inverter IP55 Safety Unintended use The frequency inverter is not designed to be used under water. If used underwater, water will penetrate into the frequency inverter resulting in a short circuit. The frequency inverter is not suitable for use in chemically charged environments. The frequency inverter's control functions are not designed for use in safetyrelevant systems. Use of the frequency inverter for anything other than the intended purpose is subject to approval by Interroll. Unless otherwise stated in writing and/or specified in a quote, Interroll and its dealers shall assume no liability for product damage or failure which result from failure to observe these specification and restrictions. 6 Version 1.1 (08/2011) en Original instructions Interroll Frequency Inverter IP55 Safety Qualified persons Qualified persons are persons who read and understand the manual and, taking national regulations into account, can competently execute incidental work. Only instructed and qualified persons may work with the frequency inverter, taking the following into account: • the relevant manuals and diagrams, • the warning and safety instructions in this manual, • the system specific regulations and requirements, • national or local regulations and requirements for safety and accident prevention. Dangers Important The following list informs you about the various types of danger or damage that may occur while working with the frequency inverter. Persons Electricity Working environment Faults during operation Maintenance Accidental motor starts ¾ Maintenance or repair work must only be executed by authorized and qualified persons in accordance with the applicable regulations. ¾ Before turning on the frequency inverter, ensure that no unauthorized persons are near the conveyor. ¾ Only perform installation and maintenance work after you have switched off the power. Ensure that the frequency inverter cannot be turned on accidentally. ¾ Do not use the frequency inverter in explosive atmospheres. ¾ Always remove materials and objects which are not required from the work area. ¾ Regularly check the frequency inverter for visible damage. ¾ Should smoke develop or unusual sounds be heard, turn the frequency inverter off immediately and prevent it from being turned on accidentally. ¾ Contact qualified personnel immediately to find the source of the fault. ¾ Since the product is maintenance free, you only need to check it regularly for signs of visible damage, unusual noises and to also ensure that the connections are secure. ¾ Do not open the frequency inverter. ¾ Take care during installation and maintenance work or in the event of a frequency inverter fault: The drum motor could start up unintentionally. Interfaces to other devices Hazards could occur when connecting the frequency inverter– to the power supply and when installing the drum motor into a conveyor module. These hazards are not described in this manual and have to be analysed during the development, installation and commissioning of the conveyor module. ¾ Following installation, the entire system must be checked for potential new hazards before being turned on. Version 1.1 (08/2011) en Original instructions 7 Interroll Frequency Inverter IP55 Product information Frequency inverter components Input 1 Frequency Inverter Input 2 Power Trip Power In Sensor Input Communications Part Power Out ASI Data Fault Frequency inverter 1 2 3 4 5 Power supply connection Motor connection 6 7 8 Digital input status LEDs Frequency inverter status LEDs ASi interface status LEDs Digital inputs connection Serial interface ASi interface Label The information on the label is used to identify the frequency inverter. Product identification The information given below is required in order to identify the Interroll frequency inverter IP55. Material group 8 Device type Voltage class Rated current IP class PD - A - 400 (380 V AC to 480 V AC) - 1A5 (1.5 A) - 55 PD - A - 230 (200 V AC to 240 V AC) - 2A5 (2.5 A) - 55 Version 1.1 (08/2011) en Original instructions Interroll Frequency Inverter IP55 Product information Technical Data PD-A-400-1A5-55 PD-A-230-2A5-55 IP55 IP55 Ambient temperature range (operation) -20 °C to +40 °C -20 °C to +40 °C Ambient temperature range (storage) -40 °C to +60 °C -40 °C to +60 °C max. 1000 m max. 1000 m 1% / 100 m 1% / 100 m < 95%, non-condensing < 95%, non-condensing 380 V AC to 480 V AC ± 10 % - threephase 200 V AC to 240 V AC ± 10 % - onephase 50 / 60 Hz 50 / 60 Hz 2A 6.5 A Fuse or MCB 6 A, type B 10 A, type B EMC category C2 C2 1.5 A 2.5 A < 30 mA < 3.5 mA 50 mA @ 30 V (without loading of 24 V DC outputs) 50 mA @ 30 V (without loading of 24 V DC outputs) 3 A for 2 s 5 A for 2 s 2 kHz, 4 kHz, 6 kHz, 8 kHz, 12 kHz, or 16 kHz 2 kHz, 4 kHz, 6 kHz, 8 kHz, 12 kHz, or 16 kHz 1.5 mm² 1.5 mm² Protection classification Installation altitude above sea level Restriction above 1,000 m (up to max. 4,000 m) Relative humidity Input voltage Input frequency Rated input current Rated output current Leakage current Max. ASi input current Overload Transistor switching frequency (PWM1) Line cross-section (motor) 1 Version 1.1 (08/2011) en Original instructions PWM = Pulse width modulation 9 Interroll Frequency Inverter IP55 Product information Frequency inverter dimensions All the length-dependent dimensions in the catalogue and in this manual comply with the requirements of DIN/ISO 2768 (medium quality). 240 Input 1 Frequency Inverter Power Trip Power In Power Out 118 Input 2 Sensor Input Communications Part ASI Data Fault 270 58 92 85 288 28 Frequency inverter dimensions 10 Version 1.1 (08/2011) en Original instructions Interroll Frequency Inverter IP55 Product information Connections Connections for power supply and motor Power In: Power supply connection (6-pin M23 male socket) PD-A-400-1A5-55 PD-A-230-2A5-55 1 2 3 4 5 6 1 2 3 4 5 6 Phase L1 Phase L2 PE Phase L3 - Phase L PE Neutral conductor N Reference: Interroll supplier is AMPHENOL. The plug is assembled of : MB3CGS1, MB1CKN0600, SC000014 (x4) Power Out: Motor connection (8-pin M23 female socket) 1 2 3 4 Motor Motor Motor Motor line U PE line W line V D C B A Thermal cut motor protection switch Thermal cut motor protection switch - Pins B and C have high voltage potential also. Reference: Interroll supplier is AMPHENOL. The plug is assembled of : MB3CGS1 , MB1JJN0800 , SC000035 (x2), SC000036 (x4) Version 1.1 (08/2011) en Original instructions 11 Interroll Frequency Inverter IP55 Product information Digital inputs, serial interface and ASi interface Sensor input: Digital inputs connection (5-pin M12 female socket) 1 2 3 4 5 +24 V DC output Digital input 2 (sensor or control input) 0V Digital input 1 (sensor or control input) - Communications port: Serial interface (RJ45) 1 2 3 4 0V Optibus (RS485–) 5 6 7 8 Optibus (RS485–) +24 V DC output Modbus RTU (RS485–) Modbus RTU (RS485+) ASi: ASi interface (4-pin M12 male socket) 1 2 3 4 ASi+ or external supply voltage (+ pole) ASi- or external supply voltage (- pole) - Hint External supply voltage: 24 V DC to 30 V DC 12 Version 1.1 (08/2011) en Original instructions Interroll Frequency Inverter IP55 Product information Connection diagram Example of connection of the frequency inverter: 230 V/ 400 V Input 1 Frequency Inverter Input 2 Power Trip Power In Power Out Sensor Input Communications Part Data ASI Fault ASi 1 2 3 Power supply Contactor Motor Version 1.1 (08/2011) en Original instructions 4 5 6 Sensors or PLC PC External control keypad 13 Interroll Frequency Inverter IP55 Product information Status LEDs Input 1 Input 2 Power Trip Data Fault 1 2 3 4 5 6 Digital inputs status display Input 1: yellow LED for digital input 1 status display Input 2: yellow LED for digital input 2 status display Power: green LED for frequency inverter/power supply status display Trip: red LED for frequency inverter status display Data: green LED for ASi interface status display Fault: red LED for ASi interface status display LED input 1/2 Status of the associated digital input Not active Active Frequency inverter status display LED power LED trip Status No power supply Motor is powered - Normal operation Motor is not powered - Normal operation No power supply - Warning Motor is powered - Warning Motor is not powered - Warning No power supply - Frequency inverter fault Motor is not powered - Frequency inverter fault ASi interface status display LED data LED fault Status No power supply via ASi connection Normal operation No data exchange Ready for data exchange Field bus address = 0 ASi periphery fault Legend Symbol Meaning 14 LED off LED on LED flashing Version 1.1 (08/2011) en Original instructions Interroll Frequency Inverter IP55 Product information Hint Meaning of "Warning": The frequency inverter signals a warning if it is aware of a problem that will – immediately or after a certain time – result in a "Frequency inverter fault" status. Warning is always an "actual" state with no memory. Examples: motor temperature while stopped; over current while running. Parameters Hint The parameter set for the frequency inverter is divided into several parameter groups. Access to the parameter groups is determined by the value of the parameter P1-14: Parameter group 0 Monitoring parameters (read only) P1-14 any (P0-01 to P0-50) P1-14 = P2-40 1) + (P0-51 to P0-80) 1 Basic parameters for configuration P1-14 = P6-30 2) + + + + + 2 Extended parameters + + 4 Control parameters for high-performance motor control + + 5 Communication parameters + + 6 Special parameters + 7 Motor parameters + 8 Application-specific parameters + Version 1.1 (08/2011) en Original instructions 1) Factory-set standard parameter value for P2-40 = 101 2) Factory-set standard parameter value for P6-30 = 201 15 Interroll Frequency Inverter IP55 Product information Parameter group 0 – Monitoring parameters (P0-01 to P0-50) P0-01 (Reserved) P0-02 (Reserved) P0-03 Status of inputs The states (0 or 1) of the following digital inputs and ASi inputs are shown from left to right: 1st entry: • • • • • Digital input 1 Digital input 2 (Reserved) (Reserved) Input for the thermal cut motor protection switch 2nd entry: • • • ASi input bit 0 ASi input bit 1 ASi input bit 2 To change between the entries push the UP and DOWN buttons on the external keypad. P0-04 P1-10 = 0: Values in Hz P1-10 > 0: Values in rpm P0-05 Set value of torque control Set value at the reference input for internal regulation of torque P0-06 Digital set speed Digital value of the internal motor potentiometer for the set speed. The unit of this value depends on parameter P1-10: P0-07 16 Set value of acceleration time / braking time Set value at the reference input for internal regulation of the acceleration time / braking time. The unit of this value depends on parameter P1-10: P1-10 = 0: Values in Hz P1-10 > 0: Values in rpm Field bus set speed Set speed received via the field bus interface. The unit of this value depends on parameter P1-10: P1-10 = 0: Values in Hz P1-10 > 0: Values in rpm P0-11 Applied motor voltage Instantaneous output voltage of the frequency inverter to the motor. P0-12 Output torque of the motor Instantaneous output torque level produced by the motor. P0-13 Log of fault messages The number of decimal points in the display of the external keypad shows the number of fault messages. The last four fault messages are shown together with the time stamp. By pressing the UP and DOWN buttons on the external keypad at the same time the respective time stamp (based on parameter P0-31) is shown. To change between the last four fault messages push the UP and DOWN buttons on the external keypad. Version 1.1 (08/2011) en Original instructions Interroll Frequency Inverter IP55 Product information P0-14 Motor magnetising current (ld) Motor d-axis current If the motor is not in operation, the last saved value is shown. P0-15 Rotor current of the motor (Iq) Motor q-axis current (current that generates torque) Requirement: Automatic motor tune for the connected motor has been successfully concluded. P0-16 Magnetic field strength of the motor Requirement: Automatic motor tune for the connected motor has been successfully concluded. P0-17 Stator resistance of the motor (Rs) Requirement: Automatic motor tune for the connected motor has been successfully concluded. P0-18 Stator inductance of the motor (Ls) Requirement: Automatic motor tune for the connected motor has been successfully concluded. P0-19 Rotor resistance of the motor (Rr) Only valid for asynchronous motors Requirement: Automatic motor tune for the connected motor has been successfully concluded. P0-20 Intermediate circuit voltage of the frequency inverter Instantaneous DC bus voltage of the frequency inverter P0-21 Temperature of the frequency inverter Current temperature of the frequency inverter's heat sink P0-22 DC bus voltage ripple This value is used for internal protection and monitoring purposes. P0-23 Operating time above heat sink temperature of 80°C Cumulative operating time of the frequency inverter at a temperature of above 80°C measured on the heat sink 1st entry: Number of hours 2nd entry: Number of minutes and seconds This value is used for internal protection and monitoring purposes. To change between the entries push the UP and DOWN buttons on the external keypad. P0-24 Operating time above board temperature of 80°C Cumulative operating time of the frequency inverter at a temperature of above 80°C measured on the board 1st entry: Number of hours 2nd entry: Number of minutes and seconds This value is used for internal protection and monitoring purposes. To change between the entries push the UP and DOWN buttons on the external keypad. P0-25 Version 1.1 (08/2011) en Original instructions Estimated rotor speed In vector control operation. The unit of this value depends on parameter P1-10: P1-10 = 0: Values in Hz P1-10 > 0: Values in rpm 17 Interroll Frequency Inverter IP55 Product information P0-26 Energy consumption in kWh As soon as the value 1,000 is reached, the parameter value P0-27 is increased by 1 and the display is reset to 0.0. 1st entry: The value can be reset by the user 2nd entry: Value is marked with "F" and cannot be reset. To change between the entries push the UP and DOWN buttons on the external keypad. P0-27 Energy consumption in MWh 1st entry: The value can be reset by the user 2nd entry: Value is marked with "F" and cannot be reset. To change between the entries push the UP and DOWN buttons on the external keypad. P0-28 Software version and checksum 1st entry: IO software version 2nd entry: Checksum of the IO software 3rd entry: DSP software version 4th entry: Checksum of the DSP software To change between the entries push the UP and DOWN buttons on the external keypad. P0-29 Frequency inverter type 1st entry: Design and input voltage in V (e.g. )) 2nd entry: Rated output current in A (e.g. ) 3rd entry: Number of phases (e.g. 3RXW) To change between the entries push the UP and DOWN buttons on the external keypad. P0-30 Serial number Unambiguous production serial number of the frequency inverter 1st entry: first part of the serial number (e.g. ) 2nd entry: second part of the serial number (e.g. ) To change between the entries push the UP and DOWN buttons on the external keypad. P0-31 Total running time of the frequency inverter 1st entry: Number of hours 2nd entry: Number of minutes and seconds To change between the entries push the UP and DOWN buttons on the external keypad. P0-32 Total running time since the last fault (1) 1st entry: Number of hours 2nd entry: Number of minutes and seconds If there was a fault the value is reset by means of a restart or the next start signal. To change between the entries push the UP and DOWN buttons on the external keypad. 18 Version 1.1 (08/2011) en Original instructions Interroll Frequency Inverter IP55 Product information P0-33 Total running time since the last fault (2) 1st entry: Number of hours 2nd entry: Number of minutes and seconds The value is reset by the next start signal if there was a fault. Undervoltage does not trigger a fault. The value is not reset by restarting as long as this does not trigger a fault. To change between the entries push the UP and DOWN buttons on the external keypad. P0-34 Total running time since the last start signal 1st entry: Number of hours 2nd entry: Number of minutes and seconds To change between the entries push the UP and DOWN buttons on the external keypad. Version 1.1 (08/2011) en Original instructions P0-35 (Reserved) P0-36 Intermediate circuit voltage log (256 ms) The values are measured every 256 ms. If a fault occurs, the last values for diagnostic purposes remain saved. To change between the 8 entries push the UP and DOWN buttons on the external keypad. P0-37 DC bus voltage ripple log (20 ms) The values are measured every 20 ms. If a fault occurs, the last values for diagnostic purposes remain saved. To change between the 8 entries push the UP and DOWN buttons on the external keypad. P0-38 Temperature of heat sink log (30 s) The values are measured every 30 ms. If a fault occurs, the last values for diagnostic purposes remain saved. To change between the 8 entries push the UP and DOWN buttons on the external keypad. P0-39 Board temperature of the frequency inverter log (30 s) The values are measured every 30 ms. If a fault occurs, the last values for diagnostic purposes remain saved. To change between the 8 entries push the UP and DOWN buttons on the external keypad. P0-40 Motor current log (256 ms) The values are measured every 256 ms. If a fault occurs, the last values for diagnostic purposes remain saved. To change between the 8 entries push the UP and DOWN buttons on the external keypad. P0-41 Number of critical faults – overcurrent The counter is increased by 1 as soon as the permissible motor current is exceeded. This information can be used for diagnostic purposes. P0-42 Counter for critical faults – overvoltage The counter is increased by 1 as soon as the permissible motor voltage is exceeded. This information can be used for diagnostic purposes. P0-43 Number of critical faults – undervoltage The counter is increased by 1 as soon as the permissible voltage is undercut. This information can be used for diagnostic purposes. 19 Interroll Frequency Inverter IP55 Product information P0-44 Number of critical faults – excess temperature The counter is increased by 1 as soon as the permissible operating temperature is exceeded. This information can be used for diagnostic purposes. P0-45 (Reserved) P0-46 Number of critical faults – board temperature too high The counter is increased by 1 as soon as the permissible board temperature of the frequency inverter is exceeded. This information can be used for diagnostic purposes. P0-47 (Reserved) P0-48 (Reserved) P0-49 Modbus communication faults log The counter is increased by 1 with every Modus communication fault. This information can be used for diagnostic purposes. P0-50 Warning information see "Register for controlling and monitoring the frequency inverter via the serial interface", page 54, register 30 Parameter group 0 – Monitoring parameters (P0-51 to P0-80) P0-51 (Reserved) P0-52 (Reserved) P0-53 Set value and sample of current (phase U) 1st entry: Set value (without decimal points) 2nd entry: Sample (without decimal points) To change between the entries push the UP and DOWN buttons on the external keypad. P0-54 Set value and sample of current (phase V) 1st entry: Set value (without decimal points) 2nd entry: Sample (without decimal points) To change between the entries push the UP and DOWN buttons on the external keypad. P0-57 Internal set value Uq/Ud To change between the entries push the UP and DOWN buttons on the external keypad. P0-59 Frequency input speed Scaling: 3,000 rpm = 50.0 Hz with one decimal place 0.0 Hz ~ 999.0 Hz then 1,000 Hz ~ 2,000 Hz P0-63 20 P1-10 = 0: Values in Hz P1-10 > 0: Values in rpm Speed readjustment Set value (reference input) for internal adjustment of speed Scaling: 3,000 rpm = 50.0 Hz with one decimal place 0.0 Hz ~ 999.0 Hz then 1,000 Hz ~ 2,000 Hz P1-10 = 0: Values in Hz P1-10 > 0: Values in rpm Version 1.1 (08/2011) en Original instructions Interroll Frequency Inverter IP55 Product information P0-64 P0-65 Effective switching frequency Refers to an internal frequency which is twice the PWM frequency. P0-64 = 0: 4 kHz (PWM = 2 kHz) P0-64 = 1: 8 kHz (PWM = 4 kHz) P0-64 = 2: 12 kHz (PWM = 6 kHz) P0-64 = 3: 16 kHz (PWM = 8 kHz) P0-64 = 4: 24 kHz (PWM = 12 kHz) P0-64 = 5: 32 kHz (PWM = 16 kHz) Service life of the frequency inverter 1st entry: Number of hours 2nd entry: Number of minutes and seconds To change between the entries push the UP and DOWN buttons on the external keypad. P0-66 Power factor (calculated) The value is shown to two decimal places (e.g. 78 = 0.78). P0-72 Board temperature of the frequency inverter P0-74 Internal value for input voltage L1 P0-79 Lib version of motor control and bootloader version of the DSP 1st entry: Lib version of motor control 2nd entry: Bootloader version of the DSP To change between the entries push the UP and DOWN buttons on the external keypad. P0-80 Version 1.1 (08/2011) en Original instructions Specified internal parameter 21 Interroll Frequency Inverter IP55 Product information Parameter group 1 – Basic parameters for configuration P1-01 P1-02 Maximum output frequency / maximum motor speed The unit of this value depends on parameter P1-10: P1-10 = 0: Values in Hz P1-10 > 0: Values in rpm Minimum output frequency / minimum motor speed The unit of this value depends on parameter P1-10: P1-10 = 0: Values in Hz P1-10 > 0: Values in rpm P1-03 Acceleration time Time during which the motor is accelerated from standstill to the rated motor frequency (P1-09). With access via Modbus, the parameter value is given to two decimal places (e. g. 100 = 1.00 s). P1-04 Braking time Time during which the motor is braked from the rated motor frequency (P1-09) to standstill. P1-04 = 0: The motor is braked as quickly as possible without a fault being triggered due to overvoltage. With access via Modbus, the parameter value is given to two decimal places (e. g. 100 = 1.00 s). P1-05 P1-07 Stop mode Determines motor conduct when braking P1-05 = 0: As soon as there is no longer a starting signal pending, the motor is braked. (Braking time as per parameter P1-04). P1-05 = 1: As soon as there is no longer a starting signal pending, the motor runs freely to stop. Motor rated voltage The parameter value must concur with the value for the rated voltage on the motor label. Asynchronous motor: Motor rated voltage Synchronous permanent magnet motor: Phase to phase voltage at 1,000 rpm. This parameter is required for controlling the motor. The parameter value 0 leads to a corresponding fault. 22 P1-08 Rated motor current The parameter value must concur with the value for the rated current on the motor label. This parameter is required for controlling the motor. The parameter value 0 leads to a corresponding fault. P1-09 Rated motor frequency The parameter value must concur with the value for the rated motor frequency. Version 1.1 (08/2011) en Original instructions Interroll Frequency Inverter IP55 Product information P1-10 Rated motor speed Unit for all speed-related parameters. Required with permanently excited synchronous motors (P4-01 = 3 or 4). P1-10 = rated speed of the motor: Speeds are shown in rpm. P1-10 = 0: Speeds are shown in Hz. If P1-10 = 0 and P4-01 = 3 or 4, a corresponding warning is issued. Version 1.1 (08/2011) en Original instructions P1-11 Voltage boost If the speed control for asynchronous motors is defined (P4-01 = 2), thanks to the voltage boost, the motor voltage can be increased with low output frequencies. This results in an improved starting torque with low speeds. An excessive voltage boost can lead to an increased motor current and thus to increased temperatures. In this case, cooling of the motor must be enhanced. P1-12 Main source of frequency inverter control P1-12 = 0: The frequency inverter reacts directly to the signals at the digital inputs. P1-12 = 1: The frequency inverter is controlled via the external keypad. The motor can only be operated in the positive direction of rotation. P1-12 = 2: The frequency inverter is controlled via the external keypad. The motor can be operated in both the positive and negative rotation direction. P1-12 = 3: The frequency inverter is controlled via the ASi master. P1-12 = 4: The frequency inverter is controlled via the Modbus. P1-12 = 5: The frequency inverter works as a slave and is controlled via a connected frequency inverter (master). P1-13 Function of the digital inputs see "Parametrise the digital inputs", page 48 P1-14 Access code for extended parameters P1-14 = P2-40 = 101: Allows access to all parameters in parameter groups 1 to 5 as well as parameters P0-01 to P0-50 of parameter group 0 P1-14 = P6-30 = 201: Allows access to all parameters in parameter groups 0 to 8 23 Interroll Frequency Inverter IP55 Product information Parameter group 2 – Extended parameters P2-01 Set speed 1 P2-02 Set speed 2 P2-08 Set speed 8 P1-10 = 0: Values in Hz P1-10 > 0: Values in rpm P2-09 Skip frequency centre point P2-10 Skip frequency band width Hz or Rpm The skip frequency function is used to avoid the drive operating at a certain output frequency, for example at a frequency which causes mechanical resonance in a particular machine. Parameter P2-09 defines the centre point of the skip frequency band, and is used conjunction with P2-10. The drive output frequency will ramp through the defined band at the rates set in P1-03 and P1-04 respectively, and will not hold any output frequency within the defined band. If the frequency reference applied to the drive is within the band, the drive output frequency will remain at the upper or lower limit of the band. P2-15 Function of bit 0 of the ASi input P2-15 = 0: Bit 0 = 1, when motor is started P2-15 = 1: Bit 0 = 1, when mains voltage is applied and there is no fault P2-15 = 2: Bit 0 = 1, when the current output frequency = set frequency P2-15 = 3: Bit 0 = 1, when the output frequency > 0.0 Hz P2-15 = 4: Bit 0 = 1, when the output frequency P2-16 Bit 0 = 0, when the output frequency P2-17 P2-15 = 5: Bit 0 = 1, when the output current P2-16 Bit 0 = 0, when the output current P2-17 P2-15 = 6: Bit 0 = 1, when the output torque P2-16 Bit 0 = 0, when the output torque P2-17 P2-15 = 7: Bit 0 = 1, when the frequency inverter has been activated and initialisation is complete P2-15 = 8: Bit 0 = 1, when there is a fault on the frequency inverter Note: ASi input = output from the perspective of the frequency inverter ASi output = input from the perspective of the frequency inverter 24 P2-16 Upper limit for bit 0 of the ASi input Is required in combination with specific settings of parameter P2-15. P2-17 Lower limit for bit 0 of the ASi input Is required in combination with specific settings of parameter P2-15. Version 1.1 (08/2011) en Original instructions Interroll Frequency Inverter IP55 Product information P2-18 Function of bit 1 of the ASi input P2-18 = 0: Bit 1 = 1, when motor is started P2-18 = 1: Bit 1 = 1, when mains voltage is applied and there is no fault P2-18 = 2: Bit 1 = 1, when the current output frequency = set frequency P2-18 = 3: Bit 1 = 1, when the output frequency > 0.0 Hz P2-18 = 4: Bit 1 = 1, when the output frequency P2-19 Bit 1 = 0, when the output frequency P2-20 P2-18 = 5: Bit 1 = 0, when the output current P2-20 Bit 1 = 1: output current P2-19 P2-18 = 6: Bit 1 = 1, when the output torque P2-19 Bit 1 = 0, when the output torque P2-20 P2-18 = 7: Bit 1 = 1, when initialisation is complete P2-18 = 8: Bit 1 = 1, when there is a fault on the frequency inverter P2-19 Upper limit for bit 1 of the ASi input Is required in combination with specific settings of parameter P2-18. P2-20 Lower limit for bit 1 of the ASi input Is required in combination with specific settings of parameter P2-18. P2-23 Holding time for speed 0 Time during which the output speed is held at 0 when stopping the motor. After this time the frequency inverter is disabled. P2-24 Effective switching frequency of the final stage The setting range and the factory-set standard parameter value depend on the power and rated voltage of the frequency inverter. A high value reduces noise development at the motor and improves the waveform of the output current. This, however, leads to increased losses in the frequency inverter. The effective switching frequency refers to an internal frequency. The PWM frequency is the value of P2-24 divided by 2. P2-25 P2-24 = 4: PWM = 2 kHz P2-24 = 8: PWM = 4 kHz P2-24 = 12: PWM = 6 kHz P2-24 = 16: PWM = 8 kHz P2-24 = 24: PWM = 12 kHz P2-24 = 32: PWM = 16 kHz Alternative rundown time The alternative braking time defined here can be called up via digital inputs (see "Parametrise the digital inputs", page 48) or automatically after a power failure (P2-38 = 2). P2-25 = 0,0: The motor is braked as quickly as possible without a fault being triggered due to overvoltage. With access via Modbus, the parameter value is given to two decimal places (e.g. 100 = 1.00 s). Version 1.1 (08/2011) en Original instructions 25 Interroll Frequency Inverter IP55 Product information P2-26 P2-27 Start conduct with rotating motor P2-26 = 0: The current motor speed is not taken into account when starting. P2-26 = 1: After the start the current speed of the free-running motor is calculated and taken into account for control. If this function is activated, the start may be slightly delayed when the motor is at a standstill. Standby time Maximum time during which the frequency inverter works at minimum speed. On expiry of this period, the output of the frequency inverter is disabled. P2-27 = 0,0: P2-28 Slave speed If the frequency inverter is controlled via the external keypad (P1-12 = 1 or 2) or via Modbus (P1-12 = 4) the set speed value can be multiplied by a certain factor (P2-29). P2-28 = 0: Factor P2-29 does not influence the set speed value P2-28 = 1: The set speed value is multiplied by the factor (P2-29) P2-29 Factor for slave speed Is required in combination with parameter P2-28. P2-36 Start Mode selection after switching on P2-37 26 Disabled P2-36 = 0: After being switched on, the frequency inverter waits for a new start signal. P2-36 = 1: After being switched on, the frequency inverter starts the motor immediately provided there is a start signal pending. Restart speed when controlling via the external keypad If the frequency inverter is controlled via the external keypad (P1-12 = 1 or 2) the restart speed can be defined after restarting. P2-37 = 0: After restarting the motor is operated with a minimum output frequency / at a minimum speed (P1-02). P2-37 = 1: After restarting the frequency inverter returns to the speed last set. P2-37 = 2: After restarting the motor is operated at the set speed 8 (P2-08). Version 1.1 (08/2011) en Original instructions Interroll Frequency Inverter IP55 Product information P2-38 P2-39 Conduct after power failure whilst frequency inverter is activated P2-38 = 0: The frequency motor tries to continue operating the motor. To this end, the excess energy from high inertia or trailing load from the conveyor section is converted and used for operation. If the power supply is interrupted briefly, the energy available may be sufficient to keep operating the motor before the frequency inverter control is switched off. After an interruption, the frequency inverter returns to the original set speed. P2-38 = 1: If the power supply is interrupted, the motor output of the frequency inverter is disabled immediately and the motor runs freely. In order to use this function with loads with great inertia, the start conduct with a rotating motor may possible have to be modified (P2-26 = 0). P2-38 = 2: The motor is braked from the current rated motor speed to a standstill. Here the alternative braking time (P2-25) is taken into account. Parameter access P2-39 = 0: Access to all parameters, all parameter values can be changed. P2-39 = 1: Access via the external keypad disabled, parameter values can only be changed via Modbus. Since with P2-39 = 1 access to all parameters via the external keypad is disabled, this value can also not be changed via the keypad. P2-40 Version 1.1 (08/2011) en Original instructions Access code to extended parameters Defines the access code which must be entered in P1-14 to get access to further parameter groups. 27 Interroll Frequency Inverter IP55 Product information Parameter group 4 – Parameters for high-performance motor control Hint Incorrect adjustment of parameters in parameter group 4 can cause unexpected behaviour of the motor and any connected machinery. It is recommended that these parameters are only adjusted by experienced users. P4-01 Motor control type P4-01 = 0: Speed control for asynchronous motors with torque limitation (vector mode) P4-01 = 1: Torque control for asynchronous motors with speed limitation (vector mode) P4-01 = 2: Speed control for asynchronous motor (U/f mode) P4-01 = 3: Speed control for permanent magnet synchronous motors with torque limitation (vector mode) P4-01 = 4: Torque control for permanent magnet synchronous motors and speed limitation (vector mode) In vector mode (P4-01 = 0, 1, 3 or 4) automatic motor configuration (P4-02) must be executed. P4-02 Automatic motor tune P4-02 = 1: The frequency inverter immediately performs an automatic motor-tune for optimisation of control and for enhancing efficiency. Here the parameters of the connected motor are calculated. P4-02 = 0: At the end of automatic configuration, the value is automatically set to 0. With automatic motor configuration the shaft of the motor is aligned. 28 P4-03 Speed controller Proportional gain (vector mode) Higher values result in improved control of the output frequency and shorter reaction times. A value which is too high, however, can lead to instability and excess currents. In order to optimally adapt the value to the requirements, the value should be increased in increments until the desired output speed and required dynamic conduct are reached. When the set value is exceeded the system should not or only marginally overshoot. As a rule, the value should be increased with loads with high friction and decreased with loads with high inertia and low friction. P4-04 Speed controller integral time constant (vector mode) Smaller values increase the reaction time with changing loads, but also increase the risk of instability. For optimal dynamics, the value should be adapted to the required load. P4-05 Power factor for asynchronous motors With speed control (P4-01 = 0) or torque control (P4-01 = 1) the power factor (Cos ij) must concur with the value on the motor label. Version 1.1 (08/2011) en Original instructions Interroll Frequency Inverter IP55 Product information P4-06 Version 1.1 (08/2011) en Original instructions Source for set value or upper torque limit With speed control for permanent magnet synchronous motors (P4-01 = 3) the source for the upper torque limit is specified here. With torque control for permanent magnet synchronous motors (P4-01 = 4) the source for the set torque is specified here. P4-06 = 0: Torque controller reference / limit = P4-07 P4-06 = 1: The output torque is controlled based on the signal from the communications field bus. With an input signal of 100%, the torque is limited to the value P4-07. P4-06 = 2: The output torque is controlled based on the signal from the Modbus communication. With an input signal of 100%, the torque is limited to the value P4-07. P4-07 Upper torque limit (vector mode) Used in combination with parameter P4-06. P4-08 Lower torque limit (vector mode) In order to maintain the torque defined here during the entire operation time, if necessary the output frequency is also increased above the set value. For this reason, this parameter value must be configured with extreme care. P4-09 Upper torque limit with generator operation (vector mode) Should excess energy from high inertia or trailing load flow back from the conveyor section to the frequency inverter (generator operation), the maximum permissible torque can be limited via this parameter. P4-10 Base frequency (U/f mode) In U/f mode (P4-01 = 2) the characteristic frequency is defined with which the characteristic voltage (Parameter P4-11) is applied to the motor. When defining these values it must be ensured that the motor is not damaged from overheating. P4-11 Base frequency voltage (U/f mode) Used in combination with parameter P4-10. 29 Interroll Frequency Inverter IP55 Product information Parameter group 5 – Communication parameters P5-02 Frequency inverter field bus address The external keypad and Modbus use the same address. P5-03 Modbus transfer rate Sets the baud rate when Modbus communications are use. P5-04 P5-03 = 0: 9.6 kbps P5-03 = 1: 19.2 kbps P5-03 = 2: 38.4 kbps P5-03 = 3: 57.6 kbps P5-03 = 4: 115 kbps Modbus data format Sets the expected Modbus telegram data format. P5-04 = 0: No parity, 1 stop bit P5-04 = 1: No parity, 2 stop bits P5-04 = 2: Uneven parity, 1 stop bit P5-04 = 3: Even parity, 1 stop bit P5-06 Time-out for interruption of the connection If no valid telegram is received within the time-out defined here, the frequency inverter reacts as defined in parameter P5-07. With access via Modbus, the parameter value is given to one decimal place (e.g. 10 = 1.0 s). P5-07 Conduct upon interruption of the connection P5-09 P5-07 = 0: Frequency inverter fault, motor runs freely until it comes to a standstill P5-07 = 1: Motor is braked until it reaches a standstill, a fault on the frequency inverter is then signalised P5-07 = 2: Motor is braked until it reaches a standstill (no fault is signalised on the frequency inverter) P5-07 = 3: The motor is operated at the set speed 8 (P2-08) Function of the ASi output bits P5-09 = 0: Control via digital input bits P5-09 = 1: Control via finite-state machine see "Operation via ASi interface", page 50 30 Version 1.1 (08/2011) en Original instructions Interroll Frequency Inverter IP55 Product information Parameter group 6 – Special parameters P6-01 Firmware upgrade Upgrade for IO and/or DSP (for internal use only) P6-02 Automatic temperature management P6-02 = 0: Disabled P6-02 = 1: When the temperature of the heat sink rises, the output switching frequency is automatically reduced. This reduces the risk of excess temperatures. P6-04 Switching hysteresis for rated motor frequency To prevent switching fluctuations at the output, a switching hysteresis (percentage value of the rated motor frequency P1-09) can be defined for the speed zero point. With P2-15 or P2-18 = 2 or 3 output frequencies below the defined value are treated as speed 0. P6-10 Virtual start/stop signal P6-10 = 0: Virtual stop signal if neither of the two digital inputs have been assigned the start/stop function P6-10 = 1: Virtual start signal if neither of the two digital inputs have been assigned the start/stop function P6-17 Time-out for the motor torque upper limit Within the defined time-out when the motor torque upper limit (parameter P4-07 or P4-09) is exceeded no fault on the frequency inverter is signalised. P6-23 Resetting of the energy display P6-24 P6-25 P6-23 = 0: The energy display is maintained when the frequency inverter is reset P6-23 = 1: When the frequency inverter is reset the energy display is set to 0 Resetting of the frequency inverter in the event of a fault P6-24 = 0: Disabled P6-24 = 1: The frequency inverter is reset when the signal changes from "Stop motor" to "Start motor" P6-24 = 2: The frequency inverter is reset when the signal changes from "Start motor" to "Stop motor" Hardware overload protection via the thermal cut motor protection switch P6-25 = 0: The thermal cut motor protection switch is not evaluated. Overload protection is based on the rated motor current. P6-25 = 1: The thermal cut motor protection switch is evaluated. Overload protection is based on the maximum current of the frequency inverter. P6-28 Index for display value parameter P0-80 P6-29 Save user-specific standard parameter values P6-29 = 1: Version 1.1 (08/2011) en Original instructions The motor is stopped and the current parameter values are saved as user-specific standard values. If necessary the saved values can be reinstated. 31 Interroll Frequency Inverter IP55 Product information P6-30 Access code to all parameters To get access to all parameter groups, parameter P1-14 must have the value defined here. Parameter group 7 – Motor parameters P7-01 Stator resistance (Rs) of the motor P7-02 Rotor resistance (Rr) of the asynchronous motor P7-03 Inductance of the d-axis (Lsd) Asynchronous motor: Inductance of the stator phase With a permanent magnet synchronous motor: Inductance of the d-axis stator phase P7-04 Magnetising current of the asynchronous motor No load current P7-05 Loss coefficient of the asynchronous motor Ȉ = 1 – 1/(1+SigmaS) (1+SigmaR) P7-06 Inductance of the q-axis (Lsq) Only with permanent magnet synchronous motors P7-09 Current limit with overvoltage Percentage value of the rated motor current (P1-08) for relieving the intermediate circuit voltage and avoiding overvoltage. With P7-09 = 0.0 this function is disabled. P7-10 Ratio of total system inertia to motor inertia H = (JTot / JMot) * 10 P7-11 Lower limit for pulse width (PWM) By increasing the parameter value, the minimum pulse width can be limited with long motor connection lines. As such, the risk of overvoltage as well as the maximum available motor output voltage with constant input voltage are both reduced. P7-12 Magnetising time Asynchronous motor: Period during which the magnetising current is built up following the start signal. The value should correspond to three times the motor time constant. The magnetising current for asynchronous motor is specified by the parameter P704. Permanent magnet synchronous motor: Delay time for initialisation of the motor (rotor alignment) following the start signal. The alignment current used to this end corresponds to 50 % of the rated motor current (P1-08). 32 P7-13 Speed controller differential gain P7-14 Stabilising current with low frequencies Percentage value of the rated motor current (P1-08) for current boost (torque reserve) when starting Version 1.1 (08/2011) en Original instructions Interroll Frequency Inverter IP55 Product information P7-15 Speed limit for stabilising current Percentage value of the rated motor speed (P1-10) for stabilising current (P714) P7-16 Current for parking the motor Percentage value of the rated motor current (P1-08) Parameter group 8 – Application-specific parameters Version 1.1 (08/2011) en Original instructions P8-01 Acceleration time 2 Time during which the motor is accelerated from standstill to the rated motor frequency (P1-09). With access via Modbus, the parameter value is given to two decimal places (e.g. 100 = 1.00 s). P8-11 Braking time 2 Time during which the motor is braked from the rated motor frequency (P1-09) to a standstill. With access via Modbus, the parameter value is given to two decimal places (e.g. 100 = 1.00 s). P8-13 Basis for acceleration time 2 / braking time 2 P8-13 = 0: Disabled P8-13 = 1: Based on set speed P8-13 = 2: Based on actual speed 33 Interroll Frequency Inverter IP55 Options and accessories External keypad The frequency inverter can be configured via the keyboard of the optional external keypad. The parameter values and fault messages are displayed on the keypad display. Function of the control elements 1 2 3 4 5 6 Display START button STOP button Button START STOP NAVIGATION button UP button DOWN button Function during operation Function when configuring parameters Start motor in forward direction (if P1-12 = 1) Change the direction of rotation of the motor (if P112 = 2) Reset to factory default (in combination with other buttons) Reset the frequency inverter (in the case of a fault) Stop motor (if P1-12 = 1 or 2) Change the parameter value in decimal increments Reset to factory default (in combination with other buttons) Display of various real-time statuses Access, exit and save changed parameter values Increase speed Increase parameter value Reduce speed Decrease parameter value NAVIGATION UP DOWN 34 Version 1.1 (08/2011) en Original instructions Interroll Frequency Inverter IP55 Options and accessories Status display during operation Display Status 6WRS Line voltage available, no signal for activating or starting the motor 6&$1 Keypad searches for a frequency inverter in the network $XWRW Automatic motor tune is in progress +x.x *) Motor in operation, output frequency is displayed in Hz $x.x *) Motor in operation, motor current is displayed in A 3x.x *) Motor in operation, motor power is displayed in kW x.x *) Motor in operation, motor speed is displayed in rpm or Hz (WO No mains voltage, external 24 V power supply available 3GHI Factory-set standard parameter values were reinstated 8GHI User-specific standard parameter values were reinstated Fault display see "Troubleshooting", page 70. Hint *) The display changes to the next selection on briefly pressing the NAVIGATION button. Connect the external keypad and frequency inverter ¾ Connect the external keypad to the serial interface of the frequency inverter with a standard Ethernet cable and switch the frequency inverter on. 6&$1 appears in the display. The external keypad searches for a frequency inverter with the device bus address 1. If no frequency inverter with this device bus address is found, $GU appears in the display. ¾ Change the device bus address by pressing the UP and DOWN buttons. The device address can be adjusted from 1 to 63. The changed device bus address is displayed (e.g. $GU ) ¾ Press the STOP button in order to search for a frequency inverter with a corresponding device bus address again. If a frequency inverter has been found, the frequency inverter data is transmitted to the external keypad. This can take approx. 1 to 2 seconds. /RDG appears in the display. Once the data has been transmitted, the real-time status display of the frequency inverter is shown. Hint Data and parameters are not stored on the keypad. Version 1.1 (08/2011) en Original instructions 35 Interroll Frequency Inverter IP55 Options and accessories Create a connection to a specific frequency inverter To create a connection to a specific frequency inverter (e.g. within a network), the device bus address of the frequency inverter must be specifically selected: ¾ Press the STOP and DOWN buttons at the same time. The currently selected device bus address appears in the display (e.g. $GU ). ¾ Select the device bus address of the desired frequency inverter by pressing the UP or DOWN button. The changed device bus address is shown (e.g. $GU ) ¾ Press the STOP and DOWN buttons at the same time. The connection to the frequency inverter with the corresponding device bus address is created. 36 Version 1.1 (08/2011) en Original instructions Interroll Frequency Inverter IP55 Options and accessories OptiStick Intended use With the optional OptiStick the parameter values of a frequency inverter can be quickly and reliably forwarded to another frequency inverter of the same type. To this end, the OptiStick is connected to the serial interface of the frequency inverter via the RJ45 connection. OptiStick components 1 2 3 4 5 6 Bluetooth interface Status LED Button to copy the parameter values from the frequency inverter to the OptiStick Button to copy the parameter values from the OptiStick to the frequency inverter Write protection RJ45 connection Hint When the write protection is activated, the saved parameter values on the OptiStick cannot be deleted/overwritten. Meaning of the status LED Control the OptiStick remotely via the Bluetooth interface Version 1.1 (08/2011) en Original instructions Status LED Status Lights up green Power supply OK. Frequency inverter recognised. Quickly flashing green light Parameters are being read or written. Slowly flashing green light No frequency inverter recognised. Lights up blue Bluetooth interface ready. Flashes blue Bluetooth interface active. Using the Bluetooth interface the OptiStick can be controlled remotely via a PC. To this end, the PC must have a Bluetooth interface. ¾ Connect the OptiStick to the serial interface of the frequency inverter. ¾ Establish Bluetooth connection on the PC. To do this, enter the standard code of the OptiStick "0000" and the standard device designation "Optistick". ¾ Set up the port for connection to the Bluetooth interface of the OptiStick on the PC. The software communicates via this port to the OptiStick. 37 Interroll Frequency Inverter IP55 Transport and storage Transport • Every frequency inverter is packaged in its own cardboard box. CAUTION There is a risk of injury if transported incorrectly ¾ Only qualified and authorized persons should transport the product. ¾ Follow the instructions below. ¾ ¾ ¾ ¾ Avoid serious impacts during transport. Check the frequency inverter for visible damage after transport. In the event of damage, take photos of the damaged parts. To maintain the warranty, report any damage caused by transport instantly to the transport company and INTERROLL. ¾ Do not transport the frequency inverter between warm and cold environments. This may cause condensing water. Storage ¾ If the frequency inverter is not put into operation immediately, store it in a place which is protected from moisture and dust. Ambient temperature range for storage see "Technical Data", page 9. ¾ As far as possible, store the frequency inverter in its own packaging. 38 Version 1.1 (08/2011) en Original instructions Interroll Frequency Inverter IP55 Installation Warning information for assembly DANGER Risk of injury from a defective frequency inverter ¾ Check the frequency inverter for visible damage before assembly. ¾ Check the design of the frequency inverter prior to assembly. ¾ Only assemble frequency inverters which are in a sound condition. DANGER Risk of fire from inflammable materials and gases ¾ Mount the frequency inverter on a flame retardant surface (e. g. steel plate). ¾ Assemble the frequency inverter so that it is as far away as possible from other devices which generate heat as well as highly inflammable materials. ¾ Ensure that the frequency inverter is protected from aggressive, explosive and highly inflammable gases and grinding fluids. WARNING Risk of injury due to improper assembly ¾ Assembly should only be carried out by qualified personnel taking account of the safety information. ¾ Assemble the frequency inverter on a vertical, vibrationfree wall. ¾ Assemble all screw connections carefully and ensure that they are secure. Note Protection class IP55 is only guaranteed if all sockets are fitted and screwed with plugs and if the cap of the serial interface (RJ45) is fitted and sufficiently tightened with torque of 0.75 Nm. The frequency inverter M12 sockets are factory delivered with dust covers. This proctection is not suitable to maintain an IP55 class. If the application does not need the use of both M12 sockets, contact Interroll to get a suitable M12 cover that can maintain IP55 frequency inverter class. Version 1.1 (08/2011) en Original instructions 39 Interroll Frequency Inverter IP55 Installation Installing the frequency inverter The frequency inverter is delivered preassembled and needs only to be installed and connected on site. Frequency inverter dimensions see "Frequency inverter dimensions", page 10. Hint With ambient temperatures above 30 °C, it is recommended that the frequency inverter is installed with the cooling fins in vertically position. A minimum distance of 50 mm should be maintained above and below the cooling fins. If the frequency inverter is installed in a housing, the ventilation should be set up to ensure that the permissible ambient temperature is not exceeded when the housing is closed (see "Technical Data", page 9). ¾ Carefully unpack the frequency inverter. ¾ Check the frequency inverter for any damage and notify Interroll thereof immediately. ¾ Ensure that the designated site of installation satisfies the specifications. ¾ Secure the frequency inverter with two screws (M6) to a vertical wall. Use spring rings or other tools to ensure secure installation despite vibrations. ¾ Ensure that there is a good airflow around the frequency inverter. Warning information relating to the electrical installation DANGER Danger to life from electrical voltage ¾ Always have work on electrical systems carried out by authorised electricians. ¾ Switch off the power supply, ensure that it cannot be switched on accidentally and that it is de-energised. ¾ After turning off the power supply wait at least 10 minutes before removing the connections. Wait at least 30 seconds before switching the power supply back on. ¾ Never open the frequency inverter housing. DANGER Risk of fire and material damage from incorrect wiring ¾ Check that all connections are secure. ¾ Identify the connection diagram using the label and wire according to the connection diagram. ¾ Ensure that the power supply is connected to the terminals for the power supply. Do not connect the power supply to the output terminals for the motor. 40 Version 1.1 (08/2011) en Original instructions Interroll Frequency Inverter IP55 Installation WARNING Risk of crushing from accidental start-up With a pending start command and activation of the power supply, the motor can start up automatically. ¾ When switching on the frequency inverter, ensure that there is no start command pending on the motor. WARNING Risk of burns from hot cooling fins ¾ Do not touch the cooling fins. Version 1.1 (08/2011) en Original instructions 41 Interroll Frequency Inverter IP55 Installation Electrical installation Basic requirements for electrical installation • • • • • • • Earthing requirements • • • • • • • The mains connection must be implemented as per IEC 61800-5-1. The frequency inverter should be able to be disconnected from the power supply using suitable equipment as per the local industrial and working standards (e.g. EN 60204-1). The mains connection must be secured against overcurrent by means of suitable equipment as per the local industrial and working standards. The fuse (e.g. type gG as per IEC 60269, UL type T or possibly type R) must be triggered after a maximum of 0.5 seconds. As an alternative to the fuse, suitable circuit breakers (type B MCB) as per the local industrial and working standards can be installed. Power and control cables should be laid separately, a minimum distance of 20 cm is recommended. If required, a power input filter can be installed to compensate, for example, for faults due to low network impedance, high power failure rates and imbalance between the phases. The motor and frequency inverter must not be connected to each other via automatic switchgears. Equipment for automatically resetting faults must not be installed. The motor and frequency inverter must be earthed to ensure safe operation. In order to satisfy the UL requirements, UL-tested cable lugs must be used for all earthing connections. The motor's earthing connection (PE) must be connected to one of the frequency inverter's earthing connections. If the frequency inverter is assembled in electrically conductive housing, the housing must be connected to one of the earthing connections of the frequency inverter. With installations with several frequency inverters, each frequency inverter must be earthed separately. In each case, the earth line must be led directly to a central earthing connection. All earth lines must be of sufficient size (max. secured power). The line crosssection and conductive material must comply with the connection lines for the power supply. In order to ensure secure contact between the earth line and the earthing connection, suitable clamp connections must be used. Hint An earth leakage circuit breaker can be used to monitor earthing faults. A separate earth leakage circuit breaker (type B) must be used for each frequency inverter which is suitable for monitoring leakage currents with a DC component. Connecting the power supply Hint A four-core PVC-insulated shielded cable which complies with the local industrial and working standards is suitable for connecting the power supply. A cable with symmetrical shielding is recommended. ¾ Install suitable fuses and mains switches. ¾ Ensure that the input voltage concurs with the voltage of the frequency inverter. ¾ Wire a 6-pin M23 female plug as per the connection diagram (see "Connections", page 11) and connect to the corresponding socket on the frequency inverter. Use a suitable M23 plug reference (see "Connections", page 11). 42 Version 1.1 (08/2011) en Original instructions Interroll Frequency Inverter IP55 Installation ¾ Earth the frequency inverter. To do this, connect the appropriately marked earthing connection of the frequency inverter with the building's earthing connection. Connecting the motor Hint A 4-core (6-core with connection incl. thermal earthing contact) cable must be used between the frequency inverter and motor. To prevent interference from other devices, the cable must be shielded. The shielding can be plaited or wound around and must cover at least 85% of the cable surface. Alternatively, the cable can be laid in an earthed steel or copper tube. The maximum cable length of 2 m should not be exceeded in order to ensure compliance with the EMC Cat C2 requirements. If C2 is not necessary, the maximum cable length is 25 m. ¾ Only use original Interroll cables which are pre-fabricated. ¾ Connect the motor connections U, V and W to the motor as per the instructions in the motor manual. ¾ Connect the cable shielding with the motor's earthing connection (PE). ¾ If necessary, apply connections B and C for the thermal cut motor protection switch as per the connection diagram (see "Connections", page 11). ¾ Connect the protective conductor to the motor's housing. The protective conductor connector must have the same cross-section as the lines for the power supply. ¾ Wire an 8-pin M23 male plug as per the connection diagram (see "Connections", page 11) and connect to the corresponding socket on the frequency inverter. Use a suitable M23 plug reference (see "Connections", page 11). Connecting digital inputs and interfaces Hint Various voltages, e.g. 24 V DC and 230 V AC, should be not carried together in a cable. Therefore, the connections of the digital inputs and interfaces must be led separately from the mains connection and from the motor connection. To prevent interference, the lines must not be laid parallel to each other. Lines with various voltages should be laid at a minimum distance of 100 mm from each other and crossed at an angle of 90°. Maximum current load with an output voltage of 24 V: 100 mA ¾ Connect the digital inputs via a connection cable (5-pin, M12 male plug) to the frequency inverter dedicated socket (see "Connection diagram", page 13). ¾ Connect the serial interface via a connection cable (RJ45 plug) to the frequency inverter dedicated socket (see "Connection diagram", page 13). To this end, remove the interface cover on the frequency inverter housing. Hint Protection class IP55 is not achieved if the cover of the serial interface is removed. ¾ Connect the ASi interface via a connection cable (4-pin M12 female plug) to the frequency inverter dedicated socket (see "Connection diagram", page 13). Version 1.1 (08/2011) en Original instructions 43 Interroll Frequency Inverter IP55 Initial startup and operation Initial startup Inspections before initial startup ¾ Ensure that the following points are satisfied: – The frequency inverter is not damaged. – The frequency inverter is installed on a flame retardant substrate. – The power supply is according to the frequency inverter's rated values see page 9. – The frequency inverter is exclusively connected to the voltage source and motor. – The frequency inverter and motor are earthed. – The specifications, connection diagram and the statutory regulations have been adhered to. – All screws are tightened. Hint On delivery the parameter values are adjusted to the connected motor provided that the latter was specified on ordering. Should, however, faults still occur on commissioning, the following parameters must be checked as a minimum: • Rated motor voltage P1-07 • Rated motor current P1-08 • Rated motor frequency P1-09 • Rated motor speed P1-10 The respective values must concur with the details on the label of the connected motor. Following this, an automatic motor tune should be performed. Automatic motor tune Before commissioning for the first time an automatic motor tune must be performed in order to establish the corresponding parameters of the connected motor. This serves to optimise control and enhance efficiency. Hint During automatic motor tune, the motor shaft is aligned. Here the rotor is rotated through up to 90°. Due to the gear box reduction effect, the drum motor is subjective to a small shell rotation. ¾ Ensure that the drum motor can rotate. ¾ Set parameter P4-02 to 1. Automatic motor tune starts immediately, an additional start signal is not necessary. Operation Inspections before every startup ¾ Check the set speed and direction of rotation. ¾ Check the frequency inverter for visible damage. ¾ Ensure that the power supply is sufficient and verified for the load see page 9. Hint The shaft of the connected motor is aligned each time the frequency inverter is started. Here the rotor is rotated through up to 45°. 44 Version 1.1 (08/2011) en Original instructions Interroll Frequency Inverter IP55 Initial startup and operation Commissioning via the external keypad Change the parameter values Navigate between the parameter groups ¾ Create a connection to the frequency inverter. 6WRS appears on the display. ¾ Press the NAVIGATION button and keep pressed for at least 2 s. 3 appears on the display. ¾ Press the UP button. 3 appears on the display. ¾ Select the desired parameter using the UP and DOWN buttons. The number of the selected parameter appears in the display (e.g. 3). ¾ Press the NAVIGATION button. appears on the display. ¾ Select the desired value for the parameter using the UP and DOWN buttons (e.g. 10). appears on the display. ¾ Press the NAVIGATION button. 3 appears on the display. The parameter value is saved automatically. ¾ Press the NAVIGATION button and keep pressed for at least 2 s. 6WRS appears on the display. The frequency inverter is in the operational state. ¾ To change to the next parameter group, press the NAVIGATION and UP buttons at the same time. The first parameter of the next parameter group is displayed. ¾ To change to the previous parameter group, press the NAVIGATION and DOWN buttons at the same time. The first parameter of the previous parameter group is displayed. ¾ To change to the first parameter of the current parameter group, press the UP and DOWN buttons at the same time. Change the parameter value to the minimum value ¾ Select the parameter and press the NAVIGATION button. The current parameter value appears on the display (e.g. ). ¾ Press the UP and DOWN buttons at the same time. The smallest parameter value appears on the display (e.g. ). Change the parameter value in decimal increments ¾ Select the parameter and press the NAVIGATION button. The current parameter value appears on the display. ¾ Press the STOP and NAVIGATION buttons at the same time. The decimal place in the display flashes. ¾ Increase the value in increments of 10 by pressing the UP button repeatedly. ¾ Press the UP and DOWN buttons again at the same time. B appears on the display, for example. ¾ Increase the value in increments of 100 by pressing the UP button repeatedly. Reinstate the factory-set standard parameter values Where necessary, the parameter values were adjusted to the motor supplied upon delivery. As such, the factory-set standard parameter values are mostly not identical to the parameters on delivery. ¾ Press the START, UP, DOWN and STOP buttons at the same time and keep pressed for at least 2 s. 3'HI appears on the display. ¾ Press the STOP button. Version 1.1 (08/2011) en Original instructions 45 Interroll Frequency Inverter IP55 Initial startup and operation Hint By pressing the STOP and DOWN buttons at the same time, the field bus address of the frequency inverter can be changed. To prevent this, the UP should be pressed first here. Save the current parameter values as user-specific standard parameter values ¾ Select parameter P6-29 and press the NAVIGATION button. ¾ Change the parameter value to 1 and press the NAVIGATION button. The motor is stopped. The current parameter values are saved as user-specific standard parameter values and can be reinstated if necessary. Reinstate user-specific standard parameter values User-specific standard parameter values were saved via the parameter P6-29. ¾ Press the UP, DOWN and STOP buttons at the same time and keep pressed for at least 2 s. 8'HI appears on the display. ¾ Press the STOP button. If no user-specific standard parameter values are saved, the factory-set standard parameter values are reinstated. Hint By pressing the STOP and DOWN buttons at the same time, the field bus address of the frequency inverter can be changed. To prevent this, the UP should be pressed first here. 46 Version 1.1 (08/2011) en Original instructions Interroll Frequency Inverter IP55 Initial startup and operation Frequency inverter control Hint Definition of positive rotation direction: • Asynchronous drummotor = clockwise (seen from the cable side) • Synchronous PM drummotors = anticlockwise (seen from the cable side) Negative rotation direction is the reverse direction of positive rotation. Operation via the external keypad In order to control the frequency inverter via the external keypad, the parameter P1-12 must have the value 1 or 2. • With P1-12 = 1, the motor can only be operated in the positive rotation direction. • With P1-12 = 2, the motor can be operated in both the positive and negative rotation direction. ¾ Create a connection between the external keypad and the frequency inverter. 6WRS appears on the display. ¾ Press the START button. appears on the display. ¾ Press the UP button to increase the speed. The motor starts in the positive rotation direction and accelerates whilst the button is pressed. The acceleration time is determined by the parameter P1-03. The maximum speed is limited by the parameter P1-01. If control in both directions is activated (P1-12 = 2), the rotation direction can be changed by pressing the START button again. ¾ Press the DOWN button to reduce the speed. The motor speed is reduced whilst the button is pressed. The braking time is determined by the parameter P1-04. ¾ Press the STOP button. The motor is braked until it reaches a standstill. The braking time is determined by the parameter P1-04. 6WRS appears on the display once the frequency inverter is disabled. ¾ In order to set the set speed, press the STOP button when the motor is stopped. The set speed appears on the display. ¾ Change the set speed value by pressing the UP and DOWN buttons. ¾ Press the STOP button to confirm the setting. 6WRS appears on the display. ¾ Press the START button to accelerate the motor to the set speed. Operation via digital inputs In order to control the frequency inverter via the digital inputs, the parameter P112 must have the value 0 and the function of the digital inputs can be assigned via the parameter P1-13 (see "Parametrise the digital inputs", page 48). ¾ To start the motor, activate the corresponding digital input. The motor is accelerated according to the configuration. ¾ To stop the motor, disable the corresponding digital input. The motor is braked until it reaches a standstill according to the configuration. Version 1.1 (08/2011) en Original instructions 47 Interroll Frequency Inverter IP55 Initial startup and operation Parametrise the digital inputs The digital inputs can be assigned the following functions via the parameter P1-13. Function Description Start The motor is accelerated to the set speed according to the configured acceleration time (P1-03). Stop The motor is braked to a standstill according to the configured braking time (P1-04). Positive direction of rotation The motor is operated in the positive direction of rotation. Negative direction of rotation The motor is operated in the negative direction of rotation. Motor parked The motor is braked to a standstill according to the configured braking time (P104) and kept active. As such, it can be restarted without delays and without alignment of the shaft. Motor not parked Park function not active. Set speed 1 The motor is operated at the configured set speed 1 (P2-01). Set speed 2 The motor is operated at the configured set speed 2 (P2-02). To control the frequency inverter, the functions are called up via corresponding signals (0 V / 24 V) on the digital inputs. Value P1-13 Digital Input 1 Digital Input 2 24 V 0V 24 V 0V Start Stop Start Stop 1 Negative direction of rotation Positive direction of rotation Start Stop 2 Motor not parked Motor parked Start Stop 3 Set speed 2 Set speed 1 Start Stop 4 Start Stop Negative direction of rotation Positive direction of rotation 0 2) 5 1) 2) Negative direction of rotation Positive direction of rotation Negative direction of rotation Positive direction of rotation 6 1) Motor not parked Motor parked Negative direction of rotation Positive direction of rotation 7 1) Set speed 2 Set speed 1 Negative direction of rotation Positive direction of rotation Start Stop Motor not parked Motor parked Negative direction of rotation Positive direction of rotation Motor not parked Motor parked 8 9 1) 10 1) 2) Motor not in parked position Motor parked Motor not parked Motor parked 11 1) Set speed 2 Set speed 1 Motor not parked Motor parked 12 Start Stop Set speed 2 Set speed 1 13 1) Negative direction of rotation Positive direction of rotation Set speed 2 Set speed 1 14 1) Motor not parked Motor parked Set speed 2 Set speed 1 15 1) 2) Set speed 2 Set speed 1 Set speed 2 Set speed 1 48 Version 1.1 (08/2011) en Original instructions Interroll Frequency Inverter IP55 Initial startup and operation The signals at the digital input 1 are inverted via parameter values 16 to 31: Value P1-13 Digital Input 1 Digital Input 2 24 V 0V 24 V 0V 16 Stop Start Start Stop 17 Positive direction of rotation Negative direction of rotation Start Stop Set speed 1 Set speed 2 Set speed 2 Set speed 1 ... 31 1) The signals at the digital input 2 are inverted via parameter values 32 to 47: Value P1-13 Digital Input 1 Digital Input 2 24 V 0V 24 V 0V 32 Start Stop Stop Start 33 Negative direction of rotation Positive direction of rotation Stop Start Set speed 2 Set speed 1 Set speed 1 Set speed 2 ... 47 1) The signals at both digital inputs are inverted via parameter values 48 to 63: Value P1-13 48 2) 49 Digital Input 1 Digital Input 2 24 V 0V 24 V 0V Stop Start Stop Start Positive direction of rotation Negative direction of rotation Stop Start Set speed 1 Set speed 2 Set speed 1 Set speed 2 ... 63 1) 2) Hint 1) If neither of the digital inputs has been assigned the function "Stop" / "Start" this function is controlled via the parameter P6-10. 2) If both digital inputs have been assigned the same function (parameter value 0, 5, 10, 15, 48, 53, 58 or 63), both the digital inputs will be logical AND linked. Version 1.1 (08/2011) en Original instructions 49 Interroll Frequency Inverter IP55 Initial startup and operation Operation via ASi interface ASi profile ASi outputs (inputs from the perspective of the frequency inverter) ASi inputs (outputs from the perspective of the frequency inverter) Profile for control via the ASi interface: 7.A.*.E: • I/O = 7, D0 = I/O, D1 = I/O, D2 = I/O, D3 = I/O • ID = A: extended address mode • ID1 = *: user defined • ID2 = E: The function of the ASi outputs is defined by the parameter P5-09. Bit 2 BIT 1 BIT 0 0 X X Stop motor 1 0 0 Park motor 1 0 1 Start motor: positive direction of rotation, set speed 1 1 1 0 Start motor: negative direction of rotation, set speed 2 1 1 1 Start motor: positive direction of rotation, set speed 2 Bit 2 BIT 1 BIT 0 0 0 0 Stop motor 0 0 1 Park motor 0 1 0 0 1 1 1 0 0 Start motor: negative direction of rotation, set speed 1 1 0 1 Start motor: negative direction of rotation, set speed 2 1 1 0 Start motor: positive direction of rotation, set speed 1 1 1 1 Start motor: positive direction of rotation, set speed 2 Function with control via the finite-state machine (P5-09 = 1) The function of the input bits 0 and 1 can be defined via the parameters P2-15 to P2-17 and P2-18 to P2-20. The output bits 2 and 3 always relay the status of the two digital inputs. Bit 50 Function with direct control via the digital bit input (P5-09 = 0) Function 0 User-defined (standard function: normal operation) 1 User-defined (standard function: fault on the frequency inverter) 2 Status of digital input 1 3 Status of digital input 2 Version 1.1 (08/2011) en Original instructions Interroll Frequency Inverter IP55 Initial startup and operation Finite-state machine In the following diagram the most important states of the finite-state machine are shown. Reversal of the states is also possible but not shown on the diagram. State Speed Parking Dir CW CCW Version 1.1 (08/2011) en Original instructions State Set speed Motor parked Direction of rotation of the motor Clockwise Anticlockwise 51 Interroll Frequency Inverter IP55 Initial startup and operation Example: The motor should start in a clockwise direction at speed 1, then change to speed 2 and then be parked and switched off. State Speed Parking Dir CW CCW 52 State Set speed Motor parked Direction of rotation of the motor Clockwise Anticlockwise Version 1.1 (08/2011) en Original instructions Interroll Frequency Inverter IP55 Initial startup and operation Serial interface Two independent RS485 connections are available on the serial interface of the frequency inverter: • • Modbus RTU telegram structure Optibus for connection of an optional external keypad (see "External keypad", page 34) or an optional OptiStick (see "OptiStick", page 37) Modbus RTU for formation of a Modbus RTU network with several frequency inverters Communication between the master and slave is done via functions code 03 (Read Holding Register) and Functions Code 06 (Write Single Holding Register) according to the following telegram structure: Read Holding Register Master telegram Slave answer Slave address (1 byte) Slave address (1 byte) Functions code 03 (1 byte) Slave address (1 byte) 1. Register address (2 bytes) 1. Register value (2 bytes) Number of registers (2 bytes) 2. Register value (2 bytes each) etc. CRC checksum (2 bytes) CRC checksum (2 bytes) Write Single Holding Register Access to the parameters via Modbus Master telegram Slave answer Slave address (1 byte) Slave address (1 byte) Functions code 06 (1 byte) Functions code 06 (1 byte) Register address (2 bytes) Register address (2 bytes) Register value (2 bytes) Register value (2 bytes) CRC checksum (2 bytes) CRC checksum (2 bytes) Access to all parameters of the parameters groups is possible via Modbus. The parameter values can be read and described depending on the operating state of the frequency inverter. Some parameter values cannot be changed as long as the frequency inverter is active. The register number for access via Modbus is identical to the parameter number (e.g. P4-02 = Register 402). Hint Speeds (parameters P1-01, P1-02, P2-01, P2-02, P2-08, P2-09 and P2-10) can be given either in Hz (P1-10 = 0) or in rpm (factory-set standard parameter value P1-10 > 0). Hint Some Modbus RTU master devices interpret the first register address as "Register 0". In order to get the correct register addresses in such cases, the register numbers given below must be reduced by 1 in each case. Hint Communication parameters see page 30 and see page 66 Version 1.1 (08/2011) en Original instructions 53 Interroll Frequency Inverter IP55 Initial startup and operation Registers for controlling and monitoring the frequency inverter via the serial interface Register Function Requirement 1 and 2 Frequency inverter control Main control source P1-12 = 4 (Modbus) 3 Control of output torque • • Motor control mode: P401 = 0, 1, 3 or 4 Source for the maximum value of the motor torque P4-06 = 1 (field bus) 4 Control of acceleration and braking time Control activated via field bus: P5-08 = 1 6 to 86 Frequency inverter monitoring Access does not depend on the setting of the parameter P1-12. Hint Detailed description of the registers: see "Register for controlling and monitoring the frequency inverter via the serial interface", page 54 Register for controlling and monitoring the frequency inverter via the serial interface Register Function Access 1 Command for controlling the frequency inverter via Modbus Bit 0: Bit 0 = 1, to start the motor Bit 0 = 0, to stop the motor Bit 1: Bit 1 = 1, to stop the motor with an alternative braking time Bit 2: Bit 2 = 1, to reset warnings and faults (Bit 2 must, after resetting warnings and faults, be reset to 0) Bit 3: Bit 3 = 1, to let the motor run freely until it comes to a standstill read/write 2 Set value for speed control The value can be given in Hz (P1-10 = 0) to one decimal place (e.g. 123 = 12.3 Hz) or in rpm (P1-10 > 0) without decimal places. read/write 3 Set value for torque control The value must be given in % to one decimal place (e.g. 2000 = 200.0%). read/write 4 Acceleration time and braking time see P1-03 and P1-04 read/write 6 Upper byte: Fault message see "Troubleshooting", page 70 read only Lower byte: Frequency inverter status 54 Bit 0: Bit 0 = 0, when motor is stopped Bit 0 = 1, when motor is started Bit 1: Bit 1 = 0, during normal operation Bit 1 = 1, when there is a fault on the frequency inverter Version 1.1 (08/2011) en Original instructions Interroll Frequency Inverter IP55 Initial startup and operation Register Function Access 7 Motor speed read only P1-10 = 0: Values in Hz P1-10 > 0: Values in rpm The value is shown to one decimal place (e.g. 123 = 12.3 Hz). 8 Output current of the frequency inverter in A The value is shown to one decimal place (e.g. 105 = 10.5 A). read only 9 Output torque of the motor in % The value is shown to one decimal place (e.g. 474 = 47.4%). read only 10 Output power of the frequency inverter in kW The value is shown to two decimal places (e.g. 1100 = 11.00 kW). read only 11 Status of the digital inputs read only 12 Bit 0: Digital input 1 Bit 1: Digital input 2 Status of the ASi inputs and ASi outputs Bit 0: ASi input bit 0 Bit 1: ASi input bit 1 Bit 2: ASi input bit 2 Bit 3: ASi input bit 3 Bit 8: ASi output bit 0 Bit 9: ASi output bit 1 Bit 10: ASi output bit 2 Bit 11: ASi output bit 3 read only 13 Rated power of the frequency inverter in kW The value is shown to two decimal places (e.g. 145 = 1.45 Hz). read only 14 Rated input voltage of the frequency inverter in V The value is shown without decimal places (e.g. 400 or 230). read only 15 IO software version compare 1st entry parameter P0-28 read only 16 DSP software version compare 3rd entry parameter P0-28 read only 17 Unambiguous frequency inverter serial number (part 1) The first two digits of the serial number are displayed. read only 18 Unambiguous frequency inverter serial number (part 2) Digits 3 to 6 of the serial number are displayed. read only 19 Unambiguous frequency inverter serial number (part 3) Digits 7 and 8 of the serial number are displayed. read only 20 Unambiguous frequency inverter serial number (part 4) The last three digits of the serial number are displayed. read only 22 Set value (reference input) for internal control of the acceleration time / braking time see P0-04 read only 23 Current internal voltage at the DC connection of the frequency inverter see P0-20 read only Version 1.1 (08/2011) en Original instructions 55 Interroll Frequency Inverter IP55 Initial startup and operation Register Function Access 24 Current temperature on the heat sink of the frequency inverter see P0-21 read only 30 Frequency inverter warnings read only Bit 0: Bit 0 = 1, when overload protection from the thermal earthing contact is active (P6-25 = 1) and the motor's thermal earthing contact triggers a fault on the frequency inverter Bit 1: Bit 1 = 1, when phase L1 on the connection for the power supply is missing Bit 2: Bit 2 = 1, when there is no ASi communication although the ASi control is activated (P1-12 = 3) Bit 3: Bit 3 = 1, when motor current > rated motor current (P1-08) Bit 4: Bit 4 = 1, when the rated motor current is not stated (P1-10 = 0), although it is needed for the operating mode (P4-01 = 3 or 4) Bit 5: Bit 5 = 1, when rated motor voltage (P1-07) = 0 or rated motor current (P1-08) = 0 Bit 6: Bit 6 = 1, when there is no repeated start signal after switching on the frequency inverter (P2-36 = 0) when controlling via digital inputs (P1-12 = 0). With P1-12 = 0 and P2-36 = 0 bit 6 = 1 is shown if the start signal is still pending and a stop signal was not given during this time. This also applies, for example, if the frequency inverter was stopped due to a power failure (no voltage at phase L1). Bit 7: Bit 7 = 1, if intermediate circuit voltage is too low 31 Logged fault message 1 Fault message1 is the last fault to be triggered (see "Troubleshooting", page 70). read only 32 Logged fault message 2 read only 33 Logged fault message 3 read only 34 Logged fault message 4 read only 35 Number of critical faults – overcurrent see P0-41 read only 36 Number of critical faults – overvoltage see P0-42 read only 37 Number of critical faults – undervoltage see P0-43 read only 38 Number of critical faults – excess temperature see P0-44 read only 39 and 40 Time stamp for fault message 1 Number of hours (register 39) and number of seconds (register 40) read only 41 and 42 Time stamp for fault message 2 Number of hours (register 41) and number of seconds (register 42) read only 56 Version 1.1 (08/2011) en Original instructions Interroll Frequency Inverter IP55 Initial startup and operation Register Function Access 43 and 44 Time stamp for fault message 3 Number of hours (register 43) and number of seconds (register 44) read only 45 and 46 Time stamp for fault message 4 Number of hours (register 45) and number of seconds (register 46) read only 47 to 54 Motor current log (256 ms) see P0-40 read only 55 to 62 Temperature of heat sink log (30 s) see P0-38 read only 63 to 70 Intermediate circuit voltage log (256 ms) see P0-36 read only 71 to 78 DC ripple log (20 ms) see P0-37 read only 79 to 86 Board temperature of the frequency inverter log (30 s) see P0-38 read only Procedure in case of accident or fault ¾ Stop the frequency inverter at once and ensure that it cannot be started accidentally. ¾ In case of an accident: Provide first aid and make an emergency call. ¾ Inform the responsible person. ¾ Have the malfunction repaired by qualified persons. ¾ Start the conveyor only after this has been approved by qualified persons. Version 1.1 (08/2011) en Original instructions 57 Interroll Frequency Inverter IP55 Abandonment and disposal Shut-down CAUTION Risk of injuries due to incorrect handling ¾ Shut-down may only be executed by qualified and authorized persons. ¾ Only shut down the frequency inverter after switching off the power. Ensure that the frequency inverter cannot be turned on accidentally. ¾ Disconnect the frequency inverter from the power supply and the motor. ¾ Remove the frequency inverter from the conveyor module. Disposal The operator is responsible for the proper disposal of the frequency inverter. In doing so, industry-specific and local provisions must be observed for the disposal of the frequency inverter and its packaging. 58 Version 1.1 (08/2011) en Original instructions Interroll Frequency Inverter IP55 Appendix Installation declaration in accordance with the EC Machinery Directive 2006/42/EC, Appendix II B The manufacturer: Interroll Trommelmotoren GmbH Opelstr. 3 41836 Hueckelhoven/Baal Germany hereby declares that the frequency inverters • • PD-A-400-1A5-55 PD-A-230-2A5-55 comply with the basic health and safety requirements of the Machine Directive 2006/42/EG Annex I. The special technical documentation as per Annex VII B has been prepared and will be provided in electronic format, if necessary to national authorities. Person authorized to compile the technical documents: Holger Hoefer, Interroll Trommelmotoren GmbH, Opelstr. 3, 41836 Hueckelhoven, Germany The incomplete machine complies with the following EC Directives: • Low Voltage Directive 2006/95/EC • EMC Directive 2004/108/EC • RoHS Directive 2002/95/EC The following harmonised standards were applied: • EN ISO 12100-1 • EN ISO 12100-2 • EN ISO 14121-1 • EN 61800-3:2004 • EN 61800-5-1:2003 The incomplete machine may only be put into operation following installation into another machine which satisfies the requirements of the machine directive. The EC declaration of conformity as per Appendix II A must be available. Hueckelhoven/Baal, dated 31 May 2011 Helmut Leuver (Managing Director) (This declaration can be obtained at www.interroll.com, if needed.) Version 1.1 (08/2011) en Original instructions 59 Interroll Frequency Inverter IP55 Appendix Parameters Hint The parameter set for the frequency inverter is divided into several parameter groups. Access to the parameter groups is determined by the value of the parameter P1-14: Parameter group 0 Monitoring parameters (read only) P1-14 any (P0-01 to P0-50) P1-14 = P2-40 1) + (P0-51 to P0-80) 1 Basic parameters for configuration P1-14 = P6-30 2) + + + + 2 Extended parameters + + + 4 Control parameters for high-performance motor control + + 5 Communication parameters + + 6 Special parameters + 7 Motor parameters + 8 Application-specific parameters + 60 1) Factory-set standard parameter value for P2-40 = 101 2) Factory-set standard parameter value for P6-30 = 201 Version 1.1 (08/2011) en Original instructions Interroll Frequency Inverter IP55 Appendix Parameter group 0 – Monitoring parameters (P0-01 to P0-50) Detailed description see page 16 Parameter Function Minimum Maximum Unit Number of entries P0-01 (Reserved) - - - 1 P0-02 (Reserved) - - - 1 P0-03 Status of inputs 00000 11111 - 2 P0-04 Set value of acceleration time / braking time -P1-01 P1-01 rpm or Hz 1 P0-05 Set value of torque control 0.0 200.0 % 1 P0-06 Digital set speed -P1-01 P1-01 rpm or Hz 1 P0-07 Field bus set speed -P1-01 P1-01 rpm or Hz 1 P0-11 Applied motor voltage 0 - V 1 P0-12 Output torque of the motor 0.0 200.0 % 1 P0-13 Log for fault messages - - % 4 P0-14 Motor magnetising current (ld) - - A 1 P0-15 Motor rotor current (lq) - - A 1 P0-16 Magnetic field strength of the motor 0.0 100.0 % 1 P0-17 Stator resistance of the motor (Rs) - - 1 P0-18 Stator inductance of the motor (Ls) - - H 1 P0-19 Rotor resistance of the motor (Rr) - - 1 P0-20 Intermediate circuit voltage of the frequency inverter 0 1,000 V 1 P0-21 Temperature of the frequency inverter 0 - °C 1 P0-22 DC bus ripple - - - 1 P0-23 Operating time above heat sink temperature of 80°C 0 - HH:MM:SS 2 P0-24 Operating time above board temperature of 80°C 0 - HH:MM:SS 2 P0-25 Estimated rotor speed 0 30,000 rpm or Hz 1 P0-26 Energy consumption in kWh 0 999.9 kWh 2 P0-27 Energy consumption in MWh 0 65535 MWh 2 P0-28 Software version and checksum - - - 4* P0-29 Frequency inverter type - - - 3* P0-30 Serial number - - - 2* P0-31 Total running time of the frequency inverter 0 - HH:MM:SS 2 P0-32 Total running time since the last fault (1) 0 99999H HH:MM:SS 2 P0-33 Total running time since the last fault (2) 0 99999H HH:MM:SS 2 P0-34 Total running time since the last start signal 0 99999H HH:MM:SS 2 P0-35 (Reserved) - - - 1 P0-36 Intermediate circuit voltage log (256 ms) - - - 8 Version 1.1 (08/2011) en Original instructions 61 Interroll Frequency Inverter IP55 Appendix Parameter Function Minimum Maximum Unit Number of entries P0-37 DC bus ripple log (20 ms) - - - 8 P0-38 Temperature of heat sink log (30 s) - - - 8 P0-39 Board temperature of the frequency inverter log (30 s) l - - - 8 P0-40 Motor current log (256 ms) - - - 8 P0-41 Number of critical faults – overcurrent - - - 1 P0-42 Counter for critical faults – overvoltage - - - 1 P0-43 Number of critical faults – undervoltage - - - 1 P0-44 Number of critical faults – excess temperature - - - 1 P0-45 (Reserved) - - - 1 P0-46 Number of critical faults – board temperature too high - - - 1 P0-47 (Reserved) 0 - - 1 P0-48 (Reserved) 0 - - 1 P0-49 Modbus communication faults log 0 - - 1 P0-50 Warning information - - - 1 Minimum Maximum Unit Number of entries Parameter group 0 – Monitoring parameters (P0-51 to P0-80) Detailed description see page 20 Parameter Function P0-51 (Reserved) - - - 1 P0-52 (Reserved) - - - 1 P0-53 Set value and sample of current (phase U) - - - 2 P0-54 Set value and sample of current (phase V) - - - 2 P0-57 Internal set value Uq/Ud - - - 2 P0-59 Frequency input speed - - rpm or Hz 1 P0-63 Speed readjustment 0 - rpm or Hz 1 P0-64 Internal switching frequency 0 - - 1 P0-65 Service life of the frequency inverter 0 - HH:MM:SS 2 P0-66 Power factor (calculated) 0 1.0 - 1 P0-72 Board temperature of the frequency inverter 0 - °C 1 P0-74 Internal value for input voltage L1 - - - 1 P0-79 Lib version of motor control and bootloader version of the DSP - - - 2 P0-80 Specified internal parameter - - - 1 62 Version 1.1 (08/2011) en Original instructions Interroll Frequency Inverter IP55 Appendix Parameter group 1 - Basic parameters for configuration Detailed description see page 22 Parameter Function Minimum Maximum Unit Factory-set standard value P1-01 Maximum output frequency / maximum motor speed P1-02 500 Hz or 30,000 rp m Hz or rpm 3,000 P1-02 Minimum output frequency / minimum motor speed 0 P1-01 Hz or rpm 0 P1-03 Acceleration time 0.00 600.0 s 1.0 P1-04 Braking time 0.00 600.0 s 1.0 P1-05 Stop mode 0 1 - 0 P1-07 Motor rated voltage 0 250 / 500 V 0 A 0.0 1) P1-08 0.0 P1-09 Rated motor frequency 25 500 Hz 200.0 P1-10 Rated motor speed 0 30,000 rpm 3,000 P1-11 Voltage boost 0.0 20.0 % 3.0 P1-12 Main source of frequency inverter control 0 5 - 0 P1-13 Function of the digital inputs 0 63 - 8 P1-14 Access code for extended parameters 0 30,000 - 0 1) Version 1.1 (08/2011) en Original instructions 2.5 / 1.5 1) Rated motor current depends on inverter voltage class 63 Interroll Frequency Inverter IP55 Appendix Parameter group 2 - Special parameters Detailed description see page 24 Parameter Function Minimum Maximum Unit Factory-set standard value P2-01 Set speed 1 -P1-01 P1-01 rpm or Hz 3,000 P2-02 Set speed 2 -P1-01 P1-01 rpm or Hz 600 P2-08 Set speed 8 -P1-01 P1-01 rpm or Hz 0 P2-09 Skip frequency centre point P1-02 P1-01 rpm or Hz 0 P2-10 Skip frequency band width 0 P1-01 rpm or Hz 0 P2-15 Function of bit 0 of the ASi input 0 8 - 1 P2-16 Upper limit for bit 0 of the ASi input P2-17 200 % 100.0 P2-17 Lower limit for bit 0 of the ASi input 0 P2-16 % 0.0 P2-18 Function of bit 1 of the ASi input 0 8 - 8 P2-19 Upper limit for bit 1 of the ASi input P2-20 200 % 100.0 P2-20 Lower limit for bit 1 of the ASi input 0 P2-19 % 0.0 P2-23 Holding time for speed 0 0.0 60.0 s 0.2 P2-24 Effective switching frequency of the final stage 4 32 kHz 16 P2-25 Alternative rundown time 0.00 30.0 s 0.00 P2-26 Start conduct with rotating motor 0 1 - 0 P2-27 Standby time 0.0 250.0 s 0.0 P2-28 Slave speed 0 1 - 0 P2-29 Factor for slave speed -500.0 500.0 % 100.0 P2-36 Start mode selection after switching on 0 1 - 0 P2-37 Restart speed when controlling via the external keypad 0 2 - 1 P2-38 Conduct after power failure whilst frequency inverter is activated 0 2 - 2 P2-39 Parameter access 0 1 - 0 P2-40 Access code to extended parameters 0 9999 - 101 64 Version 1.1 (08/2011) en Original instructions Interroll Frequency Inverter IP55 Appendix Parameter group 4 – Control parameters for high-performance motor control Detailed description see page 28 Parameter Function Minimum Maximum Unit Factory-set standard value P4-01 Motor control type 0 4 - 3 P4-02 Automatic motor tune 0 1 - 0 P4-03 Speed controller proportional gain (vector mode) 0 400.0 % 50.0% P4-04 Speed controller integral time constant (vector mode) 0.000 1.000 s 0.050 P4-05 Power factor for asynchronous motors 0.50 0.99 - 0.95 P4-06 Source for set value or upper torque limit 0 2 - 0 P4-07 Upper torque limit (vector mode) P4-08 200.0 % 200.0 P4-08 Lower torque limit (vector mode) 0.0 P4-07 % 0.0 P4-09 Upper torque limit in generator operation (vector mode) 0.0 200.0 % 150.0 P4-10 Base frequency (U/f mode) 0.0 100 % of P1-09 % 0.0 P4-11 Base frequency voltage (U/f mode) 0 100 % of P1-07 % 0 Version 1.1 (08/2011) en Original instructions 65 Interroll Frequency Inverter IP55 Appendix Parameter group 5 – Communication parameters Detailed description see page 30 Parameter Function Minimum Maximum Unit Factory-set standard value P5-02 Field bus address of the frequency inverter (external keypad and Modbus use the same address) 1 63 - 1 P5-03 Modbus transfer rate 9.6 115.2 kbps 19.2 P5-04 Modbus data format - - - 0 P5-06 Time-out for connection interruption 0.0 5.0 s 1.0 P5-07 Conduct upon interruption of the connection 0 3 - 0 P5-09 Function of the ASi output bits (see "Operation via ASi interface", page 50) 0 1 - 1 66 Version 1.1 (08/2011) en Original instructions Interroll Frequency Inverter IP55 Appendix Parameter group 6 - Special parameters Detailed description see page 31 Parameter Function Minimum Maximum Unit Factory-set standard value P6-01 Firmware upgrade 0 3 - 0 P6-02 Automatic temperature management 0 1 - 0 P6-04 Switching hysteresis for rated motor frequency 0.0 25.0 % 0.3 P6-10 Virtual start/stop signal 0 1 - 0 P6-17 Time-out for the motor torque upper limit 0.0 25.0 s 25.0 P6-23 Resetting of the energy display 0 1 - 0 P6-24 Resetting of the frequency inverter in the event of a fault 0 2 - 1 P6-25 Hardware overload protection via the thermal cut motor protection switch 0 1 - 1 P6-28 Index for display value parameter P0-80 0 127 - 0 P6-29 Save user-specific standard parameter values 0 1 - 0 P6-30 Access code to all parameters 0 9999 - 201 Version 1.1 (08/2011) en Original instructions 67 Interroll Frequency Inverter IP55 Appendix Parameter group 7 – Motor parameters Detailed description see page 32 Parameter Function Minimum Maximum Unit Factory-set standard value P7-01 Stator resistance (Rs) of the motor typedependent typedependent typedependent P7-02 Rotor resistance (Rr) of the asynchronous motor typedependent typedependent typedependent P7-03 Inductance of the d-axis (Lsd) typedependent typedependent H typedependent P7-04 Magnetising current of the asynchronous motor typedependent typedependent A typedependent P7-05 Loss coefficient of asynchronous motor -0.000 0.250- - 0.100- P7-06 Inductance of the q-axis (Lsq) typedependent typedependent H typedependent P7-09 Current limit with overvoltage 0.0 100.0 % 0.0 P7-10 Ratio of total system inertia to motor inertia 0 600 - 10 P7-11 Lower limit for pulse width (PWM) 0 500 - 150 P7-12 Magnetising time 50 2000 ms 100 P7-13 Speed controller differential gain 0.0 400.0 % 0.0 P7-14 Stabilising current with low frequencies 0.0 100.0 % 25.0 P7-15 Speed limit for stabilising current 0.0 50.0 % 25.0 P7-16 Current for parking the motor 0.0 100.0 % 25.0 68 Version 1.1 (08/2011) en Original instructions Interroll Frequency Inverter IP55 Appendix Parameter group 8 - Application-specific parameters Detailed description see page 33 Parameter Function Minimum Maximum Unit Factory-set standard value P8-01 P8-11 Acceleration time 2 0 600 s 5.0 Braking time 2 0 600 s 5.0 P8-13 Basis for acceleration time 2 / braking time 2 0 2 - 0 Version 1.1 (08/2011) en Original instructions 69 Interroll Frequency Inverter IP55 Appendix Troubleshooting Symptom Possible cause Help 00: QR)OW No fault No fault present - 03: 2, Firmware registers overcurrent at the output of the frequency inverter The motor is subject to excessive loading. Fault occurs upon activation of the frequency inverter: ¾ Check the motor and connection to the motor for a possible short circuit between the phases or between phase and PE. ¾ Ensure that the drum motor is not mechanically blocked. ¾ Ensure that the motor parameters on the label concur with the values of the parameters P1-07, P1-08 and P1-09 or that an automatic motor tune for the connected motor has been successfully concluded. ¾ Increase the acceleration time via parameter P1-03. Check whether the connected motor has a holding brake. Motors with a holding brake cannot be operated with the frequency inverter as there is no control option for the brake. Fault occurs during operation: ¾ Reduce the speed loop controller proportional gain via parameter P403. 04: ,WWUS Overload when activating the frequency inverter The rated motor current defined via parameter P1-08 was exceeded for a long period of time (message dependent on parameter P6-25). ¾ Should the decimal display on the external keypad display flash, reduce the load or increase the run-up time via parameter P1-03. ¾ Check whether the cable length of the motor connection is within the stated limits. ¾ Ensure that the motor parameters on the label concur with the values of parameters P1-07, P1-08 and P1-09 or that an automatic tuning for the connected motor has been successfully concluded. ¾ Ensure that the motor is not mechanically blocked and that there are no more mechanical faults. 70 Version 1.1 (08/2011) en Original instructions Interroll Frequency Inverter IP55 Appendix Symptom Possible cause Help 06: 29ROW DC bus voltage too high The current value of the intermediate circuit voltage can be displayed via parameter P0-20. The values are saved every 256 ms in a log. The last values can be displayed via parameter P0-36. This fault essentially occurs when energy flows back from the conveyor section to the frequency inverter due to high inertia or trailing load. ¾ If the fault occurs when stopping or during the braking time, increase the braking time via parameter P1-04. ¾ With vector operation, reduce the proportional gain of the speed controller via parameter P4-03. 07: 89ROW DC bus voltage too low Occurs regularly if the frequency inverter is disconnected from the power supply. ¾ If the fault occurs during operation, check the input voltage as well as all connections, fuses etc. 08: 2W Heat sink temperature too high The current heat sink temperature can be displayed via parameter P021. The values are saved every 30 s in a log. The last values can be displayed via parameter P0-38. ¾ Check the ambient temperature around the frequency inverter. ¾ Ensure that sufficient air can circulate around the frequency inverter and that air circulation to and from the frequency inverter is not obstructed. ¾ Reduce the effective switching frequency via parameter P2-24. ¾ Reduce load. 09: 8W Ambient temperature too low Occurs when the ambient temperature is below -20 °C. ¾ Increase the ambient temperature to above -20 °C. ¾ Press the STOP button. The frequency inverter must now be configured for the required application. 10: 3GHI Factory-set standard parameter values loaded 12: 6&2EV Communication fault The connection to the PC or control field has been interrupted. ¾ Check the cable and connections to the external devices. 13: )OWGF DC bus voltage ripple too high The current value of the DC ripple can be displayed via parameter P022. The values are saved every 20 ms in a log. The last values can be displayed via parameter P0-39. ¾ Check whether voltage is applied to all phases and whether the voltage is within the 3% tolerance. ¾ Reduce load. ¾ Should the fault reoccur, notify the supplier. Version 1.1 (08/2011) en Original instructions 71 Interroll Frequency Inverter IP55 Appendix Symptom Possible cause Help 15: K2, Hardware registers overcurrent at the frequency inverter output. The motor is subject to excessive loading. Fault occurs upon activation of the frequency inverter: ¾ Check the motor and connection to the motor for a possible short circuit between the phases or between phase and PE. ¾ Ensure that the drum motor is not mechanically blocked. ¾ Ensure that the motor parameters on the label concur with the values of the parameters P1-07, P1-08 and P1-09 or that an automatic setting for the connected motor has been successfully concluded. ¾ Increase the acceleration time via parameter P1-03. ¾ Check whether the connected motor has a holding brake. As the frequency inverter has no brake control option, the brake must be controlled by external device which will ensure that the brake is released before motor starting. Fault occurs during operation: ¾ Reduce proportional sensitivity of the speed controller via parameter P403. ¾ Notify the supplier. 16: WK)OW Faulty thermistor on the heat sink 17: GDWD) Internal memory fault The parameter values were not saved. The standard parameter values were loaded. ¾ Repeat process. ¾ Should the fault reoccur, notify the supplier. 19: GDWD( Internal memory fault The parameter values were not saved. The standard parameter values were loaded. ¾ Repeat process ¾ Should the fault reoccur, notify the supplier. 20: 8'HI User-specific standard parameter values loaded 72 ¾ Press the STOP button on the external keypad. Version 1.1 (08/2011) en Original instructions Interroll Frequency Inverter IP55 Appendix Symptom Possible cause Help 21: )3WF Motor over temperature The motor's thermal cut motor protection switch tripped through overload and triggers a fault on the frequency inverter, or faulty thermal cut motor protection switch. ¾ Ensure that the motor is not overloaded. ¾ Ensure that the drum motor is not mechanically blocked. ¾ Ensure that the motor parameters on the label concur with the values of the parameters P1-07, P1-08 and P1-09 or that an automatic motor configuration for the connected motor has been successfully concluded. ¾ Check whether the connected motor has a holding brake. As the frequency inverter has no brake control option, the brake must be controled by external device which will ensure that the brake is released before motor starting. 23: 2KHDW Board temperature of the frequency inverter too high The temperature measured inside the device is above the permissible operating temperature of the frequency inverter of 80°C. ¾ Increase air circulation around the frequency inverter. ¾ Reduce the effective switching frequency via parameter P2-24. ¾ Reduce the load. 24: WRUT) Maximum torque exceeded Output torque has exceeded the upper limit of the frequency inverter or the triggering level for a fault (P407). ¾ Reduce the load or increase the runup time via parameter P1-03. 26: 2XW) Fault on the output of the frequency inverter ¾ Notify the supplier. 40: $W) Measured motor resistance varies between the phases ¾ Ensure that the motor is connected correctly and is in perfect working order. ¾ Check the motor windings for the correct resistance and balance. 41: $W) Measured motor resistance too high ¾ Ensure that the motor is connected correctly and is in perfect working order. ¾ Check whether the rated power of the frequency inverter complies with the rated power of the connected motor. 42: $W) Measured motor inductance too low ¾ Ensure that the motor is connected correctly and is in perfect working order. Version 1.1 (08/2011) en Original instructions 73 Interroll Frequency Inverter IP55 Appendix Symptom Possible cause Help 43: $W) Measured motor inductance too high ¾ Ensure that the motor is connected correctly and is in perfect working order. Check whether the rated power of the frequency inverter complies with the rated power of the connected motor. 44: $W) Measured motor parameters not convergent ¾ Ensure that the motor is connected correctly and is in perfect working order. Check whether the rated power of the frequency inverter complies with the rated power of the connected motor. 50: 6F) Modbus communication fault No valid Modbus telegram was received within the defined time-out (parameter P5-06). ¾ Check whether the network master / PLC is still working. ¾ Check the connected cable. ¾ Increase the value of parameter P506 to a suitable value. 54: 6F) ASi communication fault No valid ASi telegram was received within the defined time-out (parameter P5-06). ¾ Check whether the ASi master is still working. ¾ Check the connected cable. ¾ Increase the value of parameter P506 to a suitable value. 74 Version 1.1 (08/2011) en Original instructions Interroll Frequency Inverter IP55 Appendix Version 1.1 (08/2011) en Original instructions 75 Europe Norway Austria Tel + 49 2193 23 187 [email protected] Interroll A/S Kobbervikdalen 65 3036 Drammen Norway Tel + 47 32 88 26 00 [email protected] Belgium Tel. + 49 2193 23 259 [email protected] Czech Republic Interroll CZ, s.r.o. Na Řádku 7/3172 69002 Břeclav Czech Republic Tel + 420 519 330 210 [email protected] Denmark Interroll Nordic A/S Hammerholmen 2-6 2650 Hvidovre Denmark Tel + 45 36 88 33 33 [email protected] Poland Interroll Polska Sp. z o.o. ul. Płochocińska 85 03-044 Warszawa Poland Tel + 48 22 741 741 0 [email protected] Portugal Rulmeca de Portugal, LDA Parque Industrial do Tortosendo Edifício Parkurbis, Loja 7 Apartado 113 6200-865 Tortosendo Portugal Tel + 351 275 33 07 80 [email protected] Romania Finland Interroll Nordic A/S Martinkyläntie 53 01720 Vantaa Finland Tel + 358 9 54 94 94 00 [email protected] Krako International SRL Str. Sfanta Maria 1-5 Bl. 10A4 Sc 1 Apt 4 Sector 1 001494 Bucuresti Romania Tel + 40 21 260 2050 [email protected] France Interroll SAS Z.I. De Kerannou-BP34 29250 Saint-Pol-de-Leon France Tel + 33 2 98 24 4100 [email protected] Germany Interroll Fördertechnik GmbH Höferhof 16 42929 Wermelskirchen Germany Tel + 49 2193 23 0 [email protected] Hungary Lörincz Kft. Kastély U.27 Pf. 57 2045 Törökbálint Hungary Tel + 36 23 337 891 [email protected] Iceland IBH ehf Dugguvogur 10 104 Reykjavik Iceland Tel + 354 562 6858 [email protected] Italy Rulli Rulmeca S.P.A. Via Arturo Toscanini 1 24011 Almé (Bg) Italy Tel + 39 035 43 00 111 [email protected] Luxembourg Tel + 49 2193 23 259 [email protected] Netherlands Tel + 49 2193 23 151 [email protected] Version 1.1 (08/2011) en Original instructions Slovenia 3-TEC, prehrambenatehnologija-hlajenje Dravska ulica 7 1000 Ljubljana Slovenija Tel + 386 1 56 56 370 [email protected] Spain Interroll España S.A. Parc Tecnològic del Vallès C/Dels Argenters, 5 Edificio 1 Bp y Cp 08290 Cerdanyola del Vallès Barcelona Spain Tel + 34 90 211 0860 [email protected] Sweden Interroll Nordic A/S Karlsrovägen 64 302 41 Halmstad Sweden Tel + 46 35 227 077 [email protected] North and South America Canada Interroll Checkstand 8900 Keele Street Unit 2 & 3 Concord, Ontario L4K 2N2 Canada Tel +1 905 660 4426 [email protected] USA Singapore Interroll Corporation 3000 Corporate Drive Wilmington, N.C. 28405 USA Tel +1 910 799 1100 [email protected] Interroll (Asia) Pte. Ltd. 386 Jalan Ahmad Ibrahim Jurong 629156 Singapore Republic of Singapore Tel + 65 6266 6322 [email protected] Interroll Automation LLC 5035 Keystone Boulevard Jeffersonville, IN 47130 USA Tel +1 812 284 1000 [email protected] Sri Lanka Interroll Dynamic Storage, Inc. 232 Duncan Circle Hiram, GA 30141 USA Tel +1 770 943 15 41 [email protected] Brazil Interroll Logística Elementos para Sistemas Transportadores Ltda Rua Dom João VI 555 - Parque Industrial SA Pindamonhangaba - SP CEP 12412- 805 Brazil Tel + 55 (0)12 3648 8021 [email protected] Asia Colombo Machinery & Equipment Ltd. No: 102, Fife Road Colombo 05 Sri Lanka Tel + 94 11 250 0078/79 [email protected] Taiwan First Auto-Transfer Equipment Co. Ltd 8F-3, No: 65, Song De Road Hsin Yi District Taipei 11076 Taiwan Tel + 886 2 27 59 88 69 [email protected] Thailand Interroll (Thailand) Co. Ltd. 700/685, Moo 1 Amata Nakorn Panthong, Chonburi 20160 Thailand Tel + 66 3 844 7448 [email protected] China United Kingdom India Interroll Ltd. Brunel Road Corby, Northants NN17 4UX United Kingdom Tel + 44 1536 200 322 [email protected] Interroll Drives and Rollers India Pvt. Ltd. No. 276, 4th main, 4th phase Peenya Industrial Area Bangalore-560058 India Tel + 91 080 41272666 [email protected] Interroll South Africa (Pty) Ltd Box 327 Isando 1600 Gauteng South Africa Tel + 27 11 281 99 00 za sales@interroll com Korea Interroll (Korea) Co. Ltd. Rm 301 Dongsan Bldg. 333-60 Shindang-Dong 100-826 Choong Ku, Seoul Tel + 82 2 2231 19 00 [email protected] Switzerland Tel. + 49 2193 23 190 [email protected] South Africa Interroll Japan Co. Ltd. 302-1 Shimokuzawa Midori-ku Sagamihara-shi Kanagawa 252- 0134 Japan Tel + 81 42 764 2677 [email protected] Interroll Canada Ltd. 1201 Gorham Street Newmarket Ontario L3Y 8Y2 Canada Tel +1 905 727 33 99 [email protected] Interroll (Suzhou) Co. Ltd. Block B & C Ecological Science Hub No. 1 Ke Zhi Road Suzhou Industrial Park Jiangsu Province China Postal Code: 215021 Tel + 86 512 62560383 [email protected] Africa Japan Australia and New Ze aland Australia Interroll Australia Pty. Ltd. 70 Keon Parade Thomastown Victoria 3074 Australia Tel + 61 3 94 60 21 55 [email protected] New Zealand Automation Equipment (NZ) Ltd. 26 Tawn Place, Pukete, Hamilton New Zealand Tel + 64 (7) 849 0281 [email protected] Israel Comtrans-Tech Ltd. P.O.B. 17433 Tel-Aviv 61174 Israel Tel + 972 54 4272747 [email protected] Headquarter Interroll (Schweiz AG) + 41 91 850 25 25 [email protected] www.interroll.com


