Download USER MANUAL: CITIZEN MODEL: CG
Transcript
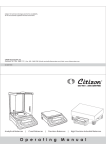
P a g e | 1/7 USER MANUAL: CITIZEN MODEL: CG USER MANUAL MODEL: CG P a g e | 2/7 Setting Up the balance Place the components listed below inside the chamber in the order given : Rubber, pan Location The Optimun location The correct location makes an important contribution to the accuracy of the weighing results of highresolution analytical and precision balances. Avoid Direct sunlight Excessive temperature fluctuations, Drafts (Power-----Air Conditioning System, Fans can also cause drafts) USER MANUAL MODEL: CG P a g e | 3/7 The best position is an a stable bench in a corner protected against drafts as far-possible from doors, windows, radiators or the ventitation slots of air conditioners. Warm Up Connecting Electronic Peripheral Devices Make absolutely sure to unplug the balance from DC power before you connect or disconnect a peripheral device Warmup Time To deliver exact results, balance must warm up to operating temperature for as leasted below before the first weighing operation is carried out. CG Analytical models: at least 30 minutes. Key Functionality in simple weighing mode Switch on & off USER MANUAL MODEL: CG P a g e | 4/7 Tare, Confirm setting Abort / Cancel Calibrate (Adjust), call Menu Print Weighing Result Power ON Connect DC Adaptor and Power ON the balance - It will display version number for software - It will display numeric countdown - It will display - The system initialization process will begin with the display indicating the current progress. (INIT 1% to INIT 100%) it will enter stand by mode & display clock. USER MANUAL MODEL: CG P a g e | 5/7 Stand by mode - After Power ON and initial test balance will automatically come in stand by mode. - Press key to come to basic weighing - Press key in basic weighing to come back to Stand by Mode Overview of Menu In this menu, you can select unit 1, 2, 3 or Application Program, adjust the stability filter, Calibration choice, Auto Zero Tracking, automatic shutdown and print setting. USER MANUAL MODEL: CG P a g e | 6/7 Time & Date Setting In this menu, User can set the clock. Clock setting consist of 2 settings, They are TIME : In this submenu user can set the time in hours, minutes & seconds, AM, PM & 24 hrs. DATE: In this submenu user can set the date, month & Years Operating Instructions Press the PRINT key for 2 sec when coming out from stand by or Power on mode. SET TIME - Current Time is displayed with first digit flashing. Flashing digit indicates that digit value or place can be changed. - Press Toggle key to change the value of the Flashing digit. - Press CAL key to shift the flashing digit from Left to Right. - After proper setting of time in hours, nimutes & seconds respectively for zeroes starting from left, press tare key - Press the PRINT key to change the format AM, PM & 24 hrs. USER MANUAL MODEL: CG P a g e | 7/7 SET DATE - Press TARE key “date” is display - Press TARE key, current date is displayed with first digit flashing. Flashing digit indicaters that digit value or place can be changed. - Press TGGGLE key - Press CAL key to change the value of the Flashing digit. to ship the flashing digit from Left to Right - After proper setting of date in day, month & year respectively for zeroes starting from left, - Press TARE key to set the date USER MANUAL MODEL: CG


