1
GM2
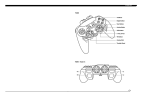
Shift Button
4 Assignable Buttons
Hat Switch
Fire Button (Assignable)
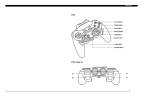
Scroll Wheel
Assignable Button
Scroll Wheel & Button
3 Assignable Buttons
Hat Switch
INTRODUCTION
Games Compatibility
Congratulations on your purchase of the Saitek GM2 Action Pad and Mouse. The GM2 is the
first Action Pad and Mouse combination developed specifically for first person gamers. The
GM2 removes the limitations placed upon the gamer by clumsy and complicated keyboard
commands and liberates the full potential of both game and gamer. It comes complete with
Saitek Gaming Extensions (SGE) software, which allows the user up to 40 programmable
commands through an easy-to-use Windows interface.
Your Saitek GM2 is specifically designed to work with games developed for Microsoft
Windows® 98 and 95.
GETTING STARTED
Connecting the Game Mouse to the Action Pad
Important Notice: You must install the product driver and Saitek Gaming Extensions (SGE)
from the Saitek Product Companion CD in order for the GM2 to function. See the Installing the
Drivers and Programming Software for the Saitek GM2 section of this manual.
The GM2 Mouse is connected to the Action Pad by means of a simple telephone connector.
Simply insert this connector into the port on the Action Pad until it clicks firmly into place.
GM2 features:
Attention: You must attach the Mouse to the Action Pad before attaching the unit to
the computer.
• Ultra quick report rates through USB connection
• Class leading engineering
• Fully programmable using Saitek Gaming Extensions (SGE) software
• Pre-defined game profiles available on the Product Companion CD and from the
Saitek website
Action Pad Features:
• 6 buttons
Installing your Saitek GM2
Important Notice: You must install the software from the Saitek Product Companion Disc
before you connect your game controller to the PC.
1
With your computer switched on, close down any programs you are running and insert
the Saitek Product Companion Disc.
2
When the Saitek Product Companion Disc Dialog Box appears, select your Saitek GM2
from the drop down list and click on the Install button.
3
In the next dialog box, click on Yes to agree with the installation of the Saitek GM2 and
then click on Accept to agree to the license agreement.
• 8-way hat switch
• Throttle Wheel (with self-centering or freewheel options)
• USB connection
• Shift button
• Programmability with up to 40 assignable commands
Note : For your Saitek GM2 to work, you need to have a minimum of Microsoft® Internet
Explorer 4 and DirectX 7.0a installed on your computer. This installation will automatically
recognize if you already have them loaded on to your machine. However, if they are not
present, you will need to take the following steps:
• Integral cable storage system
• If you are prompted to install Microsoft® Internet Explorer, click on Install and follow
the on-screen instructions and then restart your computer when prompted.
Action Mouse Features:
• If you are prompted to install Microsoft® DirectX 7.0a, click on Install and follow the
on-screen instructions and then restart your computer when prompted.
• Rotary scroll wheel
• 3 buttons
4
At the Saitek Gaming Extensions screen, click on Install and follow the on-screen
instructions and then restart your computer.
5
When you are prompted, attach your Saitek GM2 to the computer and follow the
on-screen instructions. To connect the GM2 Action Pad to your PC, simply insert the
USB connector into a USB port on the computer until it clicks firmly into place.
6
When the Test screen appears, test your controller's buttons and attributes. Your Saitek
GM2 is now ready for gameplay, but first you should take time to run the Game Profile
Wizard to get the most from your new controller (see next section).
• 4-way hat switch
Minimum System Requirements
A Pentium class computer with 32Mb RAM and Windows® 98. Microsoft® Internet Explorer 4
and DirectX 7.0a or above are required to get the most from your games and controller. These
are available on the Saitek Product Companion Disc that came with this product.
2 3
Game Profiler Wizard
Throttle Wheel (with self–centering or freewheel options)
The Game Profiler Wizard allows you to download game profiles for your favorite games from
either the Saitek Product Companion CD or the Saitek Website. These are profiles written by
our in-house gamers to help you get the most from you new Saitek controller in as little time as
possible. To run the Game Controller Wizard, follow these simple instructions:
The Saitek GM2 Action Pad comes complete with an option for changing the nature of the
throttle wheel. Using the switch underneath the pad, you can either use the throttle wheel in
self–centering or freewheel mode. The self–centering option is ideal for first person shoot ‘em
up games, like Quake, where the wheel can be used for side-to-side strafing movements. The
freewheel (unsprung) mode is ideal for strategy games where the axis can be used as a band
selector.
1
After you have completed testing your Saitek GM2, you will then be asked to run the
Game Profiler Wizard, click on Yes to proceed.
2
At the Welcome dialog box you will be prompted to Import the Game Profiles for your
controller via either the Internet or the CD. Check the box next to CD and click on
Continue. The software will scan your computer for those games you already have
loaded and will load the corresponding profiles.
3
When the Game Profiler Wizard has completed loading the profiles, click on Next and
then Finish.
Important Notice: If you connect the GM2 before installing the Saitek Gaming Extensions software, the Saitek GM2 will not operate correctly. To solve this problem, run the NukeUSB utility
(found on the Saitek Product Companion Disc CD), remove the GM2, restart the machine and
then continue the installation in the correct order.
Calibration
QUICK-START GUIDE TO USING YOUR SAITEK GM2
About Saitek Gaming Extensions (SGE) Programming Software
Saitek Gaming Extensions (SGE) is the software Saitek supplies to configure your Saitek
game controller for enhanced functionality. SGE delivers a powerful set of features, allowing
you to tailor your game controller to the ultimate configuration for the ultimate gameplay.
Despite a level of sophistication previously unseen in the market, the software remains simple
and intuitive to use.
Features of SGE:
• Automatic profile activation within current game
1
Click on Start and select Settings, then Control Panel.
• Personalize the controller settings for your favorite games
2
Double-click the Game Controllers icon.
• Configure your controller with an on-screen rotational 3D model and interface
3
Select Calibrate under the Settings tab and follow the on-screen instructions.
4
Next click on the Test tab to check your calibration.
• Multiple profile option for each controller (ideal if a controller is used by several
people)
5
The Saitek GM2 has now been successfully installed and is ready for
gameplay.
• Program special moves with sophisticated timing features
• Special game setups available from the Saitek website and the Product
Companion CD
Using Another Mouse with the Action Pad Connected
If you have a favorite mouse that you still wish to use for your other PC tasks, you can still
have it connected to the PC via a PS/2, Serial or another USB port, while the GM2 is
connected. Both the GM2 mouse and your original mouse will simultaneously report
mouse functions; so, just put to one side the mouse you do not wish to use.
Note: It is recommended that you try using the GM2 Mouse for your day-to-day PC usage for
an all-round improved performance. It’s ultra fast report rates, class leading engineering, scroll
wheel and hat switch will improve your speed in everything from word processing to
web-browsing. Also, the GM2 Mouse has a superbly comfortable design that sits perfectly in
the hand, giving you hours of fatigue-free gaming or PC interaction.
3D model of the
game controller
Shift State
Name of Control
Currently Assigned
Button
Command Editor
4 5
Quick Start Guide to Programming Your Controller
Default Commands for Saitek GM2
Creating a Profile for a Game
Action Pad
1
Open the SGE software by double-clicking on the SGE icon.
2
Next, double-click on New Game Wizard and then on Next.
3
You will now see a list of all the .exe files on your PC to which SGE can be assigned.
Highlight the name of the game you wish to create a profile for, eg, tomb4.exe, then click
on Next.
4
On the following screen, leave both options ticked and click on Next, then highlight the
controller and click on Next again.
5
Finally, review the information offered on the final screen and click on Finish.
Control Name
Thumb button
Trigger
F1
F2
F3
F4
Shift
Axis (Thumb Wheel)
Hat Control
Default Action
DirectX 1
DirectX 2
DirectX 3
DirectX 4
DirectX 5
DirectX 6
DirectX 7
Axis
POV Hat
Adding Commands to the Profile
Game Mouse
1
In the Explorer mode you will now see a folder for the your new profile. Double-click on
the folder and you will see it open out to show 2 sub-folders - the Command List and
Saitek GM2.
2
Click on the folder called Saitek GM2 and a 3-D model of the controller will appear on
the screen.
3
If you place the mouse pointer on the 3-D model and hold down the left mouse button,
you can rotate the image.
4
Next, click on any control on the controller. You will see that the control turns blue
(indicating that it is ready for programming) and that the text boxes at the bottom of the
screen show its attributes (see the SGE diagram to see what each box denotes).
5
The long bar at the bottom of the screen is the Command Editor. Simply click on and
highlight the current keyboard setting and replace it by pressing the new keyboard
command. Note: If you look in the manual that came with your game, it will tell you what
keyboard commands are associated with what actions in the game.
WARNING: THE SGE AUTOMATICALLY SAVES THE CHANGES YOU MAKE WITHOUT
THE USE OF A SAVE BUTTON. THEREFORE, IF YOU MAKE A MISTAKE, SIMPLY HIGHLIGHT THE COMMAND LINE AND TYPE IN THE CORRECT ENTRY.
Control Name
Hat Control – Up
Hat Control – Right
Hat Control – Down
Hat Control - Left
Left Mouse Button
Right Mouse Button
Scroll Wheel
Default Action
DirectX 9
DirectX 10
DirectX 11
DirectX 12
Mouse Button 1
Mouse Button 2
Mouse Button 3
Technical Support
The Saitek Website
If you have access to an Internet connection, many of your technical queries may be answered
with a simple visit to the Saitek Website at:
http://www.saitek.com
For a full guide to programming your Saitek GM2 with SGE, see the Saitek Gaming
Extensions: User Manual supplied on the Saitek Product Companion CD that came with this
product.
The technical support area will provide you with all the information you need to get the most
out of your controller, solve any problems you might have and provide you with the latest
game configurations.
The site also contains regularly updated material including information about:
• Current and forthcoming products
• Links to useful sites
• Driver upgrades
• Game configuration
6 7
Contacting Saitek
If you do not have access to the Internet, or if the Website cannot answer your question, you
will need to contact your local Saitek Technical Team.
TROUBLE-SHOOTING
Problem
Solution
However, before contacting Technical Support, here are a few tips to help us to help you:
• Make sure you have followed all the steps shown in this manual
My computer is not recognizing the GM2 –
what’s wrong?
Check the cable connections. Turn off the
computer and then unplug your controller.
Plug it back in making certain that is
securely attached.
Can I have another game controller
connected to my PC at the same time?
To avoid potential problems and conflicts,
we recommend that you remove any
existing game controllers before installing
the GM2. Do this by selecting the
previously installed controller in the Game
Controllers window and clicking on
Remove.
I have plugged in my GM2 using the USB
connector and it has not been recognized
by the computer.
Your USB connection may not be enabled
within the computer. You can switch it on
via your computer’s BIOS settings (please
check the documentation that came with
your computer). If you are still unsure as to
what to do, contact Technical Support.
When I’m using the hat switch on the
mouse for moving around in games, if I
push the hat switch forward, I move left in
the game. Can I alter this?
The default commands for the hat switch
are the same as the arrow keys on the
keyboard. If you would like to change these
settings to suit your personal gaming
preferences, you can alter the commands
by using the Saitek Gaming Extensions
programming software. See Saitek Gaming
Extensions: User Manual on the CD.
• Check that the controller is correctly connected to your computer
• Confirm that your PC is functioning normally
At Saitek, we aim to offer a comprehensive and thorough technical support to all of our users.
So, before you call, follow the guidelines below to ensure that you have all of the information
necessary for us to help you.
1
Know the problem - make sure that you are clear about the problem you are
having and can describe events that made it happen
2
Check the Trouble-shooting guide – double-check that your problem is not
covered in the Trouble-shooting section of this manual.
3
Know your hardware - if it is possible, make sure you have the following
information to hand:
• The make and model of the computer you are using
• The motherboard you are using
• The version of the game you are playing
• The make and model of your sound card
4
Be ready - if possible, please try and ring whilst sitting at the computer with all the
relevant information and hardware to hand. If you are having a problem with a
particular game, make sure that you have that game loaded.
5
Be patient - we try our best to deal with queries as fast as we can. At times it may
be necessary to refer queries on to our specialist staff. Please be patient!
To contact your local Saitek Technical Support Centre, look up the relevant address on the
separate Saitek Support sheet that comes packaged with this product.
8 9