1
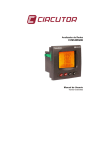
Power Analyzer
CVM-NRG96
User manual
Extended version
CVM-NRG96
Checks on receipt.
This manual assists in the installation and use of the CVM NRG 96 power analyzer so
that the best possible use can be gained from it. On receipt of the equipment check
the following:
• The equipment corresponds to the specifications in your order.
• Check that the equipment has not been damaged during delivery.
• Check that it has the correct instruction manual.
For safety reasons it is essential that anyone installing or
handling the CVM NRG 96 follow the usual safety procedures
as well as the specific warnings in this instruction manual.
Installing and maintenance for this analyzer must be carried
out by a qualified person.
TABLE OF CONTENTS
COMPLETO_NRG96_ING
2
CVM-NRG96
General features
………………
page
4
Installation and start-up
Power supply voltage
Maximum voltage in the measurement circuit
Maximum admissible current
Features of the transistor
Operating conditions
Safety
………………
………………
………………
………………
………………
………………
………………
page
page
page
page
page
page
page
6
6
7
7
7
7
7
Connection diagrams
………………
page
9
Operation
………………
page
13
Setting menus
………………
page
14
Programming SETUP Measurement
………………
Status of Setup Measurement
………………
Simple or compound voltages
………………
Transformation ratios
………………
Programming the power demand meter
………………
Programming the main page and preferred energy
…..……
Backlight (Back-lighting of the display)
………………
Deletion of Energy meters
………………
Programming THD or d
………………
Transistor digital output
………………
page
page
page
page
page
page
page
page
page
page
15
15
16
16
18
19
20
21
21
22
Programming SETUP Communications
Setting communication parameters
Protection of SETUP measurement
………………
………………
………………
page
page
page
26
27
30
MODBUS protocol RTU
MODBUS memory map
RS485 connection
………………
………………
………………
page
page
page
31
32
35
FAQ’S (Frequently Asked questions)
………………
page
36
COMPLETO_NRG96_ING
3
CVM-NRG96
General features
The CVM-NRG 96 panel analyzer is a programmable measuring instrument; it offers
a series of options for using it, which may be selected from configuration menus on
the instrument itself. Before starting the analyzer carefully read sections: power
supply, connection and setting and select the most suitable form of operation in order
to obtain the required data.
The CVM-NRG 96 measures, calculates and displays the main
electrical parameters in three phase, balanced or unbalanced
industrial systems.
Measurements are taken in true effective value using the three
alternating voltage inputs and three current inputs to measure 5
A secondaries from external measurement toroids.
With its processor, the measurement station allows simultaneous
analysis of:
MAGNITUDE
Simple Voltage
Compound voltage
Current
Frequency
Active power
Reactive Power L
Reactive Power C
Apparent Power
Power Factor
Cos ϕ
Maximum Demand
Neutral Current
Voltage THD
Current THD
kWh (consumption and generation)
kvarh.L (consumption and generation)
kvarh.C (consumption and generation)
kVAh (consumption and generation)
Harmonic decomposition (V and A) *
(•)
( •• )
(*)
UNIT
L1
L2
L3
III
V
V
A
Hz
kW
kvarL
kvarC
kVA
PF
Cos ϕ
Pd
IN
% THD – V
% THD – A
W·h
W·h
W·h
W·h
%
•
•
•
•
•
•
•
•
•
•
•
•
•
••
•
•
•
•
•
•
•
•
•
•
•
•
•
•
•
•
•
•
•
•
•
•
•
•
•
•
•
•
•
15th
Available through display and communications.
Only available through communications.
Harmonic decomposition in model HAR.
COMPLETO_NRG96_ING
4
CVM-NRG96
The CVM-NRG 96 allows the display of all electrical parameters shown above, using
the back-lit LCD display, showing 4 instant electrical parameters, maximum or
minimum on each page jump.
Other features:
Small sized instrument (96x96x50).
Measurement in true effective value.
Instant, maximum, minimum values for each parameter.
Energy measurer function.
- 1 GW·h in consumed energy.
- 100 MW·h in generated energy.
Backlit LCD display.
RS485 communications (Modbus RTU®) included.
Available models:
CVM-NRG96
CODE
CVM-NRG96
CVM-NRG96-ITF
CVM-NRG96-ITF-RS485-C
CVM-NRG96-ITF-RS485-C-HAR
CVM-NRG96-ITF-Plus-RS485-C
M51800
M51900
M51911
M51B11
M51A11
COMPLETO_NRG96_ING
5
CVM-NRG96
Installation and start-up
This manual contains information and warnings that must be followed by the user to
ensure the safe operation of the equipment and to maintain it in a safe condition. The
analyzer must not be switched on until it is finally attached to the electrical board.
IF THE EQUIPMENT IS HANDLED IN A WAY NOT SPECIFIED BY THE
MANUFACTURER, THE EQUIPMENT'S PROTECTION MAY BE COMPROMISED
When it is likely that the equipment has lost its protection (with visible damage), it
must be disconnected from the auxiliary supply. In this event, contact a qualified
technical service representative.
Installing the equipment
Check the following points before switching the equipment on:
a)
b)
c)
d)
e)
f)
Power supply voltage.
Maximum voltage in the measurement circuit.
Maximum admissible current.
Features of the transistor (digital output).
Operating conditions.
Safety.
A.
Power supply voltage
Standard version:
- Power supply
- Frequency
- Power supply tolerance
- Connection board
- Consumption of the equipment
:
:
:
:
:
230 V AC.
50-60 Hz
-15% / +10%
Terminals 1-2 (Power Supply)
5 V·A
:
:
:
:
85…265 V AC. // 95…300 V DC.
50-60 Hz
Terminals 1-2 (Power Supply)
5 V·A
Version Plus:
- Power supply
- Frequency
- Connection board
- Consumption of the equipment
COMPLETO_NRG96_ING
6
CVM-NRG96
B.
C.
Maximum voltage in the measurement circuit:
- Voltage
:
- Frequency
:
Maximum admissible current:
- Current
D.
:
Opto-isolated Transistor /Open Collector
24 V.DC.
50 mA
5 pulses / second
100 m.secs.
Operating conditions:
- Operating temperature
- Relative humidity
- Altitude
F.
External transformers In /5A.
Transistor features(output):
- NPN Type
:
- Maximum operating voltage:
- Maximum operating current:
- Maximum frequency
:
- Pulse length
:
E.
300 V ∼AC. phase-neutral
520 V ∼AC. phase-phase
45…65 Hz
:
:
:
-10 ºC / +50ºC
5 to 95 % HR (without condensation)
up to 2,000 metres
Safety:
- Designed for category III installations 300 V ∼AC. (EN 61010).
- Protection against electric shock by class II double isolation.
Installation
+0.8
+0.8
Installation for the equipment is by panel(panel drill 92
x 92
m.m., according to
DIN 43 700). All connections must remain inside the electrical board.
Bear in mind that when the equipment is connected, the terminals may be
dangerous if touched. Opening covers or removing parts may access parts
which are dangerous if touched. The equipment must not be used until it is
fully installed.
The equipment must be connected to a power supply circuit protected with gl (IEC
269) or type M fuses between 0.5 and 2 A. It must have an overload/short circuit
switch or equivalent device in order to disconnect the equipment from the power
supply. The power supply circuit and the voltage measurement circuit is connected
2
with a cable with a minimum cross section of 1 mm .
The secondary line for the current transformer shall have a minimum cross section of
2
2.5 mm .
COMPLETO_NRG96_ING
7
CVM-NRG96
Terminal list
1
2
8
Note:
3
9 10 11
4
5
6
7
12 13 14 15 16 17
No. Terminal description
1
Power supply voltage input
2
Power supply voltage input
3
Transistor output RL1
4
Transistor output RL2
5
6
RS-485 ( + )
7
RS-485 ( GND )
8
Measurement VL1
9
Measurement VL2
10
Measurement VL3
11
Neutral measurement
12
Current input AL1 – S2
13
Current input AL1 – S1
14
Current input AL2 – S2
15
Current input AL2 – S1
16
Current input AL3 – S2
17
Current input AL3 – S1
RS-485 ( - )
Internally terminals 13, 15 and 17 are joined to terminal 6 (Neutral).
The current inputs... / 5 A are isolated in model ITF.
COMPLETO_NRG96_ING
8
CVM-NRG96
Connection diagrams
A.
Three phase system measurement with 4 wire connection (Low Voltage) and
three external current transformers.
Power supply AC. // Version Plus DC.
Power supply “Plus”
Terminal
Description
1
+ V DC.
- V DC.
2
COMPLETO_NRG96_ING
9
CVM-NRG96
B.
Three phase system measurement with 3 wire connection (Low Voltage) and
three external current transformers.
Power supply AC. // Version Plus DC.
COMPLETO_NRG96_ING
10
CVM-NRG96
C.
Three phase system measurement with 3 wire connection using 2 transformers
and three external current transformers.
Power supply AC. // Version Plus DC.
COMPLETO_NRG96_ING
11
CVM-NRG96
D.
Three phase system measurement with 3 wire connection using 2 voltage
transformers and two external current transformers.
Power supply AC. // Version Plus DC.
COMPLETO_NRG96_ING
12
CVM-NRG96
Operation
Generic functions of the front keypad:
Key Reset:
Starting the equipment.
Deletion of Maximum and Minimum values.
This is equivalent to starting the equipment in the absence of
voltage.
set
ore
Key Display:
Displaying all variables by repeated presses.
Function key in set-up menu: pressing the Display key moves
forward through different screens, both on the configuration menu
and the communications menu.
In runtime mode, a long press (keeping the key pressed for 2
seconds), displays the energy meters:
Active Energy
Reactive Inductive Energy
Reactive Capacitive Energy
Apparent energy
Active energy
Inductive Reactive Energy
Reactive Capacitive Energy
Apparent Energy
Consumed
Consumed
Consumed
Consumed
Generated
Generated
Generated
Generated
Key Max and Min:
Display of maximums or minimums for each variable displayed; this
function is only valid while the key is being pressed. Once it is
stopped being pressed the instant values appears again after five
seconds.
Function keys in set-up menu: the MIN key selects the code or
parameter to be changed and the MAX key assigns the
corresponding code and/or variable.
max
min
COMPLETO_NRG96_ING
13
CVM-NRG96
Configuration Menu
TheCVM-NRG96 analyzer has two configuration menus:
1.
MEASUREMENT SETUP:
from this menu, the user can set the measurement parameters and the
analyzer's different display options.
-
2.
Measurement Setup Status (locked or unlocked)
Simple or compound voltages
Transformation ratios
Power Demand Meter Setting
Main page and preferred energy setting
Backlight (Backlit display)
Deletion of Energy meters
COMMUNICATIONS SETUP:
Configures the communication parameters: speed, parity, stop bits, etc; it
also accesses the locking menu using a password in the measurement SET
UP.
-
Communication parameters setting
Protection of measurement SETUP.
COMPLETO_NRG96_ING
14
CVM-NRG96
Setting MEASUREMENT SETUP
The parameters for the CVM-NRG 96 and all its functions are displayed and changed
from this menu (according to type); it may start the eight energy meters and return
maximum demand to zero (Pd), maximums and minimums recorded.
The analyzer does not store the changes to the settings until the whole setting
program has been completed. If it is RESET before the end of the setting process, the
configuration entered is not stored in the memory.
To access MEASUREMENT SETUP the MAX and MIN keys have to
pressed at the same time until setting mode is entered.
On entering setting mode the message "M?NOJ{ ohfi", or as a default "M?NOJ{
fi]" is displayed for a few seconds indicating that we are in setting and informing of
their status (locked or unlocked).
M?NOJ{ohfi{
On entering setting mode it is possible to see and change the setting.
M?NOJ{fi]{
On entering setting mode it is possible to see the setting but not possible to
change it.
Once in MEASUREMENT SETUP using the keypad, it is possible to select the
different options and enter the variables:
The keypad functions to carry out the setting are as follows:
The
key enters the data and moves on to the following menu.
The MAX key allows the selection of the different options in the menu or
increases a digit in the event that a variable has been entered.
The MIN key is used to move the cursor among the digits.
COMPLETO_NRG96_ING
15
CVM-NRG96
1.
Simples or Compound Voltages
Simple Voltages
Compound Voltages
O+{
O+,{
O,{
O,-{
{O+
{O,
{O-
O-{
O-+
{O+,
{O,{O-+
To select one of the two display options, just press the MAX key and the two
options will alternate.
Once the required option is selected, press the
key to enter the data and
access the next setting step moving on to the next setting step.
2.
Transformation Ratios
Transformer voltage primary
The display shows “m_n{ Oifn{ Jlf followed by three digits; these
allow the setting of the transformer voltage primary.
{{M_n
{{Oifn
{{JlC
*****+
To write or change the value of the transformer primary value repeatedly
press the MAX key increasing the value of the digit which is flashing at the
time.
When the required value is on the screen, move on to the following digit by
pressing MIN, to allow the remaining values to be changed.
When the last digit has been changed, press MIN to move back to the first
digit, allowing the previously set values to be changed again.
To enter the data and access the next setting step, press
.
COMPLETO_NRG96_ING
16
CVM-NRG96
Transformer Voltage Secondary
The display shows “m_n{ Oifn{ M_] followed by three digits; these
allow the setting of the transformer voltage secondary.
{M_n
{Oifn
{M_]
{{**+
To write or change the value of the transformer secondary value repeatedly
press the MAX key increasing the value of the digit which is flashing at the
time.
When the required value is on the screen, move on to the following digit by
pressing MIN, to allow the remaining values to be changed.
When the last digit has been changed, press MIN to move back to the first
digit, allowing the previously set values to be changed again.
To enter the data and access the following setting step, press
.
Transformer current primary
The display shows ”m_n{=oll{JlC” followed by five digits; these allow
the setting of the transformer current primary.
{M_n
{=oll
{JlC
****+
To write or change the value of the transformer primary value repeatedly
press the MAX key increasing the value of the digit which is flashing at the
time.
When the required value is on the screen, move on to the following digit by
pressing MIN, to allow the remaining values to be changed.
When the last digit has been changed, press MIN to move back to the first
digit, allowing the previously set values to be changed again.
To enter the data press
.
COMPLETO_NRG96_ING
17
CVM-NRG96
3.
Setting the Power Demand Meter
Magnitude to Integrate
The display shows “m_n{j^{=i^_” followed by two digits which identify
the code or variable to be integrated as Maximum Demand.
None
Three phase active power
Three phase apparent power
Three phase current
Current per phase
kW III
kV·A III
AIII
A1 - A2 - A3
**{
**{
+0{
{
+0
-.{
-.{
-0{
-0{
;'Jb{
Jb{
The MAX key allows the selection of the Maximum Demand variable to be
integrated.
Once selected to access the next setting step, press
.
Integration Period
The display shows “m_n{j^{J_l {`iffiq_^{\s{nqi{^cacnm{
qbc]b{ qcff{ c^_hnc`s{ nb_{ j_lci^{ i`{ chn_al[ncih{
`il{nb_{m_f_]n_^{g[ahcno^_({
{M_n
{J>
{J?l
{{{+/
To write or change the value of the integration period repeatedly press the
MAX key increasing the value of the digit which is flashing at the time.
When the required value is on the screen, move on to the following digit by
pressing MIN, to allow the remaining values to be changed.
When the last digit has been changed, press MIN to move back to the first
digit, allowing the previously set values to be changed again.
The integration period may vary between 1 to 60 minutes.
To enter the data and access the following setting step, press
.
COMPLETO_NRG96_ING
18
CVM-NRG96
Deletion of maximum Demand
The display shows “=fl{j^{hi {
(
{=fl
{J^
{S_m
{=fl
{j^
{hi
To select one of the two display options, just press the MAX key and the two
options will alternate.
Once the required option is selected, press the
key to enter the data and
access the following setting step.
4.
Setting the main page and preferred energy
Preferred page and fixed or rotating mode
The display shows ”m_n{^_`{j[3_{O[lm”.
{M?n
{^?@
{J;3?
{O;LM
Fixed page: Default value display when switched on or the CVM-NRG 96
started.
The MIN key has to be repeatedly pressed until the required default page
is displayed; to enter the page and access the following step the
key
has to be pressed.
Rotating page: Display of all electrical parameters using the automatic
rotation of the 12 screens in intervals of 5 seconds.
The MIN key has to be repeatedly pressed until all of the electrical
magnitudes flash; to enter the rotating function and access the following
key has to be pressed.
step, the
COMPLETO_NRG96_ING
19
CVM-NRG96
Preferred Magnitude of Energy
The display shows ”m_n{ ^_`{ j[3_{ ?h_l” and the Active Energy
symbol (kWh) flashes.
{M?n
{^?@
{J;3?
{?h_l
By repeatedly pressing the MAX key the required energy magnitude is
selected. This may be:
Magnitude of Energy
Active Energy
Inductive Reactive Energy
Capacitive Reactive Energy
Apparent Energy
Active Energy
Inductive Reactive Energy
Capacitive Reactive Energy
Apparent Energy
Direction
Consumption
Consumption
Consumption
Consumption
Generation (-)
Generation (-)
Generation (-)
Generation (-)
Once the energy has been selected press the
access the next setting step
5.
Symbol
kW·h
kvarL·h
kvarC·h
kVA·h
- kW·h
- kvarL·h
- kvarC·h
- kVA·h
key to enter the data and
Backlight (Backlit display).
Backlight timer
The display shows ”m_n{^cmj{i``”.
{M?n
{^Cmj
{{i``
{{{**
Indicates the screen protector time (in seconds), disconnecting the
Backlight.
COMPLETO_NRG96_ING
20
CVM-NRG96
**
*+{…{0*{
Backlight permanently on
Backlight on from 1 to 60 seconds.
These values(t), refer to the time from the last time the equipment was used
via the keypad.
6.
Deletion of Energy meters.
Deletion of the eight Energy meters
The display shows ”=fl{_h_l{hi”.
{=fl
{?h_l
{hi
{=fl
{?h_l
{s_m
To select one of the two display options, just press the MAX key and the two
options will alternate.
Once the required option is selected, press the
key to enter the data and
access the following setting step.
7.
Setting THd or d
Selecting Harmonic Distortion Analysis
The display shows ”m_n{b[l{nb^”.
{m_n
{B[l
{nB^
Thd %:
d %:
{m_n
{B[l
{^
Total value of harmonic distortion referred to the true effective value (RMS).
Total value of harmonic distortion referred to the fundamental value(RMS).
COMPLETO_NRG96_ING
21
CVM-NRG96
To select one of the two display options, just press the MAX key and the two
options will alternate.
Once the required option is selected, press the
key to enter the data and
access the following setting step.
8.
Digital output for the transistor.
The CVM-NRG96's digital output may set:
a.
Pulse per n kW.h or kvar.h (Energy): the value for the energy
consumed or generated may be set to generate a pulse.
b.
Alarm condition: associates a magnitude to a digital output, setting
a maximum, minimum and delay (delay) for the trip condition.
In the event that no variable needs to be set, put ** and enter using the
key.
The display shows ”Ion{O[l{=i^_”.
{Ion
{O[l
{=i^_
{{{**
Setting pulse per n kW·h or kvar·h
Energy code table:
Magnitude
Active Energy III
Inductive Reactive Energy III
Capacitive Reactive Energy III
Apparent Energy III
Active energy Generated III
Inductive Reactive Energy Generated III
Capacitive Reactive Energy Generated III
Apparent Energy Generated III
Symbol
Code
kW·h III
KvarL·h III
KvarC·h III
kVA·h III
kW·h III (-)
KvarL·h III (-)
KvarC·h III (-)
kVA·h III (-)
31
32
33
44
45
46
47
48
COMPLETO_NRG96_ING
22
CVM-NRG96
Once the energy code has been selected and entered using the
watts per pulse must be entered or as a default kilowatts per pulse.
key the
{Ion
{Jofm
{l[n_
**(***
Example:
***(/**
**+(/**
500 watts·h/pulse
1.5 kilowatts·h/pulse
To write or change the watts. hour/pulse, the MAX key has to be repeatedly
pressed, increasing the value of the digit flashing at the time.
When the required value is on the screen, move on to the following digit by
pressing MIN, to allow the remaining values to be changed.
When the last digit has been changed, press MIN to move back to the first
digit, allowing the previously set values to be changed again.
key to enter the data and
Once the required option is selected, press the
so finish the equipment configuration.
Setting alarm condition
Alarm code table per condition:
Magnitude
Simple Voltage
Current
Active Power
Reactive Power L/C
Power Factor
% THD V
% THD A
Simple Voltage
Current
Active Power
Reactive Power L/C
Power Factor
% THD V
% THD A
Phase
Symbol L1
L1
L1
L1
L1
L1
L1
L1
L2
L2
L2
L2
L2
L2
L2
V1
A1
kW 1
KvarL/C 1
PF 1
THD V1
THD A1
V2
A2
kW 2
KvarL/C 2
PF 2
THD V2
THD A2
Code
01
02
03
04
05
25
28
06
07
08
09
10
26
29
COMPLETO_NRG96_ING
23
CVM-NRG96
Magnitude
Simple Voltage
Current
Active Power
Reactive Power L/C
Power Factor
% THD V
% THD A
Magnitude
Phase
Symbol L1
Code
L3
L3
L3
L3
L3
L3
L3
V3
A3
kW 3
KvarL/C 3
PF 3
THD V3
THD A3
11
12
13
14
15
27
30
Symbol
Simple Voltages
Currents
Active Powers
Reactive Powers
Power Factors
Compound Voltages
% THD V
% THD I
Code
V1 / V2 / V3
A1 / A2 / A3
kW1 / kW2 / kW3
Kvar1 / kvar2 / kvar3
PF1 / PF2 / PF3
V12 / V23 / V31
Thd1 / Thd2 / Thd3 V
Thd1 / Thd2 / Thd3 A
Magnitude
Symbol
Code
Active Power III
Inductive Power III
Capacitive Power III
Active Energy
React. Energy Inductive
React. Energy Capacit.
Apparent Power III
Maximum Demand
Current III
Neutral Current
kW III
kvarL III
kvarC III
kW·h
Kvarh·L
Kvarh·C
kV·A III
Md (Pd)
AIII
IN
16
17
18
31
32
33
34
35
36
37
Magnitude
90
91
92
93
94
95
96
97
Symbol
cos ϕthree phase
Power Factor III
Frequency
L1- L2 Voltage
L2-L3 Voltage
L3-L1 Voltage
Maximum Demand L1
Maximum Demand L2
Maximum Demand L3
Code
cos ϕ
PF III
Hz
V 12
V 23
V 31
19
20
21
22
23
24
Md (Pd)
Md (Pd)
Md (Pd)
35*
42*
43*
* Variables only valid if the Maximum Demand for current has been set per phase.
There are also some variables which refer to the three phases at the same
time (Function OR). If one of these variables has been selected, the alarm
will go off when any of the three phases meet the preset conditions.
Magnitude
Simple Voltages
Currents
Active Powers
Reactive Powers
Power Factors
Compound Voltages
% THD V
% THD I
Symbol
Code
V1 / V2 / V3
A1 / A2 / A3
kW1 / kW2 / kW3
Kvar1 / kvar2 / kvar3
PF1 / PF2 / PF3
V12 / V23 / V31
Thd1 / Thd2 / Thd3 V
Thd1 / Thd2 / Thd3 A
90
91
92
93
94
95
96
97
COMPLETO_NRG96_ING
24
CVM-NRG96
Once the Alarm Condition code has been selected and the data entered
using the
key, the maximum value, minimum value and the delay
(hysteresis) for the alarm condition must be entered.
{Ion
{Bc
{***(*
-
{Ion
{Fi
{***(*
{Ion
{^_f[
{****
Hi:
Maximum value; transistor closed above this value.
Lo:
Minimum value; transistor closed below this value.
Delay: Delay in seconds from the connection and disconnection
of the transistor.
To write or change the maximum and minimum values, the MAX key has to
be pressed, increasing the value of the digit flashing at the time.
When the required value is on the screen, move on to the following digit by
pressing MIN, to allow the remaining values to be changed.
When the last digit has been changed, press MIN to move back to the first
digit, allowing the previously set values to be changed again.
In order to enter one of the data, press the
key moving on to the next
key must be pressed
setting step. Once the delay has been set, the
entering the data and ending the configuration.
MIN +
MAX +
max > min
MIN +
MAX +
max < min
MIN --
MAX +
MIN +
MAX --
MIN --
MAX -max > min
MIN --
MAX -max < min
ON
OFF
ON
======
0
Min
Max
OFF
ON
OFF
==============
0
Max
Min
ON
OFF
ON
=======
Min
0
Max
OFF
ON
OFF
=============
Max
0
Min
ON
OFF
ON
=====
Min
Max
0
OFF
ON
OFF
================
Max
Min
0
* The alarms depend on the preset values: MAXIMUM and MINIMUM
COMPLETO_NRG96_ING
25
CVM-NRG96
Setting COMMUNICATION SETUP *(Only for models with communication)
One or more CVM-NRG96 instruments may be connected to a computer or PLC in
order to automize a production process or an energy control system. As well as the
usual operation of each instrument, this system may centralize data at one single
point; for this reason the CVM-NRG96 has an RS-485 communication output.
If more than one instrument is connected to one single series line (RS-485), it is
necessary to assign to each a number or address (from 01 to 255) so that the central
computer or PLC sends the appropriate requests to these addresses for each
peripheral.
From communication SETUP, the CVM-NRG96's communication parameters may be
displayed and/or changed, this may match these parameters to the requirements of
the system topologies and/or applications.
The analyzer does not store the setting changes until all of the setting has been
finished. If it is RESET before the end of the setting, the configuration entered is not
stored in the memory.
To access COMMUNICATIONS SETUP the RESET key has to be pressed (until the
equipment starts) and then the MAX, MIN and
setting mode is entered.
keys have to be pressed until
On entering setting mode the message "M?NOJ{chc]" appears for a few seconds,
informing the user that the equipment has entered communications display or setting
mode.
Below the display shows “m_n{jlin{\om"
{M_n
{Jlin
{\om
Using this information screen, the equipment is informing the user that the
Communication Protocol via the RS-485 series port is standard MODBUS©.
key must be pressed.
To enter setting mode the
COMPLETO_NRG96_ING
26
CVM-NRG96
1.
Setting the communication parameters
Default settings (factory settings)
The display shows ”m_n{=^_`{hi”
{m_n
{=^_`
{hi
{M_n
{=^_`
{s_m
To select one of the two display options, just press the MAX key and the two
options will alternate.
m_n{=^_`{hi{
m_n{=^_`{S_m{
Personalized communication parameters.
Peripheral:
001
Transmission speed:
9,600 bps
Data bits:
8
Parity
No
Stop bits
1
Once the required option is selected, press the
access the following setting step.
key to enter the data and
If the selected option is “m_n{=^_`{S_m” the configuration screens refer
to: peripheral number, speed, data bits, parity and stop bits, are omitted
moving on to the last screen in the communication menu.
If the selected option is “m_n{=^_`{hi”:
Peripheral number
The display shows ”m_n{hj_l{**+”.
{M?n
{hj_l
{{**+
COMPLETO_NRG96_ING
27
CVM-NRG96
To write or change the number of the peripheral repeatedly press the MAX
key increasing the value of the digit which is flashing at the time.
When the required value is on the screen, move on to the following digit by
pressing MIN, to allow the remaining values to be changed.
When the last digit has been changed, press MIN to move back to the first
digit, allowing the previously set values to be changed again.
The peripheral number varies between 0 and 255 (0 and FF in hexadecimal)
To enter the data and access the following setting step, press
.
Transmission speed
The display shows ”m_n{\[o^{l[n_{30**”
{M?n
{\[o^
{l[n_
{30**
To vary the peripheral transmission speed repeatedly press MAX changing
the value of the different communications options.
Available speeds are: 1,200, 2,400, 4,800, 9,600 or 19,200 bps.
Once the required selection has been made, the next setting step is
key.
accessed by pressing the
Parity
The display shows ”m_n{j[lcns{hi”
{m_n
{J[lc
{ns
{hi
{M_n
{J[lc
{ns
{s_m
To select one of the two display options, just press the MAX key and the two
options will alternate.
COMPLETO_NRG96_ING
28
CVM-NRG96
Once the required option is selected, press the
access the following setting step.
key to enter the data and
Data Bits
The display shows ”m_n{^[n[{\cnm{2”
{M?n
{^[n[
{\cnm
{{{{2
This menu option is solely for information, because data bits cannot be
changed.
Then press the
key to enter the data and access the following setting
step.
Stop Bits
The display shows “m_n{mnij{\cnm{+”
{m_n
{mnij
{\cnm
{{{{+
{M_n
{mnij
{\cnm
{{{{,
To select one of the two display options, just press the MAX key and the two
options will alternate.
Once the required option is selected, press the
key to enter the data and
access the following setting step.
COMPLETO_NRG96_ING
29
CVM-NRG96
2.
Protection of measurement SETUP
The display shows “m_n{OJ{ohfi”
{m_n
{Oj
{ohfi
{M_n
{OJ
{Fi]
This menu option aims to protect the data set in the Measurement Setup.
As a default the equipment does NOT protect data with the “ohfi &{
ijncih{[h^{ \s{jl_mmcha{nb_{
e_s{ enters the data and
ends the configuration of the equipment.
If on the other hand the parmeters in Measurement Setup are to be
protected, the option “Fi]” has to be selected using the MAX key and then
the
key must be pressed. The protection password as a default will
always be +,-.;
+,-. any password code entered will be incorrect.
The display shows on the screen
{m_n
{Oj
{J;MM
{****
{M_n
{OJ
{J;MM
{+,-.
To write the protection password +,-.,
+,-. the MAX key has to be repeatedly
pressed, increasing the value of the digit flashing at the time.
When the required value is on the screen, move on to the following digit by
pressing MIN, to allow the remaining values to be changed.
When the last digit has been changed, press MIN to move back to the first
digit, allowing the previously set values to be changed again.
key must be pressed,
Once the password protection has been set, the
entering the data and ending the configuration of the equipment.
In the event that the measurement SETUP parameters are to be changed
again, the equipment has to be first unlocked by the same procedure
(position fi] and the appropriate changes are made.
COMPLETO_NRG96_ING
30
CVM-NRG96
MODBUS© Protocol
The CVM-NRG96 power analyzers communicate by using MODBUS© protocol,
described below:
In the MODBUS protocol the RTU (Remote terminal Unit) mode is used; each 8-bit
byte in a message contains two 4-bits hexadecimal characters.
The format for each byte in RTU mode
Code
Bits per byte
Field Check-Error
8 bit binary, hexadecimal 0-9, A-F
2 hexadecimal characters contained in each 8-bit
field in the message.
8 data bits
CRC Type (Cyclical Redundancy Check)
Modbus functions used
Function 01
Reading the status of the relays
Function 03 and 04
Reading n Words (16 bits-2 bytes). Function used for
reading the electrical parameters that the CVM-NRG96 is
measuring. All electrical parameters are long with 32 bits,
because of this two Words are required to request each
parameter.
(4 bytes - XX XX XX XX)
Function 05
Writing a relay.
COMPLETO_NRG96_ING
31
CVM-NRG96
MODBUS© memory map
MODBUS VARIABLES
Magnitude
Symbol
Instant
Maximum
Minimum
Unit
Voltage Phase
Current
Active Power
Reactive Power
Power Factor
Voltage Phase
Current
Active Power
Reactive Power
Power Factor
Voltage Phase
Current
Active Power
Reactive Power
Power Factor
V L1
A L1
kW L1
Kvar L1
PF L1
V L2
A L2
kW L2
Kvar L2
PF L2
V L3
A L3
kW L3
Kvar L3
PF L3
00-01
02-03
04-05
06-07
08-09
0A-0B
0C-0D
0E-0F
10-11
12-13
14-15
16-17
18-19
1A-1B
1C-1D
60-61
62-63
64-65
66-67
68-69
6A-6B
6C-6D
6E-6F
70-71
72-73
74-75
76-77
78-79
7A-7B
7C-7D
C0-C1
C2-C3
C4-C5
C6-C7
C8-C9
CA-CB
CC-CD
CE-CF
D0-D1
D2-D3
D4-D5
D6-D7
D8-D9
DA-DB
DC-DD
V x10
mA
w
w
x 100
V x10
mA
w
w
x 100
V x10
mA
W
W
x 100
Active Power III
Inductive Power III
Capacitive Power III
Cos φ III
Power Factor III
kW III
KvarL III
KvarC III
Cos φ III
PF III
1E-1F
20-21
22-23
24-25
26-27
7E-7F
80-81
82-83
84-85
86-87
DE-DF
E0-E1
E2-E3
E4-E5
E6-E7
w
w
w
x 100
x 100
Frequency
Voltage Line L1-L2
Voltage Line L2-L3
Voltage Line L3-L1
% THD V L1
% THD V L2
% THD V L3
% THD A L1
% THD A L2
% THD A L3
Hz
V12
V23
V31
%THD VL1
%THD VL2
%THD VL3
%THD AL1
%THD AL2
%THD AL3
28-29
2A-2B
2C-2D
2E-2F
30-31
32-33
34-35
36-37
38-39
3A-3B
88-89
8A-8B
8C-8D
8E-8F
90-91
92-93
94-95
96-97
98-98
9A-9B
E8-E9
EA-EB
EC-ED
EE-EF
F0-F1
F2-F3
F4-F5
F6-F7
F8-F9
FA-FB
Hz x 10
V x10
V x10
V x10
% x 10
% x 10
% x 10
% x 10
% x 10
% x 10
KvaIII
Md (Pd)
A_AVG
In
Md (Pd)
Md (Pd)
42-43
44-45
46-47
48-49
52-53
54-55
A2-A3
A4-A5
A6-A7
A8-A9
B2-B3
B4-B5
102-103
104-105
106-107
108-109
112-113
114-115
w
w/VA/mA
mA
mA
mA
mA
Apparent Power III
Maximum Demand
Three Phase Current (average)
Neutral Current
Maximum Demand A2
Maximum Demand A3
COMPLETO_NRG96_ING
32
CVM-NRG96
MODBUS VARIABLES
Magnitude
Active Energy
Inductive Reactive Energy
React. Energy Capacitive
Apparent Energy
Active energy Generated
Inductive energy generated
Capacit. Energy Generated
Apparent Energy Generated
Symbol
Instant
kW·h III
kvarL·h III
kvarC·h III
kVA·h III
kW·h III (-)
kvarL·h III (-)
kvarC·h III (-)
kVA·h III (-)
3C-3D
3E-3F
40-41
56-57
58-59
5A-5B
5C-5D
5E-5F
Maximu
m
9C-CD
9E-9F
A0-A1
B6-B7
B8-B9
BA-BB
BC-BD
BE-BF
Minimu
m
FC-FD
FE-FF
100-101
116-117
118-119
11A-11B
11C-11D
11E-11F
*Recordings available in HAR model
MODBUS VARIABLES
Magnitude
L1
L2
2AE-2AF
2B0-2B1
2B2-2B3
2B4-2B5
2B6-2B7
2B8-2B9
2BA-2BB
2BC-2BD
2BE-2BF
2C0-2C1
2C2-2C3
2C4-2C5
2C6-2C7
2C8-2C9
CA-CB
2CC-2CD
2CE-2CF
2D0-2D1
2D2-2D3
2D4-2D5
2D6-2D7
2D8-2D9
2DA-2DB
2DC-2DD
2DE-2DF
2E0-2E1
2E2-2E3
2E4-2E5
2E6-2E7
2E8-2E9
Symbol
Harmonic decomposition in VOLTAGE
RMS Current
Harmonic 2
Harmonic 3
Harmonic 4
Harmonic 5
Harmonic 6
Harmonic 7
Harmonic 8
Harmonic 9
Harmonic 10
Harmonic 11
Harmonic 12
Harmonic 13
Harmonic 14
Harmonic 15
V
A
w·h
w·h
w·h
w·h
w·h
w·h
w·h
w·h
L3
Unit
2EA-2EB
2EC-2ED
2EE-2EF
2F0-2F1
2F2-2F3
2F4-2F5
2F6-2F7
2F8-2F9
2FA-2FB
2FC-2FD
2FE-2FF
300-301
302-303
304-305
306-307
Vx10
%
%
%
%
%
%
%
%
%
%
%
%
%
%
230-231
232-233
234-235
236-237
238-239
23A-23B
23C-23D
23E-23F
240-241
242-243
244-245
246-247
248-249
24A-24B
24C-24D
mA
%
%
%
%
%
%
%
%
%
%
%
%
%
%
Instant
Harmonic decomposition in CURRENT
RMS current
Harmonic 2
Harmonic 3
Harmonic 4
Harmonic 5
Harmonic 6
Harmonic 7
Harmonic 8
Harmonic 9
Harmonic 10
Harmonic 11
Harmonic 12
Harmonic 13
Harmonic 14
Harmonic 15
Unit
Instant
1F4-1F5
1F6-1F7
1F8-1F9
1FA-1FB
1FC-1FD
1FE-1FF
200-201
202-203
204-205
206-207
208-209
20A-20B
20C-20D
20E-20F
210-211
212-213
214-215
216-217
218-219
21A-21B
21C-21D
21E-21F
220-221
222-223
224-225
226-227
228-229
22A-22B
22C-22D
22E-22F
COMPLETO_NRG96_ING
33
CVM-NRG96
Example of a MODBUS© question
QUESTION
0A 04 00 00 00 0A 71 76
0A
04
00 00
00 0A
71 76
Peripheral number, 10 in decimal
Reading function
Record at which the reading is to start
Number of recording to be read: 10 in decimal
CRC Character
RESPONSE
0A 04 14 00 00 08 4D 00 00 23 28 00 00 0F A0 00 00 00 90 00 00 00 60 CB 2E
0A
Number of the peripheral that is responding, 10 in decimal
04
14
00 00 08 4D
00 00 23 28
00 00 0F A0
00 00 00 90
00 00 00 60
CB 2E
Reading function- the one used in the question
Number of bytes received (20).
V1x 10 (record 00 Hex) with value in decimal 212.5 V
mA 1, in decimal 9000 mA
W 1, in decimal 4000 W
varL 1, in decimal 144 varL
PF1 x 100, in decimal 96
CRC Character
*Each Modbus frame has a maximum limit of 20 variables (40 recordings).
COMPLETO_NRG96_ING
34
CVM-NRG96
Connection for the RS485 BUS
The composition of the RS-485 cabling must be carried out with a meshed
screen cable (minimum 3 wire) with a maximum distance of 1,200 metres
between the CVM-NRG96 and the master unit. This Bus may connect a
maximum of 32 CVM-NRG96 analyzers.
RS-232
5
DB-9
A2
5
7
7
3
2
3
2
PC
A1
RS-232 / RS-485
CONVERTIDOR
CONVERTER
RS-232
/ RS-485
5
2
1
5
2
RS-485
1
A (+)
B (-)
C GND
CVM-NRG 96
For communication with the master unit, the RS-232 to RS-485 System Protocol
Intelligent Converter has to be used (M54020 Intelligent Converter). This
converter does not require the 7 Pin connection in the RS232 part.
COMPLETO_NRG96_ING
35
CVM-NRG96
FAQ’s
1.
The CVM-NRG96 analyzer, once cabled and connected is seen to give a
correct voltage and current reading, but shows negative values for active
power (generation).
This is an error with the cabling for the current transformer secondaries; the
direction of the transformer current has to be respected as shown in the
connection diagram. The current transformers have a two face primary; the
current must pass from P1 to P2 giving the result in secondary (S1 and S2) of
5 amps.
The error stems from:
a)
b)
2.
The current transformers have been incorrectly installed. As a
result it gives the direction of the current as passing from P2 to P1;
to resolve this problem, the current transformer does not have to be
dismantled and installed again, but the transformer secondary (S1
and S2) just has to be inverted.
The connection of the current secondaries in the current
transformers have been incorrectly connected; to resolve this
problem just connect the S1 transformer secondary to the S1 on
the analyzer and the S2 on the current transformer to the S2 on the
analyzer.
The CVM-NRG96 analyzer, once cabled and connected, is seen to give an
incoherent Power factor and Cos φ III reading (-0.01 or similar).
This is again a current transformer and voltage phase connection error phase
L1 (R), must correspond to the current transformer installed in phase L1 (R);
phase L2 (S), must correspond to the current transformer installed in phase L2
(S); and phase L3 (T), must correspond to the current transformer installed in
phase L3 (T).
This connection is clearly shown on the back of the analyzer.
COMPLETO_NRG96_ING
36
CVM-NRG96
3.
The CVM-NRG96 analyzer does not correctly display the current reading. It
shows values varying between 0 to 5 amps of current.
Ensure that the Transformer Primary ratio has been correctly set; once
correctly set the current measurement shall be shown correctly extrapolated to
primary (see section on transformer ratios).
4.
The CVM-NRG96 analyzer is measuring in average voltage and is displaying
the secondary voltage (for example 110 volts).
Ensure that the Primary and Secondary voltage ratio has been correctly set
(see section on transformer ratios).
5.
The CVM-NRG96 analyzer does not respond to communications requests; it
does not communicate.
Ensure that the equipment's communication parameters have been correctly
set as well as the peripheral number (0 to FF).
6.
The CVM-NRG96 analyzer is connected to the Power Studio System and it
does not communicate with the PC.
Ensure that the analyzer has been set with a Bus speed of 19,200 bauds.
COMPLETO_NRG96_ING
37
CVM-NRG96
CIRCUTOR, SA
Vial Sant Jordi, s/n
08232 Viladecavalls
BARCELONA
SPAIN
Tel. +34 93.745.29.00
Fax. +34 93.745.29.14
web: http://www.circutor.com
e-mail: [email protected]
Technical assistance:
After sales department
Vial Sant Jordi, s/n
08232 Viladecavalls
BARCELONA
SPAIN
e-mail: [email protected]
COMPLETO_NRG96_ING
38