1
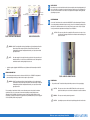
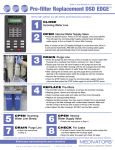
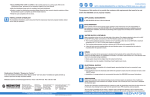
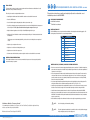
Gauge #1 Gauge #2 Water Outlet
To DSD Edge
Water Inlet:
From main water supply
✍
✍
•
4
DSD-201 DSD-201 Installation and testing Instructions
Unit set-up
Move the reprocessor to the installation location before removing the protective packaging material. If
this is not possible, use a hand truck or moving dolly and ensure the reprocessor is not damaged. The
reprocessor must be installed on a level surface or be adjusted to level. Adjust the leveling pads after
unpacking 6.
the reprocessor.
System Drain
Connect the 1” drain elbow to the rear drain of the DSD-201. The elbow threads
require Teflon tape.
Housing 1
Contains 1 micron filter
FIGURE 1. FILTRATION SYSTEM DIMENSIONS
5
Gauge #3
Housing 2
Contains 0.45 micron filter
6
SYSTEM DRAIN
Connect the drain tube provided with the reprocessor (36 inches of 1-inch diameter
Connect the 1” drain
elbow
to the
the DSD
require of
Teflon
clear
tubing)
torear
the drain
drain of
elbow.
TheEdge.
drain The
tubeelbow
must threads
have 3 inches
droptape.
(7.5 cm)
greater
overwith
thethe
36-inch
length.(36
Consult
maintenance
Connect the drain or
tube
provided
reprocessor
inchesyour
of 1-inch
diameter department
clear tubing)for
to the
multiple
installation.
drain elbow. The drain
tube reprocessor
must have 3 inches
of drop (7.5cm) or greater over the 36” (91cm) length.
Consult your maintenance department for multiple reprocessor installation.
✍
FIGURE 2. FILTRATION SYSTEM
Caution: The reprocessor drain relies on gravity flow. There must be no low
CAUTION: The reprocessor drain relies on gravity flow. There must be no low spots or loops
spots or loops in the drain line. Fluid trapped in the drain line will
in the drain line. Fluid trapped in the drain line will interfere with free drainage and
interfere with free drainage and reprocessor function.
reprocessor function.
WARNING: DO NOT over-tighten filter housings (hand-tighten only). Over tightening will result in
failure of the pre-filter components, which can lead to flooding or water leaks.
Plumbing fittings should be hand tightened followed by one complete turn with the
appropriate wrench.
NOTE:
If the water supply line is brought in from the opposite side of the system inlet, run it
behind the machine close to the floor so that the disinfector can be flush against the
wall with the water line running through the base recess.
Install the regulator (supplied in DSD Edge accessory kit) between the filter assembly and the DSD
Edge.
REGULATOR SET-UP
• The external regulator water pressure is set between 35-40 PSI (2.40 – 2.75 BAR). This adjustment is
performed during the flushing cycle after the unit is ready for cycle verification.
✍
WARNING: DO NOT over-tighten water filter housings (hand-tighten only). Over tightening will
result in failure of the pre-filter components, which can lead to flooding or water leaks.
Plumbing fittings should be hand tightened followed by one complete turn with the
appropriate wrench.
The accumulation of particulates in a filter can cause the water pressure to drop below the minimum
required level. This can occur every two to three months, depending on water quality. A pressure
differential of 5 PSI (0.35 BAR) or greater between gauges on each side of a filter indicates a need for
replacement. For example, if the pressure on gauge #2 is 35 PSI (2.41 BAR) when the pressure on gauge #1
is 40 PSI (2.75 BAR), a filter change is required.
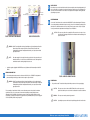
figure 3. Sample of a drain installation
7
ELECTRICAL
•
Plug cord into outlet. The outlet should be placed within operators reach for easy unplugging.
✍
✍
✍
CAUTION:
The reprocessor does not have an ON/OFF switch. Be sure the reprocessor is
7.
Electrical
positioned so that the power cord or main circuit breaker is accessible at all times.
Caution: The reprocessor does not have an on/off switch. Be sure the
reprocessor is positioned so that the power cord or main circuit breaker
WARNING: The reprocessor
must beat
protectively
is accessible
all times. grounded.
CAUTION:
Operating the reprocessor without a hook-up fitting may blow the slow blow fuse.
Document Number MI02-0160 Revision D
Endoscope reprocessing the way it should be
Page 4 of 5
MEDIVATORS