1
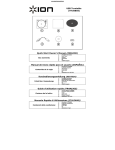
Sonneteer Sedley Phono Stage Instruction Manual Original and USB models Introduction Thank you for purchasing the new Sonneteer Sedley MM/MC phono stage. For your safety and proper operation of your system, please take time to read this manual fully before installing and operating the phono stage. Safety notice DANGER! HIGH VOLTAGE! RISK OF ELECTRIC SHOCK! Lethal voltages are present inside the unit. Always unplug the amplifier completely from mains outlet before connecting or disconnecting anything. No user-serviceable parts inside. Please refer all servicing to qualified service agents. Never expose the unit to water, moisture, extreme cold or direct sunlight. It is advisable to unplug the unit from the mains when a thunderstorm is expected. Cleaning your Sedley Always unplug the unit from mains before cleaning the unit. Do not use solvents of any kind to clean the unit, only use a soft-dry cloth. Sonneteer reserves the right to change specifications without prior notice. The contents of this box: Sonneteer Sedley User Manual Sedley phono stage and Mains power cord. Instruction Manual Instruction Manual USB Cable (USB Version) Software CD (USB Version) Rear panel connections Earth Tag R output Input L Output USB AC IN ON DIP SWITCHES FOR EACH CHANNEL AC IN: Connect to mains outlet. (Do this after all connections to the amplifier and the turn-table have been made and checked) ON: Mains ON/OFF switch. To avoid “pop” noises, the Sedley should be switched FIRST ON, LAST OFF in your system, or make sure that your amplifier volume is turned down when switching your Sedley ON or OFF, or when adjusting the DIP switches. USB (option): USB port for connection with computer for playback or backing up records. Input: Connect the outputs from your turntable to these 2 connectors. L/R Output: Connect this out to an input of your amplifier (not PHONO). Earth Tag: Most turntables have an earth connection to connect here for possible “hum” reduction. We recommend you to try this connection for “hum” reduction. DIP switches: Use these switches to set up correct matching for your cartridge, please see the next section. DIP Switches Please note: Right Channel switches are MIRRORED to LEFT Channel switches ! Switches shown in UP position! Please note: The two banks of DIP switches mirror one another (i.e. Left 1 = Right 10 and Left 10 = Right 1). To adjust your DIP switch settings: Please refer to your cartridge specifications for setup information. Please switch off your amplifier and the Sedley before commencing with the setup. We recommend the use of a small flat blade screwdriver for setting up the DIP switches (please do not use a pen or sharp knife as this will damage the switches). We also recommend that you adjust your DIP switches on one channel first before adjusting the other channel. RIGHT CHANNEL DIP SWITCHES: Switch 1 2 3 4 5 6 7 8 9 10 Function RIAA/IEC MM/MC 220pF 100pF 10pF 47pF 220 100 47 1k Switch position Up = IEC Warp Filter selected, Down = RIAA selected Up = MC (High Gain), Down = MM (Low Gain) Capacitance loading, Down = selected Capacitance loading, Down = selected Capacitance loading, Down = selected Capacitance loading, Down = selected Resistive loading, Down = selected Resistive loading, Down = selected Resistive loading, Down = selected Resistive loading, Down = selected LEFT CHANNEL DIP SWITCHES: Switch 1 2 3 4 5 6 7 8 9 10 Function 1k 47 100 220 47pF 10pF 100pF 220pF MM/MC RIAA/IEC Switch position Resistive loading, Down = selected Resistive loading, Down = selected Resistive loading, Down = selected Resistive loading, Down = selected Capacitance loading, Down = selected Capacitance loading, Down = selected Capacitance loading, Down = selected Capacitance loading, Down = selected Up = MC (High Gain), Down = MM (Low Gain) Up = IEC Warp Filter selected, Down = RIAA selected FOR MM Cartridge setup: For all MM cartridges, 47k resistive loading is required, in this case leave all resistive loading switches in the UP position (47k resistive loading is then automatically selected). FOR MC Cartridge setup: For all MC cartridges, we recommend that for resistive loading you begin with 1k loading selected only (or consult with your cartridge manufacturer). Setting your Capacitive Loading: For Capacitive setup, start with the recommended setting from your cartridge manufacturer, if the sound is too soft or warm, try reducing the capacitve loading. Conversely, if the sound is too hard or bright, you may try to increase the capacitive loading (we recommend that you don’t set this value at zero capacitance). Setting your RIAA/IEC setting: For best performance, the RIAA switch should be left in the DOWN position, unless you are experiencing too much “cone flap” due to warped records. Note on the MM/MC Gain setting: The MM/MC is purely a GAIN setting, MC is High Gain and MM is Low Gain. If you have a low output MM cartridge, you can increase the phono GAIN by setting the MM/MC switch to the UP position for more volume output. Setting the other channel: Please check the Left Channel setting is a MIRROR copy of the Right Channel! Setup examples View of back panel from rear Below we have provided some standard DIP switch default settings for your reference. For MM (Moving Magnet) cartridges: Setting 1: RIGHT Channel : LEFT Channel : Switch 1 and 6 DOWN, remaining switches UP. Switch 5 and 10 DOWN, remaining switches UP. Setting 2: RIGHT Channel : LEFT Channel : Switch 1 and 3 DOWN, remaining switches UP. Switch 8 and 10 DOWN, remaining switches UP. Note: If the sound volume is too high, the please set the GAIN setting to MM to give a lower output (Right switch 2 and Left switch 9 DOWN). For MC (Moving Coil) cartridges: Setting 1: RIGHT Channel : LEFT Channel : Switch 1, 6, 10 DOWN, remaining switches UP. Switch 1, 5, 10 DOWN, remaining switches UP. Setting 2: RIGHT Channel : LEFT Channel : Switch 1, 4, 10 DOWN, remaining switches UP. Switch 1, 7, 10 DOWN, remaining switches UP. Please note: These are only some standard examples, we recommend that you try these to start off with. Please remember the First ON – LAST OFF rule when switching the phono stage OFF or ON to avoid “pop” noises. After switching on the phono stage, we recommend that you allow the unit to have approximately 1 minute to settle down. USB Option: With the USB option fitted, the USB port allows you to connect your computer to the Sedley via the supplied USB cable. With the computer connected to the Sedley you can then: 1. Use your computer to back up your favourite LP’s and the transfer your music files on to CD’s or to your MP3 player etc. (you can use the supplied third-party recording software or software of your own choice). 2. Listen to any of your stored music files or internet radio station on your Hi Fi system by playing them through the Sedely USB (by using the ‘Record Monitor’ switch described later on in this manual). Highlights of your Sedley USB: To ensure best sound quality, the USB electronics inside the Sedley are automatically disconnected from the audio stage when the USB cable is disconnected. The Sedley USB section is powered by your computer, not the Sedley, hence it will not interfere with the Sedleys dedicated power supply for audio. Plug and Play: The Sedley does not need any additional drivers other than those supplied with your computer’ operating system. We have included 2 recording programs for use with the Sedley: Audacity – http://audacity.sourceforge.net/ LP Recorder - http://www.cfbsoftware.com/default.htm Other programs we recommend are NERO Audio Suite – www.nero.com For more information on any of the software mentioned we strongly recommend you to visit their website. Sonneteer has fully tested the supplied software for compatibility and is believed to be virus free. Sonneteer regrets that we are unable to provide any software support for the software supplied. N.B.: The Sedley USB option can be retrofitted to all Sedleys! Sedley USB installation (PC with XP installed): As the Sedley USB section is powered by the USB port, the Sedley does not need to be connected to the mains for installation or PC music playback. Installation: If your PC is not already switched on, switch on your computer. Connect the Sedley to the PC using the USB cable provided. Your computer should have detected your Sedley as “USB Audio CODEC” and begin auto installation (You may be asked for your Windows Disks). You will then see several messages regarding different USB devices being installed, this is completely normal. When done you will see a message saying your device is ready (USB Audio Codec). The Sedley installation is now finished. Please proceed with software installation in the next section (required if you want to record using your PC). Note: You can disconnect the USB cable when you are not using the Sedley for backing up vinyls or playing music files from your PC to your Hi Fi system. The Sedley USB is hot-pluggable - no need to switch the system off when connecting and disconnecting the USB cable. When plugged to a different USB port on your PC the installation sequence shown above may occur again, this is completely normal. Software installation guide: To use your computer to back up your vinyls using your Sedley USB, you will need to use a recording program (or software) of some description. There are many programs available that will work with the Sedley USB, but to get you started we have included 2 programs for you in the supplied CD. When ready please insert your Sonneteer Sedley USB CD into your computer. Within seconds the CD will auto-run and you will be greeted with the following screen: 1. Install LP Recorder 2. Help files for LP Recorder 3. Install Audacity 4. Help files for Audacity 5. Sedley USB Manual 6. Sonneteer Home Page Sedley USB Software installation disc Please select on one of the options. 1. Install LP Recorder - Simple and easy to use program, especially suitable for novice users (New to computer recording). 2. Help files for LP Recorder 3. Install Audacity – A powerful recording and editing program, suitable to the more advanced users (spent time in a recording studio!). 4. Help files for Audacity 5. Sedley USB Manual – Electronic form of the Sedley USB manual. 6. Sonneteer Home Page – Like to Sonneteers website (Internet connection required). Important!: Please read the manual/help files supplied with the software you use as this is only a guide to get started. LP Recorder: After installation, follow the instruction to Run LP Recorder. Click OK and OK again. On Audio Settings select as shown. Click OK. Note: With Simultaneous playback checked you can listen to the recording progress with the Record Monitor on the Sedley switched ON. (Record Monitor is described later in this manual). Recording: On the recording screen we recommend that you set the Volume to 100 and then check the Auto Level Box. Play the record once through to enable the software to set its recording level to best suit the record. Play the record again and press(click!) the RED record button when ready to record. When you have finished press stop and save the file. To check your recording click on the Player tab and press play. (with the Record Monitor switch in the ON position you can listen to your recording through your Hi Fi system) 2. Audacity: After installation follow the instruction to Run Audacity. On the main screen click Edit, select Preferences, click Audio I/O tab: Select USB Audio Codec for both Playback and Recording Device. Check also the Software Playthrough option box. Note: With Software Playthrough checked you can listen to the recording progress with the Record Monitor switched ON. Monitor Input: You can monitor the recording level by right clicking the recording level meter (see below) and select Monitor Input option. Now play a record through your Sedley to view the input level and adjust accordingly. Press(click!) the RED record button when ready to record and start playing your record. When you have finished press stop and save the file. To listen to your recorded files simply press play. (with the Record Monitor switched ON on your Sedley you can listen to your recording through your Hi Fi system) For more information please read Audacity help files. Listen to you recording using the ‘Record Monitoring’ facility: On the underside the Sedley towards the front you will find a switch for the Record Monitoring facility. OFF ON When your Sedley is not connected to your computer, always leave the switch in the OFF position (as shown), or no sound will be heard from your Sedley. When your Sedley is connected to your (powered ON) PC via the USB cable, you will have the following options: With the switch in the OFF position: You can listen to your record as usual. You can use your computer to record at the same time. With the switch in the ON position: You can listen to your recording progress in real time directly from your computer through your Hi-Fi system. N.B.: You must enable the “Playthrough” option in Audacity or the “Simultaneous Playback” option in LP Recorder software, please read the pages on LP Recorder (P.9) or Audacity (P.10), or on the CD. After recording, you can listen to your recorded files immediately on your Hi-Fi system, without having to burn a disc first or use your computers speakers. Likewise, you can use the Sedley USB as a computer audio preamp to play any audio files or stream internet radio programmes to your Hi Fi system from your computer. Optional Steps: To check if the USB Audio Codec was installed correctly: Open your Device Manager: Click Start, Click Control Panel, Click System, Select Hardware tab, Click Device Manager button. Click on the [+] next to Sound Video and Game Controllers and look for USB Audio Device. Click on the Universal Serial Bus controllers and check for USB Composite Device. Close your Device Manager. To check if the USB Audio Codec was selected by your system: Normally as soon as your Sedley is plugged into your PC it will automatically registered as your new audio device. To check this Click Start, Click Control Panel, Click Sound and Audio Devices, Select the Audio tab. You should see USB Audio Codec selected in the Sound Playback and Sound Recording box, if it is not there please click on the symbol and select it. Mack sure the box that says: Use only default devices is checked. Click Apply and then OK. OPERATING ENVIRONMENT: To get the appropriate operation, one of the following operating systems must be working on the host PC that has the USB port assured by the manufacturer. If the condition is fulfilled, the operation of the Sedley does not depend on the operating speed of the CPU. Sonneteer has confirmed following operating environments. Operating System: Microsoft. Windows. 98/98SE/Me. Japanese/English Edition Microsoft Windows 2000 Professional Japanese/English Edition Microsoft Windows XP. Home/Professional Japanese/English Edition (For Windows. XP, use the latest version of the USB audio driver that is available on Windows update site) Apple. Computer Mac. OS 9.1 or later Japanese/English Edition Apple Computer Mac OS. X 10.0 or later English Edition Apple Computer Mac OS X 10.1 or later Japanese Edition (For Mac OS X 10.0 Japanese Edition, plug and play does not work for USB audio device appropriately, you may need to select the device manually) Technical specification Nominal Input impedance 47k Selectable input impedance 1k, 47, 100, 220 or parallel combinations of Selectable input capacitance 10pF, 47pF, 100pF, 220pF or parallel combinations of Input sensitivity 0.5mV MC, 5mV MM Size (mm) 434 x 64 x 280 Fuse Values: UK/Europe/Australasia US/Canada 230V/240V, T 1.6 Amp 110V/120V, T 2.0 Amp Sonneteer reserves the right to change specifications without prior notice. If a fault occurs, please refer to your dealer. Do not attempt to repair the unit yourself! 2006 FTM Marketing Ltd. Sonneteer P.O. Box 163C, Esher, Surrey, KT10 0YH, England. www.sonneteer.co.uk