1
Instruction
First thank you for using our company's products! Before
using this product, please carefully read this user manual. In
order to be better service, some of the performance and
function that be mentioned in this manual may be updated. The
change for the product performance and function will not be
further notice.
1.
Appearance and buttons
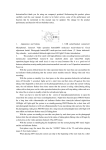
1. USB socket/headset connector
2. Microphone
3. Camera
4. Video operation button(MP3 mode:next track/volume+)
5. Clock adjustment knob
6. Photograph button(MP3 mode:previous track/volume -)
7. Status indicator
8.Infrared nightvision LED light
2. Product introduction:
This product is the frist watch with high-definition video recording
function and built-in memory,also named"Watch Camera".It may take
both photo and video.With simple operation,elegant design and small
size,it is easy to carry.Consumer like it as a good tool of
business,education,security,media,justice,tourism,medical care and
so on.
3.Operation instruction
A. Power on
With the system off,hold down the video operation button for more
than one second,then the red indicator flashes,indicating that the
system enters standby status.
B. Taking video and voice recording:
With the system on standby, by a short press on the video
operation button,the red indicator turns off first,after 3 seconds,it
lights up for a short time and then turns off again,at this time taking
video begins(By a short press on the photograph button,you can
check the current working state, the red indicator flashes three times
means that the system is taking video).During taking videos,with a
short press on the video operation button,the system will stop taking
videos and save the video files to return to standby while the red
indicator lights up.
Note: you have to turn the knob on the crown of microphone
anticlockwise to open the sound hole for camera and voice recording
function.
C.Nightvision function:press PHOTO button for a long time with video
state (the red indicator flashes three times), the infrared nightvision
LED light will light up(if the system is on standby,pressing PHOTO
button for a short time will start photograph function) ,it will turn off
automatically if you stop taking video and save the video file,during
taking video,press PHOTO button for a long time,the infrared
nightvision LED light will turn off(the red indicator flashes once).
D. Taking photo
With the system on standby,you can take one photo by each short
press on the photograph button while the red indicator flashes
once.In the status of taking photo,Taking video will begin by a short
press on the video operation button.
E. Play MP3 music
With the system on standby,plug the headphones into the
system,playing MP3 music begins and the red indicator flashes.
Note:please copy the music files into the "AUDIO" folder of the TF
card before playing music.
F. Next track/volume +
When playing MP3 music,the system can skip to the beginning of
the next track by a short press on the video operation button,and you
can turn the volume up by a long press on the video operation button.
G. Previous track/volume When playing MP3 music,the system can skip to the beginning of
the previous track by a short press on the photograph button, and
you can turn the volume down by a long press on the photograph
Button.
H. Quit MP3 mode
When playing MP3 music,the red indicator lights up with unplug the
headphones,indicating that the system enters standby.
I. Power off
With the system on standby,it can be turned off by a long press on
the video operation button and the red indicator turns off at the same
time.
With the system on standby, If no any operation,the system will
turn off automatically in one minute.
J. Low battery
During taking video,the system will save the file automatically and
then turns off before the battery runs out.
K. Charge
Connect to computer USB interface or charger with a USB
extension cable equipped for this equipment.In this case,charging will
begin automatically.During charging, the red indicator flashes.Once
the battery is fully charged,the red indicator will light up.
L.Operation method for waterproof function:
screw the knob on the crown of microphone clockwise until tight,in
this case,waterproof function can be used(note:voice recording function
can not be used while the watch is in a state of waterproof.)
4. Saving file
After finishing taking video or photo,connect to computer USB
interface with a USB extension cable,then you can copy the files into
computer to play.
Note:don't connect to computer during taking video or photo.
5. Reset
If the system stops responding due to improper operation or other
unexpected reason,you have to reset it,you can press on the video
operation button and the photograph button synchronously to reset
it,in this case the indicator turns off,indicating that the system is
turned off.
Note:the system will be turned off for resetting,but it cannot save
the file automatically in this case.
6. Setup time
First copy the "update time tool v2.0" folder from the CD equipped
for this equipment to the computer and confirm that the computer's
time is accurate,then connect to the computer and confirm the
"Removeable disk" has been in existence,then run the file "update
time tool v2.0" in the folder "update time tool v2.0" copied to the
computer,now the system's time is the same with the computer's
time.
7. Webcam function
8. First you need to install the camera driver in you computer.Copy
9. the folder "ak3631 PC Camera" from the CD equipped for this
10. equipment to the computer,then connect to the computer and confirm
11. the "Removeable disk" has been in existence,with a long press on
12. the video operation button,the computer will know that a certain new
13. piece of hardware exists and instruct you to install it.Choose the
14. column "install from the list or specified position",with clicking "next
15. step", pick out the folder "ak3631 PC Camera" copied to the
16. computer from the column "browse" and then continue to install
17. it.After installing,a icon of video device will be present in the folder
18. "my computer",now you are available for video chat with video chat
19. tool.You need not install the driver again for using later,you only need
20. to long press on the video button after right connecting to
21. computer,once a icon of video device is present in the folder "my
22. computer",you are available for video chat .
23. 8. Troubleshooting
24. a. Once the storage space is not enough,the system will save
25. thecurrent files automatically and turns off while the red indicators
26. flash three seconds.If you want to continue to use this video
27. recorder, copy the necessary files to computer and delete the
28. old documents in storage in order to free up enough storage
29. space
30.
b. When the battery is insufficient,the red indicator flash
31. about 3 seconds, then the system automatically save the
32. current files and turns off, If you want to continue to use the
33. recorder, please charge the battery.
34.
c. If the video recorder stops responding due to improper
35. operation or other unexpected reason, please hold down the
36. video operation button and the photograph button
37. synchronously and release the video operation button first to
38. restart it.
39.
d. If the system can not be turned on,please check the
40. battery power first,and then hold down the video operation
41. button and the photograph button synchronously and release
42. the video operation button first to restart it
43.
e. If it can not record video and take photo,please check
44. whether the storage space is enough
45.
f. If it can not connect with the computer,please confirm
46. your operation system,device and USB connecting are correct.
47. 9.Parameters
9.Item
10.function
11.Parameters
12.kernel
13.Microcomputer
14.processor
15.ARM9 32-bit
16.microprocessor core
17.Operation system
18.Embedded System
20.Video encoding
21.MPEG-4
22.signal system
23.digital signal
24.Video resolution
25.VAG(640*480
1280*720/1280*960/1920*1080)
26.Lowest illumination
27.0.1lux/f1.2
28.S/N
29.48db
30.AUDIO
31.white balance
32.all-directional
33.recording
34.Automatic white balance
35.-38dBhigh-fidelity
36.redording
37.Character
38.function
39.video/photograph/MP3
19.video
/
istic
40.mode
41.High-Definition
42.camera
43.30 mega-pixel / 100 mega-pixel/130
mega-pixel200 mega-pixel,1 / 6 CMOS
44.Clock adjustment
45.Real-time Clock adjustment
46.TF CARD
47.1-16GB
48.System
49.Require
m
50.ents
51.OS
52.microsoft win98
53.SE/ME/2000/XP/vista/win
54.7
55.Applied
56.Scope
57.occasion
58.Applied Scope:meeting
59.recording,monitoring
60.recording,obtain
61.evidence,webcam;applied
62.occasion:family,office,cor
63.poration,school
64.others
65.Appearance
66.stainless steel
67.power supply
68.DC5v/500ma
69.weight
70.186k
71.Operating
72.temperature
73.0-40℃
74.Operating humidity
75.95%RH
76.accessory
77.CD(including
78.instruction),power
79.cord,data cord
48.
49.
50. 10. Warning
51.
● Application: Please strictly abide
relevant regulations and
52. laws. This product should not be used for
any illegal purposes.
53. The user is fully responsible for its using
purpose.
54.
●
Battery:Battery duration will
decrease with repeated
55. usage and age.If the system has not be
used for an extended
56. period of time,please charge the battery
fully before using.
57.
● File security: This product is
not a professional storage
58. device.It does not guarantee the integrity
and security of saved
59. files. Please make a backup of your
important documents on
60. the computer or other storage device
timely.
61.
● Video quality: This product is
not a professional video
62. recording device. It does not guarantee the
video effect can
63. meet your expectations.
64.
● Operating temperature:0-40 C
65.
● Operating humidity:20%-80%. This product does not
66. have the waterproof function, So it can not work under the
67. humid environment.
68.
● Shooting brightness: Please use it under suitable lighting
69. conditions. Do not expose the camera directly to strong light,
70. such as the sun light to avoid damage to optical devices.
71.
● Cleaning: Do not use it under the environment with high
72. dust density to avoid the contamination of camera lens or other
73. components. It may attect the working of camera. The camera
74. lens can be cleaned gently by paper or cloth which is used to
75. clean glasses.
76.
● Waster disposal:Be mindful of protecting the
77. environment,not arbitrarily discarded this product,do not throw
78. it into fire so as to avoid accidents.
79.
● Other matters: The product belongs to sophisticated
80. electronic products. Please make sure that it is not damaged
81. by strong impact and strong vibration. Do not use it in the place
82. with strong magnetic or strong electric power.