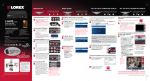
1
HD-SDI Professional
DVR Quick Guide
HD‐SDI Pro DVR Quick Guide v1.1 1. System Login
1.1 User Login
Default Admin Password: 00000
1.2 Time Setting and HDD Format
Navigate to {Menu}{Setup}{Time} and set
the time/date to the appropriate setting for the
time zone.
Before the DVR can be used properly, a new
HDD must be formatted. Navigate to
{Menu}{Setup}{Storage}, select the HDD,
and set it to “Recording-Init.”
1.3 Setup
Setup is designed to help users easily configure recording resolution, speed, mode, and
quality. Navigate to {Menu}{Setup}{Recording}{Recording}. For further details,
please refer to User Manual included on CD provided with DVR.
1
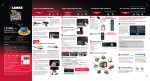
HD‐SDI Pro DVR Quick Guide v1.1 2. System Operation
2.1 Using Tool (Control) Bar
1
2
3
4
5
6
7
8
9
Full Screen
4 Channel Screen Division
9 Channel Screen Division
16 Channel Screen Division
Zoom Function
Auto Sequence Mode
Date/Time
HDD Status
Go to Playback
2.2 Display Mode
The user can select Display mode with the tool bar or pop-up menu. The images can be
seen at real-time speed with 1, 4, 6, and 9 split screen divisions.
※ Recording Event Icons ※
Motion Detection
Sensor Detection
Audio Detection
Text Detection
No Signal
※ Live Screen Icons ※
Video is not connected.
Audio is enabled.
Audio is muted.
Camera has been disconnected.
2
HD‐SDI Pro DVR Quick Guide v1.1 2.3 Using Main Menu
Right-click with the mouse or pressing [Menu] on front panel to open the Menu window.
Setup: Configure Time / Camera / Recording / Schedule / Storage / Network / System
Search: Search recorded images
Backup: Backup recorded files
PTZ Control: Control PTZ Camera
Zoom: Control Zoom
Miscellaneous: DVR Info / Log Viewer / Misc Control / Display Setting / System
Shutdown
2.4 Search Mode
The user can click the Search incon on the Menu Bar to search the recorded images by
selecting date & time on the calendar. The user can click the Playback icon to play them
back.
2.5 Backup Mode
Click the Backup icon on the Menu bar to easily archive video images. The Backup
window will then appear. Select the backup media (e.g. CD/DVD or USB drive) and
select time and channel to be recorded. Finally execute the archiving to complete the
process.
3
HD‐SDI Pro DVR Quick Guide v1.1 3. Network Setting
3.1 Public/Static IP
Navigate to {Menu}{Setup}{Network}{Ethernet}, check TCP/IP, and input IP Address,
Subnet Mask, and Default Gateway (IP address is assigned by ISP).
3.2 Public/Dynamic IP without IP Router
Navigate to {Menu}{Setup}{Network}{Ethernet} and check DHCP. Next, navigate to
{Menu}{Setup}{Network}{DDNS} and select “DDNS On.”
3.3 Public/Dynamic IP with IP Router
3.3.1 DVR IP Setting
Navigate to {Menu}{Setup}{Network}{Ethernet} and check TCP/IP and input IP
Address, Subnet Mask, and Default Gateway (Router IP address: 192.168.0.#, DVR IP address:
25)
4
HD‐SDI Pro DVR Quick Guide v1.1 3.3.2 Router Setting
Input a router IP address (192.168.0.1) and go to the router setting. There are 2 ways to
set up “port forwarding”:
1) DMZ: Enable DMZ and input the DVR IP address 192.168.0.25
2) Port Forwarding: Set up 2000
All routers are different. To port-forward your router, please refer to your router’s user
manual.
3.3.3 DDNS Setting
Navigate to {Menu}{Setup}{Network}{DDNS}, select “DDNS On,” and input Host
Domain Name (DDNS from IP router can also be applied).
Example Domain Name:
000c28020f3f.lorexddns.net goodvr.cctvuser.com
4. RMS (Remote Monitoring Software)
RMS (Remote Monitoring Software) is a centralized management solution that enables
user to control the entire system over the network. It can utilize a variety of functions
including System Monitoring, Remote Playback, and System Setup Configuration.
4.1 Program Start
In the program start menu, navigate to RMS Menu and select RMS icon; or double-click
RMS icon on the desktop. The software will open immediately, but functionality will be
limited until a site is registered.
4.2 Site Registration
1) Select
button, then select ‘Server Manager.’ A new window will appear.
5
HD‐SDI Pro DVR Quick Guide v1.1 2) In Server Manager, the users can add, modify, and delete servers.
3) Click [Add] and fill in the necessary information.
Item
Description
Name
Name of the DVR to be
used in the program
Description Description of the DVR
Connect
Address
Port
Network address of the
DVR
Network port no. of the
DVR
Camera
The number of cameras
Count
connected to the DVR
User Name User name registered in
the DVR
Password
Password registed in
the DVR
4) Click [Modify] to edit server information.
5) Click [Delete] to discard server information.
6
HD‐SDI Pro DVR Quick Guide v1.1 5. Web Viewer
The System is equipped with a built-in web server. Therefore user can be connected to
the system via Internet Explorer for live monitoring, playback, and remote setup
configuration.
[Setting in Internet Explorer]
1) Input IP address or Domain name
2) After downloading Active-X file, login
dialog box will appear. Enter address,
port, user ID, and password.
Port
:
User Name: admin
Password : 00000
[Live & Playback]
1) Click [Live] or [Playback] buttons on
bottom of window
2) Double-click channel screeen or
select [Channel mode]
3) Click [Trick mode] button in
Playback
6. CCTV Smart Viewer (Smartphone Mobile Viewer)
CCTV Smart Viewer is mobile viewer software that allows a user to view video images
from the DVR on his or her smartphone. By installing the cooresponding CCTV Smart
Viewer software on the smartphone, users can view up to 16 channels live video/audio,
PTZ control, PTZ zoom in/out via WAP, Wi-Fi, etc.
7
HD‐SDI Pro DVR Quick Guide v1.1 Smartphone software for iPhone and Android can be found at the Apple “App Store”
and Google “Play Store,” hence users can download the software at the respective
application stores.
Refer to the [User Manual] for full functional explanation of Front Panel, Rear
Panel, and IR Remote Controller.
Specs and functions are subject to change without notice. Some functions may
not be available depending on the model.
8