1
Atomic resolution of
the graphite surface by STM
-
5.3.2000
as possible (in a very sharp angle).
Close the cutters until you can feel the wire, but do not cut the wire.
In order to obtain the required sharpness, the tip needs to be torn off by pulling the wire cutter
quickly away from you, rather than cutting cleanly through the wire.
Use the pointed tweezers to hold the tip wire right behind the tip.
Release the flat pliers.
Transfer the tip to the microscope.
Tip mounting
- Put the tip wire underneath the clamp on the tip
holder (A), parallel to the groove and push it all the
way to the end.
- Move the tip wire sideways until it is in the groove
and held securely under the clamp (B). It should
stick out about 1–2 mm beyond the tip holder. See
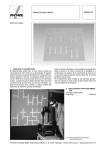
also Fig. 5 for step-by-step pictures.
Fig. 4:
Fig. 5:
Sketch of the tip mounting.
Step by step pictures of the tip mounting.
Now that you have prepared a new a tip and mounted it in the tip holder’s groove proceed with preparing
the sample surface.
Sample preparation
In most cases it is enough to cleave the graphite sample once in a while. If you have problems to find a
clean area or you don’t get good images with several freshly prepared tips, clean the sample surface as
described below. Highly oriented pyrolytic graphite (HOPG) consists of weakly bonded (van der Waals
bonding) layers.
Due to this layered structure of graphite, it can easily be cleaved using a piece of adhesive tape:
- Put the sample on the table using a pair of tweezers.
- Stick a piece of adhesive tape to the graphite surface and apply very little pressure with your
thumb or the end of the tweezers.
- Use the tweezers to go under the adhesive tape and press the sample down to the table.
www.phywe.com
P2532000
PHYWE Systeme GmbH & Co. KG © All rights reserved
3