1
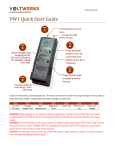
www.revely.com BY REVELY MICROSYSTEMS Quick Start Guide - VW Power Supply Connect 5-16V power source to terminals Step ...or to USB 1 Step 3 Adjust voltage using screwdriver tool. If Fault LED flashes, the selected voltage is too high. Step 4 Press On/Off switch to supply power to the load. Step 2 Connect load to +/terminals Faults are indicated by a flashing fault LED. Simply count the flashes before the long pause to determine the fault code. The most common fault occurs when the output voltage is set too close or above the input voltage. Simply adjust the output voltage to correct this. WARNING: When using the input screw terminals to supply power, do not connect a USB cable. The supply voltage present on the USB connector may exceed 5V and may damage any connected USB device or power supply. WARNING: Do not exceed the current (amp) rating of a USB port when powering the VW0 power supply. Most USB ports are protected against over-current, but this should not be assumed. CAUTION: The aluminum surface on the back of the VW0 power-supply will get hot under some load conditions. Take care when handling the power supply. VW User s Manual www.revely.com BY REVELY MICROSYSTEMS This manual contains detail information on the operation and specifications of the VoltWerks VW0 power supply. The VW0 linear supply provides adjustable DC power for lab and system use. The 25 turn trimmer enables accurate and dependable voltage adjustment. Overview Wired power input Power Control input Power OK signal Convenient USB-type power input Fault indicator Output indicator (also blinks periodically in stand-by mode) Power switch Voltage adjustment Direct regulator output Slew-rate control input +/- Power output terminals Linear Operation The linear regulator provides very low noise output voltage. Linear operation does mean that the power supply must dissipated heat to maintain regulation. The maximum output current may be limited by the thermal capacity of the supply. See output current section for additional information. Rev 1.0 VoltWerks VW0 P “ U M Page 2 www.revely.com BY REVELY MICROSYSTEMS Feature Summary The VW0 linear supply provides adjustable DC power for lab and system use. Unlike most lab power supplies, VoltWerks has no clunky knobs. A precision trimmer keeps accurate power available at the point of load. Simple and dependable operation Connect to included power supply or USB port Adjust output voltage with screwdriver Press ON switch to enable output Applications Industry and University lab use Low-voltage digital circuit development and testing Analog circuit characterization Robotics, transportation, and automotive Burn-in and cycle testing Features Voltage Output 0.8 - 4.5V output with 5V or USB-style supply 0.8 - 10V output with 12V source 5mV voltage precision, noise less than 2mVPP Current output 500mA output from powered USB port Up to 1 2 A from other power sources Other Built-in thermal and voltage shutdown Push-on/off power button Digital control via Power Good Output and Enable Input “ Part Numbers and Contents Orderable Part Number VW-M0-U Output capability using included USB cable 4.5V 500mA VW-M0 Accessories Included USB power cable, adjustment tool, output cables with alligator clips none Rev 1.0 VoltWerks VW0 P M “ U n/a Page 3 www.revely.com BY REVELY MICROSYSTEMS VW0 Block Diagram Figure 1 VOLTWERKS VW0 BLOCK DIAGRAM FAULT Internal Power Supply USB power OUTPUT +VIN Voltage Reference GND PON PGD MCU ADJUST ON/OFF PON GND PGOOD GND VIN SENSE VOUT SENSE GND VREG SENSE SLEW Current Sense +VO Linear Regulator Load Switch +VO REG Indicators VW0 displays status information on two LEDs. Table 1 INDICATOR DESCRIPTIONS Indicator Name Output Indicator Fault Indicator Rev 1.0 Description Green LED illuminated continuously when power output is active. In standby operation (output off) the LED blinks periodically to indicate that input power is connected and no errors are present. Red LED flashes when an error occurs. Count the flashes before the long pause to determine the fault code. VoltWerks VW0 P “ U M Page 4 www.revely.com BY REVELY MICROSYSTEMS Controls The VW0 front panel includes two push-buttons and two 25-turn adjustment trimmers. Control Name On/off button Voltage adjustment Description Press to turn the power output on or off. Adjusts the regulator voltage. Input/Control Terminals A 4-way 3.5mm pluggable terminal block provides a power-source input as well as I/O signals for controlling and monitoring the VW0 output state. Replacement terminal block is Phoenix Contact 1840382 or equivalent. Terminal Name OK ON + Input - Input Description Power OK digital output. 1 = Output power is On, 0 = Output power is Off and/or there is a fault. Power ON digital input with internal pull-up resistor. 1 = On/Off button controls power. 0 = force power always On. Power input positive connection 5-16Vdc. Power input ground connection. WARNING: When using the input terminals to supply power, do not connect a USB cable. The supply voltage present on the USB connect may exceed 5V and may damage any connected USB device or power supply. The USB port cover should be glued in place to permanently protect against this. Output Terminals Output power is available through a 7-way 3.5mm pluggable terminal block. The terminal block also allows direct connection to the internal regulator and slew-rate configuration. Replacement terminal block is Phoenix Contact 1840418 or equivalent. Terminal Name R + Output + Output S - Output - Output - Output Rev 1.0 Description Direct connection to regulator output for bypassing output power switch. Leave unconnected in most applications. Power ON digital input with internal pull-up resistor. 1 = On/Off button controls power. 0 = force power always On. Slew rate control input. Adjusts the turn-on slew rate using external capacitance. Leave unconnected in most applications. Power Output ground connection. VoltWerks VW0 P “ U M Page 5 www.revely.com BY REVELY MICROSYSTEMS Fault Conditions Error Type Voltage Range fault Description Unable to guarantee regulation due to selected voltage ranges. Root issues are: a) Input voltage is less than 4.5V b) Output voltage is too close to input voltage less than 0.25V c) Output voltage too low (less than 0.70V). d) Output voltage is set too high (Greater than 11.5V) Resolution: Adjust voltage trimmer to reduce output voltage and/or increase the supply voltage to VW0. Temperature fault VW0 reports internal temperature with heatsink temperature exceeding 70degC. Resolution: Reduce the VW0 power dissipation by reducing load current, reducing supply voltage, and/or increasing output voltage. Loss of regulation Internal regulator reports loss of regulation. This fault can occur due to a severe over-current or when the input supply voltage glitches. Resolution: Improve supply power quality and/or remove fault on output terminals. Over-voltage fault Over-voltage fault. Supply voltage limit exceeded so VW0 has shut-down the output to try to protect the load. Resolution: Reduce the supply voltage and verify that VW0 has not been damaged by the overvoltage condition. Code 2 To clear If output is off then cleared automatically, otherwise cleared at next power-on event. 3 Cleared at next output power-on event. 4 If output is off then cleared automatically, otherwise cleared at next power-on event. 5 Cleared when at next output power-on event. Digital control VW0 has two digital signals that provide a simple on/off and monitoring interface. PON Input Signal ON is an active-low digital input signal with 3.3V logic-levels. Asserting PON to a logic-low will turn ON the output of the supply independently of the On/Off push button. An internal pull-up resistor keeps PON normally at a logic-high level. For systems that require always-on power, PON can be wired to GND (-) directly or through a switch or relay contact. Alternatively ON can be controlled by an external digital signal. The Specification section of this document details the logic threshold levels. Rev 1.0 VoltWerks VW0 P “ U M Page 6 www.revely.com BY REVELY MICROSYSTEMS POK Output Signal OK is an active-high digital output signal with 3.3V logic-levels. A logic-high output indicates the VW0 power output is on and valid. A logic-low output indicates output power is off and/or there is a fault. Slew-rate Configuration VW0 provides a controlled turn-on slew rate for main output terminals. Refer to the Specifications section of this document for slew-rate characteristics. Turn-off slew rate is not controlled and is a function of the load current and load capacitance. Slew-rate can be decreased by connecting a capacitor between the SLEW terminal and GND (-). The slew rate is calculated as follows: The slew-rate can be decreased from the default value but it cannot be increased. Operation VW0 uses a linear regulation system consisting of a regulator controller and a discrete MOSFET as the series power control. In normal operation the regulator is always enabled. The regulator is directly adjusted by the voltage adjust trimmer. T MCU is to supervise system operation, monitoring voltage, and control the output load switch. The micro USB connector is for USB-style power only and is not a USB control interface. Most applications should use the main output terminals to allow VW0 to switch output power on and off. The main output provides controlled slew rate, fault handling, and short-circuit protection. In some specialized T R lows direct connection to the regulator, but without the benefits of the main output switch, such as slew-rate control. Note that the VW0 output switch has an internal resistance of just 0.0025 Ohms (typical), so in most applications the voltage drop will be less than the wire connections. Therefore the main terminals provide satisfactory performance. Rev 1.0 VoltWerks VW0 P “ U M Page 7 www.revely.com BY REVELY MICROSYSTEMS Mechanical outline Dimensions are in millimeters. Rev 1.0 VoltWerks VW0 P “ U M Page 8 www.revely.com BY REVELY MICROSYSTEMS VW0 Power Supply Specifications Characteristics Parameter Output voltage range (using 5V power source) Output voltage range (using 12V or greater power source) Output current Input supply voltage range Min 0.8 0.8 Typ. 4.5 Internal Power dissipation (25°C ambient) P = (Vin-Vout) * Iload Drop-out voltage @ 1A load Quiescent current with output on Quiescent current with output off Output noise with 2V 2A load (wall supply) Output ripple with 2V 2A load (wall supply) Output noise with 10V 1A load (wall supply) Output ripple with 10V 1A load (wall supply) Voltage adjustment accuracy Max 4.5 10.2 2 16 Unit V V A V 4 W 0.2 22 16 V mA mA < 0.5 1 < 0.7 2 mV p-p mV p-p mV p-p mV p-p 5 mV Operating temperature range (max - see table for SOA) 0 50 °C POK open-drain active output voltage @ 1mA Power OK internal pull-up resistance (to 3.3V) 0 0.6 V 10.2 PON input Vil (threshold to turn-on) PON input Vih (threshold to turn-off) 0.45 1.7 Fault Limits Parameter Input supply under-voltage fault Input supply over-voltage fault Drop-out voltage (Vin - Vout) fault Output voltage maximum voltage fault Heatsink Temperature fault Absolute Maximum Ratings (1) Parameter Input voltage (continuous) Input voltage (surge for 1 second) Rev 1.0 VoltWerks VW0 P “ U M Min Typ. 4.5 21 0.2 10.6 70 Value 18 24 Unit V V V V Max Unit V V V V °C Page 9 www.revely.com BY REVELY MICROSYSTEMS Reverse input voltage (continuous) Reverse input current (surge for 1 second) PGD/PON input voltage PGD/PON/SLEW ESD rating (HBM) Power in/out ESD rating (HBM) Ambient or storage operating temperature range -0.6 4 6 16 16 70 V A V kV kV °C 2.5 2.0 1.5 1.0 0.5 0.0 4.5 4 3.5 3 2.5 2 1.5 1 Maximum Output Current (Amps) (1) Stresses above these ratings may cause permanent damage 0.5 Output Voltage (V) 2.5 2.0 1.5 1.0 0.5 0.0 10.5 9.5 8.5 7.5 6.5 5.5 4.5 3.5 2.5 1.5 Maximum Output Current (Amps) Figure 2 - Operating Limits with 5V power source 0.5 Output Voltage (V) Figure 3 - Operating Limits with 12V power source Power Adapter Specifications Part Number VW-M1-5V Specification summary for the included wall adapter: Rev 1.0 VoltWerks VW0 P “ U M Page 10 www.revely.com BY REVELY MICROSYSTEMS Input voltage range AC 100 240VAC Input Frequency 50 60Hz Output voltage 5.0V +- 5% @ 10W Compliance: RoHS, CEC Level V, UL/cUL For additional information on this Wall Adapter refer to the Volgen KTPS10 Series datasheet. Part Number VW-M1-12V-US, VW-M1-12V-EU, and VW-M1-12V-UK Specification summary for the included wall adapter: Input voltage range AC 100 240VAC Input Frequency 50 60Hz Output voltage 12.0V +- 5% @ 12W Compliance US model: RoHS, CEC Level V, UL/cUL Compliance EU and UK Model: RoHS, CEC Level V , EN 60950-1, CE. EMI/EMC EN 55022 Class B, AS/NZS CISPR 22 Class B, EN 61000-3-(2,3), IEC 61000-4-(2,3,4,5,6,8,11) For additional information on this Wall Adapter refer to the relevant CUI EPSA 12V Series datasheet. Self-test VW0 has an internal self-test procedure that validates internal functionality. A 5V power supply and a 10-ohm +/5% resistive load is recommended before initiating the test. Testing must be done with the VW0 at or close to room temperature since the test is used to calibrate the internal temperature sensor. Start with the input supply power turned-off. Connect the Control (ON) input terminal to (-), then hold down the On/Off push button while applying 5V power. The self-test sequence will run automatically as follows: 1) Count 0..F on each LCD digits on all displays. This is a manual test to observe LCD segment operation. No fault codes will be reported. 2) The test sequence starts with the power off. Check input supply voltage is close to 5V. If supply voltage measures less than 4.90V or higher than high than 5.45V then a fault is reported. 3) Check regulator output voltage is greater than 0.8V. If too low then report fault. 4) Check that output terminal voltage is close to zero. Report fault if the reading is greater than 13mV. 5) The test sequence now turns on the output switch then checks that output voltage is close to the regulator voltage. The actual level is not critical. Difference between voltages must be less than or equal to 30mV or a fault is reported. 6) Check temperature reading and use the value for temperature sensor offset calibration. Calibration data is automatically stored in non-volatile memory if this test passes. If the temperature reading exceeds the expected range of values then report fault. If any test in the sequence fails, addition test steps will halt and the Red fault LED flashes. If all 6 steps pass, then the Green Output LED flashes. A power cycle is needed to resume normal operation. Rev 1.0 VoltWerks VW0 P “ U M Page 11 www.revely.com BY REVELY MICROSYSTEMS Compliance Information This device complies with Part 15 of the FCC Rules as an exempt test equipment device intended for use in a professional environment. Operation is subject to the following two conditions: (1) this device may not cause harmful interference, and (2) this device must accept any interference received, including interference that may cause undesired operation. Rev 1.0 VoltWerks VW0 P “ U M Page 12