1
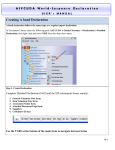
Customer Interface Technology
ExpressShipper
User Manual
ExpressShipper
Version: 1.2
User Manual
Date: July 15, 2011
Revision history
Date
Version
Description
Author
July 15, 2011
1.2
Final version
FW
External
1
ExpressShipper
Version: 1.2
User Manual
Date: July 15, 2011
Table of contents
1.
2.
3.
4.
5.
Introduction
1.1 General information
1.2 Connectivity
1.3 Support
Shipping manager
2.1 Shipment overview
2.2 Enter a booking
2.3 Save a booking
2.4 (Re-)print shipping documents
2.5 Change a booking
2.6 Remove a booking
2.7 Generate templates
2.8 Print a manifest
2.9 Request a collection
2.10
Calculate a tariff
2.11
Track a shipment
2.12
Types of shipment
Address book
Configuration
4.1 Add consignment numbers
4.2 Import and export addresses
4.3 Export data
4.4 Printer settings
4.5 Goods and article maintenance
Managing shipping documentation
5.1 Address label
5.2 Consignment note
5.3 Manifest
5.4 Commercial invoice
External
3
Error! Bookmark not defined.
3
Error! Bookmark not defined.
Error! Bookmark not defined.
Error! Bookmark not defined.
Error! Bookmark not defined.
Error! Bookmark not defined.
8
Error! Bookmark not defined.
Error! Bookmark not defined.
Error! Bookmark not defined.
11
Error! Bookmark not defined.
Error! Bookmark not defined.
Error! Bookmark not defined.
14
16
17
Error! Bookmark not defined.
18
Error! Bookmark not defined.
20
Error! Bookmark not defined.
Error! Bookmark not defined.
23
Error! Bookmark not defined.
24
25
2
ExpressShipper
Version: 1.2
User Manual
Date: July 15, 2011
1. Introduction
You chose for ExpressShipper to book your shipments with TNT Express. This manual explains you how
to use ExpressShipper, in simple steps. ExpressShipper can be used for more than just booking
shipments. You can also request tariffs, check the status of a shipment, export shipment and address
details etc. You will find all needed information in this manual.
1.1 General information
At the bottom of the ExpressShipper screen, you will see 4 menu items:
1. Shipping Manager: book a shipment, print documents and request a tariff or status.
2. Address Book: the sender or receiver addresses can be stored here, so that upon booking a
shipment, you can directly select the correct address.
3. Configuration: here you can for example add a new series of consignment numbers, change your
printer settings, export data, etc.
4. About: apart from the General Terms & Conditions, here you will find the version and registration
number.
In this document, the main functionalities within these menu items will be detailed. When giving
examples, a goods consignment is assumed.
1.2 Connectivity
The connectivity module (also referred to as activation key) enables the internet connection, so that for
example you can request a tariff or shipment status in real time. In the registration e-mail you received
after registering for ExpressShipper, you will find a link to this module. You can find the Connectivity
Module under ‘Downloads’ on our website.
To install, you require administrator rights and port 80 and 443 to be open in order to successfully
connect. For other technical details, such as installing the proxy server, we refer you to the installation
manual.
We advise you to activate this module, since it offers you several advantages, which will be detailed
throughout this document.
External
3
ExpressShipper
Version: 1.2
User Manual
Date: July 15, 2011
1.3 Support
Should you need, after reading this user manual, still need extra support, you can choose from several
options:
At the bottom of the ExpressShipper screen, help messages will appear, depending on the field
in which you are:
Screenshot 1: help text example
Frequently asked questions (FAQ). Please visit www.tnt.com | Shipping tools for answers to your
questions.
A demo explains the main features and you have the opportunity to discover ExpressShipper in
your own time. Go to www.tnt.com | Shipping tools
Should you still have technical questions or issues, then contact our ICS Service Desk:
Country
Telephone number
The Netherlands
+ 31 (0) 30 639 83 33
Belgium / Luxemburg
+ 32 (0) 2 754 47 73
Table 1: contact details ICS Service Desk.
For commercial or operational questions, please contact our Customer Service Desk.
Country
Telephone number
The Netherlands
+ 31 (0) 800 1234
Belgium
+ 32 (0) 70 233 633
Luxemburg
+ 352 357 395 220
Table 2: contact details Customer Service.
External
4
ExpressShipper
Version: 1.2
User Manual
Date: July 15, 2011
2. Shipping manager
The shipping manager is the heart of the application. Book shipments, request tariffs, print shipping
documents and check whether your goods have already been delivered at their destination. All these
features are explained in this chapter.
2.1 Shipment overview
The Shipping Manager gives you an overview of your past bookings. Based on the status, you can easily
check whether you printed the necessary documents and whether you handed these over to the driver.
These are possible statuses:
Screenshot 2: possible statuses
Shipped: the shipping documentation has been printed and the shipment has been handed over
to the driver.
Pending: the booking has been saved, however, the documentation has not yet been printed.
Labelled: the shipping documentation has been printed, but the shipment has not yet been
handed over to the driver.
2.2 Enter a booking
Step 1: Select addresses
In the ‘Shipping Manager’ menu, select ‘Add Consignment’. The first step is to fill out the address details.
External
5
ExpressShipper
Version: 1.2
User Manual
Date: July 15, 2011
Screenshot 3: enter an address
There are 4 ways you can do this:
1. In case the information already exists in the address book, then select the details via ‘short
name’.
2. Select the company name of the addressee.
3. Open the address book by clicking on the ‘address book’ button and then select the address.
4. Via ‘add address’, you can enter an address directly into your address book and your booking.
If you want to use an alternative pick-up or delivery address, then indicate this in the ‘collection short
name’ or ‘delivery short name’ field. Has the address not yet been added to the address book, then
simply do so by clicking ‘collect from’ or ‘deliver to’.
You want to find an address very quickly? Enter the first letters of the short name to easily find it.
Step 2: Enter the pick-up date, service and options
After entering the addresses, you need to select the service and/or option of your choice. In case you
want to ship a document, you select the service required in the ‘document services’ menu. For goods,
you select from the ‘non document services’ menu. Further in this manual you will find an example of how
to enter a booking for a goods consignment.
External
6
ExpressShipper
Version: 1.2
User Manual
Date: July 15, 2011
Screenshot 3: select a service
You can select one or several options, depending on the service you opted for. As standard, the pick-up
date is set at the date of entry and the sender pays the shipment’s cost. Both are customisable.
Lastly, you are also able to enter a customer reference and special instructions. The reference will later
on be mentioned on the invoice and is moreover handy to check a status via Track & Trace on line. The
‘special instructions’ field allows you to add extra information, for example destined for the driver who will
deliver your parcel.
Step 3: Enter shipment details
If you require insurance, then select ‘insurance’, with these fields being obligatory:
‘consignment currency’
‘consignment value’
‘insurance value’
In case you ship outside of the EU, the first two fields mentioned here are obligatory also, as is a
commercial invoice. The latter can be generated using your own software; however, ExpressShipper also
offers this feature. Click on the ‘commercial invoice’ button to generate a commercial invoice with
ExpressShipper.
The next step is to enter the parcel details: a correct description of the content, dimensions and weight.
When shipping several parcels to the same destination, you can add these via ‘add package’.
You can opt for the total numbers and weights, or have the details per item; with the item / total function.
External
7
ExpressShipper
Version: 1.2
User Manual
Date: July 15, 2011
Screenshot 4: entering shipment details
Now, after entering all required details for shipping, you have 2 options:
1. You save your booking (see paragraph 2.3)
2. You straight away print the shipping documentation (see paragraph 2.4)
2.3 Save a booking
You can (temporarily) save a booking, when for example you have not yet obtained all necessary
information. It means you temporarily park your booking. In the Shipping Manager, you will notice this
booking has been attributed the status ‘pending’ (see paragraph 2.1). You cannot yet hand this parcel
over to a driver, since the shipping documents still have to be printed.
2.4 (Re-)print shipping documents
Once all the necessary details have been entered, you can print the shipping documents. In case you
forgot to complete obligatory fields, ExpressShipper will alert you.
External
8
ExpressShipper
Version: 1.2
User Manual
Date: July 15, 2011
Screenshot 5: example of an alert that an obligatory field has not been completed.
You are then able to adjust the information and afterwards print the shipping documentation. There is
also the possibility to re-print these documents, using the ‘reprint documentation’ option.
From the moment you have printed the shipping documents, you cannot alter any details. However, you
can still remove the shipment.
2.5 Change a booking
Shipments with a ‘pending’ or ‘labelled’ status can still be changed, click in the shipping manager on ‘edit
consignment’ or double-click the actual consignment. You do need to re-print the shipping documents, for
the changes to be saved as well in ExpressShipper as to be mentioned on the documents. Shipments
with a ‘shipped’ status cannot be altered.
2.6 Remove a booking
A shipment with status ‘pending’ or ‘labelled’ can still be deleted. Simply choose ‘delete consignment’ in
the left menu of the shipping manager.
External
9
ExpressShipper
Version: 1.2
User Manual
Date: July 15, 2011
Screenshot 6: deleting a consignment
You will be asked whether you are sure you want to remove the booking, before being permanently
deleted.
2.7 Generate templates
In case you regularly enter shipments with the same details, you can apply templates. Select ‘templates’
in the shipping manager:
Screenshot 7: generate templates.
In the shipping manager you have a choice of 50 templates. By double-clicking on one of these
templates, you can start to enter booking details. However, not all information fields are obligatory, and
you are able to leave the fields for which information is still missing blank. You can then save the
template under an identifiable name.
Upon booking a shipment, you can immediately select a template, and all saved data will be entered
automatically.
External
10
ExpressShipper
Version: 1.2
User Manual
Date: July 15, 2011
Screenshot 8: choosing a template
2.8 Print a manifest
In previous paragraphs you were explained how to book a shipment and how to print the respective
documentation. Before handing over your shipment to the driver, you need a manifest. By printing the
manifest, you close the day. Click on the ‘manifest’ option in the shipping manager and you will see the
following screen:
Screenshot 9: printing a manifest.
Only consignments for which you have printed shipping documentation, can be included on the manifest.
By default, all shipments for which you printed the documentation; are listed on the manifest. However,
External
11
ExpressShipper
Version: 1.2
User Manual
Date: July 15, 2011
you can also choose to only list a selection, by using the ctrl button while ticking the shipments you want
on the manifest. Shipments with a ‘pending’ status can never be listed on a manifest.
Printing a manifest can be done in 2 ways:
1. Summary manifest: by default, 2 copies of this document are printed. Your copy needs to be
signed by the TNT Express driver and is yours to keep, the second copy needs to be signed by
yourself before being handed over to the driver.
2. Detail manifest: this document is to be handed over to the driver.
A good quality printing solution of the 2D barcode on the detail manifest is very important. So please make
sure this barcode is readable on the manifest.
2.9 Request a collection
If you already have an arrangement with TNT Express that a driver arrives each day at a set time, you do
not need to request a collction. However, in case no agreement has been made, you can arrange a
collection online via ExpressShipper. Just go to ‘collection’ and fill out the form as shown on the
screenshot below:
Screenshot 10: requesting a collection
Obviously, you can also contact the Customer Service Desk to request a collection.
External
12
ExpressShipper
Version: 1.2
User Manual
Date: July 15, 2011
2.10 Calculate a tariff
Please check beforehand whether the activation key has been installed (see paragraph 1.2). This
additional software application makes it so much easier for you to request tariff and status information
and to save this information in the shipping manager. We advise you to use this key.
Once you see these 8 filters in the shipping manager, the activation key has been installed:
Screenshot 11: filters in the shipping manager.
If you see 4 possibilities, you can find more information in paragraph 1.2 on installing the activation key.
You can request a tariff in 2 ways:
1. You select a booked shipment and then click ‘check price’. Based on the entered data, a tariff will
be requested. You can then save this tariff in the shipping manager by clicking ‘apply’.
2. Should you need a tariff indication before booking, then use the ‘adhoc price check’: enter the
sender, receiver and shipment details to receive a tariff indication for the service you selected.
To request your personal tariffs, your account number must have been registered for
ExpressShipper.
2.11 Track a shipment
Also for tracking, we advise you to install the activation key (see paragraph 1.2 for more information).
When using the option ‘track selected’, you can track a selection of shipments: press the ctrl button while
selecting the shipments. The result will look as follows:
External
13
ExpressShipper
Version: 1.2
User Manual
Date: July 15, 2011
Screenshot 12: tracking shipments
Another advantage is that you can immediately open the signature for reception; this is the proof that the
receiver signed for reception.
Once this signature is available (in pdf), you will see this when the orange star icon appears: . Click on
‘pod image’ on the left-hand side in the menu to open the signature pdf.
When you click ‘close’, the statuses are stored in the shipping manager.
2.12 Types of shipment
Several types of shipments can be booked via ExpressShipper. In previous paragraphs, an example of a
goods consignment (non documents) has been described; however, the same procedure is applicable for
other kinds of shipments:
Document shipments;
Customs controlled shipments
Dangerous goods.
Document shipments
When you want to ship documents, choose a service in the ‘document services’ menu. After this, and
possibly adding an extra option, you can enter the number of parcels and the weight. The last step is
printing the shipping documents. So, a document shipment requires less data to be entered than a goods
shipment.
External
14
ExpressShipper
Version: 1.2
User Manual
Date: July 15, 2011
Customs controlled shipments
Shipments with a destination outside the EU, are customs controlled. These require the currency to be
selected and the value of the shipment to be entered. A commercial invoice is also obligatory for these
kind of shipments. You can generate a commercial invoice in ExpressShipper, but also in your own
system. Click on ‘commercial invoice’ to generate the commercial invoice in ExpressShipper.
If you want to ship customs controlled consignments outside the EU, tick in the second screen the option
‘customs controlled’. Secondly, select the currency, enter the shipment value and generate a commercial
invoice. Then end the procedure as normal.
Dangerous goods
While booking, you have a choice out of several optional services, such as insurance or priority. You also
have the possibility to ship dangerous goods, since legally we can offer you a couple of default
Dangerous Goods options. To book a Dangerous Goods shipment, you just tick this option.
In the
second booking screen you can then select a subtype, such as dry ice or limited quantities. Lastly, enter
the UN number and the packaging group, to complete the booking.
External
15
ExpressShipper
Version: 1.2
User Manual
Date: July 15, 2011
3. Address book
The address book enables you to store the addresses of all your contacts. This makes booking a
shipment so much easier, since you can select the correct address directly from the address book.
There are 4 different kinds of addresses:
1. Sender address
2. Pick-up address
3. Receiver address
4. Delivery address
Per type, you can add, edit or delete addresses. When you double click on an address, the information
linked to it, will become visible for you to edit as required.
You can also add one or more contacts to an address, by choosing ‘manage contacts’. With ‘add
contact’, you can add contacts and select one of these as your default contact. Obviously you can edit or
delete contacts at any time.
Screenshot 13: managing contacts
The procedure to import and export addresses, is detailed in paragraph 4.2.
External
16
ExpressShipper
Version: 1.2
User Manual
Date: July 15, 2011
4. Configuration
Via the configuration menu, you can manage several settings. Some of which, such as ‘connection
settings’ and ‘back up and restore’ are not part of this user manual. For more information on these
settings, we refer you to the installation manual. We also advise you to back up your data regularly.
What will be elaborated in this paragraph, are the following items:
Add consignment numbers;
Import and export addresses;
Printer settings;
Export data;
Manage articles and packaging.
4.1 Add consignment numbers
To each shipment you book, ExpressShipper allocates a consignment number. At a certain point in time,
all consignment numbers have been used and you will need to contact the Service Desk. Go to
paragraph 1.3 for the contact details.
Adding a new range of consignment numbers is done as follows:
Screenshot 14: adding new consignment numbers.
External
17
ExpressShipper
Version: 1.2
User Manual
Date: July 15, 2011
ExpressShipper will indicate the quantity of available consignment numbers before you will need to
request a new consignment range.
Screenshot 15: consignment numbers available.
Please keep your account number and your ExpressShipper Registration number handy when requesting a
new consignment range. The latter is mentioned in the ‘Add consignment range’ and the ‘About’ sections.
4.2 Import and export addresses
To import and export addresses, go to ‘address import’. Two types of files are available:
csv, comma delimited. This format is applicable to import addresses from your own system, or for
instance Excel or Access.
ExpressShipper csv. This format can be used to re-import addresses that have previously been
exported already from ExpressShipper.
If you want to import your own .csv file, then please use this format:
Screenshot 16: address import file format.
External
18
ExpressShipper
Version: 1.2
User Manual
Date: July 15, 2011
You can browse to the file you want to import, select it and import it in ExpressShipper. ExpressShipper
will indicate whether the import was successful.
Addresses, like shipment details, can also be exported. Please go to paragraph 4.3 for more information.
4.3 Export data
The option ‘export data to file’ enables you to export shipment and address details.
Exporting address data
You can choose from 3 formats, namely: ‘fixed’, ‘re-importable’ and ‘delimited’. Should you choose the
latter, then also select the required delimiter.
You can export all addresses at once, or choose just one of a couple of address types. Indicate the file
destination in the ‘export path’ field and click ‘export’.
Screenshot 17: exporting address data.
Exporting shipment details
Shipment details can be exported as well, in two file formats: fixed or delimited. When choosing the
delimited option, also select the delimiter.
Select the information you would like to export and whether or not calendar dates have to be included.
Enter the destination of the file and click ‘export’.
External
19
ExpressShipper
Version: 1.2
User Manual
Date: July 15, 2011
Figuur 18: exporting shipment details
4.4 Printer settings
You can choose which printer you want the documents to be printed on. The printer has to be HP
compatible however.
The default setting is ‘windows default printer’, but you can adjust this per document type.
Screenshot 19: document printer set up.
External
20
ExpressShipper
Version: 1.2
User Manual
Date: July 15, 2011
In the ‘document profile type’ you can select how the printer settings are stored:
For you (personal);
Locally (local);
For all ExpressShipper network users (generic).
You can choose the required printer per document: double-click on the document’s name or select a
document and click ‘edit document’. In
Screenshot 20 you can see the configuration possibilities, such as
the number of copies and the paper size. At the end, you can save the settings, which by clicking on
‘apply selected to all’ become the settings for all documents.
Screenshot 20: edit document printer.
ExpressShipper prints the address label on A6 format. The printer configuration can be automatically
detected by the printer; however, sometimes you will have to set the printer configuration manually:
‘Envelope # 10’ is also a usable format. Select this format in the ExpressShipper printer settings, and set
the left margins at 95.
4.5 Goods and article maintenance
Via ‘goods maintenance’ and ‘article maintenance’ you can set the type of packaging and articles, which
can be used while booking a shipment. This way, you don’t have to enter this information each time you
book a shipment.
External
21
ExpressShipper
Version: 1.2
User Manual
Date: July 15, 2011
Goods maintenance
Via ‘add goods item’ you can add goods descriptions: you name the item and enter the dimensions and
weight. While booking, you can select this description and the data are entered automatically. You can
still change these settings or set a description as default.
Screenshot 21: add goods item.
Article maintenance
Apart from packaging, you can also add article settings to use for bookings. This is done in the same way
as for types of packaging.
Select ‘add article’ and enter the article code, together with the weight, value and origin of the article, then
save this entry. You can still change the settings or add other articles.
When you generate a commercial invoice, you can select the article.
External
22
ExpressShipper
Version: 1.2
User Manual
Date: July 15, 2011
5. Managing shipping documentation
5.1 Address label
The address label contains the standard data for your shipment, such as the address, weight, dimensions
and service. This document has to be clearly readable and put on your consignment in a so called plastic
pouch. In case your shipment contains more than 1 parcel, you need to print an address label for each
individual parcel.
Screenshot 22: example of an address label.
5.2 Consignment note
A consignment note can be printed for instance when a parcel is being shipped to a destination outside
the EU. ExpressShipper prints this document automatically when necessary for the destination. Two
kinds of consignment notes can be printed:
1. Receiver copy. This consignment note has to accompany the parcel.
2. Customs copy. This consignment note is to be handed over to the TNT driver.
External
23
ExpressShipper
Version: 1.2
User Manual
Date: July 15, 2011
Screenshot 23: example of a consignment note (customs copy).
5.3 Manifest
There are 2 kinds of manifests:
1. Detail manifest: this manifest is printed for each shipment and includes all the shipment’s details.
It is important you print these documents and hand them over to the driver, since TNT Express
uses these manifests to process the data of your shipment. Make sure the barcode is always
printed in high quality.
Screenshot 24: detail manifest.
To avoid any possible delay, it is very important that the barcode is printed in high quality on the detail
manifest. Have a look at the example above.
External
24
ExpressShipper
Version: 1.2
User Manual
Date: July 15, 2011
2. Summary manifest: the summary manifest by default is printed twice. One copy is to be signed
by the TNT driver and yours to keep, the other copy is to be signed by you and to be handed
over to the TNT driver.
Screenshot 25: summary manifest.
5.4 Commercial invoice
A commercial invoice is obligatory for customs controlled consignments and needs to be printed 6-fold, of
which 1 copy has to accompany the consignment. The other copies are to be handed over to the TNT
driver.
You can generate the commercial invoice in ExpressShipper, but also in your own system. It is of great
importance to add the commercial invoice to your customs controlled parcel, in order not to incur any
unnecessary delay.
External
25
ExpressShipper
Version: 1.2
User Manual
Date: July 15, 2011
Screenshot 26: example of a commercial invoice.
External
26