Download Compact Disc Player
Transcript
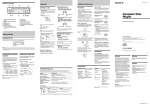
3-045-044-11 (1) Location of controls Operation Additional Information Locating a specific track — Automatic Music Sensor (AMS) Listening to a CD 1 AMS SHUF DSPL REPEAT OFF 2 2 AMS (Automatic Music Sensor) > button AMS To locate preceding tracks Insert a CD. Playback starts automatically. During playback, press and hold either side of (AMS) for about two seconds. Release when you have found the desired point. 6 Reset button 7 Display window 8 SHUF (shuffle play) button AMS 9 REPEAT (repeat play) button 3 Disc insertion slot 0 DSPL (display mode change) button 4 Z (eject) button 5 u (play/pause) button If pressed during playback, the CD will pause. If pressed again, playback will continue. qa OFF button Elapsed playing time Note To play back an 8 cm (3 in.) CD, use the optional Sony compact disc single adapter (CSA-8). Resetting the unit Before operating the unit for the first time or after replacing the car battery, you must reset the unit. Press the reset button with a pointed object, such as a ball-point pen. AMS SHUF DSPL REPEAT OFF Reset button Notes • Pressing the reset button will erase the clock setting and some memorized program and memory functions. • When you connect the power supply cord to the unit or reset the unit, wait for about 10 seconds before you insert a disc. If you insert a disc within these 10 seconds, the unit will not be reset, and you will have to press the reset button again. 3 Adjust the volume with the volume control on the car audio. To Press Stop playback Z or (OFF) Eject the CD Z To search forward Press (REPEAT) during playback. “REP” appears in the display. Changing the transmitting frequency Because this unit processes CD playback sound through an FM tuner, there may be interference noise during CD playback. In this case, change the frequency of the modulated RF signal transmitted from the unit. The initial setting is 88.3 MHz. 1 2 Press (REPEAT) for two seconds until frequency appears. To return to normal playback mode, press again. 3 Press (REPEAT) for two seconds. 2 Press (REPEAT) again. Press (REPEAT) for more than two seconds. Note Be sure to set the frequency of your FM tuner to the newly selected frequency. Before playing, clean the discs with a commercially available cleaning cloth. Wipe each disc from the center out. Do not use solvents such as benzine, thinner, commercially available cleaners, or antistatic spray intended for analog discs. Do not use rental CDs with old labels that are beginning to peel off. Stickers that are beginning to peel away, leaving a sticky residue Do not use your CDs with labels or stickers attached. Labels are attached •You can play CD-Rs (recordable CDs) on this unit. However depending on the conditions of the recording equipment or the CD-R disc itself, some CD-Rs cannot be played on this unit. •You cannot play a CD-R that is not finalized (Finalization is necessary for a recorded CD-R disc to be played on the audio CD player). •You cannot play CD-RWs (rewritable CDs) on this player. >:, 4 Press (REPEAT) for more than two seconds. The model and serial numbers are located on the bottom of the unit. Record the serial number in the space provided below. Refer to these numbers whenever you call upon your Sony dealer regarding this product. When you play 8 cm (3 in.) CDs Model No. CDX-1000RF Serial No. On a rainy day or in a very damp area, moisture may condense on the lenses inside the CD player. Should this occur, the unit will not operate properly. In this case, remove the disc and wait for about an hour until the moisture evaporates. CDX-1000RF Sony Corporation 2000 When replacing the fuse, be sure to use one matching the amperage rating stated on the original fuse. If the fuse blows, check the power connection and replace the fuse. If the fuse blows again after replacement, there may be an internal malfunction. In such a case, consult your nearest Sony dealer. Warning Never use a fuse with an amperage rating exceeding the one supplied with the unit as this could damage the unit. To decrease the output level To increase the output level Owner’s Record Printed in Korea Fuse replacement Press either the left or right side of (AMS) to select the output level. .:, Operating Instructions Maintenance B Track number Initial setting 3 Compact Disc Player There are paste residue Ink is sticky Notes on moisture condensation Playing tracks in random order — Shuffle Play You can select the output level of the CD player. Normally the initial output level is adequate; change the level if necessary. 1 Do not use second-hand or rental CDs that have a sticky residue on the surface (for example from peeled-off stickers or from ink, or glue leaking from under the stickers. Use the optional Sony compact disc single adapter (CSA-8) to protect the CD player from damage. Changing the output level Press either the left or right side of (AMS) to select the frequency. Each time you press (AMS), the frequency changes as follows: > : 88.3 MHz t 88.5 MHz t 88.7 MHz t 88.9 MHz t 89.1 MHz t 89.3 MHz t 89.5 MHz t 89.7 MHz t 89.9 MHz t . : 88.3 MHz t 89.9 MHz t 89.7 MHz t 89.5 MHz t 89.3 MHz t 89.1 MHz t 88.9 MHz t88.7 MHz t 88.5 MHz t Do not expose the discs to direct sunlight or heat sources such as hot air-ducts, or leave them in a car parked in direct sunlight where there can be a considerable rise in temperature inside the car. When the current track is over, it will play again from the beginning. Press (SHUF) during playback. “SHUF” appears in the display. If you use the discs explained below, the sticky residue can cause the CD to stop spinning and may cause malfunction or ruin your discs. Notes on CD-R discs Playing a CD in various modes Each time you press (DSPL) during CD playback, the item changes as follows: Elapsed playing time b A dirty or defective disc may cause sound dropouts while playing. To enjoy optimum sound, handle the disc by its edge. To keep the disc clean, do not touch the surface. Do not stick paper or tape on the labeled surface. To return to normal playback mode, press again. Changing the display item If you have any questions or problems concerning your unit that are not covered in this manual, please consult your nearest Sony dealer. Note ” or “ ” appears in the display, If “ you have reached the beginning or the end of the disc and you cannot go any further. Playing tracks repeatedly — Repeat Play Notes • Be sure to press (OFF) to turn this unit off when you want to listen to FM radio. • When CD playback is stopped, you may hear some noise from the speakers. To prevent this from happening, turn the volume down before stopping CD playback. • If you leave the ejected disc in the disc insertion slot after you have pressed Z, the disc will automatically retract into the unit after about 15 seconds in order to protect it. • This unit cannot be used with a car audio without an FM tuner. • If your car was parked in direct sunlight resulting in a considerable rise in temperature inside the car, allow the unit to cool off before operating it. • If no power is being supplied to the unit, check the connections first. If everything is in order, check the fuse. •Connecting this unit may cause some car battery wear when your car has no ACC (accessory) position on the ignition key switch. Notes on handling CDs If a CD is already inserted, press u to start playback. To search backward Getting Started To locate succeeding tracks Locating a specific point in a track — Manual Search Label side up 1 AMS (Automatic Music Sensor) . button During CD playback, press either side of (AMS) for each track you want to skip. Adjust the selected transmitting frequency with an FM tuner. (88.3 MHz/88.5 MHz/88.7 MHz/88.9 MHz/ 89.1 MHz/89.3 MHz/89.5 MHz/89.7 MHz/ 89.9 MHz) Notes on discs Precautions Troubleshooting guide Specifications The following checklist will help you remedy the problems you may encounter with your unit. Before going through the checklist below, check the connection and operating procedures. AUDIO POWER SPECIFICATIONS Problem Cause/Solution CD cannot be loaded. • Another CD is already loaded. • The CD was forcibly inserted upside down. Play does not begin. Dirty disc. CD is automatically ejected. The ambient temperature exceeds 50°C (122°F). CD will not eject. Press the Z button for two seconds. The operation buttons do not function. Press the reset button. The sound skips due to vibration. • The unit is installed at an angle of more than 60°. • The unit is not installed in a sturdy part of the car. Other specifications CD player section System Error displays The following indications will flash for about five seconds. Display POWER OUTPUT AND TOTAL HARMONIC DISTORTION 13 watts per channel minimum continuous average power into 4 ohms, 4 channels driven from 20 Hz to 20 kHz with no more than 1 % total harmonic distortion. Cause Solution A CD is dirty or inserted upside down. Clean or insert the CD correctly. The CD player cannot be operated because of some problem. Press the reset button or Z. If the above-mentioned solutions do not help improve the situation, consult your nearest Sony dealer. Signal-to-noise ratio Frequency response Wow and flutter Laser Diode Properties Material Wavelength Emission Duration Laser output power Compact disc digital audio system 90 dB 10 – 20,000 Hz Below measurable limit GaAs + GaAlAs 785 ~ 815 nm (Typ.800 nm) Continuous Less than 0.5 mW* * This output is the value measured at a distance of 0.7 mm from the objective lens surface on the Optical Pick-up Block. General Outputs Power requirements Current drain Dimensions Mounting dimensions Mass Supplied accessories Optional accessories Line output 12 V DC car battery (negative ground) 2 A (at disc loading) Approx. 178 × 50 × 173 mm (7 1/8 × 2 × 6 7/8 in.) (w/h/d) Approx. 182 × 53 × 159 mm (7 1/4 × 2 1/8 × 6 3/8 in.) (w/h/d) Approx. 1.1 kg (2 lb. 7 oz.) Parts for installation and connections (1 set) Compact disc single adapter CSA-8 Rotary commander RM-X4S Source selector XA-107 BUS cable (supplied with an RCA pin cord) RC-61 (1 m), RC-62 (2 m) Design and specifications are subject to change without notice. Warning Welcome ! This equipment has been tested and found to comply with the limits for a Class B digital device, pursuant to Part 15 of the FCC Rules. These limits are designed to provide reasonable protection against harmful interference in a residential installation. This equipment generates, uses, and can radiate radio frequency energy and, if not installed and used in accordance with the instructions, may cause harmful interference to radio communications. However, there is no guarantee that interference will not occur in a particular installation. If this equipment does cause harmful interference to radio or television reception, which can be determined by turning the equipment off and on, the user is encouraged to try to correct the interference by one or more of the following measures: — Reorient or relocate the receiving antenna. — Increase the separation between the equipment and receiver. — Connect the equipment into an outlet on a circuit different from that to which the receiver is connected. — Consult the dealer or an experienced radio/ TV technician for help. Thank you for purchasing the Sony Compact Disc Player. This unit lets you enjoy a variety of features. You are cautioned that any changes or modifications not expressly approved in this manual could void your authority to operate this equipment. CAUTION The use of optical instruments with this product will increase eye hazard. Features •Easy connection to any car audio with an FM tuner •Dashboard installation for easy CD disc changing •8X digital sampling filter for clear CD audio •Quick recovery function to minimize disturbance from skips •Repeat play function for playing tracks repeatedly •Shuffle play fucnion for playing tracks in random order Connections Installation Parts for Installation and Connections Caution Precautions The numbers in the list are keyed to those in the instructions. •This unit is designed for negative ground 12 V DC operation only. •Before making connections, disconnect the ground terminal of the car battery to avoid short circuits. •Connect the yellow and red power input leads only after all other leads have been connected. •Be sure to connect the red power input lead to the positive 12 V power terminal which is energized when the ignition key is in the accessory position. •Run all ground wires to a common ground point. •Connect the yellow cord to a free car circuit rated higher than the unit’s fuse rating. If you connect this unit in series with other stereo components, the car circuit they are connected to must be rated higher than the sum of the individual component’s fuse rating. If there are no car circuits rated as high as the unit’s fuse rating, connect the unit directly to the battery. If no car circuits are available for connecting this unit, connect the unit to a car circuit rated higher than the unit’s fuse rating in such a way that if the unit blows its fuse, no other circuits will be cut off. •The use of optical instruments with this product will increase eye hazard. 2 1 •Do not tamper with the four holes on the upper surface of the unit. They are for tuner adjustments to be done only by service technicians. •Choose the installation location carefully so that the unit will not hamper the driver during driving. •Avoid installing the unit where it would be subject to high temperatures, such as from direct sunlight or hot air from the heater, or where it would be subject to dust, dirt, or excessive vibration. •Use only the supplied mounting hardware for a safe and secure installation. 3 TO P 4 Installation in the dashboard ×2 Reset button 7 1 182 mm (7 1/ 4 2 in.) 9 8 When the installation and connections are complete, be sure to press the reset button with a ball-point pen, etc. TO ×4 REPEAT OFF 3 6 AMS DSPL max. size 5 × 6 mm 7 (7/32 × 1/4 in.) 53 m m (2 1/ 8 in .) P Bend these claws, if necessary. 1 SHUF Adjust the mounting angle to less than 60°. Mounting example 6 5 Mounting angle adjustment Cautionary notice for handling the bracket 1. Handle the bracket carefully to avoid injuring your fingers. Reset button Note To prevent malfunction, install only with the supplied screws 7. With the TOP marking up 4 Caution TO P 6 7 7 max. size 5 × 6 mm 6 (7/32 × 1/4 in.) Fire wall To support the unit 2 Dashboard 1 3 max. size M4 × 6 mm (3/16 × 1/4 in.) 2 TO P 4 5 Connection example 1 With the TOP marking up To a metal point of the car Black First connect the black ground lead, then connect the yellow and red power input leads. 0.5 m (1 ft. 8 in.) Blue/White 0.5 m (1 ft. 8 in.) To AMP REMOTE IN of the car audio*1 AMP REMOTE OUT Max. supply current 0.3 A Mounting the unit in a Japanese car You may not be able to install this unit in some makes of Japanese cars. In such a case, consult your Sony dealer. Fuse To the +12 V power terminal which is energized in the accessory position of the ignition key Red TOYOTA 0.5 m (1 ft. 8 in.) Be sure to connect the black ground lead first. * You can only connect a car audio which has both a remote amplifier input (AMP REMOTE IN) and an audio input (AUDIO IN). Fuse To the +12 V power terminal which is energized at all times 7 max. size 5 × 6 mm (7/32 × 1/4 in.) (7/32 × 1/4 in.) Note Do not connect an external amplifier to the audio output (AUDIO OUT) of this unit. Otherwise, the volume of the connected speakers cannot be adjusted. Yellow 0.5 m (1 ft. 8 in.) Be sure to connect the black ground lead first. NISSAN 7 max. size 5 × 6 mm 1 Car audio with FM tuner Car audio with FM tuner to dashboard/center console to dashboard/center console AUDIO OUT 8 7 max. size 5 × 6 mm Bracket 7 max. size 5 × 6 mm (7/32 × 1/4 in.) (7/32 × 1/4 in.) Bracket CDX-1000RF L To AUDIO IN of the car audio*1 R CDX-1000RF AUDIO OUT Bracket RCA pin cord (not supplied) REMOTE IN Bracket Existing parts supplied with your car From car antenna 1.9 m (6 ft. 3 in.) Existing parts supplied with your car Note To prevent malfunction, install only with the supplied screws 7. Rotary commander RM-X4S*2 (not supplied) If you have a Sony car audio with the Sony BUS terminal, the optional source selector XA-107 can be used in your system. Removing the unit 0.5 m (1 ft. 8 in.) Car audio Antenna connector*3 Sony car audio AUDIO IN BUS CONTROL IN AUDIO OUT MASTER Source selector XA-107 Speaker system 1 Insert the supplied tool 9 between the unit and the frame, and rotate 90° to release the hidden mounting spring. Repeat on the opposite side and remove the frame. *3 An adaptor (optional) may be necessary for your car and car audio system. In such a case, consult your dealer. 4 mm (3/16 in.) 10 mm (13/32 in.) AUDIO OUT 90º CDX-1000RF Insert a flathead screwdriver between the bracket and mounting spring. Gently pry the spring toward the unit while pulling the unit out a little. Repeat on the opposite side and remove the unit. *2 You can also control the following functions with the rotary cammander RM-X4S: Power on – Press SOURCE. Power off – Press OFF. Locate a specific track – Rotate the SEEK/AMS control momentarily and release. Locate a specific point within a track – Rotate the SEEK/AMS control and release when the desired point is found. Adjust the volume – Rotate the volume control. 9 AUDIO IN 2


