1
CONTENTS
Warranty coupon..........................................................................................23
Purpose.........................................................................................................25
Base kit.........................................................................................................25
Specification................................................................................................26
Precautions...................................................................................................27
Appearance of the Device............................................................................28
Controls......................................................................................28
Power..........................................................................................29
Screen Indicators........................................................................30
Main menu...................................................................................................35
Units ..........................................................................................35
Language....................................................................................36
Settings.......................................................................................36
Level in mcR/h.........................................................36
Level in mcSv/h.......................................................36
Vision.......................................................................37
Sound.......................................................................37
Power........................................................................38
Power control of the device..........................................................................39
Beginning to Use the Device........................................................................40
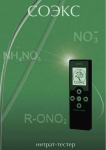
Ecotester Soeks
Purpose
Ecotester SOEKS is designed for express analysis of fresh fruit,
vegetables and meat for nitrates and for assessing the product radioactivity
level and detecting objects, food or construction materials contaminated with
radioactive elements.
Nitrate content analysis is based on conductivity of alternating
high-frequency current the measured food items.
Ecotester can easily assess the level of radioactivity according to
the power level of ion radiation (gamma radiation and beta particles stream)
with taking into account x-ray radiation.
Base kit
kit:
Ecotester SOEKS has the following items included in the base
Ecotester Soeks
1 pcs
Passport
1 pcs
2 batteries (AAA size)
2 pcs
Rigid paperboard box
1 pcs
Battery charger, power cord, rechargeable batteries and other
accessories and supplies are purchased separately.
A Geiger-Muller counter is used as ion radiation senser in our device.
The manufacturer reserves the right to add new features to the
device. Please follow new code modifications on the official website:
www.soeks.ru. The device’s code can be modified only in the
manufacturer’s service centers.
-25-
Specification
Range of indicated nitrate
from 20 to 5 000
content, mg/kg
Range of indicated background
from 0,03 to 1 000
radiation level, mcSv/h
Range of indicated background
from 3 to 100 000
radiation level, mcR/h
Registered gamma radiation energy from 0,1
Levels, mcSv/h
Levels, mcR/h
Time of measurement, seconds
Display format of indication
Power elements
from 0,3 to 100
from 30 to 10000
up to 20
Constantly, number and graphical
AAA size batteries rechargeable
or non-rechargeable
Power voltage range, V
Time of continuous work
of the device, hours at least**
Overall dimensions
height х width х thickness,
max, mm
Weight (without power
elements), max, grams
Battery charging current, max, mA
Current consumption from charger
or USB not more than
Output charger voltage
Display
Operating temperature range, °С
1,9 - 3,5
10
144х47х17
66
300
500
from 4,5 to 5,5
Color TFT, 128x160
from -20 to +60
Comment:
* Increasing the number of measurements shall improve the reliability of readings.
** The time of continuous work of the device is up to 10 hours, with default settings
and two batteries of capacity 1,350mAh.
*** Default settings:
measuring units– mcSv/h, alarm level - 120, color theme
- green, sound – on.
-26-
Precautions
Before using the product, please read carefully the safety
measures below and strictly observe them when using the product. Violation
of these rules may cause malfunction or cause total failure of the product.
The manufacturer’s guarantee shall be void if the safety measures stated
below are violated.
• Protect the product from shock and other mechanical impacts that can
damage it.
• Do not use the product in conditions of high humidity, under or in contact
with water: the product is not waterproof.
• Do not leave the product in places with intensive sun light or high temperatures for a long time, this can cause electrolyte leakage from power elements,
failure of the product, and injuries.
• Do not leave the product for a long time near devices that generate strong
magnetic fields, such as magnets or electric motors, and where strong
electrical magnetic signals are generated, such as transmitter towers.
• Do not perform measurements close to cell phones and microwaves, this
may affect the instrument’s readings.
• Do not disassemble and do not try to repair the device on your own.
• Do not connect the device to a PC or socket while it has regular batteries
installed.
• Strictly observe polarity when you install power elements, otherwise the
device may overheat and fail.
-27-
Appearance of the Device
Color
TFT display
Button [UP]
Button [ENTER]
mini-USB
Button [OK]
Button [BACK]
Button [DOWN]
Measuring
probe
Protective
cap
Controls
Button [ОК] – turn the device on/off,
confirmation in nitrat-tester mode.
Button [ENTER] – confirm selection.
Button [BACK] – back to previous menu.
Button [UP] – moving up in the menu.
Button [DOWN] – moving up in the menu.
-28-
Power
At the back side of the device there is the cover of the battery
section. AAA type batteries or accumulators can be used to power the device.
The bottom of the battery section shows the manufacturer’s trademark SOEKS - and board model.
The front side of the device has a mini-USB port that can be used
to recharge batteries from a computer via a USB-mini-USB cable or from the
power mains. If connected to a PC or electric mains, the device can work
without power elements.
How to install power elements
• Strictly observe polarity when you install power elements, otherwise the
device may fail.
• The type of power elements installed must match the parameters preset in
the ‘Power’ menu item (page 38).
• When the device is turned off, you can leave the power elements installed –
the batteries and accumulators are not spent if the device is in standby mode.
• If you expect not to use the device for a long time, it is recommended to
remove the power elements after the device is turned off.
-29-
Screen Indicators
1
2
3
4
5
1. List indicators – appear if the list
exceeds the screen.
- the list exceeds the bottom limit
of the screen
- the list exceeds the top limit of
the screen
Measuring
Main Menu
- the list exceeds both the top and
bottom limits of the screen
2. Diagram
Shows radioactivity during the previous
minute. The diagram keeps moving from
BACK
ENTER
right to left, and the bar height shows the
level of background radiation: the higher the background, the taller the bar.
The bar may be blue, yellow and red.
3. USB indicator
- USB cable connected
- batteries are charging
- charging completed
4. Battery charge status indicator:
- normal power level
- running down
- low power level
- replace or recharge the batteries
-30-
5. Active status indicator
The continuously moving element in the upper right corner of the screen
indicates the device’s active status.
When buttons are pressed, icons in this area show which button has been
pressed.
- the [BACK] button was pressed
- the [UP] button was pressed
- the [ENTER] button was pressed
- the [DOWN] button was
pressed
- the [OK] button was pressed
Menu indication and navigation
Settings
Level mcR/h
30
Level mcSv/h 0,3
Vision
Sound
Power
BACK
7
6
8
Level mcR/h
30
40
50
60
70
80
BACK
ENTER
ENTER
6. The current (selected) line is highlighted with color.
7. Inside a selected menu item, the upper line on the list indicates the parent
menu item.
8. As the device is being set up, the current parameter value is flagged with a
tick mark.
-31-
Indicators in the «Measuring» mode
A screen with the following elements appears in the measure mode:
9
12
11
14
RADIOACTIVITY
backgr., mсR/h:
12
15 16
120
Normal
radiation
background
10
13
BACK
9. Units: mcR/h or mcSv/h
10. Level in preset units
11. Indicator of measured results: filled up within 10 sec. If the background
radiation is high the result may be available much sooner.
12. Radiation level. Shown as large digits in the screen center. The first
measurement also shows the word «MEASURING»
13. The message about radiation bagkground:
- if the measured background radiation is less than 40 mcR/h, a «NORMAL
RADIATION BACKGROUND» indication appears on a green background.
- if measured background radiation is 40-120 mcR/h, caption «HIGH
RADIATION BACKGROUND» appears on a yellow background.
- if the measured background radiation is greater than 120 mcR/h, caption
«DANGEROUS RADIATION BACKGROUND» appears on a red
background.
-32-
14. The indicator of measurement accuracy – with increasing of accuracy
fills in with yellow colour. With each measurement (it takes 10 sec.) the
column of the indicator of measurement accuracy grows till complete
fulfillment. The complete fulfillment takes about 2 minutes (12 measurements). If during the measurement some sharp changes of the radiation are
defined (more than three times increasing or ten times decreasing), than the
indicator of measurement accuracy zeroes. Thanks to this fact, the defining
of sharp changes of radiation background with reflection of exact data takes
no more than 10-20 seconds.
15. The indicator of defining radiation fractions: If the fractions follow
often, than the indicator blinks with yellow and red, if the fractions are rare –
the indicator is yellow.
16. The indicators of radiation background changes:
- One red up arrow appears when increasing of radiation background is more
than 30% of average.
- One red down arrow appears when decreasing of radiation background is
more than 30% of average.
- Two red up arrows appear when the increasing of the radiation background
is considerable.
- Two green or yellow down arrows appear when decreasing of radiation
background is considerable.
-33-
Indicators in the «Nitrat-tester» mode
A screen with the following elements appears in the measure mode:
14
Nitrat-tester
RESULT:
N=15 mg/kg
17
Normal
nitrate
concentration
16
15
BACK
14. Measuring result.
15. Unit of measure: mg/kg.
16. Result message showing nitrate concentration based on maximum daily
rates of nitrate consumption with food.
- if the measured result of nitrate concentration does not exceed the medium
norm of nitrate consumtion - you will see the following message marked
green «Normal nitrate concentration».
- if the measured result of nitrate concentration exceeds the medium norm of
nitrate consumption not more than 20% - you will see the following message
marked yellow «Insignificant excess of standart!»
- if the measured result of nitrate concentration exceeds the medium norm of
nitrate consumption not more than 50% - you will see the following message
marked red «Significant excess of standart!»
- if the measured result of nitrate concentration exceeds the medium norm of
nitrate consumption more than 50% - you will see the following message
marked red «Dangerous concentration of nitrates!»
17. Coloured indicator.
-34-
The device’s menu consists of 3 items:
● Radioactivity – enter the radioactivity detecting mode
● Nitrat-tester – enter the nitrate measuring mode
● Main menu – device settings
Main menu
● Units
In this item you select units to measure the radiation background: mcR/h or
mcSv/h.
There are many different units to measure radiating doses.
Roentgen – in use since 1928 to measure generated radiation or exposure
dose.
Sievert – in use since 1979, named after Rolf Sievert – a Swedish scientist.
100 Roentgen = 1 Sievert, provided that only the biological effect of
radiation is considered.
By dividing 1 Sievert by 1000 we receive a millisievert. 1 mSv is one
thousandth of one Sievert. Millisievert is often used as a measure unit in
diagnostic procedures (X-raying, X-ray computed tomography etc.)
Microsievert – 1 mcSv – is one thousandth part of a millisievert or one
millionth part of one Sievert. Film photofluorography equals 500-800 mcSv,
digital is 60 mcSv. Computed skull tomography on a step-by-step tomograph
ensures 1,000-15,000 mcSv, a modern spiral tomograph gives 400-500
mcSv, and a maxillofacial tomograph with two-dimensional sensor ensures
45-60 mcSv.
If radiation background exceeds 0.4 mcSv/h., you need to look for the
reasons of this exceeding.
If radiation background exceeds 1.2 mcSv/h., it is not recommended to stay
in this place, it may be dangerous.
Natural radiation background in Russia is 0.05-0.20 mcSv/h. (5-20 mcR/h.).
-35-
● Language
In this item you can select the interface language. This device has only two
options: English and Russian.
Attention! After the [BACK] button is pressed the screen will display the
root menu in the selected language. If you made an error and selected the
unfamiliar language, press the following sequence of buttons to return to the
language selection menu: DOWN-DOWN-ENTER-DOWN-ENTER.
Then select the language you need.
Settings
In this section you can preset the parameters for the device and the interface.
Items of the Settings menu:
● Level in mсR/h.
● Level in mcSv/h.
These items are related: when one is changed, the other also changes.
You can select the threshold value from 16 preset values on the list.
mcR/h.
30
40
50
60
70
80
90
100
120
150
200
500
1000
2000
5000
10000
mcSv/h.
0,3
0,4
0,5
0,6
0,7
0,8
0,9
1
1,2
1,5
2
5
10
20
50
100
If the measured background radiation
exceeds the preset level, alarm sound
appears.
Alarm sound switching off:
settings > sound > alarm sound
-36-
● Vision
In this item you can adjust screen settings: brightness, display time, and color
pattern.
● Brightness
Select low, medium or high brightness level of the screen.
To save power and help the batteries last longer it is recommended to use the
low or medium brightness level of the screen.
● MinutesOn.
Set the time of display backlight in standby mode. You can select from 1 to
15 minutes in the options list.
● AlwaysOn
yes – cancels the MinutesOn parameter. Backlight is always on while the
device is in use.
no –the screen’s backlight works as preset in the MinutesOn function.
● Theme
Select from 4 possible combinations of background and font color: green,
gray, blue and white.
● Sound
In this item you can adjust the sound parameters.
● Sound on (yes/no)
● Sound tone
Select one of the 4 available sound tones.
● Keypad tone (yes/no)
To save power and make the batteries last, it is recommended to turn the
sound off.
● Alarm sound (yes/no)
Sound indication of level of radiation background exceeding.
● Volume (low/medium/high)
Default is the average volume.
-37-
●Power
In this item you can adjust parameters of the power elements used in the
device.
● Accumulators
Select ‘yes’ if the device has rechargeable accumulators installed and ‘no’ if
regular batteries are used. Incorrectly selected parameter of the installed
power supply type may cause incorrect indication of power charge.
If ‘yes’ parameter is selected the accumulators will recharge while connected
to a PC or charger via a mini-USB slot.
Attention! Never connect the device to a charger or a PC if it has batteries
installed. This can overheat the power elements, cause their failure and
electrolyte leakage, damage the case and break the device.
● Sleep
Set the time in minutes after which the device shall automatically shut down.
● AlwaysOn
yes – cancels the value of the Sleep parameter. The device will work until
turned off with the [OK] button.
no – the device automatically shuts down according to the set Sleep
parameter.
-38-
Power control of the device
1. To turn the device on, press and hold the [OK] button until the display
turns on (the screen backlight is on) then release the [OK] button.
- When the device is on, an animated screen with the company’s logo
appears. To skip this screen press the [ENTER] button.
- After the splash screen the display will indicate the model (code modification version) of the device for 3 seconds.
2. To turn the device off press and hold the [OK] button until the display
shows an animated screen with falling autumn leaves. Then release the
[MENU] button.
Pressing and holding the [OK] button will turn the device off in any mode.
3. While connected to a USB, the device will be on, even without power
elements installed. If the device automatically turned on while connected to
USB; disconnecting the device from the USB slot will shut down the device.
When the device is off, you can leave the power elements
installed – batteries and accumulators are not spent if the device is in standby
mode. If you expect not to use the device for a long time, it is recommended
to remove power elements after the device is turned off.
-39-
Beginning to Use the Device
1. Install the power source (page 29,38)
2. Turn the device on (page 39)
3. Before you begin measurements, we recommend that you tune up the
device (page 36)
4. Select the ‘Measuring’ menu item.
After turning on, the unit begins to examine the radioactive
situation. In 10 seconds approximately you will see the first readings on the
display, and the next measuring cycle will begin. Be sure that at least 4 or 5
cycles run to achieve accurate results.
If the readings are higher than the natural radiation background
typical for the locale, this means that the examined object is contaminated by
radiation.
Results obtained using the device can not be used for official
conclusions regarding the radiological situation.
Measuring radiation background of objects
To measure radiation background of foodstuffs, building materials and other things do this sequence:
1. Measure the level of radiation background several meters away from the
target.
2. Move the device directly to the target and measure radiation background
as close as possible to the target.
3. Compare the resulting data with the radiation background level measured
in step 1.
The difference of readings in step 1 and step 2 will represent the
radiation background of the target.
To evaluate radioactive contamination of liquids, the unit must be
placed above open surface of the liquid. To protect the unit from contact with
the liquid, it is recommended that the unit should be wrapped in a polyethylene bag, but ensuring that the wrapping is one layer of plastic only.
● In the measuring mode, press any button to return to the root menu.
● If the screen goes blank, press any button to reactivate it.
-40-
Measuring nitrate concentration of fruit and vegetables.
1. The measured foodstuff should be clean without any mud on
the surface. You should clean the measured foodstuff without any cleaning
agent, with clear water only, it should not be rotten or damaged. Foodstuff
should be fresh. You can use cut pieces of the foodstuff that were made not
later than 15 min.
2. Choose the foodstuff from the menu list. Norms of maximum
nitrate concentration limit are mentioned below.
Product
Apple
Apricot
Banana
Beet
Cabbage early
Cabbage late
Carrot early
Carrot late
Cucumber soil
Cucumber gr.
Eggplant
Grapes
Greengrocery
Pear
Lettuce
Marrow
Melon
Nectarine
Onion Bulb
Onin Green
Peach
Peper Sweet
Persimmon
Potatoes
Radish Black
Radish Garden
Strawberry
Tomato soil
Tomato gr.
Watermelon
Baby Norm
Fresh Meat
Norms
60
60
200
1400
900
500
400
250
150
400
300
60
2000
60
2000
400
90
60
80
600
60
200
60
250
1000
1500
100
150
300
60
50
200
Designation in menu
Apple
Apricot
Banana
Beet
Cabbage E
Cabbage L
Carrot E
Carrot L
Cucumber S
Cucumber G
Eggplant
Grapes
Greengrocery
Pear
Lettuce
Marrow
Melon
Nectarine
Onion Bulb
Onion Green
Peach
Peper Sweet
Persimmon
Potatoes
Radish Black
Radish Garden
Strawberry
Tomato S
Tomato G
Watermelon
Baby Norm
Fresh Meat
3. After foodstuff selection you will see the following text in the
menu: «Make sure that probe is not stuck in testing product and press ОК»
4. Clean the probe with alcohol and then with paper napkin. The
probe should be dry.
5. Press [OK] button. You will see that preparation process has
begun(self calibration). The following text message will appear “Wait please.
Preparation to analysis in process”. Do not touch the probe until you`ll see
new text instructions.
6. Please wait until you`ll see the following text message “Stick
probe into product. Press OK” Besides harmless recommended norm of
nitrates for selected foodstuff will be shown.
7. Stick the probe info the tested foodstuff hold the device
perpendicularly to it in direction to the center of it. Do not move or the press
probe. The depth of sticking the probe should be at least 10 mm. The pointed
cone of the probe should not go out of the foodstuff, be in the seed zone or
hollow spaces. It should be sticked to the most juicy part of the foodstaff.
Notice that you should not use holes that were made by probe or other device
iteratively
8. Press [ОК] button. The measurement process will begin.
9. Wait for the results will be displayed. During the measurement
you will see the following message «Wait please! Measurement in process».
Please do not move the probe during the measurement.
10. Chek the results.
11. Pull the probe out of the foodstuff.
12. Push the [BACK] button to go back to the menu.
-42-
product.
Device measures nitrate concentration per 1 kilogram of the
Harmless day dose of nitrates is 200-300 mg per one grownup
person. Therefore if you eat 2 kiligrams of a watermelon with 350 mg/kg
nitrate concentration you risk to pick up a nitrate poisoning. Remember that
normal concentration for a watermelon is 60 mg/kg. Some food stuffs as
beet, radish, dill, cabbage lettuce have high norm of nitrates. Normal concentration for beet is 1400 mg/kg. If you eat such foodstuffs in large amounts
please keep in mind maximum harmless doses that were pointed earlier.
Example: You measured beet and nitrat-tester measured 1000 mg/kg nitrates
per kilo. This concentration is normal for this foodstuff and you can eat not
more than 200 grams of such beet.
Notice that there are special norms for children, because child’s organism
undergoes by nitrate poisoning much more than grownups. Harmful doses
for little children are 10-50 mg/kg.
-43-
В заключение приведём значения предельно допустимых доз и
некоторые официальные данные о последствиях облучения для человека.
20 мЗв - предельно допустимая доза (ПДД) - наибольшее значение
индивидуальной эквивалентной дозы для персонала объектов атомной
промышленности, непосредственно работающего с ИИИ (категория А
облучаемых лиц) за календарный год. При такой годовой дозе
равномерное облучение в течение 50 лет не может вызвать в состоянии
здоровья неблагоприятных изменений, обнаруживаемых современными
методами. Эта доза эквивалентна тому, что человек постоянно в течение
50 лет находится (живёт) в условиях фона в 570ч650 мкР/час.
5 мЗв - предел дозы (ПД) - допустимая индивидуальная эквивалентная
доза облучения населения, проживающего в санитарно-защитных зонах,
зонах наблюдения объектов атомной промышленности (категория Б
облучаемых лиц) за календарный год. При такой годовой дозе
равномерное облучение в течение 70 лет не вызывает изменений в
состоянии здоровья, обнаруживаемых современными методами
диагностики. Исходя из этой дозы, допустимый безопасный фон 55ч65
мкР/час (0,6 мкЗв/час).
0,5 мЗв - по существовавшим ранее нормам годовая предельно
допустимая индивидуальная эквивалентная доза для внешнего и
внутреннего облучения всего населения. В настоящее время эта доза не
регламентируется. Ей соответствует фон в 5-7 мкР/час (0,06 мкЗв/час).
0,1 Зв - в течение года - не наблюдается каких-либо заметных изменений
в тканях и органах.
0,75 Зв - незначительные изменения в крови.
1Зв - нижний предел начала лучевой болезни.
3-5 Зв - тяжёлая степень лучевой болезни, погибают 50% облучённых.
To conclude description, here are values of maximum permissible doses and
certain official information about consequences of radiation exposure for
humans.
20 mSv – maximum permissible dose (MPD) – annual highest value of
individual equivalent dose for nuclear sector personnel who work directly with
sources of ionizing radiation (category A). Such annual dose of homogeneous
irradiation for 50 years cannot trigger adverse changes in health detectable by
modern methods. This dose is the equivalent of a lifetime of 50 years against a
background of 570x650mR/h.
5 mSv – permissible dose (PD) – annual permissible individual equivalent
dose for a person living in sanitary protection zones or radiation-control
nuclear industry areas (category B). Such annual dose of regular irradiation for
70 years cannot cause negative changes in health detectable by modern
methods of diagnostics. For this dose the permissible safe background is 55x65
mR/h (0.6 ЯSv/h).
0.5 mSv – previously accepted annual maximum permissible individual
equivalent dose of external and internal irradiation for all population. Currently
this dose is not regulated. It equals a background of 5-7 mR/hас (0.06 ЯSv/h).
0.1 Sv during 1 year – no perceptible changes detected in tissues and organs.
0.75 Sv - minor changes in the blood.
1 Sv - lower threshold of the radiation sickness.
3-5 Sv - grave radiation sickness, 50% of irradiated persons die.
Маркировка и пломбирование
На корпусе изделия нанесено наименование изделия.
Заводской номер и дата выпуска находятся в батарейном отсеке под
аккумулятором.
Изделие
предприятием-изготовителем
не
пломбируется.
Упаковка
Упаковка
обеспечивает
сохранность
изделия
при
транспортировке и хранении при нормальных климатических условиях.
Транспортирование и хранение
Транспортирование изделия в упаковке может производиться
любым видом транспорта на любое расстояние.
При транспортировании изделия необходимо обеспечить
защиту его от атмосферных осадков.
Условия транспортирования изделия в упаковке должны
соответствовать:
- температура окружающей среды от –40° до +60°С.
- относительная влажность при температуре +25°С не более 90%.
Изделие до введения в эксплуатацию следует хранить на
складе в упаковке предприятия-изготовителя при температуре
окружающей среды от –5° до +40° С и относительной влажности
воздуха не более 80% при температуре +25°C. Хранение изделия без
упаковки не допускается.
Изделие, в течение длительного времени находящееся при
температуре ниже 0°С, должно быть выдержано при комнатной
температуре в течение 2 часов перед вводом прибора в эксплуатацию.
Техническое обслуживание
Техническое обслуживание предусматривает:
- удаление пыли с наружной поверхности изделия;
- своевременная замена или подзарядка элементов питания;
- при длительном перерыве в эксплуатации изделия (более 2-х недель)
элементы питания должны быть извлечены;
- протирать дисплей только мягкой тканью.
Не допускается попадание посторонних предметов внутрь изделия
-45-
Marking and sealing
The name of the device is written on the case. The serial number
and date of manufacturing are written in the battery section under the
accumulator. The manufacturer does not seal the device.
Package
The package ensures safety of the device during transportation
and storage, provided normal climatic conditions.
Transportation and storage
The packed device can by shipped by any type of transport over
any distance.
During shipment, the device must be protected against humidity.
Shipping conditions of the packed device must meet the following requirements:
- environment temperatures from -40° to +60°C.
- relative humidity max 90% at +25°C.
Until operation, the device must be stored in the factory package,
in a warehouse with air temperatures from -5° to +40° C and maximum
relative air humidity 80% (at temperature +25°C). The device may not be
stored without the package. If the device remained at below-zero temperatures for a long time, it must be left indoors for 2 hours before use.
Maintenance
Maintenance includes:
- removal of dust from the outer surface of the device;
- timely changing or charging the power elements;
- if the device is not used for a long time (more than 2 weeks), power
elements must be uninstalled;
- clean the display with soft cloth only.
Prevent foreign objects from getting inside the device through the accumulator section or perforation on the back side of the device.
-46-
Талон изъят/ Coupon received (date) ____________________20____г._________________________
Корешок талона на гарантийный ремонт/ Warranty coupon stub
Талон на гарантийный ремонт/
Warranty coupon
ЭКОТЕСТЕР SOEKS/
ECOTESTER SOEKS
заводской номер/ serial number
Продан магазином/ Sold by
наименование предприятия торговли/ name of the retailing organization
Дата продажи/ Date of sale______/___________________201___г.
Выполнены работы/ Works performed_______________________
_______________________________________________________
_______________________________________________________
_______________________________________________________
_______________________________________________________
_______________________________________________________
Исполнитель/ By________________________________________
_______________________________________________________
Владелец/ Owner________________________________________
_______________________________________________________
_______________________________________________________
_______________________________________________________
фамилия, имя, отчество/ full name
подпись/ signature
ООО “ТД СОЭКС”
Россия, 127566, г.Москва, Алтуфьевское шоссе, д.48 к.1, оф.301/
Russia, 127566, Moscow, Altufyevskoye Shosse, 48, k.1, office 301.
Тел./Tel.: (495) 223-27-27