1
Step 2: Put On the Glove
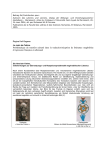
1. Put the glove on according to the directions below.
Important: Make sure your hand at all times stays above the desktop. The
receptor has a viewing angle of 45 degrees side-to-side and top-to-bottom.
• Place your fingers in the finger rings with the glove resting on the back of your
hand. When putting in your thumb, pull the strap out of the way.
The glove must be within line of sight of the receptor. When it isn’t, the light on
• After all fingers are in, pull the strap around your thumb and across your palm
the front of the receptor will blink.
to the other side. The strap should be across your wrist as well as your palm.
• Connect the strap to the hook next to your pinky finger. If the strap is too loose on
your hand, twist the end of the strap before placing it on the hook. The strap does
not have to be tight to hold the glove in place. With most hand sizes it is fine
without the twist.
Important: Make sure that the rings are around the top third of your thumb and each
finger. You can easily slide the rings to adjust them. The rings will expand to fit your
fingers; however, if you need larger rings, slide the existing rings off the glove and
replace them with the larger rings provided. (For more information, see the CD
Tutorial.)
2.
Ring Placement
Move your hand. The LED on the front of the receptor should be solid red. If the
LED blinks, the glove is out of view from the receptor (see “Troubleshooting”).
Español
Français
Paso 2: Colóquese el guante
1. Colóquese el guante según
las instrucciones que se indican
a continuación.
• Coloque los dedos en los
anillos digitales de modo que el
guante le quede sobre el dorso
de la mano. Cuando introduzca
el pulgar, aparte la correa.
• Después de meter todos los
dedos, pásese la correa
alrededor del pulgar y a lo ancho
de la palma de la mano. La
correa debe quedar sobre la
muñeca y sobre la palma de la
mano.
• Conecte la correa al gancho
ubicado junto al meñique. Si la
correa está muy floja, tuerza el
extremo de la correa antes de
colocarla en el gancho. No es
necesario que la correa esté
apretada para mantener el
guante en posición. Para la
mayoría de las personas no es
necesario torcer la correa.
Étape 2: Mettre le gant
1. Mettez le gant en suivant les
directives indiquées ci-dessous :
• Insérez les doigts dans les
anneaux avec le gant placé sur
le dos de votre main. Lorsque
vous mettez le pouce dans
l’anneau, écartez la sangle pour
ne pas qu’elle vous gêne.
• Lorsque tous les doigts sont
enfilés dans les anneaux, tirez
sur la sangle autour du pouce et
faites-la passer sous la paume,
du côté opposé de la main. La
sangle devrait passer sur votre
poignet et sous votre paume.
• Passez la sangle dans le
crochet placé près du petit doigt.
Si la sangle est trop lâche sur
votre main, entortillez l’extrémité
de la sangle avant dans la
passer dans le crochet. Il n’est
pas nécessai-re que la sangle
soit bien ajustée pour maintenir
le gant en place. Pour la plupart
des tailles de mains, il n’est pas
nécessaire de l’entortiller.
Important : Assurez-vous que
les anneaux se situent sur le
Importante: Asegúrese de que tiers supérieur de votre pouce et
los anillos queden alineados con de chaque autre doigt. Vous
pouvez facilement faire glisser
el tercio superior de los dedos.
les anneaux pour les ajuster. Les
Es fácil deslizar los anillos para anneaux s’élargissent pour
ajustarlos. Los anillos se
s’adapter à vos doigts.
expanden para adaptarse a los
Cependant, si vous devez utiliser
dedos; sin embargo, si necesita des anneaux plus larges, sortez
les anneaux du gant et
anillos más grandes, quite los
remplacez- les par les anneaux
anillos que trae el guante y
plus larges fournis (pour de plus
colóquele los anillos grandes
amples informations, veuillez
que se suministran. (Para
consulter le didacticiel sur CDobtener más información, vea la ROM.)
capacitación en el CD.)
2. Déplacez la main. La diode
2. Mueva la mano. El indicador électroluminescente sur l’avant
du récepteur devrait être rouge
luminoso de adelante del
receptor debe estar de color rojo et totalement allumée. Si la
diode clignote, cela signifie que
sin parpadear. Si el indicador
le gant est hors du champ de
luminoso parpadea, el guante
vision du récepteur (voir la
está fuera del campo visual del section «Recherche des causes
receptor (vea “Resolución de
de pannes»).
problemas”).
Important : Assurez-vous que
Importante: Mantenga la mano votre main reste toujours sur le
bureau. L’angle de détection du
siempre sobre el escritorio. El
récepteur est de 45 degrés, de
receptor tiene un campo visual
de 45 grados de lado a lado y de côté à côté, et de haut en bas.
Le gant doit se situer dans le
arriba a abajo. El guante debe
rayon du champ de vision du
estar en el campo visual del
récepteur. Lorsqu’il ne l’est pas,
receptor. Cuando no lo esté, la
la diode électroluminescente
luz de adelante parpadea.
située à l’avant du récepteur se
met à clignoter.
Deutsche
Italiano
Schritt 2: Handschuh
Fase 2. Indossate il guanto
anziehen
1. Indossate il guanto
1. Ziehen Sie den Handschuh
procedendo come segue.
gemäß den nachfolgenden
• Infilate le dita negli appositi
Anweisungen an.
anelli, poggiando il guanto sul
• Schieben Sie Ihre Finger in
dorso della mano. Quando
die Fingerringe, während der
infilate il pollice, spostate il
Handschuh auf Ihrem
cinturino in modo che non
Handrücken aufliegt. Beim
Einschieben des Daumens muss intralci.
der Riemen aus dem Weg
• Una volta infilate tutte le dita,
gezogen werden.
tirate il cinturino intorno al pollice
• Wenn sich alle Finger im
e attraverso il palmo, fino all’altro
Handschuh befinden, ziehen Sie lato. Il cinturino deve essere
den Riemen um den Daumen
und über die Handfläche auf die disposto sia lungo il palmo che
lungo il polso.
andere Seite. Dieser Riemen
sollte quer über Ihrem
• Collegate il cinturino al gancio
Handgelenk und der Handfläche accanto al mignolo. Se il
liegen.
cinturino è troppo lento sulla
• Verbinden Sie den Riemen
mano, attorcigliatene l’estremità
mit dem Haken neben dem
prima di inserirla nel gancio. Non
kleinen Finger. Wenn der
Riemen zu locker über der Hand occorre che il cinturino sia stretto
per mantenere fermo il guanto.
liegt, drehen Sie die
Riemenenden, bevor Sie ihn am Con la maggior parte delle mani
Haken befestigen. Der Riemen di normale misura, non è
muss jedoch nicht ganz fest
necessario attorcigliare
sein, um den Handschuh an Ort l’estremità.
und Stelle zu halten. Bei den
meisten Handgrößen muss der Importante: accertatevi che gli
Riemen nicht gedreht werden.
anelli siano inseriti intorno alla
Wichtig: Vergewissern Sie sich, nocca superiore del pollice e di
dass sich die Ringe um das
ciascun dito. È facile fare
obere Drittel Ihres Daumens und scorrere gli anelli per regolarne
der Finger legen. Sie können die
Position der Ringe einfach durch la posizione, in quanto essi si
allargano per adattarsi alle dita;
Verschieben anpassen. Die
se però avete bisogno di anelli
Ringe passen sich der Größe
Ihrer Finger an. Wenn Sie jedoch più grandi, rimuovete dal guanto
noch größere Ringe benötigen, gli quelli inadeguati e sostituiteli
ziehen Sie die vorhandenen
con quelli più grandi in
Ringe vom Handschuh und
dotazione. (Per ulteriori
ersetzen Sie sie durch die im
informazioni consultate la guida
Lieferumfang enthaltenen
sul CD.)
Ersatzringe. (Weitere
Informationen finden Sie im
2. Muovete la mano. Il LED
Lernprogramm auf der CD.)
rosso sulla parte anteriore del
2. Bewegen Sie Ihre Hand. Die
ricevitore deve restare acceso;
LED auf der Vorderseite des
se lampeggia, significa che il
Empfangsgeräts sollte
guanto è fuori dell’angolo ottico
durchgehend rot aufleuchten.
Wenn diese LED blinkt, befindet del ricevitore (vedi “Soluzione
sich der Handschuh nicht im
dei problemi”).
direkten Blickfeld des
Importante: accertatevi che la
Empfangsgeräts (siehe
„Fehlersuche und –behebung”). mano stia sempre sopra il livello
Wichtig: Vergewissern Sie sich, della scrivania. Il ricevitore ha un
dass sich Ihre Hand immer auf angolo ottico di 45 gradi sia
der Tischoberfläche befindet.
lateralmente che in verticale. Il
Das Empfangsgerät verfügt über guanto deve rimanere entro la
einen Blickwinkel von 45 Grad
linea ottica del ricevitore; se non
(vertikal und horizontal). Der
vi rimane, la spia sulla parte
Handschuh muss sich immer im
anteriore del ricevitore
Blickfeld des Empfangsgeräts
befinden. Ist dies nicht der Fall, lampeggia.
blinkt die LED auf der
Vorderseite des Geräts.
Page 2