1
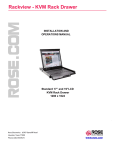
Rackview Dual Rail - KVM Rack Drawer
INSTALLATION AND
OPERATIONS MANUAL
Rackview 15”, 17”, 19” Dual Rail LCD
KVM Rack Drawer
1280 x 1024
Rose Electronics 10707 Stancliff Road
Houston, Texas 77099
Phone (281) 9337673
WWW.ROSE.COM
LIMITED WARRANTY
LIMITED WARRA
Rose Electronics warrants the Rackview Product to be in good working order for one year from the date of
purchase from Rose Electronics. Should this product fail to be in good working order at any time during this
one-year warranty period, Rose Electronics will, at its option, repair or replace the Unit as set forth below.
Repair parts and replacement units will be either reconditioned or new. All replaced parts become the
property of Rose Electronics. This limited warranty does not include service to repair damage to the Unit
resulting from accident, disaster, abuse, or unauthorized modification of the Unit, including static discharge
and power surges.
Limited Warranty service may be obtained by delivering this unit during the one-year warranty period to Rose
Electronics or an authorized repair center providing a proof of purchase date.
If this Unit is delivered by mail, you agree to insure the Unit or assume the risk of loss or damage in transit,
to prepay shipping charges to the warranty service location, and to use the original shipping container or its
equivalent. You must call for a return authorization number first. Under no circumstances will a unit be
accepted without a return authorization number. Contact an authorized repair center or Rose Electronics for
further information.
ALL EXPRESS AND IMPLIED W ARRANTIES FOR THIS PRODUCT INCLUDING THE WARRANTIES OF
MERCHANTABILITY AND FITNESS FOR A PARTICULAR PURPOSE, ARE LIMITED IN DURATION TO A
PERIOD OF ONE YEAR FROM THE DATE OF PURCHASE, AND NO WARRANTIES, W HETHER
EXPRESS OR IMPLIED, W ILL APPLY AFTER THIS PERIOD. SOME STATES DO NOT ALLOW
LIMITATIONS ON HOW LONG AN IMPLIED W ARRANTY LASTS, SO THE ABOVE LIMITATION MAY
NOT APPLY TO YOU.
IF THIS PRODUCT IS NOT IN GOOD W ORKING ORDER AS W ARRANTED ABOVE,
YOUR SOLE REMEDY SHALL BE REPLACEMENT OR REPAIR AS PROVIDED ABOVE. IN NO EVENT
W ILL ROSE ELECTRONICS BE LIABLE TO YOU FOR ANY DAMAGES
INCLUDING ANY LOST PROFITS, LOST SAVINGS OR OTHER INCIDENTAL OR CONSEQUENTIAL
DAMAGES ARISING OUT OF THE USE OF OR THE INABILITY TO USE SUCH PRODUCT, EVEN IF
ROSE ELECTRONICS OR AN AUTHORIZED DEALER HAS BEEN ADVISED OF THE POSSIBILITY OF
SUCH DAMAGES, OR FOR ANY CLAIM BY ANY OTHER PARTY.
SOME STATES DO NOT ALLOW THE EXCLUSION OR LIMITATION OF INCIDENTAL OR
CONSEQUENTIAL DAMAGES FOR CONSUMER PRODUCTS, SO THE ABOVE MAY NOT APPLY TO
YOU. THIS W ARRANTY GIVES YOU SPECIFIC LEGAL RIGHTS AND YOU MAY ALSO HAVE OTHER
RIGHTS W HICH MAY VARY FROM STATE TO STATE.
IBM, AT, and PS/2 are trademarks of International Business Machines Corp. Microsoft and Microsoft
Windows are registered trademarks of Microsoft Corp. Any other trademarks mentioned in this manual are
acknowledged to be the property of the trademark owner.
.
Copyright © Rose Electronics 2013. All rights reserved.
No part of this manual may be reproduced, stored in a retrieval system, or transcribed in any form or any means, electronic or mechanical, including
photocopying and recording, without the prior written permission of Rose Electronics.
Page 2 KVM Rack Drawer Dual Rail 15”-17”-19”
WWW.ROSE.COM
Rose Electronics Part # MAN-RV1-CDKVT
Printed In the United States of America – Revision 1.0
Table of Contents
Safety Instructions
Page 4
Pre-Installation and Package Contents
Page 5
Layout Diagram and Dimensions
Page 6-7
Installation Procedure
Page 7-9
OSD Function and Front Panel Controls
Page 10-12
Cable Connections
Page 12
Configuring Display Settings
Page 12
Specifications
Page 14
Technical Support
Page 15
Page 3 KVM Rack Drawer Dual Rail 15”-17”-19”
WWW.ROSE.COM
Safety Instructions
Please read all of these instructions carefully before you use the device. Save this manual for
future reference.
• Unplug equipment before cleaning. Don’t use liquid or spray detergent; use a moist cloth.
• Keep equipment away from excessive humidity and heat. Preferably, keep it in an air-conditioned
environment with temperatures not exceeding 50º Celsius (104º Fahrenheit).
• When installing, place the equipment on a sturdy, level surface to prevent it from accidentally
falling and causing damage to other equipment or injury to persons nearby.
• When the equipment is in an open position, do not cover, block or in any way obstruct the gap
between it and the power supply. Proper air convection is necessary to keep it from overheating.
• Arrange the equipment’s power cord in such a way that others won’t trip or fall over it.
• If you are using a power cord that didn’t ship with the equipment, ensure that it is rated for the
voltage and current labelled on the equipment’s electrical ratings label. The voltage rating on the
cord should be higher than the one listed on the equipment’s ratings label.
• Observe all precautions and warnings attached to the equipment.
• If you don’t intend on using the equipment for a long time, disconnect it from the power outlet to
prevent it being damaged by transient overvoltage.
• Keep all liquids away from the equipment to minimize the risk of accidental spillage. Liquid spilled
on to the power supply or on other hardware may cause damage, fire or electrical shock.
• Only qualified service personnel should open the chassis. Opening it yourself could damage the
equipment and invalidate its warranty.
• If any part of the equipment becomes damaged or stops functioning, have it checked by qualified
service personnel.
Regulatory Notices Federal Communications Commission (FCC)
This equipment has been tested and found to comply with the limits for a Class B digital device,
pursuant to Part 15 of the FCC rules. These limits are designed to provide reasonable protection
against harmful interference in a residential installation.
Any changes or modifications made to this equipment may void the user’s authority to operate this
equipment. This equipment generates, uses, and can radiate radio frequency energy and, if not
installed and used in accordance with the instructions, may cause harmful interference to radio
communications.
However, there is no guarantee that interference will not occur in a particular installation. If this
equipment does cause harmful interference to radio or television reception, which can be determined
by turning the equipment off and on, the user is encouraged to try to correct the interference by one or
more of the following measures:
• Re-position or relocate the receiving antenna.
• Increase the separation between the equipment and receiver.
• Connect the equipment into an outlet on a circuit different from that to which the receiver is
connected.
Page 4 KVM Rack Drawer Dual Rail 15”-17”-19”
WWW.ROSE.COM
Pre-Installation and Package Contents
Before Installation:
It is very important to mount the equipment in a suitable cabinet or on a stable surface.
Make sure the mounting location has good ventilation, is out of direct sunlight, and away from
sources of excessive dust, dirt, heat, water, moisture and vibration.
Unpacking:
The equipment comes with the standard parts shown in package content. Check and make sure
they are included and in good condition. If anything is missing, or damaged, contact your supplier
immediately.
Package Contents:
1 x Rackview Unit
2 x Mounting bracket and slide rail sets
1 x Power Cable
1 x User Manual
2 x Keys
1 x Set of screws and washers
1 x set CPU Interface Cables
Pre-Installation:
a) Preparation
• Check all peripherals against the packing list. Make sure that the unit was not damaged during the
shipping process. If you encounter any problems, please contact your reseller
• Before installation, make sure all peripherals and computers have been turned off.
• The cabinet depth range must be between 19.84” - 39.37” (504 - 1000mm) for the 15” and 17” models,
and between 21.8” – 39.37” (554 – 1000mm) for the 19” model. Contact your reseller for deeper
cabinet application.
• Reliable grounding of rack-mounted equipment should be maintained. Particular attention should be
given to power supply connections other than direct connections to the branch circuit.
b)
•
•
•
Power On Procedure
Power on the Rackview (see power switch on back panel)
Power on the KVM Switch or other connected product
Power on the CPU
c) Cleaning Your Monitor
To clean your LCD safely, please follow these steps:
• Disconnect the power cord.
• Gently wipe the surface using a clean, dry microfiber cloth. Use as little pressure as possible.
Page 5 KVM Rack Drawer Dual Rail 15”-17”-19”
WWW.ROSE.COM
Rackview Layout Diagram & Dimensions
Rackview Dual Rail 15” Model
Rackview Dual Rail 17” Model
Rackview Dual Rail 19” Model
Page 6 KVM Rack Drawer Dual Rail 15”-17”-19”
WWW.ROSE.COM
Rackview Product and Packaging Dimensions
Model
Product Dimension
(W x D x H) approx
Packing Dimension
(W x D x H) approx
Net
Weight
Gross
Weight
RV1-CDKVT15/DVI
449.8 x 443.4 x 44 mm
17.7 x 17.5 x 1.7 inch
605 x 560 x 202 mm
23.8 x 22.0 x 8.0 inch
10.5 kg
23.1 lbs
15.5 kg
34.2 lbs
RV1-CDKVT17/DVI
449.8 x 443.4 x 44 mm
17.7 x 17.5 x 1.7 inch
605 x 560 x 202 mm
23.8 x 22.0 x 8.0 inch
12.0 kg
26.5 lb
17.0 kg
37.5 lb
RV1-CDKVT19/DVI
511.3 x 443.5 x 44 mm
20.1 x 17.5 x 1.7 inch
664 x 564 x 185 mm
26.1 x 22.2 x 7.3 inch
12.5 kg
27.5 lb
19.0 kg
41.9 lb
Installation Procedure
Hardware Kit Contents
1.
Short single bracket, long assembled bracket and support bracket ( x 2 of each)
Page 7 KVM Rack Drawer Dual Rail 15”-17”-19”
WWW.ROSE.COM
2.
Washers, nuts and keys
Installation Procedure
3.
For a rack depth of 420-470mm (16.53 – 18.50”), with Rackview 15” and 17”, and for a rack depth
of 480-530mm (18.90” – 20.87”) with the Rackview 19”
Release the thumb screw on the front bracket (both sides).
Page 8 KVM Rack Drawer Dual Rail 15”-17”-19”
WWW.ROSE.COM
Install the front bracket and fix using cabinet screws.
4.
For a rack depth above 535mm (21.06”) with Rackview 15” and 17”, and for a rack depth
above 595mm (23.42”) with the Rackview 19”.
Remove the screws from the long assembled bracket.
Slide the long bracket into the existing rails and fix with 5 cap screws (each side).
Combine (I) and (II) together and fix with 7 cap screws.
Release the thumb screw from the front bracket and install the front bracket using cabinet screws.
Combine (I), (II) and (III) together and install the rear bracket using cabinet screws.
Page 9 KVM Rack Drawer Dual Rail 15”-17”-19”
WWW.ROSE.COM
5. When the rack depth is greater then 680mm (26.77”) with Rackview 15” and 17”, and greater than
745mm (29.33”) with the Rackview 19”.
Use the support bracket in place of (III) when the rack depth is greater than the limits shown above.
OSD Function and Front Panel Controls
Page
10
KVM Rack Drawer Dual Rail 15”-17”-19”
WWW.ROSE.COM
Figure 1: OSD Panel Control Buttons for the Rackview 19”. On the Rackview 15” and 17”
models, the OSD Control Panel is mounted vertically on the left side of the LCD screen.
Navigating the OSD Menu
There are eight different selectable menu items in the OSD.
To operate the OSD, press the “Menu” button
Use the “Down” and “Up” buttons to scroll through the Menu
Once the menu item has been selected, press the “Menu” button again to enter the sub-menu
•
Auto tune.
•
Input Source
•
Brightness
•
Contrast
•
Color
•
Position
•
Language
•
Recall
•
Exit
Auto Tune
Press the “auto tune” button. The panel will adjust the display size automatically and also tune the panel
to its best condition.
Controls Description
Input Source
Press the “menu” button to enter and you will see:
VGA / DVI
Use the “Down” and “Up” button to select the input source of signal.
Press the “menu” button to enter
Brightness
Press the “menu” button to enter.
Page
11
KVM Rack Drawer Dual Rail 15”-17”-19”
WWW.ROSE.COM
Use the “Down” and “Up” button to adjust the brightness of the display.
Press the “menu” button to enter.
Contrast
Press the “menu” button to enter.
Use the “Down” and “Up” button to adjust the contrast of the display.
Press the “menu” button to enter.
Color
Press the “menu” button to enter, and you will see
Ic
on
Use the “Down” and “Up” button to adjust the color of the display.
Press “menu” to enter.
Position
Press the “menu” button to enter and you will see
Ico
Use the “Down” and “Up” button to scroll.
Press the “menu” button to enter.
n Description
Language
Press the “menu” button to enter and you will see:
•
English
•
German
•
French
•
Italian
•
Spanish
Use the “Down” and “Up” button to scroll.
Press the “menu” button
Recall
Press the “menu” button to enter, and you will see:
Yes/ No
Select “Yes” button then ‘Menu” button to recall the factory setting.
Page
12
KVM Rack Drawer Dual Rail 15”-17”-19”
WWW.ROSE.COM
Select “No“ to return to the previous page.
Exit
Press the “exit” button to quit OSD menu.
Power Indicator
•
GREEN ON
•
RED
STANDBY
•
RED
SUSPEND
•
RED
OFF
Rear Panel Cable Connections
Depending on which Rackview model you have purchased, the rear panel layout could look like this.
123
4 5
6
1 = PS2 keyboard connector
2 = VGA connector
3 = PS2 mouse connector
4 = USB connector
5 = DVI-I connector
6 = IEC power socket
Configuring the Display Settings
After connecting the Rackview console and turning on your computer, you may need to configure one or
more of the following display settings:
•
Display mode (also called desktop area or video resolution)
•
Refresh rate (also called vertical scan rate or vertical sync)
•
Color depth (also called color palette or number of colors)
Each video card has several controls that let you adjust the display settings. However, the software and
driver for each video card is unique. In most cases, you adjust these settings by using a program or
utility provided by the manufacturer of the video card.
Most video cards use the Windows Display Properties control panel to configure the display. To open
the Windows Display Properties, click the right mouse button in a blank area of the Windows desktop
and then select Properties. The Settings tab usually lets you change the Color Palette and the Desktop
Area (x by y pixel resolution).
Some video cards integrate additional features into the Windows Display Properties control panel to
give you an exceptional setup that is flexible and easy to use. For example, the control panel may
include an Advanced Properties button, an Adjustment tab, or a Refresh tab for changing other settings.
Other video cards have a separate utility for setting display properties.
Whenever you change the resolution, color, or refresh rate, the image size, position, or shape may
change. This behaviour is normal. You can readjust the image using the panel on-screen controls.
Page
13
KVM Rack Drawer Dual Rail 15”-17”-19”
WWW.ROSE.COM
For more information on configuring the display settings, refer to the manual that came with your video
card.
You can adjust the horizontal and vertical position, contrast, and brightness to better suit your video
card and your personal preference.
Refer to the OSD section of this manual for more information on using the on-screen menu to adjust the
video display
Before you begin, make sure that electrical power to all the devices you will be connecting up has been
turned off. To prevent damage to your installation due to ground potential difference, make sure that all
the devices on the installation are properly grounded. Consult your direct reseller for any technical
issues if necessary.
Rackview Dual Rail 15/17/19” - LCD / Keyboard / Mouse Specification
Item
Page
14
KVM Rack Drawer Dual Rail 15”-17”-19”
Description
WWW.ROSE.COM
Display Size
15”
17”
1024 x 768 (XGA)
Max. Resolution
16M Colors (8-bit)
Color Support
400:1
Contrast Ratio (typ.)
Viewing Angle (CR > 10)
Pixel Pitch (mm)
Response Time (ms)
19”
1280 x 1024 (SXGA)
1280 x 1024 (SXGA)
16.7M Colors (8-bit)
16.7M Colors (8-bit)
450:1
R/L 130˚, U/D 100˚
R/L 170˚, U/D 160˚
0.297 x 0.297
0.264 x 0.264
Rise: 5, Decay:11
Rise: 1.2, Decay:3.8
1000:1
R/L 170˚, U/D 160˚
0.098 x 0.294
Rise: 1.3, Decay:3.7
250
Brightness (cd/m²)
Dual lamps for back light
Back Light
106-key PS2 keyboard with 2-button Touchpad mouse
Keyboard and Mouse
1x VGA (HD15)
1x DVI (on request for 15” model)
2x PS2
2x USB
1x Audio line in (optional)
Console Port Connectors
Power Input
Auto-sensing 100 to 240VAC, 50 / 60Hz
Power Consumption (Panel)
15” 16W. 17” 13.35W. 19” 13.6W
Multi-platform - Mix PCs, SUNs, IBMs, HPs & DELLs.
Compatibility
Operating System
Windows, Linux, Novell, HP-UX, SUN
FCC, CE
Regulation Approval
Environmental
0˚ to 50˚C (32-122˚F) Degree
Operation
-20˚ to 60 ˚C (-4 - 140˚ F) Degree
Storage
Operating: 10~90%, non-condensing
Relative Humidity
Chassis Construction
Heavy duty steel
Product Codes:
RV1-CDKVT15/DVI
RV1-CDKVT17/DVI
RV1-CDKVT19/DVI
Rackview Dual Rail 15”
Rackview Dual Rail 17”
Rackview Dual Rail 19”
Cables included
CAB-ZXV66MM005
CAB-USBAB006
CAB-DVIDMM006
/DCnn
VGA + PS2(MM) cable, 5ft (1.8m)
USB-AB Cable, 6ft (2.0m)
DVID-MM Cable, 6ft (2.0m)
12/24/48 DC power option
KVM Rack Drawer
KVM Rack Drawer
KVM Rack Drawer
Optional Items: (check with Rose Electronics for pricing and availability)
Audio Option
DC Voltage Option (12/24/48VDC)
Technical Support
If you are experiencing problems, or need assistance in setting up, configuring or operating your product,
consult the appropriate sections of this manual. If, however, you require additional information or
assistance, please contact the Rose Electronics Technical Support Department at:
Page
15
KVM Rack Drawer Dual Rail 15”-17”-19”
WWW.ROSE.COM
Phone: (281) 933-7673
E-Mail: [email protected]
Web: www.rose.com
Technical Support hours are from: 8:00 am to 6:00 pm CST (USA), Monday through Friday.
Please report any malfunctions in the operation of this Unit or any discrepancies in this manual to the
Rose Electronics Technical Support Department.
Copyright © Rose Electronics 2013. All rights reserved.
No part of this manual may be reproduced, stored in a retrieval system, or transcribed in any form or any means, electronic or
mechanical, including photocopying and recording, without the prior written permission of Rose Electronics.
Rose Electronics Part # MAN-RV1-CDKVT
Printed In the United States of America – Revision 1.1
WWW.ROSE.COM
[email protected]
(800) 333 9343
Rose USA (281) 933 7673 Rose Europe +49 (0) 2454 969442 Rose Asia +65 6324 2322 Rose Australia +61 (0) 421 247083
Rose Electronics 10707 Stancliff Road Houston, Texas 77099
© Copyright 2013 Rose Electronics. All rights reserved. Specifications subject to change without notice
Page
16
KVM Rack Drawer Dual Rail 15”-17”-19”
WWW.ROSE.COM