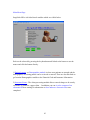
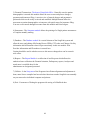
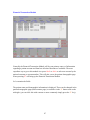
1
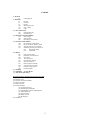
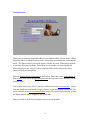
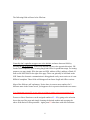
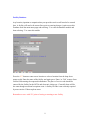
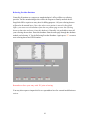
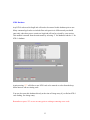
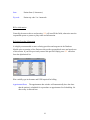
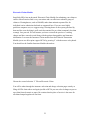
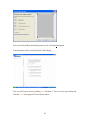
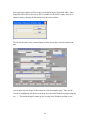
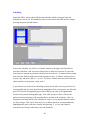
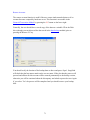
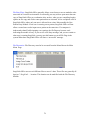
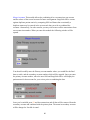
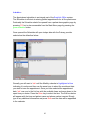
SurgiLink Office User Manual
vs. 3.074
John J Klosak
[email protected]
1.877.870.5465 (link)
Contents
(3) Welcome
(4)
Getting Started
(5) Databases
(6)
Provider
(7)
Insurance
(9)
Facility
(10)
Referring Provider
(11)
CPT / Charge
(13)
ICD9
(14) New Patient Entry
(16)
Demographic page
(20)
Insurance page
(22) Financial Transactions Module
(23)
New Charges
(26)
New Payments
(28)
Edit Charges or Payments
(29) Insurance Claims Module
(30)
Print Insurance Claim HCFA
(32)
File an Electronic Insurance Claim
(35)
Viewing contents of a Claim File
(37)
Submitting an Electronic Claim File
(38)
Print image format
(42)
ANSI 4010
(44) Reports
(45)
Daily Activity Sheet
(47)
Delinquent Account Review
(49)
CPT review
(50)
12 month review
(51)
CPT Payment Analysis
(52)
Insurance Analysis
(53)
Referring Doctor Analysis
(54)
Accounts with no Charges
(55)
Provider Charge Report
(56)
Facility Analysis
(57) Scanning
(60) Scheduling See page 82 also
(61) Time Savers (Hot –Keys)
Miscellaneous Pages and Important Functions described
(63) Main Menu Page described
(65) Patient Locator
(67) Financial Transaction Module
(71) Restore accounts
(72) Print Statements
(74) Utilities Modules
(74) Compile Name List
(74) File Management Module
(75) Field Defaults / Password Management
(76) Admin Password
(78) File Directories
(80) Merge Account
(81) Backup Files
(82) Scheduler
2
Welcome to SurgiLink Office.
Thank you for choosing SurgiLink Office for your Office management needs. We are
confident you will find SurgiLink Office to be more than adequate to manage your office
financial, billing and patient tracking needs. SurgiLink office is designed to be used in an
Anesthesiology office(s) or Surgeon’s office and has specialized reports and functions to
automate your billing needs. A patient scheduler is included in the package. The
capabilities of this software package are quite astounding allowing an unlimited number
of workstations running Windows XP with the potential for 40 individual physician or
nurse practioners and 36,000 active patients. The Insurance module is fully able to bill
standard HCFA or Medicaid forms and envelopes or communicate with the latest ANSI
4010 electronic billing language. All fully encrypted and HIPAAS compliant. The
following pages will help you with the initial database setup (please perform first),
patient entering, charge and payment entering and finally creation of a HCFA insurance
form or electronic insurance submission. If during your first year of use you decide not to
continue using this package, we will be happy to refund your full purchase price with
documented deactivation of the product. This manual is arrange in the order we would
recommend you use this product. If you wish to use it professionally we would appreciate
the opportunity to come out and assist with the final installation and fine tuning to your
practice. Please review all areas of this manual as many important points are concentrated
at the end.
Visit our web page at www.SurgiLink.com.
3
Getting Started:
Thank you, for selecting SurgiLink Office as your medical office software choice. When
SurgiLink Office is started for the first time, several files are initialized to your personal
needs. The above initial screen will be shown with this first start. Please take a moment
to carefully fill in the four fields. You will have to remember your three initials and
password that you now select to reenter SurgiLink Office in the future so key these
entries carefully and thoughtfuly.
Enter the Primary Doctors Last name in the first box. Then enter your (not the doctor’s)
three initials. Now choose any personal password that is private to you and enter it in the
next two fields.
You are now ready to go! Press F9 and you will be taken to the main menu page. Please
note that SurgiLink automatically assigns ‘surgeon’ as the administrative password. This
can be changed in the password management section. This password is necessary to enter
the Report module and to assign new user passwords.
Please Proceed to the Provider Database Area as soon as possible.
4
Databases
The word ‘database’ seems daunting. It simply indicates this is a central collection of
numbers and names. In SurgiLink Office, the database area can be accessed from many
convenient areas as you will see, but to begin with we would recommend you enter some
of the primary physician’s information that SurgiLink Office will need immediately.
Prior to patient data entry please go to the Database module from the Main Menu page
below by pressing ‘5’ with the keyboard or mouse to begin data entry.
Once in the Database module, select number ‘1’ to enter provider information.
5
The following fields will need to be filled out.
Generally don’t capitalize as upper case is the default, and move between fields by
pressing the tab or enter key. (notice that shift/tab will move the opposite direction). Fill
out the fields completely prior to using SurgiLink Office for production usage. For testing
purposes you may simply fill in the name and SSN, address (office) and date of birth. Of
note are the NSF fields on the right of the page. These can generally be left blank as the
NSF format for electronic communication is being phased out by most carriers as it is not
HIPAAS compliant. These fields will disappear from future SurgiLink Office versions.
Most of the fields are self explanatory. Notice there is room to enter numbers for 2
different states in the license area if you happen to be in a practice that borders two states.
Very Important to press F9 to save prior to exiting or going to the next practioner!!!!!!
Doctors or Nurse Practioners can be assigned numbers 02 – 40 by going to the selection
box at the top of the page and simply choosing the desired number and repeating the
above field entries for that practioner. Again press F9 when done with each Practioner.
6
Insurance Database
This is where insurance carriers should be entered. These only need to be entered once
and then they will be available for all future entries for this carrier. Also the group and
individual provider numbers are entered once and can be easily copied from carrier to
carrier as generally they don’t change. To begin select ‘F5’ to enter a new carriers name.
enter the name of the carrier ( note: if you have several carriers with the same name such
as ‘AETNA’ with one being from El Paso and another from Boise ID. You may wish to
label one AETNA (el Paso) and the second AETNA (Boise) for ease of identification.)
Again proceed with filling out the fields. Note that provider names are listed above the
group and individual numbers if you entered them in the provider database above. If you
are an anesthesiologist billing service and would like the anesthesia minutes listed
separately on the HCFA for this carrier check the box indicated above. Generally this is
‘yes’.
7
Please note the following:
Please note the following to automate ID number entry
A real time saver is included with this database. Many carriers have the same group and
individual numbers (generally mimicking Medicare). Once you have entered a provider ‘s
numbers for a carrier, pressing ‘F7’ will store the numbers internally (until you close
SurgiLink office). Simply press ‘F8’ here and the numbers will be automatically inserted
for all 40 providers. To repeat, if you are entering a new insurance carrier, simply go to
Medicare first and press ‘F7’ to store the numbers. Now enter the new carrier as above
and when it is time to type in all the ID numbers , simply press ‘F8’ and the fields will be
filled. These values are stored until you exit SurgiLink so you don’t need to press F7
again.
Remember to save each carrier with ‘F9’ prior to leaving or entering a new carrier.
This is also where insurance carriers can be deleted from the system or edited for billing
addresses or other information.
8
Facility Database
Any location, inpatient or outpatient that your providers work at will need to be entered
here. A facility will need to be entered here prior to entering charges. Again access this
Database from the main menu page and selecting ‘5’ to enter the database module and
then selecting ‘3’ to enter this module.
Press the ‘F5’ button to enter a new location or select a location from the drop down
menu to edit. Enter the name of the facility and again press ‘Enter’ or ‘Tab’ to move from
field to field entering the requested information. The place of service code should be
entered for the facility for the HCFA and electronic claim type . Generally these will be
the same though occasional exceptions exist. A facility ID code is not currently required
by most carriers. If known please enter.
Remember to save with ‘F9’ prior to leaving or entering a new facility.
9
Referring Provider Database
Generally all patients to a surgeon or anesthesiologist’s office will have a referring
provider. For the anesthesiologist this will be the surgeon or Family medical doctor.
SurgiLink Office requires an entry here for billing purposes. All your referring doctors
will need to be entered here. (Note: that when a new patient is entered in SurgiLink
Office, you can access this database from the new patient page to enter the referring
doctor at that time and enter it into this database). Generally it is preferable to enter all
your referring doctors here. Enter this database from the main page through the database
module and selecting ‘4’ for the Referring Provider Database. Again press ‘F5’ to enter a
new referring doctor and UPIN number.
Remember to Save your entry with ‘F9’ prior to leaving.
You may also export or import this list to a spreadsheet here for external modification or
review.
10
CPT/Charge Database
The CPT database is a critical database for anesthesia and surgical practices. You will
want to spend time understanding and correctly entering the information here as it will
impact your charging habits and entries. This database is entered from the main menu by
pressing ‘5’ and again selecting ‘5’ to enter the CPT Database.
Anesthesiology billing offices will want to immediately enter the dollar rate per unit time
that they will be charging. Most offices have several rates for different carriers and five
fields are allowed here. Enter the dollar and cents amount per unit you desire as above.
The minutes per unit are also specified here and generally are 15 for Medicare and 12
commercial though 3 fields are allowed if you need an addition minute per unit rate. The
illness severity score will be familiar to anesthesia billers as the ASA score and are
entered here. If you would like extra billing units for P3 or above enter these here. (note
generally enter 0 for P1 and 2, 1 for P3, 2 for P4 and 3 for P5 is entered).
11
Press ‘F5’ now to enter a new CPT code and charge or select one from the list box to edit.
Depending If the CPT is for anesthesia, surgery or medical differrent fields will need to
be filled out. Generally for an anesthesia service the procedure name, and CPT code and
Base units will be entered. Many of these are included with SurgiLink Office but
variations exist and need to be checked. If an ICD code ,such as for cataract surgery is
known, it should be entered here as it will be automatically entered in charges later
avoiding reentry later. For surgical or medical services you will want to specify a charge
here. If you would always like a modifier to be associated with a CPT such as 26 for
professional componenet only. Type it in here. (Note: you have to enter either a base unit
or a charge for each CPT code. Multiple charges are not allowed here but can be edited
later.)
Remember to Save your entry with ‘F9’ prior to leaving or entering a new charge.
Please note to edit a charge you may search the list box by name or CPT code and press
‘Enter’ or double click the entry with your mouse. You may also export the list to a
spreadsheet here or import a list here. Caution is suggested here as errors are commonly
introduced by external spreadsheets. Be sure to back up files prior to this function.
12
ICD9 Database
Any ICD-9 code used in SurgiLink will need to be entered in this database prior to use.
Many common legal codes are included but each practice is different and you should
enter only codes that you are certain are legal and will not be rejected by your carriers.
This module is entered from the main menu by selecting ‘5’ for databases and the ‘6’ for
ICD-9 database.
Again pressing ‘F5’ will allow a new ICD9 code to be entered or select from the drop
down menu to edit an existing code.
You can also enter this database directly at the time of charge entry if you find an ICD-9
code lacking. See charge entry.
Remember to press ‘F9’ to save an entry prior to exiting or entering a new code.
13
New Patient Entry
Once you have reviewed the databases and put in some preliminary information about
your practice as described in the above sections, you are now ready to begin entering
patient information. Initiating a new patient entry can be done in 3 ways. Perhaps the
easiest from the main menu is simply to press the ‘New Patient’ Quick Button shown
here.
The most common method is to use a ‘Hot-Key’ combination ALT-N (press the ALT key
and the N key simultaneously). This will exit (without saving) wherever you are in
SurgiLink Office and begin a new patient entry. Lastly, you may select from the main
menu ‘1’ Patient Locator, and then ‘N’ to initiate a new patient entry. All of these
methods will bring up a Patient Demographic Page shown here.
14
Each field is described here. Note that you move field to field with the Enter or Tab key
and Shift-Tab will retard one field. Only upper case is allowed but do not use you cap
lock or shift key as SurgiLink Office does this for you. Buttons will be described after the
field descriptions.
Patient information
Last
Enter Patient’s last name
First
Enter Patient’s first name
Initial
Middle initial
Title
Two character Title
(Mr., Ms, Dr, Jr) for mail purposes (not mandatory).
SSN
Social Security Number
Birth Date
8 digit birth date (must be month,date,year)
Gender
M/F
Home phone 10 digits with no ()- allowed
Work phone
10 digits with no ()- allowed
Definable
User defined in Utility/Field defaults
Definable
User defined in Utility/Field defaults
Street Line 1 Patient Address
Street Line 2 Patient Address
City
Patient City
15
State
Patient State (2 characters)
Zip code
Patient zip code 5 or 9 numerals
Bill to information
Generally the same as above and pressing ‘F4’ will auto fill the fields, otherwise enter the
responsible spouse or parent or party name and information.
Referring Provider Information
It is highly recommended to enter referring providers and surgeons in the Database
Module prior to entering a New Patient as this avoids typographical errors and speeds use
of this section. If you have previously entered this provider simply press ‘F5’ and select
from the alphabetical list.
Else carefully type in the name and UPIN required for billing.
Appointment Dates The appointment date window will automatically have the dates
that the patient is scheduled for a procedure or appointment. See Scheduling. No
direct entry is allowed here.
16
Patient Instructions You may want to mail your patients a reminder each month of
appointment or procedures. Here you can type instructions for the patient, such as,
‘Please call our office to arrange an office visit etc.’ After the instructions are
entered, enter a 4 digit return date and these labels can be printed from
Utilities/Process return cards on labels and mailed on post cards monthly. The
date can be as far in the future as you wish.
Employer Name
Required by some carriers.
Deceased Y/N
Default is N.
Inactive Y/N
Default is N. You may wish to make a patient inactive once placed
in collections to remove his debt from report inclusion. Also once inactive and 3
years have past, if not in collections, SurgiLink Office may reuse his account
number.
Automatic billing
Default is Y. Generally this should be checked yes and when you
generate your monthly statements, this account will be included. You
would indicate ‘N’ if you don’t want a monthly statement mailed such as
for a Medicaid patient or courtesy patient.
Office location
Default is 1. If you are billing for several profit centers that you
wish to track separately in the report module, you may specify 1-9 in this
area and tracking will be automatic. For most practices generally this is
left ‘1’.
Collections
Default is ‘N’. If a patient is turned into collections for non
payment of funds, check ‘Y’. this will prevent SurgiLink Office from
reissuing the account number so you have a permanent record of this data.
17
Buttons (Demographic Page)
F2
Clears Patient Instructions.
F3
Toggles to and back Patient Insurance Page.
F4
Copies patient information to Bill to information.
F5
Selects Referring Doctor.
F6
Clears the page (caution here).
F7
Saves entry and proceed to Financial Transaction Module.
F8
Prints the Demographic information for office use.
F9
Saves entry and returns to main menu.
F10
Saves entry and proceeds to scheduler.
F11
Scans a page into Account if attached scanner detected.
Please note the following Now to not loose data.
In the upper right corner of the window is the assigned account number. If this has
pending listed then the data is NOT saved. Pressing ‘Escape’ in SurgiLink Office
generally will exit the module without saving or altering the existing data so if you leave
this module now your entries will be lost. (a warning will be given).
18
There are 4 ways to save the data and have an account number assigned.
1) Press F9. An account number will be assigned and you will return to the main
menu
2) Press F7. An account number will be assigned and you will proceed to the
Financial Transaction Module where you can enter a charge.
3) Press F10. An account number will be assigned and you will proceed to the
Scheduler. Note that the minimum information to enter the scheduler is the full
name, phone and Date of Birth and SSN. You do not have to enter all the other
fields to schedule a new patient appointment. This can be done at the office visit.
4) Press Alt-S. generally not recommended but if you must leave without entering all
the required information, this will assign an account number.
19
Patient Insurance Information
Generally you will want to enter the patient insurance at this time. Note that pressing ‘F3’
will toggle back in forth between the demographic page and insurance page. Information
is not saved by going to the insurance page.
Notice that Insurance names and addresses cannot be directly typed in. This may seem
inconvenient but is necessary to prevent different names being used for the same carrier
and inevitable typographic errors. To enter the primary insurance, press Ctrl-P or click
the Primary button with the mouse. A drop down window will appear with an
alphabetical list of the carriers you have entered in the Insurance Database (described in
the database section). Simply select the proper carrier from the list and the information
will be filled in. If the carrier was not entered previously, you may conveniently proceed
now to the insurance database and not loose you place here by pressing ‘F8’ and enter the
Insurance Database and make the entry now. When you save the new entry you will
automatically come back here and may select the new entry from the drop down window
above. Be sure to check the proper box for relationship. And enter the group and ID #.
20
Note: that pressing the ‘Insert’ button while in the ID# field will automatically transfer
the patients SSN to this field . Very convenient for Medicare as the SSN and ID# are the
same except for one appended letter. Pressing ‘Insert’ when in the Insured name field
will transfer the last and first name of the patient to the field.
Repeat the above to enter secondary or tertiary insurances. Note : press Ctrl-S for
secondary and Ctrl-T for tertiary carriers.
Remember – information not saved unless F9, F7 or F10 are pressed as indicated above
and an account number is assigned.
21
Financial Transaction Module
(gateway to charges & payments)
The heart of SurgiLink Office and generally the starting place for any established patient.
Here is where Charges and Payments are entered. Insurance claims are made both paper
and electronic. Patient demographics can be altered. Statement printed. Most databases
also can be accessed from here. You will want to fully review this section. To enter this
area simply press ‘F7’ in a new or established patient demographic or insurance page.
(Alternatively, this module may be entered from the main menu page – numeral ‘3’, and
then supply the account number or name.)
The patient name and account numbers are shown at the top. Filed Charges, Payments,
Refund and Writeoff are listed and sorted. Each can be individually selected for review or
editing. The aged balances for each provider is shown at the bottom. Each Button will be
reviewed at the end of this section, but lets proceed to entering a new Charge from here.
22
New Charge Entry
Press ‘F5’ from the Financial Transaction Module and a New Charge Page will be
displayed.
Notice most of the information is automatically transferred limiting errors and repeat
entries. After you select the provider this charge is for you will need to enter the
following fields.
Date of Posting
Generally today’s date (may use +/- key to advance or retard all
date fields and ‘Insert’ will place today’s date in ALL date fields)
Date of Service
From
The date of Service
To
Generally the same as ‘From’ unless a series of visits.
Emergency Indicator Y or N.
Return to work date
Not mandatory
23
Disability Dates
Not mandatory
Hospitalization
Mandatory for Inpatients
Facility
Mandatory to select facility where service provided. Press ‘F5’ to
select from drop down window. Note: must be entered first in the
facility database described in the database section.generally arrow
down to the facility (or press the first letter of the facility) and
press “Enter’ to transfer to Charge field.
Charge Line
F6, F7 and F8
To enter the CPT code of the Service press F6. Notice that 3 separate charges are
allowed per New Charge entry. You may recall that a HCFA form allows 6
entries per individual form. Generally all similar charges that are done on the
same day and facility may be grouped here as you would on a HCFA. Press F6
now to enter the first Charge. A drop down box will be presented
and you may search this by name or CPT code. Once found press enter. Note If a
CPT/charge was not entered previously, you may enter the CPT database now
and not loose your place by pressing ‘F4’ and enter the CPT information. Return
here and select as above. You have to enter a dollar charge or a Base unit for the
service in order to proceed. Enter a legal ICD9 code or press F7 to enter. Note that
the ICD database can also be entered now by pressing ‘F3’. Remember to check
the Type of Service entered. 7 is used for anesthesia and will be automatically
entered if you enter Anesthesia start and stop times below. Also enter any
modifiers for ASA score now or press F8 to access from a list. (if you desire
different modifiers in your copy of SurgiLink Office contact your vendor).
Units of Service
For surgical or medical services generally left 1. For anesthesia
with a type of service ‘7’ will be calculated from the start and stop times.
24
Anesthesia Start
For anesthesia service enter the beginning and ending 4 digit time.
Anesthesia Stop
Enter the ending time. Units will reflect minutes now for TOS 7.
Assignment
Y or N (may be set in Field Defaults).
Preauthorization
Enter a preauthorization number if available.
Round Time up
For anesthesia times. Do you wish orphan minutes to be rounded
up or down in units.
Any comments
Enter if desired.
Buttons
F2
Calculate Anesthesia Charges. Press F2 now if you have any TOS 7 entries for
anesthesia and you will be offered in a drop down window to select the charge per
unit and minutes per unit. Once selected, any service with a blank charge and An
indicated Base unit will have the charge calculated and will include any
modification for risk units as indicated. Note that these charges and rates are
entered in the CPT database module discussed under databases and can be
modified now by pressing F4 and entering the rates.
F3
Enter the ICD database to enter a legal code and return here.
F4
Enter the CPT database to enter a legal code or rate.
F9
Save Charge(s). Will check for missing required information and then save each
charge to the Financial Transaction module. You will be returned now to that
module.
25
Payment Entry
Payment Entries like Charge entries are entered through the Financial Transaction page
by pressing F6. In SurgiLink Office all Payment, Refunds and Writeoffs have to have a
previously entered charge. charges and payments are linked in this fashion. When a
payment is entered (by pressing F6), you will be shown a list of charges sorted by
provider and date entered on this account.
Select the charge the payment is for from the list and press enter or F9.
A Payment Entry page will now be opened.
26
Notice most of the information is entered for you and cannot be altered. Simply enter the
amount of payment, check the payment box and enter the check # if know. Note this
important time saver: if this is a combined Medicare check for many different services
and patients and you previously entered the same check number. You can push the
insert key and the last check number will be inserted.
Press F8 to select the source of payment and your done.
Remember to press F9 to save the entry and return to the Financial Transaction page.
A special note is needed here regarding Scanning. It is very convenient at this time to
scan in an EOB from the carrier. Simply press F5 and scan in the document and it will be
linked to this page for later viewing if needed. Also note that similar to the Check # entry,
if you scanned in an EOB from a combined payment, you can press F6 and the EOB will
be inserted in this page so no need to rescan combined EOBs. Please review the chapter
on scanning and image acquistion in SurgiLink Office.
Refunds and Writeoffs are entered exactly the same. Simply check the appropriate box.
27
Editing Charges or Payments
Charges and Payments can be edited or reviewed in detail from the Financial Transctions
page.
Simply highlight the desired Charge, Payment, Refund or writeoff by cursoring up and
down with the mouse or arrow keys ,and Press Enter or ‘V’ to view the entered data of
the charge or payment. Make whatever changes you wish and then press ‘F9’. To save
the alterations. If you do not make alterations press ‘Escape’ to return to this module.
28
Insurance Claim Module
The Button ‘I’ in the Financial Transaction Module is the most convenient way to file a
claim or perform most insurance related transactions and is best done at the time of filing
a charge. After you file a charge in the financial transaction module ,as in the above
section, press the Button ‘I’ or the Key ‘I’.
You will notice several options here. You can immediately print a claim here or store for
group printing later. Both are similar so we will proceed with printing immediately now.
Electronic claim filing is also very similar but will be discussed later.
29
Proceed with selection ‘1’ Print Paper Claim.
Select the provider (See Provider Selection Window in Time Savers Section) and confirm
that the account number is correct (should be automatically filled in) and that you desire a
HCFA 1500 format. (other formats available at request).
Press F9 to proceed.
Verify the Primary and Secondary Carriers you wish this claim sent and again press F9 to
proceed.
30
Select up to 6 charges to include on this HCFA by using the mouse or keyboard with
arrows and the space key to highlight as in any Windows program.
Once you have selected the charges you wished filed again press F9.
And your documented will be printed or stored. SurgiLink Office scans the entry to stop
most omissions that cause rejections. If errors are detected you will be taken to the area
of concern to complete the information.
You will notice an automatic entry in the comment area of the Financial Transaction
Module. This occurs with all claim filing or patient statements.
31
Electronic Claims Module
SurgiLink Office has an advanced Electronic Claim Module for submitting your claims to
carriers. Most Practices find it very convenient and cost efficient to submit a group of
claims to Clearinghouses ,such as WebMD, rather than maintain separate files for
individual carrier submission but both are supported here. If you are not a highly
proficient computer user, we suggest using a clearing house as the reports generated by
them and the error checking is well worth the nominal fee per claim (commonly less than
a stamp). Lets proceed. We will assume you have reviewed the process of creating
charges and have entered several along with the patient demographics and insurance
information. Lets enter the Insurance Claim module from the Financial Transaction
Module just as we did to print a paper HCFA by pressing ‘I’ with the mouse or keyboard.
You should see the familiar Insurance Module shown here.
Choose the second selection ‘2’ File an Electronic Claim.
You will be taken through the insurance selection and charge selection pages exactly as
filing a HCFA claim above and again just like a HCFA you can select 6 charges to put on
one claim form electronic or paper. Be cautious that the place of service is the same for
all claims lumped together on one form.
32
After you select the charges press F9 to proceed. After you enter the Coinsurance amount
which generally is 0, you will be taken to a standard windows file selection box.
SurgiLink Office creates two standard files for all 40 practioner. They are HCFA and
Medicaid which are usually reserved for stored paper claims for printing.
(The actual location of these is C:\SURGILINK\ELECTRONIC\DOCTORxx\ where xx is
the numeral for each doctor).
If you wish to create an electronic file simply type the name in the file box ,such as,
Medicare.Exx or WebMd.Exx. Generally you will want to enter the file WebMd.Exx.
33
The appendix should be Exx again where xx is the numeral representing the provider.
(You only have to create the file once per provider and then it will remain available for
all future use.
Press the Open key or press Enter and you should see a ‘successful message’ shown.
That’s it your ready to enter a another claim.
If you want to check that the claim was entered in the selected file. Review the chapter on
‘Viewing a claim file, page 35.
You should also see an automatic comment entered in the Financial Transaction module
indicating the Doctor, Date, CPT code(s) and insurance carrier the claim was submitted
to.
34
Viewing a Claim File
All claim files whether Electronic or stored Paper are stored in SurgiLink Office for
processing. Prior to submitting or printing the files they can be ‘Viewed’ to see who and
what are in each and you can selectively delete claims if desired. If you wish to change
the contents of a stored HCFA or claim you will need to delete it here and reenter the
altered claim.
To view a claim file, Enter the Insurance module from the Financial Transaction page or
the main menu with numeral ‘2’ Insurance Claims.
Select numeral ‘4’ View Stored Claim file. And select the provider of the claim file you
wish to review (01-40 or press the providers first letter of the last name).
A standard file selection window will be shown and all files for this provider are
available for selection. Select the file you wish to review whether stored paper or
electronic and press ‘Enter’.
35
All the charges that are in the file will be shown and sorted as above. You may print the
list if desired or delete an erroneous entry. A point is needed regarding deleting entries. If
you created a Single HCFA for Mr. Fred Anders with 4 charges and stored it. You will
see Anders, Fred four times listed in the box with each CPT code and charge listed
individually. You cannot delete an individual line from a HCFA. If you wanted to deleted
one of these charges for Mr. Anders, all the charges would be removed that were
included on the HCFA so be careful to resubmit them. To delete a claim simply highlight
the claim desired and press the ‘Delete’ key. This is a permanent deletion.
36
Submitting an Electronic Claim
The claims that you store in an electronic file, such as, WebMD.E02 are not in a usable
format that an insurance company will accept. Many carriers will only accept electronic
claims in large bulk from clearing houses (WebMD) and not individual providers.
Exceptions exist, particularly with Medicare which generally will accept claims from
individual providers. In order to submit or transmit a SurgiLink Office claim file to a
carrier or clearinghouse, you will have to convert the file into a format the carrier or
clearinghouse can accept. SurgiLink Office is particularly efficient at converting to a
form called ‘Print Image’ which WebMD or Mdonline accepts without difficulty.
Prior to conversion, we recommend you purchase a 256 meg usb memory stick (about
$50.00 at office supply stores). Plug it into your USB port and determine which drive
letter your computer assigns to it. Generally E:\ or F:\ in ‘My Computer on the Start
Button’. On the main menu of SurgiLink Office, use your mouse and click the word
‘File’ and select File Directory as shown here.
The current settings for SurgiLink Office will be displayed as below.
37
Change the last entry ‘Path for Closed Files’ from A:\ to match the drive of your memory
stick i.e. E:\ and press F9 to save and restart. You are now ready to process your files for
the clearing house or insurance Carrier.
38
From the Insurance module accessed from the main menu or the Financial Transaction
Module press ‘3’ to close and move an Electronic File.
Select the provider 01-40 that you want to process
and press F9 to continue.
39
A standard file selection box will be displayed and generally you will want to select the
Clearing house file such as WebMd.E01 (for provider 01) and click open. You will be
prompted with a message asking to confirm if this is the right file. After you do you will
be prompted with anther file selection box as below and it should be pointing at the drive
represented by your memory stick i.e. E:\ .
Simply click open and again a message will prompt you if this is the correct drive and
file. (should be E:\ WebMd.E01 for provider1, E:\WebMd.E02 for provider 2 etc.). Click
yes and the file will be processed and moved to the memory stick. SurgiLink Office will
40
check if the entire contents were moved and if the results are correct it will display a
message ‘Successful’. Click Ok
Now Click to clear the Source file and this will remove the claims from SurgiLink Office
leaving only the processed files on your memory stick. It is important to clear the files
once processed or you will resubmit the same information in the future. Prior to
emailing your files to WebMD please make a copy of the entire memory stick on
your computers hard drive. Most practioners find if they create a directory called
C:\Submitted claims\ and create folders in this directory for the date of submission i.e.
2005 May 1. They copy all the files from the memory stick into the folder in case the
files are lost or corrupted in transit You will need to contact your clearing house of choice
and they are responsible for transmitting the files from you to them generally by modem
or the internet with encryption.
The above procedure using the ‘Close and Move Function’ uses a format called print
image which is used by major clearinghouses for processing. Medicare will not accept
this form but uses ANSI 4010 discussed below.
41
ANSI 4010
Medicare and some carriers will accept files directly from providers. This can save some
money as generally this service is provided free from the carriers but reports and
complexity of transmission may curtail your use of this. If you decide to go this route,
SurgiLink Office will support the HIPAAS compliant transmission of information as
below.
First make sure the ANSI 4010 fields are correctly filled out in the Utility Module
accessed from the main menu.
Your carrier will supply you with most of these numbers but a detailed information sheet
is available from SurgiLink upon request. There is a drop down selection box at the top
which allows for 3 different carriers numbers to be stored. If you need more again contact
you SurgiLink Office vendor.Once these values are entered correctly the conversion of
the Claim file to a ANSI 4010 is essentially the same as for the above described process
to ‘close and move a file’ . In the insurance module, select numeral ‘6’ Convert to ANSI
4010. You will be presented with a choice of the carriers you entered for ANSI
submission under Utilities above.
42
Select the provider and carrier and press F9 to continue.
An identical file selection box and storage box will be presented. If you agree with the
selections click yes and again if successful SurgiLink office will offer to clear the source
file for you. Remember again to save the contents of the memory stick to a folder on you
hard drive prior to submitting to Medicare or the carrier. Once submitted , erase the
memory stick to use again.
43
Report Module
One of the strongest features of SurgiLink Office is the report capability. Here you can
analyze your practice for strengths and weaknesses. Find delinquent accounts and quickly
remedy problems. Reviewing each Insurance Carrier is easily accomplished.
Each module will be briefly gone through here.
44
Daily Activity Sheet, is the module most practices use almost daily to balance their
receivables. Select ‘1’ from above.
Select the individual provider or if you wish select *.* for all providers. Remember
providers can be selected throughout SurgiLink Office by their numeral (01) or the first
letter of the last name. Tab down to the Beginning and ending dates and adjust them with
the + and – keys to reflect the range you desire and press F9 to begin the search.
Soon the results will be displayed as below .
The List displays the individual Charges, Payments, Refunds and Writeoff for the time
period selected. The totals for each column are summed up at the end of the List for each
45
column. There are a few very powerful tools available to you now that you will want.
Note you can toggle the above listto sort by Date or Name by pressing F6 Save the
contents of the box to a Spreadsheet format with F7 or Print the Contents with F8. In
most reports you may go directly to a patients financial card from this list box if you
suspect a problem or want more information. In the above list box, if you arrowed
down or used the mouse to double clicked (or press enter) a patient’s name. you will
go to that patient financial Transaction Module. Here you can review or edit charges
and payments or proceed to the patient demographics or insurance page and edit changes.
Remember to save changes with F9 or exit the financial module with Escape and you will
be returned to this report page where you can continue your review. This ability to access
the patient information and return to the report module is a key feature of all the Report
modules and very useful for rapid review and decision making.
46
Delinquent Account Review
Selection ‘2’ in the report module will bring up a menu page shown below
here you can specify the provider and whether you wish to look for a single insurance
carrier or all carriers. You can enter the minimum days the account should be delinquent
to trigger a review and the minimum dollar amount to review. Generally it is best to skip
inactive accounts. Press F9 to begin.
Soon the following list will be displayed.
47
The patient’s name and insurance carriers and the amounts owed and aged by 30,60 and
90 days are listed. Note again that you can arrow down to an individual patient and press
‘Enter’ to go to the financial transaction module to review if a claim was sent and make
decisions what to do with this delinquent account. When done pressing Escape in the
Financial Transaction Module, will return to this module rather than the main menu page
for continued review.
48
CPT Review
CPT Review is entered by selecting numeral ‘3’. This is a very convenient method to
analyze how you are doing with certain CPT codes.
Enter a date range and up to 5 CPT codes for simultaneous review. The report should
look similar to below.
Note again that individual entries may be reviewed by selecting the line in the list box
and pressing ‘Enter’ to go to the financial transaction module. Escape will return here.
49
12 Month Review
This is a very nice module to look at monthly summaries of charges, payments, refunds
and writeoff along with account receivable and a summary of the preceding 3 years is
presented for comparison. You can also separate the results by office location or profit
center (See the patient Demographic page 1-9). Once entered select the provider and
year. Use the + / - sign to adjust the year and press F9.
The report should look like below. With monthly summaries presented.
To print this page use the PrtSc function and paste into a wordprocessor such as ‘Word’
and print the page.
50
CPT Payment Analysis
CPT payment analysis is simply just that. You select the provider and year and SurgiLink
Office goes through your databases and analyses what you charge and receive for each
CPT code you use. With this you can determine what percentage of your receivables is
from each code and see trends over time. The results look as below.
Again you can save the list box to a spread sheet or print it for review.
51
Insurance Analysis
Insurance Analysis is an excellent module to determine which payers are contributing the
most to your practice and make decisions regarding future contracts and their impact on
your bottom line. Simply enter the module and select the year and provider to review.
You should quickly be presented with this report.
each carrier is individually listed with the amount paid and written off. This can be saved
or printed as desired for record keeping.
52
Referring Doctor Analysis
It pays in practice to know who is supplying you. With this module you can easily see
who is sending you patient and who is not. Again enter the module and enter the provider
and year and you will be presented with the following type of report.
The referring doctors name and the dollar amount of business you derived from him.
Perhaps the top 30 doctors deserve a special yearly gift.
53
Accounts with No Charges
Generally these are patients that didn’t show up for appointments but missed charges are
also common in practices and it pays to review this quarterly to be sure your not missing
some charges. Simply enter a provider and press F9 to begin. You will be presented with
a list box of the names and account numbers of these ‘orphan’ patient so you can decide
what to do with them.
Again remember that selecting the account from the list box and pressing enter will take
you to that financial transaction card for review and decision making. Escape will return
you here.
54
Provider Charge Report
The provider charge report is accessed from the report module and after you select a
provider and date range you will be provided with a list of all the charges filed for that
provider during the time period entered allowing cross checking to avoid missed charges.
The report appears as below.
The list is sorted by date and can be saved to a spread sheet or printed and each entry can
be scrolled down to and press enter to access the financial transaction module as
discussed for other report modules. Escape in the Financial Transction Module will return
the user here rather than the main menu.
55
Facility Analysis
Facility analysis is a report accessed through the report module where the user can
determine the monies received for each facility. Occasionally this is useful for tax
purposes. Simply select the provider and year and press F9. The report should appear as
below.
again you may print or save the list as you wish.
56
Scanning
Scanning documents into SurgiLink Office is a powerful tool. Hospital face sheets can be
scanned into the patient demographic page by pressing F11 and later reviewed by
selecting from the drop down scan window. EOB’s can also be scanned into New
Payments to avoid filing and searching for later. If an EOB is necessary later simply print
from file. In order to use this feature you will need a WIA compliant scanner (generally
$90.00 at an office supply store) and your ready to go. Simply follow the on screen
direction or refer to the section of this manual for payments or demographics. Don’t
underestimate the productivity saved by not searching for an EOB and having it readily
available for review. Also saves filing space.
An example of scanning will be shown. From the Demographic page below, you may use
the mouse and push the F11 button or more commonly use the keyboard and press ‘F11’.
If you have an attached scanner that is WIA compliant (as most are) the SurgiLink
Acquistion program will start and a scan selection window will be presented. Generally at
this point SurgiLink recommends you do not exit the process until you are done scanning.
For most documents excellent resolution is obtained by selecting the 3rd option, ‘Black
and white picture or text’. If you must use a ‘Color picture’ setting for angiograms or
other photographs, it is recommended to use the custom settings and use not more than 75
DPI resolution as the resulting file can exceed 3 megabytes.
57
After you click on Black and white picture or text, click the Scan button.
Your document will be scanned and the results shown.
Now you will want to save by pushing Alt-S and then ‘S’ for save or use your mouse and
click the Save in the upper left corner shown above.
58
The Acquistion program will close and you should be back in SurgiLink Office. Once
SurgiLink Office detects that a new file is available it will ask for a name. Enter an 8
character name reflecting the document.in the box shown below.
The file will be place in the scanned Image window shown here with the number and
date.
you can place up to 8 images or documents in each demographic page. These can be
viewed by highlighting the choice in the drop down Scanned Image box and pressing the
key ‘V’. This should bring the image up for viewing in the Windows default viewer.
59
Scheduling
SurgiLink Office comes with a full function scheduler which is integrated into the
Program for ease of use. The Scheduler can be accessed from the main menu by simply
pressing the green schedule button.
Once in the scheduler you will see a calendar window in the upper left which allows
selection of the date. And a provider selection box to allow the selection of a provider.
Once these are entered any patients scheduled can be seen here. To make an entry simply
select the time from the upper time window and press enter. A window will open to key
in your entry and press enter or F9 to save. The lower window shows any times that have
entries and this can be printed easilty with F8.
A special note is in order when scheduling a patient for an office visit or procedure. It is
recommended that you enter the patients demographics first (at least name, ssn, dob) and
press F10 from the demogrpahic page as this will place an entry in the appointment
window of the patient demographic page. Also when you go to select a time for the
patient, his name and phone will automatically be inserted in the scheduler. Also it is
frequently convenient when in the scheduler to want to view a patients financial card to
see if his charges. This can be done easily if you follow the above recommendation by
highlighting his name in the time window and pressing ‘V’ to view the fianncial
transaction card. Escape will return you to the scheduler.
60
Time Savers
This section simply lists some very convenient ways to get around SurgiLink Office and
save time and increase your pleasure in its use. (Note that ALT- A indicates that you
should press the ALT key and the A key at the same time.)
ALT-N
will initiate a new patient entry from anywhere in SurgiLink Office
ALT-L
will locate a patient by Last name. simply enter all or part of the last and
first names and the patient demographic page will appear. If multiple
patients with the same name, such as ‘Smith J’, you will be offered to
proceed to each match. With a complex name,’Mahadavia Afzal’, and
spelling not quite known. You could enter ‘MAHA and A’. SurgiLink
Office will locate the patient for you.
ALT-A
will locate a patient by account number.
Provider Selection Windows
Most provider selection windows can be searched either by number 0-40
or by the first initial of the providers last name. so that if provider 05 is
Cunningham. Rather than remember 05 = Cunningham, you can press the
‘C’ key and that provider will be show. If multiple Providers with same
61
initial, will go to the next with the next press of that key. I.e. ‘D’ will
rotate through Doctor 06, Doctor 07, Doctor 08 etc.
Insert
pressing the Insert button has different effects in different fields. In most
date fields the current date will be entered. In the Insurance page of a
patient, the ID# will change to the SSN entered. In the payment module,
check # field. The last check number will be placed so no need to retype.
+/-
pressing the + or the – key in most date fields will move the 8 digit date
ahead or behind simplifying entries.
Rt Click
The user may right click the mouse on any button for a brief explanation
of the function that button performs.
62
Main Menu Page
SurgiLink Office is divided into 8 modules which are visible below.
Each can be selected by pressing the keyboard numeral linked to the button or use the
mouse and click the button directly.
1) Patient Locator - or Demographics module is where new patients are entered and the
demographics of existing patient can be reviewed or entered. There are also Hot links to
go from the Demographics module to the Financial Card and Insurance Information.
2) Insurance Forms - The claim processing module allows entered charges to be sent by
electronic or printed to a paper claim . . In addition you can view the contents of an
electronic file here waiting for submission or close and move electronic files once
completed
63
3) Financial Transactions -The heart of SurgiLink Office. Generally once the patient
demographics is entered this module allows the user to enter and process charges,
payments and insurance filing. A succinct view of entered charges and payments is
presented which can be easily reviewed and modified. Multiple buttons allow the
movement to patient demographics or insurance with quick return for insurance filing.
You can even restored damaged accounts from this module and Print Ledgers.
4) Statements - The Statement module allows the printing of a Single patient statement or
a Complete monthly mailing.
5) Database - The Database module Is a crucial element of the SurgiLink system and
allow the entry and editing of Referring Doctor UPINs, CPT codes and Charges, Facility
information and All Insurance data is kept conveniently in this one module. Also
Provider information and ID numbers is entered here.
Caution should be used in who has access to this area as changes here can be network
wide effect.
6) Reports - The Report Module is a collection of useful reports which allows the
authorized user to Monitor the Financial situation, Delinquency reports, Analyses and
much more is available here for the
administrator or designated personnel.
7) Utilities - Is the Setup area of the Program where Printer alignment and adjustment is
done, name list are compiled and several other functions to make SurgiLink run smoothly
on your network or individual computer and printers.
8) Exit - Fast means of Exiting the program with saving of all buffered data.
64
Patient Locator
The Patient Locator module is the gateway to a patient’s demographic page. Through this
gateway the patient can be located by last name/first name, Account number, SSN or
Date of Birth. Access this module by pressing #1 on the main menu or alternatively Alt-L
to find by last name or Alt-A to find by account number.
Selecting ‘N’ will bring up a New blank patient demographic page. (Note Alt-N will go
automatically to a New patient form). Selecting ‘E’ will bring up the account number
window or the Last and First Name window. Regarding the name locator above. If you
are uncertain of a last name spelling, you can enter partial last and first names and
SurgiLink will bring up all the matches for you to puruse. For instance, if a patient is
named John Klosak and you wish to find him; simply enter Klos in the last name box and
‘J’ in the First and press Enter and SurgiLink will bring up all the matches for you to
inspect in order. If you wish to locate by account number, simply enter the account
number and press Enter.
65
Pressing F8 will bring up a selection window as below with additional search parameters.
With the above the user may enter the SSN or 8 digit Date of Birth to see if a match
exists on SurgiLink. Alternatively a complete alphabetically sorted name list can be
displayed or printed from this Menu.
66
Financial Transaction Module
Generally the Financial Transaction Module will be your primary source of information
regarding a patient account and from here all other functions are available. The most
expediant way to get to this module is to press Alt-L or Alt-A to select an account by the
patient last name or account number. This will take you to the patient demographic page
where pressing F7 will bring up the Financial Transaction Module.
Let’s examine the fields:
The patient name and demographic information is displayed. These can be changed in the
patient demographic page (and insurance page) accessable via the ‘P’ button seen on the
mid right. (you can click this with a mouse or more commonly simply press the ‘P’ key).
67
Central List Box
A central transaction list box is present. This lists all the charges, payments and refund
and wirteoffs entered. Notice the box is automatically sorted by provider and date of
service and posting. This sorting will place payments with the linked charges for easy
balancing and analysis. The List Box also is the means for editing an existing charge or
payment or deleting it altogether. To review an existing charge or payment simply cursor
down to the desired transction and press the Enter key. The charge or payment page will
be displayed where changes can be made and saved and will immediately reflected in the
List Box. If you would like to delete an erroneous entry altogether, simply cursor down to
the transcation and press the Delete key. The entry will be permanently removed.
Balance Window
To the right of the Central List Box is the balance window which displays a balance for
the provider as each transaction is entered.
Available Insurance
Below the Central List Box the insurances entered for this patient are listed. These can be
altered in the Patient Demographic Module via the ‘P’ button seen on the mid right.
Comment Box
Below the available Insurance is a Comment box where the user can place an unlimited
amount of information that they would like to save regarding this patient’s account. In
addition SurgiLink Office will automatically enter a comment for each Insurance Claim
made either paper or electronic for reference later. The comment box automatically saves
the contents every time the enter key is pressed or alternatively you can force a save by
pressing the F9 key. Also note the contents of the comment box can be cleared with the
F8 key.
68
Buttons
To the right of the Comment Box are five very useful buttons.
S-
Prints a single Statement for this account.
P-
Will bring up the patient demographic page where the user can make changes and
save them which will return the user to this module.
I-
Will access the Insurance Claim module for convenient filing of a paper or
electronic claim. When done the user will be returned to this module.
F7-
Print a detailed Ledger of all transctions on this account.
F8-
Clear the comment box.
F9-
Save the contents of the comment box.
Provider Balances
Below the comment box are the balance owed each provider sorted by total amount and
30, 60, 90 day delinquencies.
69
Buttons
Below the provider Balances are sereral more buttons which are needed to access
additional functions (you may click with a mouse or press the Keyboard).
Escape
F3-
Will Advance to the next patient account.
F4-
Will Retard to the prior patient account.
F5-
Initiate a New Charge Page on this account.
F6-
Initiate a New Payment,Refund or Writeoff on this account.
V-
Will bring up the selected transaction in the central list box for review and editing
as needed
Del-
The Delete key will permanently Delete the selected transaction in the central list
box.
R-
Allows the user to restore all transactions and data in an account to a previously
saved version.See Restore Account.
70
Restore Account:
The restore account function is useful if the user creates inadvertant deletions or if an
account becomes corupted by hardware errors. This function is accessable in the
Financial Transcation Module by pressing the ‘R’ button on the lower right.
Generally, the user should have a saved copy of the data on a writable CD in the Disk
drive (though you can also used the data saved in the data backup module) prior to
pressing the Restore ‘R’ key
You should verify the location of the backup data as above and press ‘Open’. SurgiLink
will check that the last names match on the two accounts. If they do then the process will
proceed and all data for this account will be restored permanently to the backup version,
otherwise you will be cautioned about the discrepancy and asked to proceed or not. Again
if you select ‘Yes’ the process will be completed and you should remove your backup
disk.
71
Print Statements:
The SurgiLink Office Statement module is very easy to use and efficient. It allows the
printing of one statement or a full complement. Simply enter the Print Statement Module
from the Main Menu Page.
And select single or a Complete Billing.
For the single statement you will be prompted for the account number and physician
supplier for this account. Once you supply that press F9 and the statement will be printed.
For the complete billing you will have several parameters you may wish to modify.
You will have to select the provider the statement is for and how many days delinquent
72
an account should be before SurgiLink Office generates a statement. 30 days is the
suggested default. Also the beginning and ending account numbers should be confirmed.
Note-that if you are printing on blank paper and would like SurgiLink Office to generate
a professional appearing backround please check the Blank Paper Box. A comment box
is present where you can include a brief message to be printed on everyone’s statement if
desired. Pressing F9 will begin the process and it will continue until done. A few
additional points should be mentioned. SurgiLink Office will strive to generate no more
than one sheet of paper per account. Also accounts that are checked inactive ‘Y’ or
automatic billing ‘N’ in the patient Demographic Page will not be included in the
Printing.
73
Utility Module
The Utility Module is the location of several important utility functions you will need to
keep SurgiLink Office running smoothly. In addition, if you are planning on submitting
directly to medicare or a major insurance company this is the location to enter the
provider data needed to generate either the NSF or ANSI 4010 file formats. For a clearing
house such as WebMD these are not needed as they accept the PrintFile format which is
basic to SurgiLink Office.
Compile Name List – The first module will recompile a new name list. This should rarely
be needed but if SurgiLink Office is having trouble locating a patient by name and you
are certain it was entered it is possible the name list has become corrupted and will need
to be recreated. Selecting this button will create a new name list for SurgiLink.
File Management Module – Is discussed in the next chapter but includes many useful
functions such as changing the Next new account number, Reset file busy flags, Change
File Directory location for networking, Merge two accounts if needed into one, and A
very Important Backup Module to backup the critical SurgiLink Office Files to prevent
74
data loss.
Printer Alignment Module – To accurately align preprinted HCFA-1500 forms with the
SurgiLink Office output, the printers occasionally need to be alligned with SurgiLink
Office. The defaults will work fine with most printers but some require fine tuning and
this is the module to perform this alignment.
Field Defaults – Allows the customization of each copy of SurgiLink Office. In this
module the user can adjust the Definable entry in the Patient Demographic page, Set the
office location identifier in the Demographics page, Set the default for accepting
assignment Y/N, Set the default type of service for use on Charge Pages, Adjust the
amount of time allowed that SurgiLink Office can set idle prior to effecting an auto shut
off, and Turn off the Mouse Hover messages.
Process the Return Cards – Allow the monthly printing of patient return cards for
mailing.
Password Management – Is the module where passwords can be reviewed and changed.
In additions users can be deleted here.
To access this module the user will need to know the Administrative password. The
default password is ‘surgeon’ and should be changed to a private password know to the
Office Manager. Simply key in the password in the box above.
Simply select the function you wish to perform.
75
Change Admin Password –
Simply key in the new desired password twice and the New Password is in effect.
Review Users and Passwords – will bring up a list window with the current user initials
and passwords.
To delete a user simply highlight the user and press the delete key.
NSF Submitter information – Enter the provider data needed for NSF file submission.
ANSI Submitter information - Enter the provider data needed for ANSI file submission.
76
File Management Module
Next New Patient:
SurgiLink Office automatically advances the account number for new patients as they are
entered. Rarely you may wish to change the index mark that SurgiLink maintains to a
different value. When you select the Next New Patient function SurgiLink will display
the image above which contains the next new account number SurgiLink Office would
assign for a New Patient. You may change this to a number of your choosing. Press F9 to
save changes.
77
File Busy Flags: SurgiLink Office generally allows several users to access modules at the
same time in a network environment. Occasionally you may wish to open more than one
copy of SurgiLink Office per workstation also, such as, when you are compiling lengthy
reports on one copy and wish to enter patient data on a second. A few exceptions exist in
SurgiLink Office where only one user is allowed in at a time. Most notably the New
Patient Entry Module. If one user is entering a new patient, SurgiLink Office will not
allow a second user to also imput a new patient at the same time. If a computer is
inadvertanly shutoff while inputing a new patient, the file flag may become stuck
indicating the module is busy. If you receive a file busy message, and you are certain no
other user is running SurgiLink, you may use this button to reset all file flags in the
system.When done SurgiLink Office will show a ‘successful’ message.
File Directories: File Directory can also be accessed from the Menu Bar on the Main
Menu Page.
SurgiLink Office uses several different files to store it’s data. These files are generally all
kept in C:\SurgiLink\..... location. This location can be modified with the File Directory
Module.
78
In a Network environment with serveral workstations, it’s important that all the
workstations point at the same data. Generally in this case One server is designated the
Main Computer and the other workstations ‘Map’ that server’s C drive as Drive ‘Z’. The
the above directory locations are changed from the C Drive to the Z drive on the
workstations. The Main computer should be left C Drive so that all computers are
looking at the same information.
You may wish to consult a SurgiLink Office Network specialist to set this up for you. To
select a new location simply press the ‘Select’ button next to the file name and select the
new file from the file selection window shown below.
79
Merge Accounts: This module allows the combining of two accounts into one account
and the release of the second account for future reassignment. SurgiLink Office screens
against duplicate patient entries by comparing SSN and Names but occasionally a
duplicate name may be entered in the system such that you wish to combined the
accounts. Alternatively, for other reasons you may wish to move all the transactions from
one account into another. When you enter this module the following window will be
opened.
You should carefully enter the Primary account number where you would like the final
data to reside, and the secondary account number which will be emptied. Once you enter
the primary account number, tab to the next field and SurgiLink Office will display the
patient name for that account for your review prior to combining the data.
Once you’re satisfied press F9 and the transactions and all data will be removed from the
secondary account and combined with the primary data. The name in secondary account
will be changed to ‘Invalid Account’.
80
BackUp Files: The Backup module can be entered from the Utility Menu above or from
the Menu Bar on the Main menu page.
SurgiLink Office recommends no less than daily backup of data or backup anytime you
finished a significant amount of information entry. The Backup is easily accomplished in
this module. Once entered the following window is opened.
Simply enter the drive to back up to and press F9. The files will be copied to that
location. Generally you should select a harddrive not on the main computer so that if a
catastrophic hard drive failure occurs a duplicate file set exists. Alternatively many
computers now come with writable CD drives. You may very easily copy the entire
C:\SurgiLink directory of the Main Computer to a writeable drive for safe storage off
site.
81
Scheduler:
The Appointment scheduler is an integral part of the SurgiLink Office system.
The Scheduler is efficient at entering patient appointments for all five practioners.
Preferably the Scheduler should be opened from a patient demographic page by
pressing F10 but is also accessable from the Main Menu page by pressing the
green schedule button.
Once opened the Scheduler will open todays date with the Primary provider
selected as the default as below.
Genrally you will want to 'tab' until the Monthly calendar is highlighted to blue
indicating it is active and then use the arrow keys to select the month and date
you wish to issue the appointment. Once you have selected the appointment
date, 'tab' one over to the List box with the available times and arrow down to the
open time you desire. Press the Enter key to select the time. The Edit box below
will appear with the time and patient name and phone number inserted. Simply
type in any additional information and press Enter and the data will be appended
to the calendar.
82
Press Escape to leave the scheduler or F8 to print a Condensed List box
contents
83
Initials Field
Please enter your 3 initials at the Prompt
The User is required to enter their 3 Initials at the beginning of using SurgiLink Office as
a means of tracking the users activities and entries. After the Three initials are placed,
Surgilink will ask for your password. Press the Enter key when done with your password.
This is any combination of letters or numbers up to 20 long. (Note the password is Case
sensitive such that Surgeon is different than surgeon.) If this is the first time a user is
accessing Surgilink they will have to establish a personal password to be recognized.
Simply check the new user box and SurgiLink will ask for the Administrative password
which is 'surgeon' unless altered. after surgeon is keyed in you will be asked for your
initials and desired personal password. Each time you reenter SurgiLink please reenter
your initials and password. After you enter your initials with the start or SurgiLink Office
you will be taken to the module you chose. This entry will be retained until you exit
SurgiLink Office. The users initials are placed on all Charge and Payment entries and
also appended to insurance submissions.
Office Location :
Office Location 1/2 - Most Surgeons have one office and as such you would leave this
area with the numeral 1. if you have 2 or more offices and would like to keep the patients
and profit centers separate then you may indicate 1-9 in this field. You will see an option
to select which office location you would like to review in several report modules.
Note: The default setting here can be set between 1-9 in the Defaults module. Generally
should be left 1 unless several offices linked by VPN.
84
Printer Assignment:
You may setup your preferred form and envelope printer on the Main Menu Page menu
at the top of the screen.
Simply select the menu entry from above and choose from the available printers.
85