1
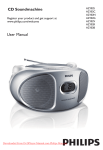
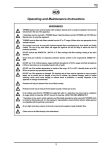
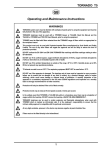
Congratulaons on your purchase of a ROC SOLID Folding Solar panel. Your unit is
fully assembled and factory tested, all you need to do is a'ach the ba'ery cable
to the ba'ery and plug into the panel.
These units are designed to charge a 12 volt ba'ery and are suitable for Deep
Cycle, Float and Automove Cranking ba'eries of the following types.
Flooded Lead Acid (wet)
Sealed Lead Acid (vented)
Gel Cell
AGM
Spiral
Danger: These units must not be used on baeries not designed to be
recharged or baeries which cannot accept the charging current
or charging voltages as per the specificaons.
Features
Your ROC SOLID folding solar panel is one of the most sophisticated solar
charging systems available and understanding the features will help you
maximise its benefits.
•
80W and 120W Portable Folding Solar Panel
User manual
1
MPPT Regulator – The regulator is the “brains” of the system. Your
solar panel is equipped with one of the most advanced and sophisticated ROC SOLID designed and built Maximum Power Point Tracking (MPPT) regulators. These regulators will provide up to 30%
more charging current from the solar panel than conventional regulators. This performance is most evident in poor light or overcast
situations when you really need to maximise what sun power is
available. The MPPT regulator has over double the capacity of the
solar panel to cater for a plug in Auxiliary solar panel without the
need to upgrade the regulator.
2
•
Solar panels - An efficient and high reliability poly crystalline construction with toughened glass protection shield will give you years of trouble free use. The solar cells have a 25 year performance warranty for
your peace of mind.
•
Adjustable angle - The solar panel has a 6 (80W unit) or 5 (120W unit)
position angle adjustment to ensure the panel is accurately positioned
to face the sun and to further maximise energy production.
•
All components are designed to withstand weathering and rust and are
made of Glass, Aluminium, Stainless Steel or Plastic
•
Plug-in Heavy Duty fused Battery Cable and Clips - The battery lead is
made with oversized heavy duty cable (2 x 4sq mm) to minimise voltage drop during heavy charging. Typically the cable is double the size
that’s normally required. Two strong and colour coded heavy duty battery clips are provided to ensure reliable and positive connection to the
battery. A 20Amp automotive fuse is built into the cable at the clip end
for extra safety and security in the unlikely event that the cable is damaged.
•
Carry Bag - The carry bag has two solid solar panel protection inserts
to further protect the solar panels during storage and transport. Each
bag is made of quality breathable canvas to reduce condensation and
retention of moisture which is a common problem when synthetic material is used. Tie down loops are provided to assist in securing the
panel during transport. A generous utility section is included to store
cables and accessories.
•
Fully Expandable - All solar panels are pre wired and have connecting
plug to fit an auxiliary solar panel to double the capacity of the charger.
The regulator and wiring is designed to cater for an Auxiliary unit without needing upgrading.
3
When you open the bag..
Your Portable Folding Solar Panel includes
1)
2)
3)
Folding Solar Panel complete with MPPT regulator
Plug In Heavy Duty 5 meter long fused Battery Lead
Canvas carry Bag with side wall protection
An Auxiliary Folding Solar Panel Unit will include:
1)
Folding Solar Panel auxiliary unit
2)
Heavy Duty Plug In 2 meter interconnection cable
3)
Canvas carry Bag with side wall protection
4)
User manual
4
How to use your Folding Solar Panel
7)
CAUTION: Recheck that the BLACK clip is connected to
the NEGATIVE terminal and the RED clip to the POSITIVE terminal. Ensure the battery clips will not touch
each other or any other object.
Where do I put it?
Your panel should be:
•
North facing for Australia, New Zealand, South Africa (Southern Hemisphere) and South facing for Europe, USA, Canada (Northern Hemisphere)
•
•
Less than 5 meters from the battery being charged
•
Clear view of the sky so that direct sunlight for the entire day is not
blocked by buildings, vehicles, caravans or trees
•
Reasonably flat ground
The cable from the solar panel to the battery should not cross walkways, vehicle roads or access ways or be permanently immersed in
water
How do I set it up?
Connect the BLACK battery clip to the NEGATIVE terminal of the
Battery, then the RED battery Clip to the POSITIVE terminal.
7)
8)
Connect the Grey plug at the other end of the battery cable into the
Battery connection (grey plug) on the solar panel (do not attempt to
plug it into the RED plug – these plugs are keyed so that only grey
plugs will fit grey plugs and red to red, however forcing the wrong
type of plug may cause damage)
The Panel will start charging automatically when there is sufficient
sun. The charge LED on the regulator (viewed via an inspection hole
in the regulator cover) will illuminate to indicate charging. The MPPT
regulator will automatically start and stop and control the charging
when necessary. The unit is safe to leave connected over night or
extended periods and will not drain the battery.
The following sequence is important and must be followed exactly
1)
2)
3)
4)
5)
6)
Remove the Solar panel from the canvas carry bag
Hold the panels so the ROC SOLID label on the face of the panel is at
the top left hand corner.
Release both latches from the side of the panel and open the unit fully
Adjust the legs so that the panel is supported and directly facing the
sun’s expected noon (mid day) position (if unsure, set the legs to any
position and adjust later) Generally the first two notches are suitable
for the southern parts of Australia and the last two for the Far North.
Note, in the Southern hemisphere the panel should point in a Northerly
direction and South in the Northern hemisphere.
If the location is windy or there is a likelihood that the panel may be
blown over, weigh down the legs with a sand bag or use a tent peg to
secure the legs to the ground.
Before connecting the Battery cable to either the solar panels or battery, position the cable on the ground with the battery clips at the battery end and the grey plug at the solar panel end.
5
When you are finished….
The following sequence is important and must be followed exactly
If an Auxiliary unit is connected, disconnect by unplugging the interconnection cable from the main solar panel.
1)
Unplug the battery cable at the solar panel by unplugging the GREY
terminal.
2)
You may now proceed to remove the RED battery Clip from the battery positive terminal then the BLACK battery clip from the Battery
Negative terminal.
3)
Release the solar panel legs and fold the legs flat then close the panels and secure the side latches.
4)
Place the panels in the canvas bag. The cables may be stored in the
side pocket of the bag.
6
I need more power!
Specificaon
80 Wa' panel
120 wa' panel
Auxillary folding panel sets can be purchased to expand your power
generating to a maximum of 250W.
Nominal Ba'ery Voltage
Float Voltage
Maximum charging current
Dimension Closed
12 Vdc
13.8 Vdc
6.7 Adc
610 x 540 x 80 mm
12 Vdc
13.8 Vdc
10 Adc
810 x 540 x 80mm
Connecting the Expansion panel
Dimension Open
Weight
Regulator Type
Regulator Model
Short Circuit
Overcharge
Reverse Ba'ery Connecon
Ba'ery Lead Fuse
610 x 1090 x 80mm
13.20Kg
Maximum Power Point
Tracking
PS 2012 BC
Protected
Protected
Protected
20 amp Automove Blade
Ba'ery Lead dimension
Auxiliary Panel size
Auxiliary Panel Dimensions Closed
Auxiliary Panel Dimensions Open
5M x twin 4sqmm cable
80 Wa's
610 x 540 x 80 mm
610 x 1090 x 80mm
810 x 1090 x 80mm
15.90Kg
Maximum Power Point
Tracking
PS 2012 BC
Protected
Protected
Protected
20 amp Automove
Blade
5M x twin 4sqmm cable
120 Wa's
810 x 540 x 80mm
810 x 1090 x 80mm
The expansion panel may be connected at anytime, even if the main solar
panel is connected to the battery.
1)
2)
3)
4)
5)
6)
7)
Remove the Auxiliary Solar panel from the canvas carry bag
Hold the panels so the ROC SOLID label on the face of the panel is at
the top
Release both latches from the side of the panel and open the unit fully
Adjust the legs so that the panel is supported and directly facing the
suns expected noon (mid day) position similar to the main solar panel.
NOTE, position the Auxiliary panel next to the main panel so that its
orientation is identical and ensure that neither the main solar panel nor
the Auxiliary panel will cast a shadow on the other panel.
If the location is windy or there is a likelihood that the panel may be
blown over, weigh down the legs with a sand bag or use a tent peg to
secure the legs to the ground.
Connect the Auxiliary panel into the Main solar panel using the interconnection cable (red plug at both ends). Plug the cable into the RED
plug on the Auxiliary unit then plug into the Auxiliary connector (RED)
on the main solar panel.
Both Panels will start charging automatically when there is sufficient
sun. The MPPT regulator will automatically sense the additional solar
panels and adjust the charging. The unit is safe to leave connected
over night and will not drain the battery.
7
LIMITED 12 MONTH WARRANTY
ROC SOLID OWNER WARRANTY POLICY March 2012.
ROC SOLID warrants that, during the warranty period specified below, it will repair or replace,
free of charge, any part(s) that is defective in material or workmanship or both. Transportation
charges on product submitted for repair or replacement under this warranty must be borne by
purchaser. This warranty is effective for and is subject to the time periods and conditions in this
statement. For warranty service, return the item to your place of purchase or visit www.rocsolidsolar.com.au for an authorized service centre. The purchaser must contact the Authorized
Service Centre, and then make the item available to the Authorized Service Centre for inspection and testing. Your original proof of purchase must be presented to the Authorised Service
Centre at the time you submit your warranty claim.
There is no other expressed warranty or implied warranties, including those of merchantability and fitness for a particular purpose, are limited to one year from purchase, or to
the extent permitted by law. All other implied warranties are excluded. Liability for incidental or consequential damages are excluded to the extent exclusion is permitted by
law. Some states or countries do not allow limitations on how long an implied warranty lasts,
and some states or countries do not allow the exclusion or limitation of incidental or consequential damages, so the above limitation and exclusion may not apply to you. This warranty gives
you specific legal rights and you may also have other rights which vary from state to state and
country to country.
8