1
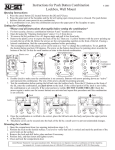
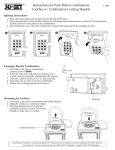
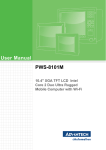
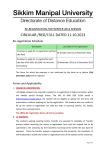
USER MANUAL
AndroPay Admin Center—Getting Started
Introduction: The Customer Administration Center, or Admin Center, is your central site for
all things AndroPay. Through the Admin Center, you can upload your payment files to the system as well as
download your lockbox files. This is where you will go to manage the access of your staff to the AndroPay
site and maintain information about your own account. You can also view reports and information
regarding the payments you have received.
Logging In: To access the Customer Administration Center, go to :
https://admin.andro-pay.com/login.aspx
User Name: Your user name is permanent
and will be assigned when you are first set
-up for access on the AndroPay System.
Password: Your password will originally
be assigned by a AndroPay team member
or by the Administrator in your municipality. This Password can be changed at
any time but must be a minimum of 7
characters including 1 symbol (!,@,$, etc.)
Forgot your password? Just
click the link and follow the
screens below!
Forgot Your Password? Not a problem! Just click the link shown above and follow these
steps!
e
am
r yo
nte
E
.
p1
ur
rN
Use
Ste
Step 2. Answer your personal challenge question
A new generic password has been sent to the email address listed on file with your User
Name. *** We recommend using the Copy and Paste function with this password as they are
a computer generated assortment of numbers, letters, and symbols ***
2
May 2012
AndroPay Admin Center—Getting Started
Welcome Page: The Welcome Page (below) is your Home Page for AndroPay and allows you to
access all of the services it provides. These are accessed by using the four User Functions found at the
upper left hand corner of the Welcome Page.
Monitor this section for updates
on new features, functionality
and scheduled maintenance
Need to change
Users? Click her to
log out at any time
The Function Menu above is your key to the many capabilities of UniPay Gold.
To access a function, just drag your mouse over the appropriate category. A second drop
down menu of the functions available in that category will appear to the right. Holding your
mouse over the ‘My Account’ category, for example, will reveal the two options shown above.
Select the function you need, such as ‘Change Password’, and the system will take you to the
next screen
3
May 2012
AndroPay Admin Center—My Account
My Account: The My Account classification contains the Login and Change Password functions.
This section is available to all users to manage their own personal accounts.
Login: Use this function to log out of the system and return to the Log In page. (See Page 9 for
Login help) By doing this, you can log in as a different user on the same computer.
Change Password: This function opens the Change Your Password screen shown below.
Step 1:
Step 2.
Step 3:
Minimum Criteria for Passwords:
At least 7 total characters in length
At least 1 alphanumeric character (!,@,$)
To create a new password, just follow the steps below:
Step 1: Enter your current password in the Password field.
Step 2: Enter a new and different password in the New Password field.
Step 3: Confirm the new password by entering it in the Confirm New Password field.
You should now see the following prompt:
If you don’t, you will receive this message indicating the minimum criteria required:
4
May 2012
AndroPay Admin Center—Customer Admin
Customer Admin: The Customer Admin classification contains the Manage function. Only the
Administrator set up for your municipality will be able to use this function.
Manage: As a Customer Administrator, you will use the ‘Manage’ function to review and/or edit
any of your users. The screen below will show all personnel authorized to use AndroPay and the level of
that authorization. It also allows you to add new users, delete existing ones, and/or edit user profiles.
to
ad
dn
ew
Us
er
it U
to
ck
a User
C li
Delete
Ed
Click to
ser
C li
ck
Adding a User: To add a user simply click the Add User link at the top right of the box
The first step to creating a new user is selecting the appropriate ‘User Role’ for this person.
The User Roles and corresponding abilities
are listed below*
Customer Administrator
Has access to the entire site including the ability to add,
delete, and edit customers
(There should be only one Customer Administrator.)
Customer User
Has access to entire site excluding the ability to manage
customers.
Customer Researcher
Has access to the My account and Review Data tabs (cannot
import files or generate lockbox payment files)
Customer File Manager
Has access to the My Account and File Management tabs
(cannot view reports or research page)
5
May 2012
AndroPay Admin Center—Customer Admin
Adding a User (Continued): Simply enter the required information to complete the New User
setup process. Click ‘Create User’ when you have finished.
Full Name: Enter Users Full Name
User Name: Create an easy to remember name
(example shown)
Password: Enter an initial password, this can be
changed at any time by user.
E-Mail: This email will receive the generic password
if the user has to use the ‘Forgot Password’ Function.
Security Question and Answer: Select a security
question and answer for the user to verify their
identity in the ‘ Forgot Password’
Minimum Password Criteria:
At least 7 total characters
At least 1 Alphanumeric
Character (!,@,$)
Click here to Create New User
Edit User: To edit a user’s information, click the ’Edit’ button opposite his or her name on the
User Manager screen. (Shown on page 12) This will bring you to the ‘Edit’
screen (below).
Simply change any information
necessary and click update to
complete.
*If a user has entered the wrong
password 3 times, they will be
locked out. Uncheck the box and
click update to unlock them.
Delete User: To delete a user, simply click the ‘Delete’ button to the right of his or her name.
Then click the ‘OK’ button to confirm.
eU
k
Clic
elet
to D
ser
Click here to Confirm
6
May 2012
AndroPay Admin Center—File Management
File Management: The ‘File Management’ classification gives you access to 6 functions, all of
which correspond with the upload and download of files to and from the AndroPay system. As well as these
features, you can monitor and maintain your payment files as well.
Import Data Files: The Import Data Files function is used to upload and import your export files
to the AndroPay system. Your customers and residents will look up their bills using the information
provided to them in these files.
Step
ck ‘U
2. Cli
pload
File’
Step 1. Click Browse to
find the file you wish to
upload from your computer or network
Once the file has been uploaded you
will see the file name, size and
status here. You should now also see
the file listed in the file list below.
7
May 2012
AndroPay Admin Center—File Management
Import Data Files (continued):
1.
Click on the file you wish to import from the list of recently uploaded files.
2. Select the transaction type for the file you are importing, in this case, Real Estate.
Step 1. Select the File
you wish to import
Step 2. Use the drop down to select the correct Transaction type
3. Enter a short description to help differentiate between multiple files. This description will be shown
on the ‘Maintain Expiration Dates’ page. (Page 16).
4. Choose the date you wish the file to expire. The file will be removed and unavailable to residents as
of 12 AM on this date.
5. Click ‘Start Import’ to complete the import process.
3. Enter a short description to help
differentiate between multiple files.
li
5. C
e
her
ck
4. You can either type in the date or
choose a date from a calendar by
clicking the icon next to the date field
ed
ish
Fin
n
e
wh
8
May 2012
AndroPay Admin Center—File Management
Import Monitor: This function allows you to see the files you have imported and their status. You
will be taken to the Import Monitor after you import a file to view the status and to be sure it has imported
successfully. You can also access this page by dragging your mouse over the file management classification
and selecting ‘Import Monitor’.
After uploading and importing a file to the system, you will be taken here
to view the progress of the upload. This page will refresh every 30 seconds.
If your file is not listed as ‘Complete’ immediately, you may need to wait
until the next refresh.
This Page also serves as a permanent audit trail for all files uploaded to
the system. As you can see, the user who uploaded the file is listed along
with the start time, time of completion, status, and expiration date.
Maintain Expiration Dates: This function is used to view the files currently available to your
residents, change the date they expire, or remove them altogether.
Want to add a few more
days after the due date?
Or maybe a few days
less? Just change the
date here and click
‘Update Expiration
Dates’
Need to remove a file?
Set the date to today’s date or any previous
day’s date and click ‘Update Expiration Dates’
9
May 2012
AndroPay Admin Center—File Management
Download Lockbox Files: To download your electronic Lockbox Files, hold your mouse over the
‘File Management’ button and click on ‘Download Lockbox Files’. This will take you to the ‘Download
Lockbox Files’ page. From this page, you can download lockbox files to be electronically posted to your
accounting software.
As you can see there is a list of previous lock box downloads at the bottom of the screen. This list is specific
to the export type you choose and
will not be removed for any reason.
***Always be sure to check the Form
and To Dates to avoid downloading
the same date twice!
Multiple Transaction Lockbox Files: Many accounting software have the ability to process
multiple payment types in a single lockbox. In order to accommodate this feature and provide and easier
and more efficient method for posting your lockbox files, we are able to setup a single file for most of your
transaction types. In order to accomplish this, all payment types must be handled using the same
accounting software. In most cases you will have Real Estate, Personal Property, and Excise payments on
the same software and in some cases, Water and Sewer as well. If you would like to utilize this feature,
please notify UniPay Gold Support at [email protected]. Our team will set up the export file and
you will be able to choose it from the drop down menu just as you would a single export type.
10
May 2012
AndroPay Admin Center—File Management
Download Lockbox Files (continued):
To Download your lockbox files, follow these 3 easy steps:
Step 1: Select Date Range. Enter or choose the date range of the payments you wish to review.
Step 1: You can either type the date or
you can click the calendar icon and
choose the date needed from the
calendar.
Step 2: Select Export Type. From the dropdown menu, select the export type you want to export.
Step 2: Select your export type from the
dropdown menu.
Step 3: Generate Lockbox. Click the ‘Generate Lockbox File’ button and follow the prompts.
You can also click
‘Open’ if you need
to view a file.
Ste
p 3.
d
loa
wn
do
o
’t
r
ave pute
S
‘
om
ck
Cli our c
y
to
Clic
k‘
kbo Gener
ate
xF
ile’
Loc
Find the folder you
wish to save the file
to and click ‘Save’
*You can also change the file name if your
software has certain naming requirements.
11
May 2012
AndroPay Admin Center—File Management
Generate Lockbox Package: Besides the ability to download a single file for multiple transactions
(page 17), you can also download a single zip file with all of your required lockbox files. This is helpful when
downloading multiple files with different layouts or from different accounting software's. To use this
feature, drag your mouse over the ’File Management’ classification and select ’Generate Lockbox
Package’. This will bring you to the ‘Generate Lockbox Package’ screen.
The following steps will walk you through the creation of your lockbox package:
Step 1: Select Date Range. Type or select the date range you would like to download.
Step 1. You can either type the
date or you can click the calendar icon and choose the date
needed from the calendar.
12
May 2012
AndroPay Admin Center—File Management
Generate Lockbox Package (continued):
Step 2: Select Export Files. Select the files you would like to download. You can also select the ‘All’
checkbox to automatically select all the exports available.
You can also select
‘All’ instead of clicking each export individually.
Click here to Generate Lockbox Package
Step 3: Generate Lockbox Package. Click ‘Generate Lockbox Package’. This will start the process
of generating the lockbox package. You will also be taken to the ‘Download Lockbox Package’ screen.
Download Lockbox Package: The Download Export Packages screen will allow you to view previously generated and downloaded packages, as well as download the package you have just created. To access this feature, drag your mouse over the ‘File Management’ classification and select ‘Download Lockbox
Packages’.
To download your package click Ready for Download and follow the prompts.
Your file will now be downloaded in a Zip format. You will be able to open this file and see each of
the separate files you selected when generating the lockbox package.
13
May 2012
AndroPay Admin Center—Review Data
Review Data: The ‘Review Data’ classification gives you access to the View Reports and Research
functions. These functions will allow you to view reports on your payments received as well as the full
information on individual payments as necessary.
View Reports Selecting the ‘View Reports’ button above opens the ‘Customer Reports’ page to
allow you to view the ‘Transaction Detail’, ‘Bank Deposit Aggregate’, ‘Transaction Detail (Charge back
only)’ and ‘Bank Deposit (Daily)’ reports. To view these reports simply follow the steps below.
Select the report
you wish to view
You can either type the date
or you can click the calendar
icon and choose the date
needed from the calendar
By Clicking ‘Run’ will
create the report on
screen for you to
view and /or print
14
Here there are three links which would allow you to 1.
Export to a PDF/EXCEL/WORD Doc. 2. Refresh 3. Print
Files
May 2012
AndroPay Admin Center—Review Data
Review Data (continued): The following are examples of the 4 reports available.
Transaction Detail Report:
The Transaction Detail Report is a
detailed report of all the payments
made in your selected date range.
Each payment is shown with post
time, confirmation number, tender
type and amount paid. Chargebacks
will also be marked in the right column and accounted for in the net
payment amount.
Bank Deposit Report Aggregate:
The Bank Deposit Report Aggregate provides you with the
total of all payments received in your chosen date range.
These totals are separated by transaction type and a total
amount is provided in the bottom right corner.
15
May 2012
AndroPay Admin Center—Review Data
Review Data (continued):
Transaction Detail Report (Charge back only):
The Transaction Detail Report (Chargeback Only)
The Transaction
Report
(Chargeback
Only)that have been
is aDetail
detailed
report
of all payments
is a detailed report
of all
payments
thatdate
haverange
beenselected. This
charged
back
during the
charged back report
duringprovides
the date the
range
selected. This
chargeback
date, confirmation
report provides
the chargeback
date,
number,
and reason
forconfirmation
chargeback
number, and reason for chargeback
Bank Reconciliation Report:
The Bank Reconciliation Report provides you with the total of all
payments received in your chosen date range. These totals are separated by transaction type and by date. Each day is totaled and a grand
total is provided in the bottom right corner.
***This report was designed to assist in reconciling a range of payment with you monthly bank statement.
16
May 2012
AndroPay Admin Center—Review Data
Research: The Research function is your area to look up individual payments or to search through
payments received using different criteria depending on the transaction type. Once you have found the
payment(s) you are looking for, you will be able to view a full receipt.
Option 1
Option 2
You can search by either of the 2 methods shown above; Confirmation Number or by
Transaction Information. If you know the confirmation number, enter it in the field and click ‘Search’. If
you do not have the specific confirmation number, choose the date range and transaction type you would
like to search in. You can also narrow your search by the ‘Look Up’ information if this is a file based
transaction. Once you have found the payment(s) you are searching for, click the confirmation number to
view the full receipt.
If your transaction type is currently inactive, click here to search for payments
made while active
Click the confirmation number to
view a full receipt.
17
May 2012
AndroPay Admin Center—Review Data
Research (continued): Once you click on the Confirmation Number shown on the Research page,
a screen will open with a full receipt for the payment you selected.
s
ll
fu
w
.
vie nt
to yme
a
re
he a p
or
ick
Cl ail f
t
de
si
i
Th
iv
al
m
eE
L
ail
k
in
By clicking on the transaction type, details of the payment will appear at the bottom of the ‘Detail
Receipt’ screen as shown below.
After viewing the receipt, the three buttons in the upper right hand corner of the Detailed Receipt
screen will enable you to Save the receipt, Print a copy for your records or for a customer, and finally to
Close the Detail Receipt Screen.
18
May 2012