Download CARDIOGIMA 6M User Manual
Transcript
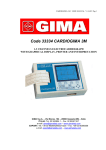
CARDIOGIMA 6M USER MANUAL V. 04-05 Pag. 1 Code 33350 CARDIOGIMA 6M 3-6-12 CHANNELS ELECTROCARDIOGRAPH WITH GRAPHICAL DISPLAY AND PRINTER GIMA S.p.A. – Via Monza, 102 – 20060 Gessate (MI) – Italia ITALIA: Tel. 02 953854.1 – Fax. 02 95381167 e-mail: [email protected] – www.gimaitaly.com EXPORT: Tel. +39 02 953854209/221/225 – Fax. +39 02 95380056 e-mail: [email protected] – www.gimaitaly.com CARDIOGIMA 6M USER MANUAL V. 04-05 Pag. 2 USER MANUAL 1. INTRODUCTION 2. CHARACTERISTICS AND SAFETY RIFERIMENTS 3. USE INSTRUCTIONS 3.1 3.2 3.3 3.4 3.5 3.6 3.7 3.8 3.9 3.10 3.11 3.12 3.13 INITIAL SET-UP AND AMBIENTAL CONDITIONS RECOMMENDATIONS FOR SAFE USE POWER ON/OFF KEY BOARD DESCRIPTION DEFAULT OPERATIONAL SET-UP THE MAIN OPERATIONAL MODES SECONDARY OPERATIONAL MODES CHANGE PREPARATION OF THE PATIENT ELECTRODES APPLICATION IMAGE FREEZING PRINTING TRACES LOADING THE THERMAL PAPER BATTERIES CHARGE 4. MAINTENANCE 4.1 GENERAL RACCOMENDATIONS 4.2 PERIODIC CONTROLS 5. STANDARD ACCESSORIES 6. TROUBLE SHOOTING CARDIOGIMA 6M USER MANUAL V. 04-05 Pag. 3 1. INTRODUCTION Congratulations on your purchase of the new CARDIOGIMA 6M electrocardiograph. The CARDIOGIMA 6M is build in compliance with the Medical Devices Directive (93/42/EEC) and therefore is labeled with the corresponding mark CE 0068. 2. CHARACTERISTICS AND SAFETY REFERENCES CARDIOGIMA 6M is a 3-6 channels electrocardiograph and is in class II CF according to the EN60601-1 and EN60601-2-25 norms. FUNCTIONAL CHARACTERISTICS 1. LCD Graphical Display 320x240 dots, 3 or 6 channels in Standard or Cabrera format with base line movement possibility. 2. High Resolution Thermal Printer (8 dots/mm). 3 or 6 channels hardcopy in real time with possibility to print the millimetric grid. 3. Manual or Automatic recording. 4. 10 seconds memory for all 12 derivations. 5. Image Freeze with the possibility to scroll into the memory for reviewing/hardcopy . 6. Integrated Digital Filters : Low pass, High pass and Notch 50/60 Hz . 7. Internal rechargeable Ni-Cd Batteries with high capacity and fast charge time. 8. Easy Operation with one touch keys and menus. 9. Based on a RISC processor for full digital signal processing. 10. Really portable. Small dimensions and light weight. 11. Easy drop in paper loading. CARDIOGIMA 6M USER MANUAL V. 04-05 Pag. 4 TECHNICAL CHARACTERISTICS POWER SUPPLY: Internal rechargeable Ni-Cd batteries LINE POWER SUPPLY: 220V~ ± 10%; 50 – 60Hz; 150 mA max; Isolation CL2 B BATTERY AUTONOMY: 2,5 hours APPLIED PART: CF type INPUT IMPEDANCE: > 100 Mohm FREQUENCY RESPONSE: 0.05 : 145Hz CMRR: > 100 dB TIME CONSTANT: > 3,2 s ACQUISITION: 12 bit 800 samples/sec/channel-isochrone LEADS : 12 Standard or Cabrera SENSITIVITY: 5mm/mV; 10mm/mV; 20mm/mV ± 5% SCROLLING SPEED: 5mm/s; 10 mm/s; 25 mm/s; 50 mm/s SIGNAL MEMORY: 10s for each lead PRINTER: thermal printer 8dots/mm, paper 110 mm DISPLAY: LCD 320 x 240 dots, back light CFL FILTERS: muscles tremors 35Hz digital; power line interference 50Hz 60Hz digital; high pass 0.5Hz digital DEFIBRILLATION PROTECTION: internal DISPLAY : 3-6 channels, HARDCOPY 3-6-12 channels DIMENSIONS: 240 x 160 x 65 mm WEIGHT : 1.500 g. CASE : IP 20 OPERATION TEMPERATURE: +10°C ...... 40°C STORAGE TEMPERATURE: -10°C ...... 40°C RELATIVE OPERATIONAL UMIDITY: 25% ……95% without condensation CONFORMITY STANDARDS: 93/42/CEE; EN60601-1; EN60601-1-2 ; IEC601-2-25 CLASSIFICATION : II a class (according to 93/42/CEE) SERIAL NUMBER : model symbol, year, month and progressive production CARDIOGIMA 6M USER MANUAL V. 04-05 Pag. 5 3. USE INSTRUCTIONS 3.1 INITIAL SET-UP AND AMBIENTAL CONDITIONS CARDIOGIMA 6M is built according to the CE standards and therefore is protected against electromagnetic interference from other devices. Nevertheless, in order to protect your device from other equipment that does not conform to the standards, it is recommended to: • • • • • Avoid using cellular telephones in the vicinity specially during recording. Place the electrocardiograph as far as possible from electrical lines or static electricity sources to avoid the ECG signal disturbance. Avoid positioning of the electrocardiograph, during recording, close to other diagnostic or therapeutic equipment like X-ray or ultrasound which can generate excessive electromagnetic interference. Perform the recording in a room with temperature between 20 and 25 degrees centigrade to avoid the patient feeling cold and induce the presence of muscle tremors. Do not expose the unit to excessive salty or humid environments. 3.2 RECOMMENDATIONS FOR SAFE USE • • • • • • • • Use the device in accordance with the instructions in this manual. The unit is delivered with a set of standard accessories. For reasons of safety, reliability and compatibility with the CE standards, use only the original accessories or others approved by the producer. CARDIOGIMA 6M is equipped with thermal head printing mechanism which allows high quality hardcopy. To ensure the quality and reliability of the printer use only the original paper or one approved by the producer. Make sure that the line voltage corresponds to the voltage indicated on the batteries charger supplied with the unit. The CARDIOGIMA 6M has the isolation class II CF which means no ground connection is needed. Moreover the patient is fully isolated and defibrillation protected. The defibrillation protection is guaranteed only if the original patient cable is used. Check periodically the integrity of all accessories and the unit itself. Do not use the unit in presence of anesthetics or flammable gases. The producer is responsible for the unit in terms of safety, reliability and functionality only if: - The unit is used in accordance with the user instructions. - The electrical service at the location of use is according to the binding standards. - The repairs are performed by the producer or by an authorized service center. CARDIOGIMA 6M USER MANUAL V. 04-05 Pag. 6 • The unit is equipped with long life rechargeable batteries. However it is recommended to use only the original charger and to follow the procedures described in this manual to ensure the long autonomy of the batteries. The producer is not responsible for damage to persons or the unit following the usage of a non-original charger. 3.3 POWER ON/OFF To turn on/off the instrument press the main switch, placed on its back left side. The initials screen will display the battery status bar. If the charge value is lower than 80% please plug in the charger. To start the work connect the patient cable, apply the electrodes on the patient and than push the key (start) F1. 3.4 KEY BOARD DESCRIPTION Batteries Charger Indicator Paper Feed Sequential Mode or Printing form Freeze Manual Mode Automatic Mode Freeze Paper Speed Sensitivity of Recording Filters Menu Vertical Arrows – Traces Group Selection Horizontal Arrows - Memory Scroll CARDIOGIMA 6M USER MANUAL V. 04-05 Pag. 7 F1-F4 Menu Selections 3.5 DEFAULT OPERATIONAL SET-UP At power on the default set-up is: • Traces display/print number: 6 • Traces Order: Standard • Paper Speed: 25 mm/s • Sensitivity of recording: 5 mm/mV • Filters: Disabled • Traces Group: I; II; III; aVR; aVL; aVF • Hardcopy frame length: 5 seconds 3.6 THE MAIN OPERATIONAL MODES 1. Paper Speed: 25mm/s at the turning on. Pushing the key ???? it is possible to select the paper speed: 50mm/s, 5mm/s, 10mm/s, 25mm/s…… 5mm/s …….. 2. Sensitivity of recording: 5mm/mV by default. Pushing the key {{{{it is possible to select the sensitivity of the trace: 10mm/mV, 20mm/mV……….5mm/mV………. 3. Filters: disabled by default. Pushing the key ≈ it is possible to enable the desired filter, according to the keys F1; F2; F3: - LP: anti muscle tremors filter - HP: anti base line disturbs filter - NOTCH: anti power line disturbs filter 4. Traces Group: the Standard modality is predefined at power on. With this modality, on the display will show: - First Group: I; II; III; aVr; aVL; aVF - Second Group: V1; V2; V3; V4; V5; V6 It is possible to select the desired group pushing the keys © and ª. Changing to Cabrera modality, the display will show: - First Group: aVL; I; -aVR; II; aVF; III - Second Group: V1; V2; V3; V4; V5; V6 CARDIOGIMA 6M USER MANUAL V. 04-05 Pag. 8 3.7 SECONDARY OPERATIONAL MODES CHANGE Using the menu options it is possible to access the secondary operational parameters as follows: pushing the key Menu (F4), different menus will be displayed according to the keys F1; F2; F3. First Menu: - Standard (F1): for turning on the Standard or Cabrera modality. - Grid Off (F2): for turning on/off the hardcopy grid. - 6 Leeds (F3): for three or six traces display and 3, 6, 12 traces print. In 12 traces mode the sensitivity is fixed 2.5 mm/mV Second Menu: - Base 1 (F1): enables the first trace base line shift using the © and ªkeys. - Base 2 (F2): enables the second trace base line shift using the © and ªkeys. - Base 3 (F3): enables the third trace base line shift using the © and ªkeys. Third Menu: - Base 4 (F1): enables the fourth trace base line shift using the © and ªkeys. - Base 5 (F2): enables the fifth trace base line shift using the © and ªkeys. - Base 6 (F3): enables the sixth trace base line shift using the © and ªkeys. Fourth Menu: - Table (F1) : for turning on/off the Patient Data Table. - Frame (F2): to set the hardcopy frame length to 5/10 sec. - Clamp (F3): to reset the base lines when the electrodes are disconnected or in case of excessive shift of the traces. Fifth Menu: for turning on the Filters as the key ≈ alternative (v. Main operational modes). 3.8 PREPARATION OF THE PATIENT For a high quality ECG recording good preparation of the patient and correct positioning of the electrodes is necessary. • • • The patient should be relaxed and the room temperature must be above 20 deg. centigrade to avoid the ecg signal to be disturbed by muscle tremors. Clean the skin where the electrodes will be placed with alcohol. Make sure that during recording the patient does not touch another person or conductive objects. CARDIOGIMA 6M USER MANUAL V. 04-05 Pag. 9 3.9 ELECTRODES APPLICATION Apply a small quantity of conductive gel on the part of the skin where the electrodes will be placed (not necessary if disposable electrodes with pre-applied gel are used). Position the electrodes according to the following scheme: C1: on the 4th intercostal space on the right parasternal part. C2: on the 4th intercostal space on the left parasternal part. C3: on the 5th rib, between C2 and C4. C4: on the 5th intercostal space, on the left hemiclavicular region. C5: on the left anterior axillary, at the same level as C4. C6: on the left mid-axillary at the level of C4. Peripheral electrodes: N: R: F: L: Right leg Right hand Left leg Left hand ECG DERIVATIONES ACCORDING TO IEC and AHA: IEC AHA ---------------------------------------------------------------------------------------------------------N Black RL Green R Red RA White C1 White/Red V1 Brown/Red C2 White/Yellow V2 Brown/Yellow C3 White/Green V3 Brown/Green C4 White/Brown V4 Brown/Blue C5 White/Black V5 Brown/Orange C6 White/Violet V6 Brown/Violet L Yellow LA Black F Green LL Red CARDIOGIMA 6M USER MANUAL V. 04-05 Pag. 10 It is important not to use electrodes of different material as this can create polarization currents and disturb the base line of the ECG signals. 3.10 IMAGE FREEZING By pushing the key “Freeze” Η it is possible to stop the display. The data acquisition will continue for 10 seconds (RECORD). When the acquisition is finished (MEMORY), pushing the ← and → keys it is possible to review the traces memorized and to print them pressing the key ¬. 3.11 PRINTING TRACES 1. Manual mode, in real time: at any time, pressing the “Manual key. To stop → the print push again the same key. 2. Isochronous mode (suggested): pushing the key 0 the first leads group will be printed and in the same time the other leads are acquired and printed in sequence for 5 or 10 seconds according to the frame length set-up. Basic model After first group print, the message “DATA FROM MEMORY” will be displayed. It is also possible to modify the parameters (paper speed, sensitivity of recording …..) and to reprint the traces in memory pushing the key “Copy” ¬. To exit this mode press again the same key. Parameter calculation/ Interpretation model After traces hard copy, the table with parameter calculation will be printed (for Par. C. model) and then the interpretation (for Int. model). After machine, automatically, returns to normal operation. 3. Sequential Mode: push the key ¬, all the electrocardiograph leads are acquired and printed in automatic sequence. The print can be stopped pressing the key ¬ at any time. 3.13 LOADING THE THERMAL PAPER When the thermal paper is finished, the “paper missing” message appears on the display. Open the printer cover (pressing the green button) and place the paper roll with the thermal sensible side down, leaving about 5 cm out. Replace the printer cover by inserting it on the left side opening and then push it down until it locks. CARDIOGIMA 6M USER MANUAL V. 04-05 Pag. 11 Keep pushing the feed key until the paper comes out of the printer straight. The paper used – of high quality – can be diagrammed or white; in this case it is necessary to program the electrocardiograph for the Grid Print (v. Secondary operational modes). 3.14 BATTERIES CHARGE At the first use, the batteries must be charged. During the first charge, it is suggested to turn off the instrument. Connect the line power supply to the charge connector placed on the back side, near the main switch. When the “Battery Low” message appears on the display it is necessary to recharge the batteries. During charging the front LED is on. When the LED is flashing, or at maximum 4 hours time, disconnect the charger. Batteries can also be charged connecting the optional cable to the car cigar-lighter. It is a good practice to disconnect the charger, after charge finished ATTENTION: use only the original line power supply. 4. MAINTENANCE 4.1 GENERAL RECCOMENDATIONS The equipment needs neither special servicing nor calibration. For a correct maintenance, is recommended: - after use, clean the patient cables and the electrodes removing the gel residue - do not use aggressive chemical detergents, or vapour. - clean the unit with dry cotton. - the device cannot be sterilized. The electrodes can be sterilized with oxide of ethylene. - do not scratch the screen. - do not spill liquid on the unit. - do not pull the patient cables. 4.2 PERIODIC CONTROLS Periodically control the battery status bar. When the charge value is lower than 75%, please plug in the charger. CARDIOGIMA 6M USER MANUAL V. 04-05 Pag. 12 IMPORTANT To insure a correct and long-lasting operation of the batteries it is necessary to control the charge status. If the device is not used, it is suggested to recharge the batteries every 2 weeks. 5. STANDARD ACCESSORIES Carrying case (optional) Consolle CARDIOGIMA 6M Patient Cable Electrodes Set Power Cable Paper roll Gel Flacon User Manual 6. TROUBLE SHOOTING TROUBLES CAUSES AND REMEDIES Pressing the “Freeze” key the graphic does After pressing the “Freeze” key wait the not stop cursor to reach the end of display, then press the other keys. Graphic not displayed Batteries discharged Faded hardcopy Non original paper or batteries discharged No hardcopy Wrongly positioned paper roll, thermosensitive side up. Batteries not recharging Verify power cable connection Device does not turn on Recharge the batteries Faulty paper flow End of paper roll, non original paper or wrongly positioned paper roll Baseline drift Dirty electrodes surface, insufficent skin contact or patient movement Muscle tremors Patient not relaxed; filter non active Interferences on trace Faulty patient cable; dirty electrodes surface or insufficent skin contact CARDIOGIMA 6M USER MANUAL V. 04-05 Pag. 13 PARAMETERS CALCULATION STANDARD INTERVALS RR: The time between two consecutive QRS complexes, computed from the heart rate median value. PQ (PR): QRS: P-R interval is the time between the P wave start and the QRS complex start. The length of the QRS complex. QT: The interval between the QRS complex start and the end of the T wave. QTC: The normalized QT interval (QT that the patient would have at a 60BPM heart rate). The formula used for computing QTC is: QTC = QT * sqr( 1000 / RR ) WARNING The electrocardiograms, in general the biosignals, do not correspond to precise mathematical functions. The measurement points defined by the machine are extremely sensitive to noise disturbs. For an accurate interpretation the doctor have to control and validate the measurement points. The doctor should never confirm the machine analysis results without controlling first the morphology of the representative cycles and the correct position of the measuring points. Each electrocardiogram and the relative analysis becomes a diagnostic document only after the doctor approval and his signature.


