1
Congratulations! You have the best in suspension components on your bicycle! This manual contains
important information about the safe operation and maintenance of your fork. To insure that your RockShox fork
performs properly, we recommend that you have your fork installed by a qualified bicycle mechanic. We also urge
you to follow our recommendations to help make your bicycling experience more enjoyable and trouble-free.
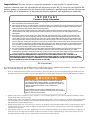
IM PO RTA N T
Consumer Safety Information
1. Before riding the bicycle, be sure the brakes are properly installed and adjusted. If the brakes do not work properly, the
rider could suffer serious and/or fatal injuries.
2. If the fork ever loses oil or if it makes sounds of excessive topping out, stop riding the bicycle immediately and have the
fork inspected by a dealer or call RockShox. Continuing to ride with the shock in these conditions could result in loss of
control of the bicycle with possible serious and/or fatal injuries.
3. Always use genuine RockShox parts. Use of aftermarket replacement parts voids the warranty and could cause
structural failure to the shock. Structural failure could result in loss of control of the bicycle with possible serious and/or
fatal injuries.
4. Use extreme caution not to tilt the bicycle to either side when mounting the bicycle to a carrier by the fork drop-outs
(front wheel removed). The fork legs may suffer structural damage if the bicycle is tilted while the drop-outs are in the
carrier. Make sure the fork is securely fastened down with a quick release. Make sure the rear wheel is fastened down
when using ANY bike carrier that secures the fork’s drop-outs. Not securing the rear can allow the bike’s mass to sideload the drop-outs, causing them to break or crack. If the bicycle tilts or falls out of its carrier, do not ride the bicycle until
the fork is properly examined for possible damage. Return the fork to your dealer for inspection or call RockShox if there
is any question of possible damage (See the International Distributor List). A fork leg or drop-out failure could result in
loss of control of the bicycle with possible serious and/or fatal injuries.
5. Only mount cantilever-type brakes to the existing brake posts. Forks with hangerless style braces are only designed for
‘V’- style or hydraulic cantilever brakes. Do not use any cantilever brake other than those intended by the brake
manufacturer to work with a hangerless brace. Do not route the front brake cable and/or cable housing through the stem
or any other mounts or cable stops. Do not use a front brake cable leverage device mounted to the brace.
ROCKSHOX FORKS ARE DESIGNED FOR COMPETITIVE OFF-ROAD RIDING AND DO NOT COME WITH THE
PROPER REFLECTORS FOR ON-ROAD USE. YOUR DEALER SHOULD INSTALL PROPER REFLECTORS TO MEET
THE CONSUMER PRODUCT SAFETY COMMISSION’S (CPSC) REQUIREMENTS FOR BICYCLE STANDARDS IF THE
FORK IS GOING TO BE USED ON PUBLIC ROADS AT ANY TIME.
I N S TA L L AT I O N
It is extremely important that your RockShox fork is installed correctly by a qualified bicycle mechanic. Improperly installed
forks are extremely dangerous and can result in severe and/or fatal injuries.
1. Remove the existing fork from the bicycle and the crown race from the fork. Measure the length of the fork steerer tube against the length of the RockShox steerer tube.
The RockShox steerer tube may need cutting to the proper length. Make sure there is sufficient length to clamp the stem (refer to the stem manufacturer's instructions).
! WARNING
DO NOT ADD THREADS TO ROCKSHOX THREADLESS STEERERS.
THE STEERER TUBE CROWN ASSEMBLY IS A ONE-TIME PRESS FIT.
REPLACEMENT OF THE ASSEMBLY MUST BE DONE TO CHANGE THE
LENGTH, DIAMETER OR HEADSET TYPE (THREADED OR
THREADLESS).
DO NOT REMOVE OR REPLACE THE STEERER TUBE. THIS COULD
RESULT IN THE LOSS OF CONTROL OF THE BICYCLE WITH POSSIBLE
SERIOUS AND/OR FATAL INJURIES.
2. Install the headset crown race (26.4mm for 1" steerers, 29.9mm for 1 1/8" steerers) firmly against the top of the fork crown. Install the fork assembly on the bike.
Adjust the headset until you feel no play or drag.
3. Install the brakes according to the manufacturer's instructions and adjust brake pads properly. Use the fork only with V-type or hydraulic cantilever brakes mounted
to the existing brake posts or disc style brakes mounted through the provided mounting holes. Do not use any cantilever brake other than those intended by the
brake manufacturer to work with a hangerless brace.
4. Adjust the front wheel quick release to clear the dropout's counter bore. The quick release nut must be tightened after the wheel is properly seated into the dropout's
counter bore. Make sure four or more threads are engaged in the quick release nut when it is closed. Orient the quick release lever in front of and parallel to the
lower tube in the locked position.
5. Keep in mind tire clearance as you choose tires. Maximum size is 2.6" wide or 347 mm radius installed. Be sure to check this radius whenever you change tires. To
do this, remove the air and compress the fork completely to make sure at least 5mm of clearance exists between the top of the tire and the bottom of the crown.
Exceeding maximum tire size will cause the tire to jam against the crown when the fork is fully compressed.