Download 100 Gallon 4-‐Wheel Sprayer
Transcript
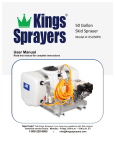
100 Gallon 4-‐Wheel Sprayer Model #: K4C100P7027 User Manual Read this manual for complete instructions Need help? Call Kings Sprayers if you have any questions with this product. Technical service hours: Monday – Friday, 8:00 a.m. – 5:00 p.m. ET 1-800-228-0905 | [email protected] Model #: K4C100P7027 Table of Contents Warranty .......................................................................................................................... 3 General Safety Information ........................................................................................... 3 Hazardous Substance Alert .......................................................................................... 4 Sprayer Components ..................................................................................................... 5 Getting Started ............................................................................................................... 7 Starting Your 4-Wheel Sprayer for the First Time................................................................ 7 Shutting Down Your 4-Wheel Sprayer .................................................................................. 7 Engaging / Disengaging the Regulator ................................................................................. 8 Troubleshooting Your Sprayer ..................................................................................... 8 2 Warranty 5 year frame / 5 year tank / 1 year parts and labor (limited to manufacturer defects) / 1 year pump (limited to manufacturer defects) / 3 year gas engine (limited to manufacturers defects). The warranty will not apply to products that were improperly installed, misapplied, damaged, altered or incompatible with fluids or components. Kings Sprayers obligation under this warranty is limited to the repair or replacement of the product. All returns will be tested per factory criteria. Products found not defective (under the terms of this warranty) are subject to charges paid by the returnee for testing and packing of “tested good” non-warranty returns. No credit or labor allowances will be given for products returned as defective. Warranty replacement will be shipped at Kings Sprayers discretion. Kings Sprayers reserves the right to choose the method of transportation. Contact Kings Sprayers at 800-228-0905 to receive a Return Merchandise Authorization (RMA#) before returning any products. The RMA number should be clearly marked on the outside of the package. Kings Sprayers shall not be liable for freight damage incurred during shipping. All products returned for warranty work should be sent shipping charges prepaid. General Safety Information The following chemicals should never be put through any pump: • • • • • • Gasoline (Petrol) Kerosene/Kerosine (Paraffin) Diesel Fuel Ceramic Slurries Sewage Potable Water DO NOT pump flammable or explosive fluids such as gasoline, fuel oil, kerosene, etc. DO NOT use in explosive atmospheres DO NOT pump asphalt sealer, roofing compounds, concrete sealers, or any two-step curing products DO NOT pump non-approved liquids (See Above) DO NOT operate any pump under the influence of drugs or alcohol DO NOT perform service or maintenance to the pump or attached components until the pumping unit is below 109°F Only authorized operators having the knowledge and skill necessary to safely use the pump, or any equipment the pump is connected to, may run the pump. When handling pumps, wear steel-toed shoes and protective gloves in order to protect the feet in the event the pump is dropped and protect the hands from chemicals or any sharp surfaces on the pump. When spraying manually, chemical-resistant facemasks and clothing should be worn to prevent any chemicals from coming into contact with the skin or being inhaled. When spraying manually, always spray downwind of yourself as long as the sprayed chemical will not drift into the vicinity of other people. Never operate a pump outside while there is a chance of getting struck by lightning. Never leave wires or plumbing components where they can be a tripping hazard or become entangled in a moving component. 3 All maintenance should be done when machinery is stationary and has been isolated from its energy sources. It is dangerous to perform maintenance while machinery is still connected to its power source. Machinery should be isolated from its electrical, hydraulic, shaft driven or gas engine power source. Be sure to release all pressure from the system before performing any sort of maintenance on a pump. The sound level of the pump may exceed 80dBA. Observe all safety precautions when operating the pump within close proximity for extended periods of time by wearing hearing protectors. Extended exposure to elevated sound levels will result in hearing loss and other effects such as loss of balance and awareness. Do not pump at pressure higher than the maximum recommended pressure. Operate the pump between a temperature range of 45° to 140°F (7° to 60°C). Secure the discharge line before starting the pump. An unsecured discharge line may whip, resulting in injury. Check all hoses for weak or worn condition before each use. Periodically inspect the pump and the system components. Perform routine maintenance as required. Do not use pumps for pump water or other liquids for human or animal consumption. Do not pressure feed pump inlet. Failure to follow these notices can result in severe personal injury and/or property damage and will void product warranty. Hazardous Substance Alert Any hazardous liquids should be disposed of in a manner that complies with local and national regulations. Never dump fluids onto the ground. Always drain and flush pump before servicing or disassembling for any reason. Always drain and flush pump prior to returning unit for repair. Never store pumps containing hazardous chemicals. Before returning pump for service/repair, drain out all liquids and flush unit with neutralizing liquid. Then, drain the pump. Attach tag or include written notice certifying that this has been done. Please note that it is illegal to ship or transport any hazardous chemicals without United States Environmental Protection Agency Licensing. 4 Sprayer Components Inline strainer to keep debris out of system Ball valve to shut off flow when cleaning strainer or servicing sprayer Figure 1: Side View Lever to engage pressure regulator. Pull down and lock into p lace to engage. Pull up to put regulator back into bypass mode. Brass nut to adjust pressure setting. Unobstructed bypass line. Pressure gauge to calibrate when spraying. On/Off Ball valve for agitation. On/Off Ball valve leading to hose reel and spray gun. Regulator positions (from right to left): #1 #2 #3 #4 Figure 2: Detailed View 5 Accumulator / Upper air chamber – Fill with 20 psi or 20% of the normal operating pressure Figure 3: Front View Quick disconnect to spray gun Hose reel swivel Pinlock assembly to lock hose reel Figure 4: Back View 150’ h igh pressure hose Drain 6 Getting Started Starting Your 4-‐Wheel Sprayer for the First Time 1. 2. 3. 4. 5. 6. 7. 8. 9. 10. 11. 12. 13. 14. 15. 16. 17. 18. Ensure all unnecessary personnel are clear of the area. For initial testing, it is recommended to start with clean water instead of chemicals to confirm the system and plumbing components are leak free. Ensure there is fluid in the tank and supply line. Check line strainer for debris or clogs and remove if any found. Check all plumbing connections to ensure tightness. Ensure all valves and regulators are set to the desired setting and working properly. Ensure all hoses are positioned properly and undamaged. Follow the next steps on starting the engine. Set the ON/OFF switch to the ON position. Set the throttle to SLOW. Turn the gas to the ON position. For a cold start, set the choke to FULL. Pull start the engine. Release the choke. Raise the throttle to FULL. The regulator has four settings. First set the base pressure with the adjustment nut by releasing the lever and turning the nut to meet your desired pressure needs. Reset the lever to desired setting. a. When the regulator is engaged in the number one position (located farthest from the brass nut), the pressure is roughly 100 psi; b. In the number two position, the pressure is approximately 250 psi; c. In the number three position, the pressure is roughly 450 psi; d. In the number four position, the pressure is about 550 psi; e. To fine-tune the pressure rating, use the brass nut on top of the spring. To engage the agitator, flip the switch to the left of the pressure gauge. You will notice a slight drop in pressure as the agitator mixes the tank to help evenly dispense chemicals. The right switch turns on pressure to the spray gun. Adjust the spray gun to the desired setting and you are ready to spray. Shutting Down Your 4-‐Wheel Sprayer 1. 2. 3. 4. 5. 6. Shut sprayer down using the outlined steps. Turn off the agitator and spray gun. Release the pressure. Set the throttle to idle. Turn the ON/OFF switch to the OFF position. If pump will not be used for several hours flush your system to prolong the life of the components. For a step-by-step video guide, visit the Sprayer Depot YouTube Channel to watch instructional videos on a variety of topics. Tune in by visiting http://YouTube.com/SprayerDepot. 7 Engaging / Disengaging the Regulator For regulators found on roller pumps and 3Point Hitches, leaving regulators engaged will not hurt the pumps. Pump Model Hypro D30 Engage Move lever down Disengage Move lever up Hypro D252 Turn knob to “C” Turn knob to “A” Iota 20 Turn lever clockwise Turn lever counterclockwise Kappa 40 Move lever up Move lever down Kappa 43 Turn lever clockwise Turn lever counterclockwise Troubleshooting Your Sprayer Symptom Pump does not draw water Possible Reason One or more valves are seating improperly. Suction line is plugged or collapsed. Clogged strainer. Liquid flow is irregular The charge in the pulsation dampener is incorrect. One or more valves are seating improperly. Output drops and the pump is noisy Oil comes out of the discharge port or oil is a milky color The oil level is too low. Loss of pressure / pressure fluctuation Check valve spring is worn or valve seat is not sealing. One or more diaphragms have split. Pressure regulator internal parts are worn/compromised. Correction Remove valve and check for debris. Remove any debris found. Examine valve seatings and clean them. Examine and clean the suction line. Clean the strainer. Check the pressure in the pulsation dampener. (It should be 20% of your spray pressure.) Remove valve and check for debris. Remove any debris found. Examine the valve seatings and clean them. Add oil to the correct level (halfway up the sight tube). Remove the manifold and heads. Drain the oil and clean the crankcase of water. Replace the diaphragms, heads, and manifold. Refill with Hypro Oil (part number 2160-0038). Examine spring to ensure it is not broken or gummed up with chemical. Inspect seat to make sure valve is still sealing. Examine o-rings to ensure they are not swollen or ripped. Inspect poppet/seat to make sure it is still intact and not broken apart or shrunk down. 8


