1
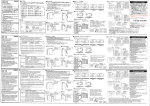
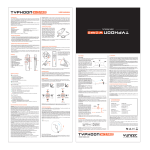
USER MANUAL
INTRODUCTION
OVERVIEW
The CGO SteadyGrip™ is a ground handle designed to extend the CGO-GB 3-axis
gyro stabilized camera from the sky to the ground, allowing you to capture amazing
acion shots easier than ever before. The camera pitch controller allows precise
camera angle control on the go using your mobile device as a display. The SteadyGrip's ergonomic design is capable of holding up to a 6.4 inch mobile device.
The SteadyGrip™ paired with Yuneec’s CGO2-GB Full-HD 3-Axis Stabilized Gimbal
Camera System allows you to capture fluid footage right out the box. Please take
the ime to read through this enire instrucion manual for more informaion on
safety, batery charging, camera controls and more before filming your first hit
video. Please also visit www.Yuneec.com for addiional informaion including
product updates, bulleins, videos and more.
CGO-2GB (available separately) is an innovaive combinaion of 3-axis brushless
gimbal, camera and digital video downlink.
The Self-Stabilizing gimbal makes it possible to capture amazing photographs and
video footage for an array of uses. And the built-in digital video link delivers
streaming video to 5.8GHz WiFi compaible iOS® and Android™ equipped devices
including smart-phones and tablets as well as YUNEEC Personal Ground Staions.
WINDOWS SYSTEM
REQUIREMENTS
MAC SYSTEM
REQUIREMENTS
Windows XP (Service Pack 2 or later)
or Vista
3.2GHz Penium 4 or faster
Minimum 4GB of system RAM
Mac OS® X 10.4.11 or later
2.0GHz Intel Core Duo or faster
Minimum 4GB of system RAM
CGO2 APP COMPATIBLE DEVICES
Android:
Mobile Devices with 5.8GHz Support
Apple iOS:
phone4s
iphone 5,5c/5s,6,6+
ipad mini / mini+ /3/4.
SPECIFICATIONS
CGO STEADYGRIP™
CGO SteadyGrip™ Acion Ground
Handle for CGO™ Series Camera
2
3
1
1. CGO2-GB
2. Main Status LED
3. Pitch Control Roller Wheel
4. Rubberized Ergonomic Grip
5. On/Off Switch
6 . 6AA Batery Compartment
4
6
5
BATTERY WARNINGS AND USAGE GUIDELINES
WARNING: Alkaline Bateries May explode or leak, and cause burn injury if
recharged, disposed of in fire, mixed with a different batery type, inserted
backwards or disassembled. Replace all bateries at the same ime. Do not carry
bateries loose in your pocket or purse. Do not remove the batery label.
WARNING: All instrucions and precauions must be read and followed exactly and
you must follow instrucions of the batery manufacturer.
WARNING: procedures, which if not properly followed, create the probability of
property damage, collateral damage and serious injury or create a high probability
of superficial injury.
Failure to exercise care while using this product and comply with the following
condiions and guidance could result in product malfuncion, excessive heat, fire,
property damage, and ulimately injury.
Lithium lon bateries are not toys. For the purpose of the document Li-lon, Li-Po,
Li-Fe, NiCd or NiMH bateries will be described as "Bateries".
Handling and Storage:
● Never alter, puncture or impact Bateries or related components.
● Do not directly connect the terminals with metal objects. This will short-circuit
Bateries, resuling in heat and electrical discharge.
Height: 223mm (8.78 in)
Depth (front to back): 182mm (7.17 in)
Width: 70mm (2.76 in)
Weight (without gimbal/bateries): 200g (7.05 oz)
Required Bateries: 2850mAh Energizer® 6x 1.5V AA Bateries
(Sold Separately)
Runime: 48-64 minutes (depending on usage)
● Never store loose Bateries together, the Bateries' terminals may contact one
another causing a short circuit.
CGO2-GB
● Ensure bateries are not damaged, as this may cause a short circuit of fire.
Charging
Height: 115mm (4.5 in)
Width: 74mm (2.9 in)
Depth: 135mm (1.4 in)
Weight: 185g (6.5 oz)
Video Resoluion: Full-HD 1080p 60, 50 or 48 fps(
Photo Resoluion: 12 Megapixels
Transmission Distance/Range: Up to 600m (1970 t) depending on receiving device
and environment
Transmission Band: 5.8GHz
Storage (memory): microSD Class 10 up to 128GB
NOTICES AND WARNINGS
IMPORTANT NOTE: All safety precauions and warnings, instrucions, warranies
and other collateral informaion is subject to change at the sole discreion of
Yuneec. For the most up-to-date informaion please visit the corresponding
product page at www.Yuneec.com or contact the nearest Yuneec office or
authorized distributor.
The following special language terms are used throughout the product literature to
indicate various levels of potenial harm when operaing this product:
NOTICE: Procedures, which if not properly followed, create a possibility of property
damage and/or litle to no possibility of injury.
CAUTION: Procedures, which if not properly followed, create the probability of
property damage and/or a possibility of serious injury.
WARNING: Procedures, which if not properly followed, create the probability of
property damage, collateral damage and/or serious injury or create a high probability
of superficial injury.
WARNING: Read the ENTIRE instrucion manual to become familiar with the
features of the product before operaing. Failure to operate the product correctly
can result in damage to the product, property and/or cause serious injury.
WARNING: This is a sophisicated consumer product. It must be operated with
cauion and common sense, and requires some basic mechanical ability. Failure to
operate this product in a safe and responsible manner could result in damage to the
product, property and/or cause serious injury. This product is not intended for use
by children without direct adult supervision. Do not use with incompaible
components or alter this product in any way outside of the instrucions provided by
Yuneec. The instrucion manual contain instrucions for safety, operaion and
maintenance. It is essenial to read and follow all the instrucions and warnings
prior to assembly, setup and/or use in order to operate the product correctly and
avoid damage or serious injury.
● Never expose Bateries to extreme temperatures or direct sunlight.
● Always disconnect Bateries when not in use.
Before the First Charge:
● Always refer to your charger's manual to ensure safe operaion.
● Always charge Bateries in an open area away from flammable materials, liquids
and surfaces.
● Never charge Bateries that are hot to the touch (above 120°F)
If at any ime Bateries become damaged, hot, or begin to balloon or swell,
disconinue charging (or discharging) immediately. Quickly and safely disconnect
the charger. Then place the Bateries and/or charger in a safe, open area away from
flammable materials in an approved Li-Po bag to observe. Ater one hour, remove
the Bateries from service. DO NOT coninue to handle, atempt to use, or ship the
Bateries. Failure to follow these procedures can cause damage to Bateries,
personal property or cause serious injury.
Damaged or swollen Bateries can be unstable and very hot. DO NOT touch
bateries unil they have cooled. Dispose of bateries in the manner required by
your city, county, state or country. Contact the appropriate Yuneec Product
Support Office to speak to a service technician for more informaion.
In the event of fire, a Class D, dry chemical fire exinguisher must be used then
bateries must be placed inside of an approved Li-Po bag.
Addiional Guidelines and Warnings:
● In the event of a crash, always quickly and safely disconnect and remove Bateries
from the model. Then follow the previously listed safety procedures.
● If the internal contents of Bateries come into contact with your skin, wash the
affected area(s) with soap and water immediately. If it comes into contact with your
eye(s), flush them with generous amounts of water for 15 minutes and seek
immediately medical atenion.
INSTALLING THE AA BATTERIES
WARNING: Alkaline Bateries May explode or leak, and cause burn injury if
recharged, disposed of in fire, mixed with a different batery type, inserted
backwards or disassembled. Replace all bateries at the same ime. Do not carry
bateries loose in your pocket or purse. Do not remove the batery label.
STEP 1) Remove the Batery Cover / Door
from the botom of the SteadyGrip™
Hold the botom of the SteadyGrip™ toward
yourself with the front part facing
downward. Slide the batery cover / door
upward with slight force and inspect the AA
batery compartment.
AGE RECOMMENDATION: NOT FOR CHILDREN UNDER 14 YEARS. THIS IS NOT
A TOY.
GENERAL SAFETY PRECAUTIONS AND WARNINGS
WARNING: Failure to use this product in the intended manner as described in
instrucion manual can result in damage to the product, property and/or cause
serious injury. This product is not a toy! If misused it can cause serious bodily harm
and damage to property.
WARNING: As the user of this product you are solely and wholly responsible for
operaing it in a manner that does not endanger yourself and others or result in
damage to the product or the property of others.
STEP 2) Install 6x AA Bateries
For long life and extended run ime, we
recommend Energizer® 1.5V AA Bateries
which are known to have 2,850mAh of
stored energy. The SteadyGrip™ will run for approximately 48-64 minutes depending
on the gravity of usage.
STEP 3) Re-installing the Batery Cover / Door on the botom of the SteadyGrip™
Always allow CGO2-GB and SteadyGrip™ to iniialize properly by seing the
SteadyGrip™ on a flat and stable surface prior to switching it on and allowing the
SteadyGrip™ and CGO2-GB to iniialize properly which someimes takes about 4-8
seconds.
Once you’ve installed 6 fresh AA bateries, Hold the botom of the SteadyGrip™
toward yourself with the front part facing downward. Slide the batery cover / door
downward with slight force and ensure you hear and feel a noiceable ‘click’
indicaing the batery cover / door has been closed securely.
Always operate your SteadyGrip™ in a respecful and safe manner.
ATTACHING THE CGO2-GB TO THE STEADYGRIP™
Do not atempt to operate your equipment in areas with potenial magneic and/or
radio interference including areas nearby broadcast towers, power transmission
staions, high voltage power lines, etc.
WARNING: Before switching on the SteadyGrip™ it is highly recommended to first
securely atach the CGO2-GB to your SteadyGrip™.
FCC INFORMATION
QUICK TIP: It’s a good idea to ensure you have your microSD card with lots of
space for photos and videos handy.
This device complies with part 15 of the FCC rules. Operaion is subject to the
following two condiions: (1) This device may not cause harmful interference, and
(2) this device must accept any interference received, including interference that
may cause undesired operaion.
CAUTION: Changes or modificaions not expressly approved by the party responsible
for compliance could void the user’s authority to operate the equipment.
This product contains a radio transmiter with wireless technology which has been
tested and found to be compliant with the applicable regulaions governing a radio
transmiter in the 5.8GHz frequency range.
Antenna Separaion Distance:
Maintain a separaion distance of at least 50mm (2 in) between your body (not
including your fingers, hands and wrists) and the antennas to meet the RF exposure
safety requirements determined by FCC regulaions. Holding the SteadyGrip™ by
the ergonomic handle with your arm straight out in front of you, will provide
adequate antenna separaion distance.
STEP 1) Carefully slide the top part of the CGO2-GB (that also ataches below the
nose of the Q500 Typhoon) onto the mount below the front part of the SteadyGrip™.
A corresponding ‘click’ will be noiced once the CGO2-GB has securely been
installed into the slide-in mount on the SteadyGrip™.
www.modellmarkt24.ch
USER MANUAL
STEP 2) Carefully connect the CGO2-GB’s power/control connector to the power/control port of the CGO SteadyGrip™ and then insert a microSD card into the
corresponding slot on the botom of the CGO2-GB. You can use the included 8GB
card (from your RTF package) or any Class 10 microSD card up to 128GB.
STEP 3) Powering on and iniializaion. Place your
CGO SteadyGrip™ on a flat and stable surface, then
switch on the SteadyGrip™ and it will iniialize ater
4-8 seconds of no movement or vibraion.
SteadyGrip™ Main LED Status:
Upon Powering On: Green LED Blinking for 8 seconds
(Staring up, Iniializaion) and Then Solid Green for
READY TO USE!
Low Voltage Warning: Green LED Blinking Slowly
Voltage Dropping: Green Blinking LED Speeds Up As
The Voltage Drops
CGO2-GB Error: Red LED Blinking
ATTACHING A MOBILE DEVICE TO THE STEADYGRIP™
The SteadyGrip's ergonomic design is capable of holding up to a 6.4 inch mobile
device.
Step 1) Press the Curved Lip at the top
front of the SteadyGrip™ as illustrated
and fit your Mobile Device with the
screen facing toward the Main LED
and Pitch Control Wheel.
IMPORTANT NOTE: You cannot take sill photos while recording video. You MUST
stop recording video in order to take sill photos.
2) To start/stop recording video simply press the red buton located on the APP.
You’ll hear an audible indicaion from the APP each ime the recording starts/stops.
And while video is recording the LED indicator on the front of the CGO2-GB will
flash blue and green, and there will be an indicator showing ime length of the
recording on the APP Screen.
IMPORTANT NOTE: You can choose to record video at 48, 50 (PAL) or 60 (NTSC)
frames per second by tapping the corresponding buton near the upper let-hand
corner on main screen of the APP.. Keep in mind that the delay in the live video
stream will be lowest at 48 and 50 as compared to 60 frames per second.
The pitch control wheel, (similar to a scroll wheel on a tradiional computer mouse)
located on the top of the SteadyGrip™ allows you to set the pitch/ilt posiion of
the CGO2-GB from approximately straight ahead (when the pitch control wheel is
rolled backward toward the user to its maximum posiion) to approximately straight
down (when the pitch control wheel is rolled out away from you unil its maximum
posiion). And you can easily set a posiion in between by adjusing the pitch
control wheel accordingly. According to Figure 9a on page 9.
QUICK TIP: There’s an adjustable counterbalance located on the rear of the
CGO2-GB. This counterbalance has been adjusted at the factory to provide the
best balance and performance overall so typically it should NOT need to be
adjusted. However, if you find that the CGO2-GB is making any ‘buzzing’ sounds
while powered on, carefully twist the counterbalance in or out unil the sound
stops in order to achieve the best balance, performance and photo/video quality.
WARRANTY INFORMATION
Yuneec products and accessories are guaranteed against manufacturing defects for
six (6) months from the original date of purchase. Yuneec’s sole obligaion in the
event of such defects during this period is to repair or replace the defecive part or
product with a comparable part or product at Yuneec’s sole discreion. Except for
such repair or replacement, the sale, processing or other handling of this product is
without warranty, condiion or other liability. Damage (including crash damage)
resuling from use, accident, or normal wear and tear is not covered by this or any
warranty. Yuneec assumes no liability for any accident, injury, death, loss, or other
claim related to or resuling from the use of this product. In no event shall Yuneec
be liable for incidental or consequenial damages relaing to or resuling from the
use of this product or any of its parts. Please review the instrucions carefully when
using the products. Returns or replacements of parts and/or products may be
subject to shipping, handling, replacement and/or restocking fees.
Step 2) Download the CGO2 APP on
the Apple APPSTORE or Android
APPS Marketplace.
Step 3) Connect your Mobile Device
to the CGO2-GB’s WiFi by selecing
CGO2GB’s SSID and by entering the
WiFi Key / Password:1234567890.
IMPORTANT NOTE: Drop or water damage is NOT covered under warranty.
USING THE CAMERA PITCH CONTROL WHEEL
The SteadyGrip™ features a camera pitch controller that allows precise camera
angle control on the go. Simply roll the pitch control wheel forward to move the
camera pitch/angle downward and
roll the pitch control wheel
backward to move the camera
pitch/angle upward. Please review
these instrucions along with the
illustraions to familiarize yourself
on how to control the CGO2-GB
with your SteadyGrip™.
TAKING PHOTOS AND RECORDING VIDEO
CGO2 APP seamlessly integrates camera controls and user seings of the
CGO2-GB so you can easily take sill photos and start/stop video recording using
the corresponding butons touch screen butons found on the app.
1) To take a sill photo press the White
Sill Photo Capture buton to capture .
You’ll hear an audible ‘shuter’ sound
from the APP and the LED indicator on
the front of the CGO2-GB will change
from glowing solid green to glowing
solid blue. It will take approximately 5
seconds to capture the photo and
before you can take another sill photo.
CUSTOMER SERVICE
htp://yuneec.com/support
YUNEEC USA
5555 Ontario Mills Parkway,
Ontario, CA91764, USA
1 855 2848888
[email protected]
YUNEEC EU
24568 Kaltenkirchen, Germany
+49 4191 932620
[email protected]
YUNEEC HK
2/F, Man Shung Industrial Building,
7 Lai Yip Street, Kwun Tong,
Kowloon, Hong Kong
852 3616 6071
[email protected]
YUNEEC AU
53 Ellemsea Circuit, Lonsdale
South Australia 5160
+61 (0) 8 8186 3301
[email protected]
This device complies with part 15 of the FCC Rules. Operation is subject to the following two
conditions: (1) This device may not cause harmful interference, and (2) this device must accept any
interference received, including interference that may cause undesired operation.
www.modellmarkt24.ch
WWW.YUNEEC.COM