1
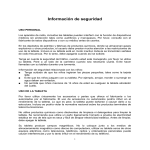
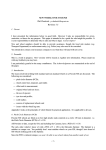
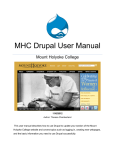
Installing the 928 Specialists H4 Bi-Xenon HID Conversion Kit on the Porsche 928S4 Ed Scherer <[email protected]> August 20, 2005 revision 1.4 Introduction This document relates my experience in ordering, installing, and using the HID H4 conversion kit offered by 928 Specialists. This kit is for the main headlights, which I had already converted from the original U.S. DOTcompliant 9004-bulb-based headlight assembly to the Euro E-code H4-bulb-based assembly. If you have researched HID conversions, you may be aware that HID conversions often have a bad reputation for producing a poor beam pattern and unacceptable glare, as the geometry and optics of HID bulbs and the original halogen bulbs are different. This is true to varying extents, but at least with H4, the H4 bulbs and the HID bulbs share an axial light source (light produced along the axis of the bulb by either a filament or electric arc). It is essential to properly aim your lights after installing the HID conversion kit, or else you will be: (a) not satisfied with the beam pattern, (b) contributing to the bad reputation of HID lighting, and (c) likely to be flashed by oncoming traffic, and (d) compromising the safety of your fellow travelers. Obtaining The Kit The kit I bought and installed was the “H4 BI-XENON High/Low Beam Kit”, SKU HID.H4.BI. at 928 Specialists. I got mine on July 22, 2005. At the time I bought mine, 928 Specialists was offering a variety of bulb temperatures, but since then have restricted their offerings to the 6000 K bulbs. I got the 6000 K bulbs, knowing that the higher temperature bulbs were geared more to the “bling crowd” than the “brightness crowd.” -1- Installing the 928 Specialists H4 Bi-Xenon HID Conversion Kit on the Porsche 928S4 What’s In The Box When you open the box, you’ll discover that it contains a plastic tray containing the ballasts and HID bulbs (the instruction manual originally laying on top was removed prior to taking the photo in Figure 1. Lifting the plastic tray out reveals the igniters and two identical bags of installation hardware, as shown in Figure 2. Although unbranded, this appears to be a kit manufactured by Brightstar Technology Co., Ltd., of Taipei, Taiwan, which uses the manufacturing plants of Bailangxing Technology Co., Ltd., of mainland China. Brightstar is one of the few companies (in addition to Philips and Figure 1 Contents of plastic tray in box Osram/Sylvania) that manufactures their own ballasts and their own bulbs; they are not just rebasing-to-H4 the D2S or D2R bulbs manufactured by someone else. No warranty information was included with the kit; I assume that 928 Specialists will stand behind the product should it fail prematurely. 928 Specialists does offer replacement bulbs. The bulbs appear to be Brightstar 6L3064411. Figure 2 Contents under plastic tray in box Figure 3 Bulb Comparison: Standard 55W/60W H4 Bulb (Sylvania SilverStar, left), 35W HID Bulb (right) Figure 4 Ballast -2- Installing the 928 Specialists H4 Bi-Xenon HID Conversion Kit on the Porsche 928S4 Figure 5 shows the entire contents of the box spread out on a table. Figure 5 Entire Box Contents, Spread Out on Table Ref. Num. Num. Units Description Notes 1 User’s Manual (really, more of an installation manual) You probably won’t need it. 1 Extra insert by 928 Specialists indicating that you should replace your fuses with slightly higher amperage fuses provided 2 HID ballasts 2 Igniters 2 HID bulb assemblies (with temporary protective plastic covers) attached to short wiring harnesses 2 Metal mounting brackets I didn’t use these. 2 Installation hardware bag, each bag containing sheet metal screws, nylon zip ties, two 10 A fuses, and a roll of what appeared to be cable wrapping tape I used the fuses, but nothing else. You might want to use the zip ties if you don’t have other wider/longer ones to use. -3- Installing the 928 Specialists H4 Bi-Xenon HID Conversion Kit on the Porsche 928S4 Installation Notable Installation Challenges I found the main challenges for installation to be: 1. placement of major components — choosing an optimal (or at least acceptable) location for each component is not that easy, but has significant impact on the ease of installation and the ease of subsequent maintenance operations (like HID bulb replacement) 2. robust attachment of ballasts — attaching the ballasts securely is important, as the ballasts are rather heavy 3. routing of wires through and under the headlight assembly — proper routing is essential, as the headlight assembly consists of two independently-moving parts (you can actually lift up the headlight even if the headlight bar is in the “down” position) it is essential that wiring passes through only the appropriate passages and is properly fastened as was the original headlight wiring My initial attempts to install the kit with the original HID bulb wiring harness revealed that the bulky connectors were at a very unfortunate position, which, if used unaltered, would not satisfy my requirements that (a) bulb changes could be completed by only opening the headlight cover and, (b) wiring under the headlight assembly would not be vulnerable to pinching or other damage. For that reason, I elected to modify the harness and was pleased with the results. Additional Items Used During Installation Figure 6 shows additional items that were used during the installation. Some of these items are a significant part of the installation procedure, but others are just for recommended “while you are in there” (WYAIT) subtasks. Figure 6 Additional Items Used During Installation -4- Installing the 928 Specialists H4 Bi-Xenon HID Conversion Kit on the Porsche 928S4 Ref. Num. Num. Units Description Notes 16 Nylon zip ties, 20 cm (8 in) 20 Nylon zip ties, 10 cm (4 in) 4 Nylon zip ties, 28 cm (11 in) 2.5 m flexible (stranded) two-conductor 18 to 24 AWG wire 2 3-inch (closed diameter) stainless steel hose clamps 2 5008 lamps Needed if you want to replace side marker lights WYAIT. 10 ft Weatherstrip, ½-inch thick by ¾-inch wide Needed if you want to replace any missing or damaged sections of the foam rubber seal around the wheel well covers. Tools Needed The tools used for installation are shown in Figure 7. Figure 7 Tools Used for Installation -5- 2 equal lengths are needed Installing the 928 Specialists H4 Bi-Xenon HID Conversion Kit on the Porsche 928S4 Ref. Num. Description Notes soldering iron, solder, and vice/clamp Used when modifying wiring harness supplied with kit. Torque wrench with 19mm socket Torque wrench with 19 mm socket to remove and replace front wheels. Phillips screwdriver Assorted pliers Magnetic pick-up Small ¼-inch-drive ratchet 8mm ¼-inch drive socket and 10mm ¼-inch drive socket Used for removing wheel well covers and for tightening hose clamps. flexible ¼-inch drive extension Very useful for getting into tight spaces when removing/replacing wheel well covers. electric screwdriver, hex-to-¼-inch drive adapter, Phillips bits, and right-angle adapter Faster than the ratchet for most operations, but not necessarily needed. Right angle adapter is very handy for getting to the inside (toward the hood) screw on the 928 light covers. 1-inch C clamp Used to hold the 928 lamp assembly up even when the lights are switched off and the lights “should be” down. wire cutters Used to cut both wire and nylon zip ties. Good for picking up any screws you might drop. Installing the Kit These instructions will have you installing the right side (passenger side for U.S. cars) kit first, and then the leftside kit. The right side is slightly roomier, so it’s better to start there before moving on to the tighter quarters on the left side. Detailed steps will follow, but as an overview, you will be: modifying the HID bulb / wiring harness assembly from the kit jacking up the corner of the car removing the wheel removing the wheel well liners (both the large semicircular top one and the flat forward one) removing the headlight cover relocating the existing headlight wiring harness replacing the existing H4 halogen bulb with the HID bulb and harness and fastening the HID igniter and wiring harness to the headlight assembly mounting the HID ballast connecting and tying down all remaining cables -6- Installing the 928 Specialists H4 Bi-Xenon HID Conversion Kit on the Porsche 928S4 reattaching the wheel well liners replacing the wheel lowering the corner of the car Note that the headlight covers should be left off so the headlight can be aligned at the next opportunity. The holes on U.S. headlight covers do not provide access to both of the screws used to align the headlight. Modifying the Bulb Assembly Wiring Harnesses 1. Lay out one of the bulb assembly / wiring harness on a flat surface and notice how the three-contact H4 connector: wires running to the blue connector are independent of the other wires and these are only held together by the rubber grommet. Use scissors and cut the grommet off, being very careful so you don’t cut or nick the wires. You can leave a couple of little pieces to hold the remaining pairs of wires together, as shown below. -7- Installing the 928 Specialists H4 Bi-Xenon HID Conversion Kit on the Porsche 928S4 2. You now need to extend the short small diameter blue wire and black wire that is attached to the three-contact H4 connector. Use a 1.25 m length of two-conductor wire (Figure 6 ). You can either: a. [Option A] cut the small-diameter wires about halfway along their length, splice in the extension wire, soldering the connections and using heat shrinkable tubing to cover the splices, …or… b. [Option B] disassemble the three-contact connector, cut the smalldiameter wires there, and solder your extension wire directly to the connector contacts and then splice the short wires to the other end of your extension wire. I opted to do this, to minimize the number of visible splices. You can pull the contacts out of the three-contact H4 connector by just pulling on them with pliers (they don’t have a release tab or anything like that). Once you’ve done that, you can release each internal quick-disconnect (that the contacts slide into) by pushing something like a large paperclip into the small rectangular slot next to each contact hole (from which you’ve already removed the contact); pull the quick-disconnect out the other side while you press the paper clip in. Note that in the photo on the right, I should have — but didn’t — remove the contact on the left before snapping the photo. 3. Use 10 cm nylon zip ties (Figure 6 ) to fasten the newly extended wire to the igniter cables as shown in Figure 8 . The small-diameter wire with the small white connector on the end should extend approximately 10 cm beyond the end of the igniter cable (this is the approximate difference in lengths between the matching connectors on the bulb assembly shown in Figure 8 . 4. Repeat steps (1) through (3) for the other bulb assembly / wiring harness. Figure 8 Modified Wiring Harness; Three Separate Pluggable Components -8- Installing the 928 Specialists H4 Bi-Xenon HID Conversion Kit on the Porsche 928S4 Headlight Anatomy, Top Side This photo shows the top back of the headlight assembly before installing the HID kit. The dual connectors are present because that’s how I decided to leave it when I previously upgraded from 9004/H5 headlights to H4 headlights. (This would make it easy to revert to the 9004/H5 headlights should that ever become necessary). Figure 9 Headlight Anatomy, Top Side -9- Installing the 928 Specialists H4 Bi-Xenon HID Conversion Kit on the Porsche 928S4 Headlight Anatomy, Bottom Side This photo shows the bottom of the headlight assembly before installing the HID kit. Figure 10 Headlight Anatomy, Bottom Side -10- Installing the 928 Specialists H4 Bi-Xenon HID Conversion Kit on the Porsche 928S4 Subprocedures Because the headlight assembly being worked on needs to be either up or down during certain steps of subsequent procedures, and furthermore, since the headlight assembly can move independently of the headlight movement arm (the part that lifts the headlight when the headlight drive shaft rotates), there are three states that will be used. {Headlight Up, Headlight Arm Up} — On the ’90 S4, you can stay in this state with the actual lamp turned off by: (a) turning headlight switch to full on position “2”, (b) turning ignition switch to the accessories position “1” momentarily until the headlights pop up, (c) turning ignition switch to the off position “0”, (d) turning headlight switch to off position “0”. {Headlight Up, Headlight Arm Down} — This is an abnormal state, but can be achieved (when you have access to the area under the headlight assembly) by clamping the headlight assembly to the upper stop, even when the headlight arm is down. It is safe to move the headlight shaft and arm while the headlight is clamped like this, as long as there are no other obstructions in the path of the headlight arm. {Headlight Down, Headlight Arm Up} is impossible. {Headlight Down, Headlight Arm Down} — This is the normal headlights down and off position. On the ’90 S4, if the headlight switch is in the off position “0”, the headlights are usually down. If they’re not (because the ignition switch was previously turned to the off position while the headlights were up), they can be put down again by just turning the ignition switch to the accessories position “1” momentarily until the headlights go down and then back to off position “0”. -11- Installing the 928 Specialists H4 Bi-Xenon HID Conversion Kit on the Porsche 928S4 Installing Right Side Ballast, Igniter, and Bulb 1. Jack up the right front of the car using the proper lifting point. 2. Remove right front wheel. 3. Remove top semicircular wheel well liner. There are three 8 mm hex-head screws, three 10 mm hex-head screws, and one 10mm hex-head plastic nut/washer. This is a good time to use an electric screwdriver and flexible extension, if you’re so equipped. Once you’ve got all the fasteners out, you might be surprised how much you need to wiggle, twist, and pull on it to get the liner out. 4. Remove front flat wheel well liner. There are six 8 mm hex-head screws. The two on the bottom are longer than the other four. 5. Remove the right headlight cover, which is fastened by three Phillips-head screws. A right-angle adapter is handy for getting to the screw closest to the hood. Be careful not to scratch your paint when turning that screw, as quarters are rather cramped. I used a protective cloth just in case a tool got away. 6. {Headlight Up, Headlight Arm Down} Unplug the H4 connector from the back of the headlight. Unscrew cable clamp #1 (Figure 10 ) and cable clamp #2 (Figure 10 ). Pull the cable/connector from the top to the bottom of the headlight assembly through the passageway (Figure 10 ) and leave it dangling for later use. 7. Remove the weather seal — if your headlight has one — (Figure 9 ) from the back of the headlight assembly by squeezing together the retaining clip (Figure 9 ) to release it, flipping it out of the way, and then lifting/peeling away the weather seal. Set the weather seal aside; you will not be able to reuse it with the HID bulb (unfortunately). 8. Remove the H4 halogen bulb by squeezing together the small retaining clip that holds the bulb’s base to the headlight assembly, flipping the retaining clip out of the way, and pulling out the bulb. Set it aside in your spare parts bin. 9. Insert the HID bulb assembly (Figure 8 ) in the headlight and secure it with the small retaining clip. You will notice that it is a little harder to latch the clip than it is for H4 halogen bulbs. 10. Feed the H4 connector attached to the igniter assembly from the top of the headlight to the bottom of the headlight through the passageway (Figure 10 ). Leave the igniter module on the top side. -12- Installing the 928 Specialists H4 Bi-Xenon HID Conversion Kit on the Porsche 928S4 11. Fasten the igniter module to one of the sides of the weather seal retaining clip (Figure 9 ) with 20 cm nylon zip ties (Figure 6 ). Connect the three connectors between the HID lamp assembly and the igniter assembly. Fasten the wires to the large retaining clip with 20 cm nylon zip ties (Figure 6 ) and make sure that everything is reasonably neat. Double check that you have left enough clearance for the headlight cover: test fit it and make sure it still fits over the headlight assembly. When you are done with this step, the top side is pretty much done (other than aiming the headlight and putting the cover back on, which comes later) and should look something like Figure 11. Figure 11 Completed Top Side 12. Route the igniter cable / extension wire pair through the channels under the headlight assembly and secure it with cable clamp #1 (Figure 10 ) and cable clamp #2 (Figure 10 ), tightening them down over the wires; it should look like Figure 12 when you are done. Make sure that you have routed the cables such that the -13- Installing the 928 Specialists H4 Bi-Xenon HID Conversion Kit on the Porsche 928S4 headlight arm will not pinch them when it is lifting the headlight. You might want to double check this by unclamping the headlight from the upper stop and lowering it and making sure nothing pinches. Figure 12 Routing the Cables from Top Side of Headlight to Bottom Side 13. {Headlight Up, Headlight Arm Up} Mount the ballast (Figure 8 ) under the metal ear that holds the bottom stop, as shown in Figure 13. Use a 3-in diameter stainless steel hose clamp (Figure 6 ). 14. Referring once again Figure 13 to see how everything should be oriented, connect the black cable from the ballast to the black cable from the igniter. Use two 28 cm nylon zip ties (Figure 6 ) to suspend the connectors you just connected as well as the small extension wire under the headlight drive shaft (Figure 10 ). This assures that the pivot point for this cable pair will undergo minimal movement and flexing as the headlight moves up or down. 15. Connect the remaining three connectors (the three-contact H4 connectors, the red ballast connectors, and the small white connector. Try to tidy these up a bit (hard to do!) and zip tie them to something such as the fog light cable that will keep them out of the way. -14- Installing the 928 Specialists H4 Bi-Xenon HID Conversion Kit on the Porsche 928S4 16. {Headlight Down, Headlight Arm Down} Lower the headlight and check to make sure that headlight movement is unimpeded. 17. {Headlight Up, Headlight Arm Up} Headlight should now be functional. Turn it on and make sure it works, both on low beam and high beam. Figure 13 Completed Bottom Side -15- Installing the 928 Specialists H4 Bi-Xenon HID Conversion Kit on the Porsche 928S4 18. Before you button everything back up, there are two WYAITs you might want to consider: a. It’s a 5-minute job to replace your side marker lamp. Just pry the black rubber weather seal off the white fixture, press the tab (pointed to by the yellow arrow in the following photo) to the right, and that will release the metal lamp holder. Replace the bulb with a Sylvania 5008 (Figure 6 ) or equivalent. b. It’s also a good time to replace the plastic Y-connector (which is almost always cracked or completely broken) near the charcoal canister with the stainless steel equivalent, which you can get from David Chamberland (email address [email protected]). From this: to this: 19. If the foam rubber seal around the front flat wheel well liner is in bad shape, you might want to repair it before reinstallation. The bottom part of the seal on mine had completely disintegrated; I used three layers of weatherstrip (Figure 6 ) to rebuild the seal, as shown in the following photo. 20. Reinstall the front flat wheel well liner. 21. Reinstall the top wheel well liner. -16- Installing the 928 Specialists H4 Bi-Xenon HID Conversion Kit on the Porsche 928S4 22. Put the wheel back on and torque the wheel nuts to factory specs. 23. Lower the right front side of the car. 24. Note that the headlight cover has intentionally been left off so the headlight can be aimed after we get done with the left side. Installing Left Side Ballast, Igniter, and Bulb Since the left side installation is almost identical to the right side installation (mirror image, for the most part), only the significant differences from the right side installation procedure are detailed below. 1. Removal of the front flat wheel well liner is a bit more complicated than the right side. There are two slightly countersunk (into square recesses) screws that hold a metal clamp that holds the alternator cooling hose on other side. You will need to remove these, along with all the other screws holding the liner in place. When you get the liner loose, you will also need to unfasten a cable holder on the other side that fastens a cable to the temperature sensor that lives inside the alternator cooling hose. 2. The left side headlight lives in slightly more cramped quarters due to the presence of the ABS hydraulic unit. It’s a little harder to get your arms in there to fasten zip ties, fasten the ballast, etc. 3. Don’t forget to test both the low and high beams of the headlight before you start buttoning everything up. 4. Don’t forget to replace the side marker bulb if you elected to replace bulbs. -17- Installing the 928 Specialists H4 Bi-Xenon HID Conversion Kit on the Porsche 928S4 5. Don’t forget to refasten the temperature probe cable to the back of the front flat wheel well liner. 6. Don’t forget to reattach the alternator hose metal clamp bracket to the back of the front flat wheel well liner before you refasten the front flat wheel well liner. Aiming The Headlights Background Information Because the HID bulbs yield a more poorly defined, but brighter, beam pattern, it is essential to aim your headlights such that it allows you to see well, but not at the expense of annoying or blinding oncoming traffic with glare. Ideal preconditions are: 1. very low-light (evening, night time, or darkened indoor) environment where you can aim lights 2. suspension loaded normally (i.e., make sure you’ve settled your suspension after lifting) 3. tires properly inflated 4. half tank or more of fuel 5. car loaded normally (including weight of normal driver and/or passengers) Of these, item (2) is the one to watch out for, because if you just installed the HID kit, you’ve lifted the front end of your car, which is probably now sitting quite high. Drive the car a bit, preferably over some rough roads, to settle the front suspension, much the same as you would prior to getting an alignment. These are ideal preconditions; items (3) through (5) probably don’t really matter that much, especially if your 928 has a fairly stiff suspension. The aiming procedure for ECE-spec headlights (including the 928 H4 headlights) is based on the following: headlights 7.5 m (approximately 25 ft) away from a “screen” (vertical wall, garage door, etc.) screen has the following lines marked on it: C V C B B ground the horizontal C-C line is at the height of the center of the headlights — this was about 72 cm (28½ in) on my car, but might be different on yours) the intersection of the C-C line and each C-B line is at the middle of the H4 in the center of the glass of each headlight — the C-B lines were about 114 cm (45 in) apart for my car for standard aiming, the B-B line is about 8 cm (approximately 3 in) below the C-C line; however I found that due to the increased diffusion of the HID lamps, I had to increase this distance substantially and wound up using 30 cm (12 in) The diffusion of the HID lamps is substantially greater than for the original halogen lamps and enough, in fact, that it is difficult to identify the “15-degree up to the right” notch in the beam pattern. -18- Installing the 928 Specialists H4 Bi-Xenon HID Conversion Kit on the Porsche 928S4 Aiming Procedure 1. Satisfy as many of the preconditions as you can (or want to) as described in the previous section. 2. With the headlights on, roll your car up close (maybe 1 m or a little less) to the vertical surface you’re using as the screen. This will make it easier to identify the points for your C-C line and your C-B lines. I used a garage door for the screen. 3. Mark your C-C, B-B, C-B, and C-B lines on the vertical surface. I used blue painters tape, since it holds reasonably well, but is easy to remove without causing damage. 4. Back away from the screen, keeping the car as straight as possible (you want to be at a perfect right angle to the screen), until the front of the headlights are 7.5 m (25 ft) from the screen. You might want to mark this position (I marked the 7.5 m point with some blue painters tape on the driveway) so you can return to it later if you decide you want to make further adjustments. 5. If the headlight covers are on, remove them. 6. When you’re adjusting one headlight, cover the other one so it doesn’t interfere with the one you’re working on. I used a black canvas bag. 7. Adjust adjustment screw #1 (Figure 9 ) and adjustment screw #2 (Figure 9 ) to position the beam pattern so the top beam cutoff is just below the B-B line and the notch is at the intersection of the B-B line and the C-B line. Repeat for the other headlight. 8. Go on a test drive and check to see if you like the resulting beam pattern. If oncoming traffic flashes you, you might have a problem. 9. If you need to make further adjustments, return to step 6 after repositioning your car at the correct distance from the screen. Otherwise, replace the headlight covers. You’re done! -19- Installing the 928 Specialists H4 Bi-Xenon HID Conversion Kit on the Porsche 928S4 Note: when you replace your headlight covers, make sure you get the small oval indentations (the arrow in the photo on the left points to the left one, and there is another identical one on the right side) to fit over the small metal pins. These two pins secure the bottom of the headlight cover. If you don’t do this correctly, the corner of the cover will be floppy and pushed away from the headlight. Also note that the three speed nuts for the headlight cover screws might require a little repositioning to get the cover back on and positioned correctly. Performance The following illumination measurements were taken with an Extech 403125 light meter at 7.5 m before and after installation of the kit. The measurements were taken at the brightest spots in the beam pattern. This is not a very good technique, but it was quick and all I had time for. Standard 55W/60W Sylvania SilverStar H4 Halogen Bulbs 35W Brightstar Xenon HID Bulbs Illumination, Low Beam 456 lx (42 fc) 2160 lx (201 fc) Illumination, High Beam 1089 lx (101 fc) 1990 lx (185 fc) 2 Note: a lux is a lumen per square meter: 1 lx = 1 lm/m ; a footcandle is a lumen per square foot: 1 fc = 1 lm/ft2 I’d like to take more substantial measurements, especially to more fully characterize the beam pattern, and especially the amount of stray light above what should be a clean cutoff line. But this will have to wait until I have the time to set up a large grid pattern and take numerous measurements. Final Thoughts I was a little concerned that the HID kit would result in a large amount of glare and a very poor pattern. What I have found, though, is that with the headlights aimed as described in this document, I get great lighting, but not at the expense of annoying other drivers. I’m very happy with this result. The high beam is not very effective, though. Whereas on the original halogen lamps, switching from low beam to high beam resulted in a much improved “beam is now going way down the road”, with the HID bulb, it’s more of a “just throw a little more light up in the sky”. It’s better than no high beam, but not by much. But I should emphasize that the low beam is so improved that it reduces the need to even use or want the high beam. Would I do it again? Am I recommending the kit to others? Short answers: yes, and yes. -20-