1
ANA PLOT Program
User's Manual
Version 3.4c
ANA Plot program is a simple sign cutting program, which
drives vinyl cutting plotters. ANA Plot can import EPS,
DXF, AI and other files from various programs, including
WORDS FOR WINDOWS and CORELDRAW!.
ANAgraph, Inc
ANA Plot 3.4
Table of Contents
CHAPTER 1 INTRODUCTION
1. Hard disk space
2. Install instructions
CHAPTER 2 BASIC TOOLS
1. Screen layout
2. Mouse
3. Menu bar items
4. File menu
5. Import
6. Special instructions for exporting text from CorelDraw!
7. Photo cut
8. Printing
9. Show color
10. Tools menu
11. Help menu
CHAPTER 3 COMPOSITION PAGE
1. Move
2. Copy
3. Scale
4. Mirror
5. Rotate
6. Slant
7. Unpick/pick everything
8. Delete
9. Grid
10. Measure
11. Zoom
12. Redraw
CHAPTER 4 PLOTTER OPERATIONS
1. Select device
2. Plot control
3. Other plotter control features
4. Job queue list
Warranty and License
ANAgraph Inc, warrants the physical diskette(s) to be free from defects for 30 days of purchase.
The remedy for breach of warranty is limited to replacement and shall not include any damages
from use or unusability. ANAgraph specifically disclaims all other warranties, expressed or
implied. The computer software contained on the diskettes is licensed to the purchaser on an
“as is” basis, as ANAgraph specifically does not warrant this software to be free from errors or
omissions.
Trademark
ANA Plot and DesignArt are trademarks of ANAgraph Inc. Various trade names contained in
this manual are the property of respective owners.
Copyright 1996, ANAgraph, Inc.
CHAPTER 1 INTRODUCTION
This booklet is to assist the user so that he/she can begin to use ANA Plot within a short
period of time. For more detailed instructions, please read through the online help file.
ANAgraph’s ANA Plot program requires Microsoft Windows 3.1. It is recommended that your
system have DOS 5.0 or a later version.
1. HARD DISK SPACE
ANA Plot occupies about 2.5 megabytes of hard disk space to install. However, you should
have about 10 megabytes of additional hard disk space available in order to operate the
program.
2. INSTALL INSTRUCTIONS
(1) Make certain that your computer meets the hardware requirements of at least a 386, 486 or
a Pentium, with at least 4 Meg. or more Extended Memory.
(2) You must have an I/O card (2 Serial and 1 Parallel).
•
DB9 (male) Serial Port for Mouse
•
DB25 (male) or Second DB9 (male) Serial Port for the Plotter
(3) If installing on Windows 95 / 98 jump to step (6). Installing DOS 5.0 or above is desirable if
your system is currently using an earlier DOS version. (To verify what DOS version is in your
system, type in VER at any DOS prompt.)
(4) Install Microsoft Windows 3.1 following the Windows installation instructions.
(5) Install ANA Plot using the following instructions.
Begin your installation by starting Windows. The installation process is the same whether you
are using the 3.5" or 5.25" ANA Plot Install diskettes.
i)
Have the Windows Program Manager on the screen (Make sure that no other
application programs are currently running on your system.)
ii)
Insert the ANA Plot Install Disk into drive A or drive B of your computer.
iii)
If you are using a mouse or tablet, move the pointer to the File menu item in the
Program Manager Menu Bar.
iv)
When the File pull-down menu opens, click the Run command in the File menu.
v)
A Run dialogue box will display with a blinking cursor in the command line. Type
a:\setup (or b:\setup if you are using drive B). Click the "OK" button or press
ENTER. Select “Continue” when prompted.
vi)
Then the ANA Plot group box will appear under the Windows Program Manager
page.
vii)
Exit Windows. (Press the ALT-F key. The File pull-down menu appears. Press the
X key. When the “Exit Windows” message box appears, press the Enter key.)
viii)
You will be outside of Windows. Type in WIN at the C:\ prompt and press the Enter
key.
ix)
To enter ANA Plot, double click the ANA Plot icon in the DesignArt group box. Go to
step (7).
5
(6) To install ANA Plot on Windows 95/98follow these steps:
i)
Click on the Start button. Go to Run; (Close all programs currently running on your
system).
ii)
Insert Disk 1 into drive A:
iii)
In the Command Line text box, type a:setup. Click on OK. Next the Initializing
Setup screen will display.
iv)
Choose a install directory for the software or take the default. Click next.
v)
When finished, it is best to reboot the computer.
(7) If you are connecting a vinyl cutting plotter, connect it to the computer's open serial port
(DB25 male connector or DB9 male connector).
CHAPTER 2 BASIC TOOLS
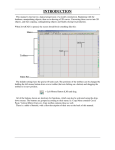
1. SCREEN LAYOUT
Across the top you will see a listing beginning with file and ending with help. This line is called
the menu bar. Each menu bar item is explained separately in the following pages. The far left of
your screen contains two columns of command buttons called the control panel. You can invoke
or trigger a command (such as slant or move) by clicking on one of these control panel buttons.
2. MOUSE
The mouse is the primary tool you use to communicate with the computer. There is a Left
Mouse Button (LMB) and Right Mouse Button (RMB). You will normally use the LMB. The
RMB is reserved for specific operations.
3. MENU BAR ITEMS
The Menu Bar items each display a list of commands when clicked. Each one of the menu items
and its commands are described below.
4. FILE MENU
File is used to open, save, print or exit a file. The following options are available when you click
the File menu:
NEW
MERGE
AUTO BACKUP
PHOTOCUT
EXIT
OPEN
SAVE
IMPORT
PRINT
New: Click the LMB on "New" or press Ctrl+N to start a new job. It will wipe off whatever job or
design you have on the screen.
Open: Click the LMB on "Open" or press Ctrl+O to open an existing ANA Plot job file. The
following dialogue box will display.
Merge: Click the LMB on Merge or press Ctrl+M to merge a job into another job.
Save: Click the LMB on Save or Ctrl+S to save a job that has already been named.
Save As: Click the LMB on Save As to save the current job. The ANA Save File As dialogue
box will display. Simply type the job name in the file name box and click the OK button.
Auto Backup: Auto Backup, found under the File menu, allows you to set the system to
automatically save your job as you go in case of a power outage or system crash.
5. IMPORT
ANA Plot can import DXF, EPS (encapsulated postscript), AI (adobe illustrator), WMF (window
metafile in vector format), PCX, PLT, BMP in bitmap image and ascii text files, DOC, WRI, and
TXT.
To import a file from another program:
i)
Go to the program whose file you want and open the file.
ii)
Export the file as an acceptable ANA Plot 3.4 import format. Usually you can do this by
going to the File menu of the program and choosing Export. A dialog box will appear
where you will select the type of file to export. There are some EPS files that are not
compatible with ANA Plot so generally it is better to use the AI format if it is available.
iii)
Go to ANA Plot and from the File menu, choose Import... The Import dialog box will
appear
iv)
In the directories list box, select the directory where the exported file was saved.
v)
From the File Name list select the file you want.
6. SPECIAL INSTRUCTIONS FOR EXPORTING TEXT FROM CORELDRAW!
Before you export text from CorelDRAW, you should select each text object in your CorelDRAW
design and press Ctrl+V to convert the text to curves and then Ctrl+K to break apart the curves.
The text or graphics can not be filled and must have a hairline outline form around them. Then
follow the export procedure described above.
7. PHOTO CUT
Photo Cut allows you to create vinyl photographs. It is a process in which images are converted
into lines with various thickness to represent varying color densities.
8. PRINTING
It is necessary that your printer is properly hooked up to the system and that the proper printer
driver software is installed. You must follow the printer manufacturers instructions, as well as,
Microsoft Windows for proper installation of the printer driver. Click the LMB on print to print
what is on your screen. To plot a layout with a vinyl cutting plotter or large format plotter, you
must use the plotter menu item.
9. SHOW COLOR
Under DISPLAY Menu, you will notice “Show Color” item.
If your job has color assignment, show color will display the finished colors as they appear.
10. TOOLS MENU
The Tools menu item allows you to change tools in the control panel. Each of the commands in
the Tools menu are described in detail in the following pages.
Composition
Use these tools to design a layout or panel of artwork.
Color Separation
Use these tools to assign colors.
Plotter Menu
Click the plotter menu item to run the vinyl cutting plotter.
Settings Menu
When you click this menu item, the following menu displays:
JOB SIZE
JOB MARGIN
INCHES
CENTIMETERS
MILLIMETERS
POINTS
PREFERENCES
Job Size: The default job size (or art board) represented by the working area of the screen is
24H x 32L. Click Job Size under Settings on the menu bar to change this job size.
Inches/Centimeters/Millimeters/Points: The programs unit of measurement can be set to
inches, centimeters, millimeters and points by making the appropriate selection.
Preferences: Preferences allows you to set your own default values for different commands.
Click Preferences under the Settings menu and a dialogue box will appear.
You now have the option to change the default values for the above listed commands. If you do
not want your job to shift down when you add text lines, click on the insert line spaces to remove
the check mark. The system default is insert line spaces, which means your job will shift down
when you hit enter. After you have made the desired changes click the ok button.
HELP MENU
Under the Help menu, you can find the full operation manual of ANA Plot. Under Help scroll to
the Index feature. Example: choose “Control Panel Tools”, this will list all of the tools within
ANA Plot. Simply pick on any tool you require information about and a full description will
display on screen.
INDEX
USING
About ANA Plot
CHAPTER 3 COMPOSITION PAGE
The COMPOSITION control panel contains three groups of command buttons located on the left
side of the working area. There are two columns of buttons, each containing an icon
representing the feature performed when that button is clicked.
The commands available as Composition tools are as follows:
MOVE
SCALE
ROTATE
UNPICK/PICK
GRID
ZOOM
1. MOVE
COPY
MIRROR
SLANT
DELETE
MEASURE
REDRAW
(ALT-M)
The Move command allows you to move objects in the working area.
2. COPY
(ALT-C)
The Copy command allows you to copy objects in the working area. Pick one or more lines of
text and/or graphics or even one or more traces in a graphic or character.
3. SCALE
(ALT-A)
The Scale command allows you to change the scale or size of text and/or graphics. You can
change the scale of text and/or graphics proportionately (changing the height and length at the
same rate) or non-proportionately (changing the height or length independent of each other).
4. MIRROR
The Mirror command allows you to create a mirrored image of an object across an imaging line.
First, Pick the line(s) of text and/or graphics and click the Mirror button.
5. ROTATE
(ALT-R)
The Rotate command allows you to rotate text lines or graphics. Pick one or more lines. When
you click the Rotate button or press Alt-R, a dashed line box will enclose the Picked area with a
small white cross in the center. The cross indicates the axis of Rotation of the box. Click any
point near the box and drag it in a circular direction.
NOTE: In this operation, you must click and drag without releasing the button. If you simply click
and release the button, the axis point moves.
6. SLANT
The Slant command allows you to slant text and/or graphics. Pick one or more lines of text
and/or graphics and click the Slant button. A dashed-line box will enclose the Picked area. Click
and drag the upper left or upper right corner of the box for the desired level of slant. The slanting angle will display in the status line.
7. UNPICK/PICK EVERYTHING
The Unpick command allows you to unpick an object, changing all lines from blue to black.
Clicking the Unpick command button unpicks ALL of the Picked lines in the working area.
Clicking the Pick Everything button picks ALL of the lines in the working area.
NOTE: If you have difficulty unpicking an object with the hand icon, click the unpick command
button.
Another way to unpick all objects is to click into empty space or the blank area within your job.
8. DELETE
The Delete command allows you to delete all objects that are picked (turned blue). Pick those
objects you wish to delete and press the Delete command. If you have made a mistake, click
the Undo under the "Edit" menu and your deleted image will reappear. When you have objects
picked that you wish to delete, you can also press Del on the keyboard.
9. GRID
The Grid command allows you to easily layout a job by displaying a dotted grid in the job area.
Since the job box represents the job size, the grids only shows up in the job box.
10. MEASURE
The Measure command allows you to measure between two points in the working area.
11. ZOOM
The ZOOM command allows you to magnify a part of the working area. You can zoom more
than once for greater magnification.
12. REDRAW
The Redraw command allows you to redisplay the working area. You can click the Redraw
button at any time in any operation to display a fresh screen of your current work. Clicking the
RMB on Redraw button redraws the display so that all text, graphics and border elements will
be drawn full screen. This function ignores the Job Box. It contrasts with double-click of the
Zoom button, which brings up the Job Box full screen.
NOTE: If you have difficulty Picking an object, click the Redraw command button, then Pick the
object.
CHAPTER 4 PLOTTER OPERATIONS
For those customers interested in vinyl applications, the Plotter Control menu item contains
commands that allow you to split your job, select a plotter and control the plotting of your job.
Click the Plotter Control menu item and the following commands display:
SPLIT-JOB
SEQUENCE JOB
NEST JOB
SELECT DEVICE
PLOT
NOTE: If all the traces on your job are Unpicked (display black), the plotter will cut ALL the
traces. If any traces are Picked (display blue), the plotter will cut ONLY the Picked traces.
Split-Job: If your job is larger than the capacity of the plotter, you'll have to plot it in more than
one strip. The Split-Job command allows you to set the horizontal split lines by which you want
to split the job.
NOTE: Place the splits so that they cut across as few text or graphics as possible to make
aligning them easier.
Nest Job: Nesting will remove empty space and position your text and graphics in the most
efficient way to save vinyl. Click Nest Job located under the "Plotter" pull-down menu. If you
have not saved your job in the current layout, the system will prompt you to save, before
nesting. After you have saved the job, the following dialogue box will appear.
SELECT DEVICE: YOU MUST SELECT THE PLOTTER THAT YOU ARE GOING TO USE
BEFORE PLOTTING. WHEN YOU CLICK SELECT DEVICE, THE PLOTTER SELECTION
DIALOGUE BOX DISPLAYS. THE NAMES OF THE PLOTTERS LISTED WILL VARY
DEPENDING ON THE DRIVERS THAT ARE ADDED TO YOUR SYSTEM. CLICK THE NAME
OF THE PLOTTER THAT YOU ARE GOING TO USE FOR THE CURRENT JOB AND CLICK
THE "OK" BUTTON.
1. PLOT CONTROL
Select the plotter you are driving from the Plotter Selection dialog box. When you click on Plot
in the Plotter pull-down menu, the following dialog box will be displayed listing the plotters
name.
Job name: If you have saved your job, the job name will display. If you have not named your
job, "Untitled" will display.
Material: The default material displayed is Vinyl. If you are using another material, click the
Down Arrow button on the right side of the material name.
Plot Speed: Your plot speed is determined by the plotter and the material that you have
selected. This is shown as a percentage of the maximum speed. The default is 100%. You can
manually change the speed to suit your particular need.
Weed Border: You can create a border around your job so that you can more easily weed the
vinyl. Click the Weed Border box.
Mirror Image: You can automatically cut or plot a mirror image of your job. Click the Mirror
Image box.
Rotate 90 degrees: You can rotate your job at a 90 degree angle counterclockwise to the way it
displays on the screen. This is helpful in saving material. However, if you rotate 90 degrees, any
splits will be canceled and a new split has to be made. Click the Rotate box.
Scale In/Out Line Offset: Scale In/Outline offset allows you to scale previously defined inlines
or outlines along with your job. The default is the inlines and outlines will not be scaled when
your job is scaled.
Sequencing Plot: Sequencing Plot will minimize the tool movement or tool travel of your
plotter's cutting or drawing head. Normally the job will be cut or drawn in the sequence it was
created.
Plot to Offline File: If checked, this option allows you to plot to a file on the hard disk. This
HPGL compatible file can be used as an import file into other Drawing packages or to plotters /
routers that do not communicate through the normal serial I/O ports.
Color Select: When you click Color Select, the Color Select Dialogue Box displays. The colors
that are used in your job display by the color name.
Get Plotting Area / Plotter Height: If the currently selected plotter supports the returning of the
plotter height, this button will be accessible. This button allows you to poll (ask) the plotter for it’s
current plotting area. If the plotter does not support the question the default height for the plotter
will be displayed.
Height and Length: Height is measured from the top trace of the job to the bottom trace.
Length is measured from the far left hand trace to the far right hand trace. This may be different
from the job size you specified as most designs do not touch the job border.
Scale: You can scale your job from 10% to 999% of its original size to plot. The default scale is
100%.
Across, Down: These are used to specify multiple copies. Type in the number of copies across
and the number of copies down. The multiplication of these two numbers is the total number of
copies to be generated.
Across, Space: "Across" relates to the X-axis or from left to right on your screen. You can
make copies across next to each other with a specified space between each.
Down, Space: "Down" relates to the Y-axis or from top to bottom on your screen. You can
make copies down next to each other with a specified space between each.
Border Space: This is the distance from the outside trace to the Weed Border.
Split Overlap: The split overlap is the distance that one strip will
overlap another in order to make alignment of the strips easier.
Material Advance: This will feed material from the plotter in the same amount as the job size,
before cutting. If you have multiple copies, the plotter will feed only one copy at a time. This
feature is for ANAgraph’s “AE” series of plotters only.
Split: If you want to cut only one strip, click the "Split" button to display the Split Select dialogue
box. The strips are numbered from top to bottom. You can select the strip that you are going to
plot or select "All Strips". The default is "All Strips". Clicking a selected strip will deselect it.
2. OTHER PLOTTER CONTROL FEATURES
Plot: When you are ready to plot your job, click the Plot button.
Cancel: Click Cancel to remove the Plot Control dialogue box from your screen.
X-Move: The X-axis moves from top to bottom on the plotter or from side-to-side on your
screen. Entering a distance in the X Move box and then clicking the "Move" button moves the
platen that distance.
Y-Move: The Y-axis moves from left to right on the plotter or from top to bottom on your screen.
Entering a distance in the Y Move box and then clicking the "Move" button moves the head that
distance.
Move: When you have entered the X and/or Y values in the above boxes, clicking the Move
button moves the plotter. If you want to draw or cut with the XY Move command, you must first
bring the tool down, using the Tool Position command before clicking the Move button.
Tool Position Up, Down: To move the tool head up off the material, click the "Up" button. To
move the tool head down on the material, click the "Down" button. In normal plot operation, Tool
Up/Down is taken care of by the system.
3. JOB QUEUE LIST
The Job Queue box lists all of the jobs currently in queue to be sent to the plotter. Normally,
the job listed at the top is indicated as “...plotting”. Once a job is completely sent to the plotter, it
is removed from the queue.
Bytes Sent: This displays how many Bytes are left to be sent to the plotter.
Copies Sent: This displays the number count of multiple copies across sent to the plotter.
Abort Current Plot: Click the Abort button or press Ctrl, Alt-X to stop plotting the current job.
The plotting operation of the current job will be aborted.
Pause Current Plot: Click Pause to temporarily stop plotting the current job. This is helpful if
you need to attend to the material.
Resume Current Plot: Click Resume to continue plotting the current job after the plotting was
temporarily interrupted by clicking Pause.
Replot Job: Click Replot Job and the job that was just plotted will be plotted again.
Delete Job: This allows certain jobs to be deleted from the job queue. Highlight the jobs to be
deleted by clicking the job with your LMB. Then, click the Delete Job button.
Home Plotter: If the currently selected plotter supports this command, you can send the plotter
head to it’s starting position (origin), by clicking on this button. The button is only accessible
when the plotter is not plotting.