1
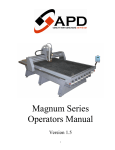
Magnum Series
Operators Manual
Version 2.0
1
Advanced Plotting Devices
COPYRIGHT NOTICE
Copyright © 2006, 2007 Advanced Plotting Devices
All Rights Reserved
NOTICE OF PROPRIETARY INFORMATION
This document contains proprietary information owned by APD. This document is provided to
the owner of the Magnum Series CNC router for the purpose of setup and operation of the
APD Magnum Series CNC router. Information contained in this document is not to be
duplicated or given to a third party without the expressed written permission of APD.
2
Table of Content
Introduction…………………………………………………………………7
Surveying your router.………………………………………………………8
Important Attention....………………………………………………………9
Connecting your router.………………………………………………...10-11
Material setup and routing guide………………………………………12-13
Remote control panel functions………………………………………...14-15
Function menu tree……………………………………………………..16-19
Moving tool position……………………………………………………….20
Routing area..…………………………………………………………….…21
Routing time…..……………………………………………………………22
Routing Method……………………………………………………………23
Job Rotate…………………………………………………………………..24
Clear Buffer…………………………………………………………………25
Serial Port Setting..…………………………………………………………26
Machine Unit Setting….……………………………………………………27
Machine Homing ..…………………………………………………………28
Re-route last job……………………………………………………………29
Loading user & manufacture default………………………………………30
Saving user defaults………………………………………………………..31
Built in self test patterns…………………………………………………...32
Data format…………….…………………………………………………...33
3
Tool Depth Setting……..…………………………………………………...34
Changing routing speed.…………………………………………………...35
Move all Axis to machine origin ………………………………………...36
Move all Axis to current origin…………………………………………...37
Setting Axis Origin ….…………………………………………………...38
Z Surface setting .…….…………………………………………………...39
Move Axis …………….…………………………………………………...40
Device On/Off ……….…………………………………………………...41
Setting Serial Communication (RS232)…………………………………...42
Setting Baud Rate…………………………………………………...42
Setting Stop Bit……………………………………………………...42
Setting Data Bit……………………………………………………..42
Setting Parity………………………………………………………..43
Setting handshaking protocol……………………………………….43
Pausing Router….…………..……………………………………………...44
Resume Router..…….……………………………………………………...45
Routing From Software…………………………………………………….48
Contour Routing ……..…………………………………………………49-50
Maintenance…………………………………………………………….51-53
Testing Your Router...……………………………………………………..54
Troubleshooting…………………………………………………………....55
Appendix A (HPGL Command Listing)………………………………..56-60
4
HPGL Commands………………………………………………………...56
IN Initialize Command……………………………………………..56
RS Routing Resolution Command……...………………………….56
ZZ 2D or 3D mode select Command…………...…………………..56
PA Absolute Routing Command…………………………………...56
PR Relative Routing Command…………………...……………….56
PU Tool Up Command……………………………………………..57
PD Tool Down Command………………………………………….57
ZA Absolute Z Plotting Command……………..…………………..57
ZR Relative Z Plotting Command….…………..…………………..57
!OT Homing Command…………….…………..…………………..57
SF Set Feed Rate Command……..……………..…………………..57
VS Set Feed Rate Command….……………………………………57
VZ Set Z speed Command….………………………………………57
SP Tool Selection Command……………………………………….58
ZD Set Z Down Distance Command..………….…………………..58
ZU Set Z Up Distance Command..……………..…………………..58
TC Tool Change Command……...……………..…………………..58
ZW Set Z Dwell Command……...……………..…………………..58
XW Set XY Dwell Command…………………..…………………..58
OH Absolute Routing Area Output Command……………………..58
OF Factor Output Command……………………………………….59
5
OA Actual Tool Position Output Command……………………….59
2D sample file………………………………………………………59
3D sample file……………………………………………………… 60
Appendix C (Error Message)…………………………………………...61-75
Appendix D (routing speed guide)……………………………………...76-77
Appendix E (Main board replacement) ………………………………...78-81
Appendix F (Enroute 3 setup inches)
………………………………...
Appendix G (Enroute 3 setup centimeter)
…………………………...
Introduction
APD Magnum Series CNC router was developed for the main purpose of reliability, cutting
quality and performance at an affordable price for our customers. This series is the pinnacle of
6
HPGL open architecture and is compatible for many of your sign-making software’s. The
machine is capable to cut through many types of materials such as wood, foam, plastic, Plexiglass, aluminum, steel, etc.
Within this manual contains all pertinent information for your APD Magnum Series Router. At
this time we have to offer three models.
Magnum I is 4’x4’ table
Magnum II is 4’x8’ table
Magnum III is 5’x10’ table
Surveying Your Router
When finished unpacking your APD Magnum Series router, survey your router for any
shipping damages or any further discrepancies. Contact your dealer or APD’s Customer
Service dept. at 714.653-1299 ext. 113 if you found any. Below is a check list of misc. items
that will be shipped with your router.
(1) Controller box with minimum of 6 feet power cable
(1) Remote terminal with 10 feet of cable
(1) 25 feet of RS-232 Serial data cable
7
(1) ½” and ¼” collets
(1) Set of wrench (2 pieces)
(1) Dust collector system (optional item)
(1) Mist cool system (optional item)
(1) Vacuum pump (5.0 HP or 10 HP or 15 HP) (optional item)
(1) USB port (optional item)
(1) CD ROM User Manual
(1) Enroute 3 Entry level software
(1) Starter kit
(1) Warranty Card
Attention:
Before running machine, you must do the following:
1- Unlock the X axis by removing the rope which tight the routing head to the gantry
2- Unlock the Y axis by removing 2 retaining screws which keep the gantry from
moving back and forth
3- Make sure all connectors to Electronic Control Box are tight and locked. Make
sure to tighten both screws at DB25 and DB37 connectors
8
Connecting Your Router
CONNECTING TO POWER
CAUTION: Your APD Magnum Series Router is shipped preset as a 115 VAC or 230
VAC unit single phase or 230 VAC 3 phase. Please check the label on the controller box to
verify with the power you have. If the power indicated is incorrect for your area or
country, please call APD tech support at (714) 653-1299 ext. 113 for further instructions
on changing voltage. You will need to install the following electrical services for your
router.
1234-
A wall circuit breaker of 60A, 250V, 2 poles for single phase and 3 poles for 3 phases.
For extension cord, A 50A receptacle part number: NEMA 10-50R
For extension cord, A 50A plug part number: NEMA 10-50P
Use 8 to 10AWG, 3 conductor power cable for single phase and 4 conductor power cable
for 3 phase to connect power from the wall to controller box.
5- A NEMA L5-30R receptacle is used to mate with provided plug to controller box used
115V single phase
6- A NEMA L6-30R receptacle is used to mate with provided plug to controller box used
230V single phase
7- A NEMA L15-30R receptacle is used to mate with provided plug to controller box used
230V three phase
9
8- Make sure the switch of power on controller box is in the off position
9- Plug male end of the supplied power cord (connected to controller box) into the
receptacle of the extension power cable (customer supplied).
10- Plug the other end of extension power cable into a GROUNDED AC power source.
11- Plug one end of the coiled cable into remoter terminal (RJ45) and the other end into
controller box located on the right side of controller box.
12- Plug the spindle power cable (circular plastic male connector) to the spindle connecter
located on the left side of controller box. This cable is the one that goes through cable
track up to the spindle. The mating connector is clearly marked on controller box.
13- If the dust collector is purchased from APD, plug the dust collector cable (circular
plastic female connector) to the dust collector connecter located on the left side of
controller box
14- If the table vacuum hold down option is purchased from APD, plug the table vacuum
cable (circular plastic female connector) to the vacuum table connecter located on the
left side of controller box
15- If the mist cool option is purchased from APD, plug the mist cool cable (circular plastic
female connector) to the mist cool connecter located on the left side of controller box.
Customer is responsible to supplying an air supply with minimum of 80 PSI.
16- Plug the male end (25 pins) of the data cable into the connector located at the right side
of controller box.
17- Plug the female end (9 pins) of the data cable supplied with your router into the serial
communication port (RS232) of your computer.
WARNING: Your APD Magnum Series Router is only supported by a Serial
Communication Protocol and is supplied with 9 pins Female to 25 pin Male data cable.
Make certain that you do not connect the router controller box to the parallel port of your
computer. Permanent damage to the serial port of your router may occur if connection to
the serial port is not properly made. Use the serial cable provided for connecting your
APD Magnum Series Router to your computer. Do not use a female to female or a male to
male adapter to connect the cable provided to your router and computer.
WARNING: Your APD Magnum Series router is shipped with X, Y, and Z axis locked.
Make sure to unlock all axis before turn on machine.
10
Material Setup and Routing Guide
The construction of the Magnum Routing System is built with high performance servo motors
for very accurate motion control. We at Advanced Plotting Devices have designed machine
with you as the user in mind; the user-friendly control terminal will enable you to accurately
and quickly set up your material and start cutting in minutes.
Material Hold Down
High Volume Vacuum Table
As an optional in our affordable Magnum Series CNC Router, we offer a vacuum table, which
is designed to hold materials for random shape cutting. This vacuum table is not designed to
hold small parts, if small parts are being cut, a double sided tape and sacrificial material is
recommended to use to hold the part down.
Sacrifice Material:
is the material placed under the matter which is to be cut, this allows you to cut through parts
and not cut up your table top. Peg board is normally use on the vacuum tables.
Clamping Material:
All Magnum Series CNC Routers are come with a versatile T-clamp system. The clamps can
be used to both hold down material and to create reference points for a repetitive jobs that
require the same origin. It is very important to clamp material securely but not too tighten so
that they will not bend or damage the material.
Taping or Adhering Material
When cutting small parts it may be necessary to use double sided tape or spray adhesive to hold
the parts in place. It is recommended to stick the material to a sacrifice material and not
directly to the table.
Cutting Direction:
Choosing which direction to cut around the part can be very important in the smoothness of the
edge quality of the part. Some materials give a better edge quality when cutting direction is
clockwise (Conventional) and other give a better cut when cutting direction is counter
clockwise (Climbing). Note: If the outside direction moving counter clockwise, the inside cuts
will need to be clockwise. Most software packages take care of this automatically, but it is
11
important to double check the cutting direction if possible. Following is a general guide for
different materials
Material
Wood
Plastic
Foams
Metals
Cutting Direction
Depending on type of wood.
Clockwise or Conventional
Clockwise or Conventional
Counter clockwise or Climb
Cutting Speed:
There are many parameters involve when selecting the proper cut speed. Bit size, material
type, material thickness, cut depth, and type of hold down are the items used when selecting the
appropriate cut speed. Vacuum table hold down is for faster cut speed since materials will not
vibrate. Please refer to appendix D for a general guide on setting routing speed
Cutting Plexy or Acrylic
In cutting plastic, good edge is not always obtained at slower speed. The recommended bit for
cutting plastic is 2 flute carbide up cut spiral and the material should be held down tight and
securely to reduce the vibration. The speed recommended is 1 IPS (60 IPM)
Cutting Wood
There are many types of woods to cut. All of which should be cut with 1 or 2 flute straight cut
carbide bits. If a spiral bit is use generally the edge quality will be rougher although the cut
speeds can sometimes be increased. Using straight cutting bits on wood will produce a smooth
edge quality. If the wood begins to burn then the spindle speed is too fast and/or the cut speed
is too slow.
When hog out of fill patterns are to be cut in wood, generally it is better to run cleaning pass
first. This will help keep the wood from chipping.
Remote Control Panel Functions
12
From the remoter terminal keypad there are a number menu functions available for you to use.
With these menu functions you can adjust the performance of the router for cutting, drawing,
contour cut, feet rate, Z depth, Z surface, etc.
The following functions are available:
Moving the cutting head position X,Y, and Z axis
Absolute routing window
Changing routing speed
Changing Feed rate
Changing Traverse
Changing Z up speed
Changing Z down speed
Setting axis origin
X only
Y only
Z only
All axis
Z surface setting
Firmware updating
Turn devices on/off
spindle, vacuum table, dust collector, and mist cool
Running Machine Test Patterns
Saving Machine Defaults
Saving Machine Settings
Load Machine Settings
Re-Routing
Homing the Router
Clearing the Buffer
Software Control Command Toggle
Unit Changing
Selecting route mode
13
Changing Z depth
Changing Z lift
Changing Serial Communications
Routing time
XY return to origin
XY park
XY return
The following pages contain a flow chart (menu tree) that shows the menu functions available.
While all menu functions are available while not routing, only some menu functions are
available while cutting.
14
Routing Window
X-Axis: 48.000 In
Y-Axis: 48.000 In
Z-Axis: 5.000 In
Up
Down
Total Routing Time
999.00
Machine Time Remain
99.00
Z
Z
Enable Slow Cut Off
Yes
<
>
Z
Enter
>
Z
Enter
X
>
Z
Enter
Z
Job Rotate: 0
<
X
Enter
>
Enter
Routing Method
Contour
X
<
X
degree
>
Set Z Bottom Surface
Yes
Z
Routing Method
Regular
<
<
X
Z
Set Z Bottom Surface
No
<
X
Enable Slow Cut Off
No
>
Enter
Job Rotate: 90 degree
X
<
>
Z
Enter
<
X
Z
Clear Buffer: No
>
Enter
Clear Buffer: Yes
X
<
>
Z
Enter
Z
Serial Port Setting
No
<
>
Z
<
X
Enter
Z
>
Enter
Serial Port Setting
Yes
X
<
X
Z
>
Enter
Z
To Sub Menu
15
Menu tree (Continued)...
Machine Unit:
Inches
Software Control: No
<
>
Enter
Z
X
Z
Machine Homing:
No
<
X
>
Z
Enter
X
X
Z
Re-Route Last Job: No
Machine Unit:
Centimeter
Software Control: No
<
>
Enter
Machine Homing:
Yes
<
>
Enter
Re-Route Last Job: Yes
X
<
>
Z
Enter
Z
Load Machine Setting
Default: 1
<
>
Z
Enter
X
X
Z
Save Machine Setting
Default: 1
<
X
>
Enter
Z
Z
Z
Z
X
X
<
>
Enter
Load Machine Setting
Default: 2
<
>
Enter
Save Machine Setting
Default: 2
<
>
Enter
Machine Self Test
PD-2400
Table Surface
<
>
Enter
Data Format
HPGL2D
<
>
Enter
Z
Z
Z
Z
Tool Depth: 0.250 In
Tool Lift : 0.100 In
Max Depth: 2.000 In
Mat: 0.750 < > Enter
Menu tree (Continued)...
16
Feed Rate: 1.0
I/S
Traverse: 7.0
I/S
Z-Down: 0.5
I/S
Z-Up: 3.0 < > Enter
Z
Z
Move All Axis To
Machine Origin: Yes
<
>
Z
Enter
Z
Move XY Axis to
Current Origin: Yes
<
>
Z
Enter
Z
Setting Axis Origin
X-Axis
<
>
Z
Enter
Z
Z-Surface Setting: Yes
<
>
Z
Enter
Z
Axis Movement:
Yes
<
>
Z
Enter
Z
Spindle: Off Vac: Off
Dust: Off
Mist: Off
<
>
Enter
Z
Z
Z
Z
Routing Window
X-Axis: 48.000 In
Y-Axis: 96.000 In
Z-Axis: 5.000 In
Menu tree (Continued)...
17
Axis Movement
Use Arrow Keys
X: 22.22
Y: 22.22
Z: 2.22
Serial Communication Setting Sub-Menu
Serial Port Setting
Yes
<
>
Z
Enter
Z
Baud Rate: 9600
Data Bit: 8
Stop Bit: 2
<
>
Enter
Z
X
X
Baud Rate: 19200
Data Bit: 8
Stop Bit: 2
<
>
Enter
Z
CONTROL PANEL FUNCTIONS
Axis Movement
Use Arrow Keys
X: 22.22
Y: 22.22
Z: 2.22
18
This menu allows you to jog the tool to a new starting position. Also, it allow you to view the
current position of X, Y, and Z axis. You can also jog all axis to view any portion of the job
while the router is in pause mode. When the router resumes plotting it will return to where it
left off and finish the job. Jogging can only be done while the router is not running.
Press the Y
key on the keypad to move the gantry backward.
Press the Y
key on the keypad to move the gantry forward.
key on the keypad to move the routing head to the left.
Press the X
Press the X
key on the keypad to move the routing head to the right.
key on the keypad to move the routing head down.
Press the Z
Press the Z
key on the keypad to move the routing head up.
Press the
key on the keypad while in the idle mode to go to additional menu functions; and
while in the PAUSE mode to go to RESUME menu.
Control Panel Functions (Continued)...
Routing Window
X-Axis: 48.000 In
Y-Axis: 48.000 In
Z-Axis: 5.000 In
19
This menu allows you to view the currently available routing area in current unit either
centimeter or inches. Whenever your router is homed the menu will display the current routing
area. It is also the first menu displayed after pressing the
key while in the jogging menu.
Press the Z
Press the Z
Press the
key on the keypad to go to the next menu function.
key on the keypad to go to the previous menu function
key on the keypad to return to the jogging menu.
Control Panel Functions (Continued)...
Total Routing Time
999.00
Machine Time Remain
99.00
This screen display how many hours and minutes router has been cutting/drawing. It also
display the remaining time before machine going into expiration mode if programmed.
20
Press the Z
Press the Z
Press the
key on the keypad to go to the next menu function.
key on the keypad to go to the previous menu function
key on the keypad to return to the jogging menu.
Control Panel Functions (Continued)...
Enable Slow Cut Off
Yes
<
>
Enter
This menu allows you to either enable the function that when enable, router will slow down to
0.2 ips when the cutting approaching the start point. This function is only enable after the Set
Z Bottom surface function performed. This feature is very useful in avoiding problem of
having small images shifted while finish cutting.
Press the X
key on the keypad to change Yes (enabled) to No (disabled)
21
Press the X
key on the keypad to change No (disabled) to Yes (enabled).
Press the Z
key on the keypad to go to the next menu function.
key on the keypad to go to the previous menu function.
Press the Z
Press the
key on the keypad to confirm the selection.
Press the
key on the keypad to return to the jogging menu.
Control Panel Functions (Continued)...
Set Z Bottom Surface
No
<
>
Enter
This menu allows you to set the Z bottom surface. By combining this function and Set Z
Surface function; Machine will calculate the thickness of current material for you
Press the X
key on the keypad to change No to Yes
Press the X
key on the keypad to change Yes to No.
Press the Z
key on the keypad to go to the next menu function.
key on the keypad to go to the previous menu function.
Press the Z
Press the
key on the keypad to confirm the selection.
22
Press the
key on the keypad to return to the jogging menu.
Control Panel Functions (Continued)...
Routing Method
Regular
<
>
Enter
This menu allows you to change the method of routing from Regular route to Contour route. If
the Contour method is selected, sub menu will be displayed to enter registration points.
Press the X
key on the keypad to change routing method to Regular.
Press the X
key on the keypad to change routing method to Contour.
Press the Z
key on the keypad to go to the next menu function.
Press the Z
key on the keypad to go to the previous menu function.
Press the
key on the keypad to confirm the selection.
key on the keypad to return to the jogging menu.
Press the
23
Control Panel Functions (Continued)...
Job Rotate: 0
<
>
degree
Enter
This menu allows you to rotate the job from 0 to 90 degree.
Press the X
key on the keypad to select 0 degree .
Press the X
key on the keypad to select 90 degree.
Press the Z
key on the keypad to go to the next menu function.
Press the Z
key on the keypad to go to the previous menu function.
Press the
key on the keypad to confirm the selection.
Press the
key on the keypad to return to the jogging menu.
24
Control Panel Functions (Continued)...
Clear Buffer: No
<
>
Enter
This menu allows you to clear the data received buffer.
Press the X
key on the keypad to select No.
Press the X
key on the keypad to select Yes.
Press the Z
key on the keypad to go to the next menu function.
Press the Z
key on the keypad to go to the previous menu function.
Press the
key on the keypad to confirm the selection.
Press the
key on the keypad to return to the jogging menu.
25
Control Panel Functions (Continued)...
Serial Port Setting
No
<
>
Enter
This menu allows you to change the serial port setting. Selecting Yes will take you to the sub
menu.
Press the X
key on the keypad to select No.
Press the X
key on the keypad to select Yes.
Press the Z
key on the keypad to go to the next menu function.
Press the Z
key on the keypad to go to the previous menu function.
Press the
key on the keypad to confirm the selection.
Press the
key on the keypad to return to the jogging menu.
26
Control Panel Functions (Continued)...
Machine Unit:
Inches
Software Control: No
<
>
Enter
This menu allows you to change the unit setting. Selecting Inches will display all measurement
in Inches while selecting Centimeter will display all measurements in centimeter. This menu
also allows you to enable or disable some of the commands sending from host computer. By
setting Software Control to No, the following commands sending from host computer will be
ignored:
1- Feed Rate
2- Traverse
3- Z Down speed
4- Z Up speed
5- XY Dwell
Press the X
key on the keypad to select Inches (or No).
Press the X
key on the keypad to select Centimeter (or Yes).
Press the Z
key on the keypad to go to the next menu function.
Press the Z
key on the keypad to go to the previous menu function.
key on the keypad to confirm the selection and go to the next item.
Press the
Press the
key on the keypad to return to the jogging menu.
27
Control Panel Functions (Continued)...
Machine Homing
No
<
>
Enter
This menu allows you to home the machine. Homing is the same as move all axis to machine
origin.
Press the X
key on the keypad to select No.
Press the X
key on the keypad to select Yes.
Press the Z
key on the keypad to go to the next menu function.
Press the Z
key on the keypad to go to the previous menu function.
Press the
key on the keypad to confirm the selection.
Press the
key on the keypad to return to the jogging menu.
28
Control Panel Functions (Continued)...
Re-Route Last Job: No
<
>
Enter
This menu allows you to route the last job sent and saved in the control box memory. If there
is no job stored in control box memory or the last job sent was more than 3.5MB, an error
message will be prompted.
Press the X
key on the keypad to select No.
Press the X
key on the keypad to select Yes.
Press the Z
key on the keypad to go to the next menu function.
Press the Z
key on the keypad to go to the previous menu function.
Press the
key on the keypad to confirm the selection.
Press the
key on the keypad to return to the jogging menu.
29
Control Panel Functions (Continued)...
Load Machine Setting
Default: 1
<
>
Enter
This menu allows you to load the saved default into the current settings
(Y origin, feed rate, traverse, Z-up, Z-down, etc.) from the EEPROM.
Press the X
key on the keypad to decrease default number.
Press the X
key on the keypad to increase default number.
Press the Z
key on the keypad to go to the next menu function.
Press the Z
key on the keypad to go to the previous menu function.
Press the
key on the keypad to confirm the selection.
Press the
key on the keypad to return to the jogging menu.
30
Control Panel Functions (Continued)...
Save Machine Setting
Default: 1
<
>
Enter
This menu allows you to save the current settings (X-Y origin, feed rate, traverse, Z-up, Zdown, etc.) into the EEPROM. Some of the settings will be saved into individual default,
others will be saved to all defaults.
Press the X
key on the keypad to decrease default number.
Press the X
key on the keypad to increase default number.
Press the Z
key on the keypad to go to the next menu function.
Press the Z
key on the keypad to go to the previous menu function.
Press the
key on the keypad to confirm the selection.
key on the keypad to return to the jogging menu.
Press the
Note: Whenever a job being routed, the machine current setting will be automatically saved
into default #1 and this default is automatically loaded every time machine is powered up.
31
Control Panel Functions (Continued)...
Machine Self Test
Table Surface
PD96000
<
>
Enter
This menu allows you to perform some of the built in self-test. This main purpose of this
function is enable the manufacture and field technician to troubleshoot and burn in test the
machine.
Press the X
key on the keypad to change test.
key on the keypad to change test.
Press the X
Press the Z
key on the keypad to go to the next menu function.
Press the Z
key on the keypad to go to the previous menu function.
key on the keypad to confirm the selection.
Press the
Press the
key on the keypad to return to the jogging menu.
Control Panel Functions (Continued)...
32
Data Format
HPGL2D
<
>
Enter
This menu allows you to select a different data format. The data format is depending on the
software you are using in driving our router.
1- HPGL2D is for all software which can output data in HPGL, 2D, absolute format.
2- HPGL3D is for all software which can output data in HPGL, 3D, absolute mode.
3- GCODE is for all software which can output data in GCODE
4- APDGL is for APD specific data format, which can interface with Corel Draw, Adobe
Illustrator.
5- HPGL REL is for all software, which can output data only in HPGL Relative format
(like Flexi, Anagraph DesignArt).
Press the X
key on the keypad to change data format.
Press the X
key on the keypad to change data format.
Press the Z
key on the keypad to go to the next menu function.
Press the Z
key on the keypad to go to the previous menu function.
Press the
key on the keypad to confirm the selection.
Press the
key on the keypad to return to the jogging menu.
Control Panel Functions (Continued)...
33
Tool Depth : 0.250
In
Tool Lift : 0.100
In
Max Depth : 2.000
In
<
>
Enter
This menu allows you to set the Z depth, Z lift, and Max Z depth. The Tool Depth and Tool
Lift setting are very useful if your software does not generate these two settings. The max
depth setting is very useful in term of preventing the tool bit going too deep into the material.
key on the keypad to decrease the number.
Press the X
Press the X
key on the keypad to increase the number.
key on the keypad to go to the next menu function.
Press the Z
key on the keypad to go to the previous menu function.
Press the Z
Press the
key on the keypad to confirm the change and move to the next setting.
Press the
key on the keypad to return to the jogging menu.
Control Panel Functions (Continued)...
34
Feed Rate: 1.0
I/S
I/S
Traverse: 7.0
Z-Down: 0.5
I/S
Z-Up: 3.0 < > Enter
This menu allows you to change the feed rate from 0.2 ips to 7.9 ips; the Traverse (Tool up
move) from 0.2 ips to 7.9 ips; the Z Down speed from 0.1 ips to 3.5; and the Z up form 0.1 ips
to 2.5 ips
Press the X
key on the keypad to decrease the number.
Press the X
key on the keypad to increase the number.
Press the Z
key on the keypad to go to the next menu function.
key on the keypad to go to the previous menu function.
Press the Z
Press the
key on the keypad to confirm the change and move to the next setting.
key on the keypad to return to the jogging menu.
Press the
Control Panel Functions (Continued)...
35
Move All Axis to
Machine Origin: No
<
>
Enter
This menu allows you to move all axis to the machine origin which is the position after
machine powered up. As soon as the Yes selection is confirmed, all axis will be moving to the
machine origin.
Press the X
key on the keypad to select No.
Press the X
key on the keypad to select Yes.
Press the Z
key on the keypad to go to the next menu function.
key on the keypad to go to the previous menu function.
Press the Z
Press the
key on the keypad to confirm the selection.
key on the keypad to return to the jogging menu.
Press the
Control Panel Functions (Continued)...
36
Move All Axis to
Current Origin: No
<
>
Enter
This menu allows you to move all axis to the current origin which is the positions after you set
in the Setting Axis Origin or the origin currently saved in the default. As soon as the Yes
selection is confirmed, all axis will be moving to the current origin.
Press the X
key on the keypad to select No.
Press the X
key on the keypad to select Yes.
Press the Z
key on the keypad to go to the next menu function.
key on the keypad to go to the previous menu function.
Press the Z
Press the
key on the keypad to confirm the selection.
key on the keypad to return to the jogging menu.
Press the
Control Panel Functions (Continued)...
37
Setting Axis Origin
X-Axis
<
>
Enter
This menu allows you to set the current axis position to be the origin. You can set axis origin
individually or all axis at once.
Press the X
key on the keypad to change selection.
Press the X
key on the keypad to change selection.
Press the Z
key on the keypad to go to the next menu function.
Press the Z
key on the keypad to go to the previous menu function.
key on the keypad to confirm the selection.
Press the
key on the keypad to return to the jogging menu.
Press the
Control Panel Functions (Continued)...
38
Z-Surface Setting: No
<
>
Enter
This menu allows you to perform material surface. Following are the steps you need to do in
setting all axis before routing:
1- Move X and Y-Axis to the desired position.
2- Go to Setting Axis Origin menu, select All axis and press ENTER
3- Place the Z surface device (provided with the machine) right underneath of router bit.
Note: make sure the device is resting on a flat surface.
4- Go to Axis Movement menu and jog the Z down until the router bit is about 1/8” from
the device.
5- Go to this menu, change the selection to Yes, and press ENTER.
6- The machine will slowly move the Z down until router bit touch the Z surface device, set
the Z origin, and then move the Z up for the Z lift setting. Note: Do not set Z origin
after this.
key on the keypad to select No.
Press the X
Press the X
key on the keypad to select Yes.
Press the Z
key on the keypad to go to the next menu function.
Press the Z
key on the keypad to go to the previous menu function.
Press the
key on the keypad to confirm the selection.
Press the
key on the keypad to return to the jogging menu.
Control Panel Functions (Continued)...
39
Axis Movement
No
<
>
Enter
This menu allows you to move one axis at a time either in absolute or relative mode. By
selecting Yes, it will take you to a sub menu where you can select what axis to move and what
mode to move (Absolute or Relative).
Press the X
key on the keypad to select No.
Press the X
key on the keypad to select Yes.
Press the Z
key on the keypad to go to the next menu function.
key on the keypad to go to the previous menu function.
Press the Z
Press the
key on the keypad to confirm the selection.
key on the keypad to return to the jogging menu.
Press the
Control Panel Functions (Continued)...
40
Spindle: Off Vac: Off
Dust: Off
Mist: Off
<
>
Enter
This menu allows you to turn on/off individual devices. The displayed status of the devices is
the current status of that device.
Press the Z
Press the Z
Press the
Press the
key on the keypad to go to the next menu function.
key on the keypad to go to the previous menu function.
key on the keypad to toggle device status and go to the next device.
key on the keypad to return to the jogging menu.
Control Panel Functions (Continued)...
41
Baud Rate:
Data Bit :
Stop Bit :
<
>
9600
8
2
Enter
This menu allows you to change the serial port setting by changing the Baud Rate, Data bits,
and Stop bits. You must make sure that this setting and the setting at host computer match.
Press the X
key on the keypad to decrease the number.
key on the keypad to increase the number.
Press the X
Press the Z
key on the keypad to go to the next menu function.
key on the keypad to go to the previous menu fu
Press the Z
Press the
key on the keypad to confirm the change and move to the next setting.
Press the
key on the keypad to return to the jogging menu.
Control Panel Functions (Continued)...
42
Parity: None
Protocol: Hardware
<
>
Enter
This menu allows you to change the serial port setting by change the Parity and Handshaking
Protocol. You must make sure that this setting and the setting at host computer match.
Press the X
key on the keypad to change the selection.
key on the keypad to change the selection.
Press the X
Press the Z
key on the keypad to go to the next menu function.
key on the keypad to go to the previous menu fu
Press the Z
Press the
key on the keypad to confirm the change and move to the next setting.
Press the
key on the keypad to return to the jogging menu
Control Panel Functions (Continued)...
43
Operation: Pause
Received: 99999
Procesed: 99999
<
>
Enter
This menu will be prompted whenever the machine is in routing mode. It allows you to pause
or abort the routing operation. It also displays the amount of vectors it received and processed
up so far.
1- Pause: machine will go into pause mode, and from this point you can move any or all
axis around.
2- Abort: machine will abort current routing, home machine, and clear all remaining data in
the plot buffer.
key on the keypad to select Pause.
Press the X
Press the X
key on the keypad to select Abort.
key on the keypad to go to the next menu function.
Press the Z
Press the Z
key on the keypad to go to the previous menu fu
Press the
key on the keypad to confirm and execute the selection.
Press the
key on the keypad to return to the jogging menu
Control Panel Functions (Continued)...
44
Operation: Resume
<
>
Enter
This menu will be prompted whenever the machine is in pause mode. It allows you to resume
or abort the routing operation
1- Resume: machine will move into the last position where it pause and start continue
routing.
2- Abort: machine will abort current routing, home machine, and clear all remaining data in
the plot buffer.
key on the keypad to select Resume.
Press the X
Press the X
key on the keypad to select Abort.
key on the keypad to go to the next menu function.
Press the Z
key on the keypad to go to the previous menu fu
Press the Z
Press the
key on the keypad to confirm and execute the selection.
Press the
key on the keypad to return to the jogging menu
45
46
Routing From Software
Your APD Magnum Series router will respond to standard HPGL2D (2 dimensions absolute),
HPGL3D (3 demensions absolute, HPGL (2 dimensions absolute) lower left origin commands
(Refer to HPGL Commands), HPGL RELATIVE (2 dimensions relative), or APDGL (APD
graphics language).
You can route or draw from HPGL files sent from any computer, which has been set up for the
following default configuration:
47
Baud Rate............. 19200
Data Bits .............. 8
Stop Bits............... 2
Parity.................... None
Handshake............ Hardware
These parameters are usually set up in your driver software. If your software cannot be
operated at these settings then you may change the routers default communication protocol.
Refer to the menu functions on how to do this.
Even though the Trinity Router is designed to communicate with most standard sign software,
the controller need to be set at certain mode for different software.
If you use standard software like Flexi, Anagraph DesignArt; set the controller in HPGL REL
mode.
If you use Scanvec Amiable software like Enroute, set the controller either HPGL2D or
HPGL3D.
If you use Corel Draw, Adobe Illustrator, please call APD Tech support for further details on
how to set up the controller box.
48
Contour Route
With the optional APD light indicator device, you can accurately locate and position printed
media for cutting on the Magnum Series CNC Router. With the APD lighted indicator, you
can easily locate the image registration mark by using jog keys.
Many of the sign design software programs that support inkjet or thermal printing have limited
special functions that support the APD lighted indicator use for locating registration mark.
Other sign design software programs have additional enhanced functions designed to
automatically adjust the output by rotating the image to match the mis-aligned image on the
material already on the router. These enhanced functions are designed to work with the
“Digitize Point” feature found in the firmware for the APD Magnum Series CNC Routers.
1- Follow the steps in your software’s documentation to create a cutting job and add the
contour cut lines around the objects in that job.
2- Follow the print instructions in your software documentation to print the job with the
contour cut lines.
3- After printing the image load the image into the router and orient the job as described in
your software’s documentation. The image does not need to be perfectly square loaded
into router; the router is able to handle any possible skew, shrink, and stress of the
images.
4- Place the APD light indicator into the collet and adjust the light indicator to be in focus
if it is not.
5- The Software Control in the menu must be set to Yes.
6- From the software, use the instructions to send the job to the router to cut the contour
lines.
7- At this point the software should have sent the “PC” command (stand for print and cut),
the router remote terminal LCD should display the following
49
Upper Right:
Lower Right:
Lower Left :
Done:
< > Enter
1- Use the arrow keys on the remote terminal keypad to move the indicator light to the
center of the first image registration mark, which is in the upper right hand corner as
you are looking at the router. Once this pointed is located, press ENTER key to enter
coordinate of this point into router’s memory.
1- Continue to move the indicator light by pressing the arrow keys to the center of
second registration mark which is below the first registration mark (lower right
corner). Press ENTER to confirm the coordination of this second point.
2- Continue to move the indicator light by pressing the arrow keys to the center of third
registration mark which is on the left of second mark (lower left corner). Press
ENTER to confirm the coordination of this third point.
3- At this point, if you need to re-enter any registration mark, you must set Done: to No
and press ENTER key to go back to step 7. If you do not need to re-enter the points,
set Done: to Yes and press ENTER key.
8- Replace the indicator light with router bit, perform all necessary setup and start routing.
Maintenance
IMPORTANT:
50
Keep your APD Magnum Series router in a clean environment. Do not allow metallic
filings to come in contact with the controller box. Do not let any conductive material get
into Electronics through venting holes.
Maintenance
Your APD Trinity Series router is designed to operate reliably with only minor attention to the
following details:
1- Keep the router clean and dry. You can clean the router jut by vacuuming all the debris
on and around the router.
2- Regularly clean and lubricate the rails for all Axis.
Spindle Maintenance
Cleaning:
Keep spindle housing, fans and ductwork clear to allow free movement of cooling air. Clean
tool tapers, collet cavities, shafts and collets clean using denatured alcohol. Never use
lubricants or oils on tooling items. Failure to keep tooling clean can cause tool misalignment,
out of balance, tool slip and poor quality cuts.
Warm Up:
Do not apply loads to a cold electric spindle. Before commencing work, run the spindle at
9,000 rpm for 10 minutes or until the spindle bearing supports reach 98º F (human body
temperature). This allows bearings, supports and shaft to reach their designed dimensions
through thermal expansion. Applying loads to a cold spindle will cause premature bearing
failure.
Cool Down:
Allow cooling system (fan, compressed air or liquid) and bearing pressurization (if fitted) to
run for 10 minutes after stopping work. This minimizes condensation and prevents
contaminants from being drawn into the bearing cavities.
Tooling:
Keep tools sharp to reduce forces, heat and to maintain cut quality. Monitor increases in
electric current to the spindle to detect loss of tool sharpness. Heat generated from tools can
overheat bearing grease, evaporate its essential components and lessen bearing life. Maximum
bearing temperature of bearing supports is 150º F. Excess heat will cause tool holders to jam in
automatic tool change spindles. Be sure all spindle sensors operate to avoid damage. Use only
51
balanced tools and tool holders. Rebalance all tools after each sharpening. Vibration from
unbalanced tools can rapidly destroy bearings. The balance standard is 1.0 g (ANSI 1940/1).
Replace any worn, scratched or deformed tool holders and collets with new items to prevent
tool slip and imbalance from run-out. Consider optional vibration sensors now available.
Normal collet wear life is < 700 hours. Tool slip leads operators to over tighten collet nuts and
damage threads.
CAUTION:
All APD spindles with ATC are designed to accept only ISO or HSK tool holders. BT tool
holders are not interchangeable.
Troubleshooting
Problem: Unable to reach maximum rated speed Verify VFD parameter settings.
Solution: Verify input line voltage to machine
Problem: Spindle vibration or rough edge cut on work-piece
Solution: Balance tool holders. Balance cutter. Dull cutter. Tool length exceeds maximum
allowed.
Problem: Inadequate bearing life. Spindle noise or premature failure Overheating. Excessive
feed rates. Unbalanced tooling.
Solution: Check warm-up procedure. Check feed rate. Check ramp-in angle.
Problem: Spindle overheating
Solution: Verify condition and operation of spindle cooling system (e.g., compressed air
supply set properly, electric fan operating, shaft fan operating, chiller operating). Check
incoming voltage. Check VFD for proper settings to match spindle.
Problem: Cutter stalls in cut
Solution: Reduce depth of cut. Dull cutters.
Problem: Tool holder sticking in spindle taper
Solution: Verify that the actuator is functioning. Verify adequate air pressure to the actuator.
Check tool ejection (2.67-3.05 mm ISO & 0.5 mm HSK). Check that the cone cleaning feature
(if applicable) is operating. Check cleanliness of spindle taper and tool holders. Check for
proper pull stud. Note: Always remove tool holders from spindle before shutting the machine
down.
Problem: Tool holders loose
Solution: Check taper (visual) for fretting. HSK requires regular cleaning to maintain proper
clamping force. Check for worn tool holders. Check for worn taper. Check for proper pull stud.
52
Problem: Popping sound during tool change
Solution: Check for contamination in air line.
Problem: One of the most common failures is due to actuation while rotating
Solution: Check all adjustments and signals of sensors. "Use of sensors required for valid
guarantee"
Problem: Cutter dropping out
Solution: Check threads for damage or wear, possible over tightening of collet nuts.
Problem: Cutters breaking frequently
Solution: Check cutter length. Possible feed rate too high. Removing too much material in one
pass.
Testing Your Router
ROUTER TEST
After loading material and adjusting the pressure, you are ready to test cut. Refer to the Control
Panel section for test patterns.
COMMUNICATION TEST FOR DOS SYSTEMS
53
1) Enter the following file into text file. You can use the DOS Editor program or any word
processing program that can save a DOS text file.
IN;
RS39;
ZZ0;
ZU200;
ZD-50;
SP0;
PA0,0;
PU;
PD1000,0,10000,10000,0,10000,0,0;
PU 0,0;
2) Save this file as TEST.TXT and exit the editor.
IMPORTANT:
If your output port is COM1, 2 or 3 then substitute the proper COM port into the
following MODE and COPY commands.
3) If your communications output port is COM2 then enter at the DOS prompt: "MODE
COM2:9600,n,8,12 and press ENTER. This will set up COM2 for direct output.
4) Enter at the DOS prompt: "COPY TEST.TXT COM2" and press ENTER. This will copy
the file out through COM2 to the router.
Troubleshooting
ROUTER WILL NOT BOOT UP
1) Power switch not on.
2) Power is not connected properly.
3) Resettable fuse is reset
4) Faulty power source.
5) Remote Terminal coil cable is bad
(See Connecting Router)
(See Appendix B)
(Check with Electrician)
ROUTER WILL NOT CUT
1) Data cable not connected properly.
(See Connecting Router)
54
2) Software communication protocol not set properly.
3) Software language not compatible.
4) Communications board faulty.
(See Plotting from Soft.)
(See HPGL Commands)
(Check with Vendor)
Appendix A
HPGL Commands
The APD Magnum Series Router will respond to a generic type of lower left origin HPGL.
IN
This command tell the controller to begin processing the following data as HPGL data format;
without this command all the following data will be ignored. Multiple IN commands in 1 job can cause
unpredictable routing. At the beginning of each job, IN command must be sent. When the IN command
is executed, several setup operations occurs:
1- Controller data format switched to HPGL 2-D
2- The last machines settings take effect
55
RS[39,40,100]
A value of 39 sets the controller to a resolution of 1000 unit per inch, a value of 40 sets the
controller to a resolution of 1016 unit per inch, and a value of 100 sets the controller to a resolution of
2540 units per inch
ZZ0,1
A value of zero sets the controller to HPGL-2D mode and a value of one will set the controller to
HPGL-3D mode. All subsequent data must be sent accordingly otherwise machine will route
unpredictably.
PA[X,Y]
An HPGL 2-D command which is move X and Y axis to an absolute position and sets the
controller to absolute mode for future PU and PD commands.
PA[X,Y,Z]
An HPGL 3-D command which is move X, Y, and Z axis to an absolute position and sets the
controller to a 3-D absolute mode. In this mode all subsequent PU, PD will be ignored. Note: a negative
value of Z will move the tool down and a positive value of Z will move the tool up)
PR[X,Y]
An HPGL 2-D command which is move X and Y axis to a position relative to the current position
and sets the controller to relative mode for future PU and PD commands
PR[X,Y,Z]
An HPGL 3-D command which is move X, Y, and Z axis to a position relative to the current
position and sets the controller to a 3-D relative mode. In this mode all subsequent PU, PD will be
ignored.
PU[X,Y]
An HPGL 2-D command which is move Z axis to a position off the surface of material (normally
called Z lift position); and move X and Y axis either to an absolute or relative position if X and Y values
are specified. In HPGL 3-D mode this command is ignored.
PD[X,Y]
An HPGL 2-D command which is move Z axis to a position into the material (normally called Z
depth position); and move X and Y axis either to an absolute or relative position if X and Y values are
specified. In HPGL 3-D mode this command is ignored.
ZA Z
modes.
Moves Z axis to the specified absolute position. This command is valid for both 2-D and 3-D
56
ZR Z
modes.
Moves Z axis to the specified relative position. This command is valid for both 2-D and 3-D
!OT
Moves the tool to the physical origin of the machine which is the position after machine homed. In
2-D mode, machine will move to 0,0,Zlift position. In 3-D mode, machine will move to 0,0,0 position
SF[XY-rate][,Z-rate]
Set the federate (X and Y move speed) for the machine, values are in mm/sec. The Z-rate value is
for plunging (down speed) of the Z axis. This command works for both 2-D and 3-D modes.
VS[XY-rate]
Set the federate (X and Y move speed) for the machine, values are in mm/sec. Unlike SF
command, this command only set the federate for X and Y axis only and works for both 2-D and 3-D
modes.
VZ[Z-rate]
Set the plunging rate for the machine, values are in mm/sec. Unlike SF command, this command
only set the federate for Z axis only and works for both 2-D and 3-D modes.
SP[0,1,2,…,15]
Select new router bit . 0 – 7 are for spindles and 8 – 15 for drills
ZD Z
Set the Z distance from surface of material to move down on PD command (the Z depth must be
negative number). Changing the ZD value will change the depth on all subsequent PD commands. This
command is ignored in 3-D mode.
ZU Z
Set the Z distance from surface of material to move up on PU command (the Z lift must be positive
number). Changing the ZU value will change the depth on all subsequent PU commands. This command
is ignored in 3-D mode
TC Z
Tool change command. The text following the TC command will be displayed on the remote
terminal when the command being executed. User will have the ability to change the bit according to
information displayed on remote terminal and to change a number of routing parameter such as feed
rate, depths, tool lift, setting new Z origin, etc.
57
ZW[Z-well]
Set the dwell time in millisecond after finish moving the tool down. Negative number will be
ignored. This command works for both 2-D and 3-D mode.
XW[X-well]
Set the dwell time in millisecond after X-Y move comes to a stop. Negative number will be
ignored. This command works for both 2-D and 3-D mode.
OH
Output hard clip limit; returns the minimum and maximum routing area in current units.
Xmin,Ymin, Zmin, Xmax, Ymax, Zmax.
OF
Returns the current router factor. The internal factor is the router resolution based on a 1mm x 1mm
(.3937" X .3937 X .3937) cube.
Output:
39.37,39.37,39.37; for 1000 steps per inch
40,40,40; for 1016 steps per inch
100,100,100; for 2540 steps per inch
OA
Returns the actual XYZ position in current unit
Output:
Xpos,Ypos,Zpos;
2-D sample file of drawing (1) 5” square with 0.200” depth and (2) 10” square with 0.400” depth.
IN;
ZZ0;
RS39;
PU;
PA0,0;
SP0;
SF75.;
ZU100;
ZD-200;
PA10000,10000;
PD10000,15000;
PD15000,15000;
PD15000,10000;
PD10000,10000;
PU;
ZD-400;
PA7500,7500;
PD7500,17500;
PD17500,17500;
PD17500,7500;
PD7500,7500;
; Initialize command
; Set 2D mode
; Set machine resolution to be 1000 unit per inch
; Move tool up to the last Z lift set
; Move to current origin
; Select tool 1
; Set feed rate at 75mm/s
; Set Z lift at 0.100”
; Set Z down at 0.200”
; Set Z down at 0.400”
58
PU;
PA0,0;
3D sample file of drawing (1) 5” square with 0.200” depth and (2) 10” square with 0.400” depth.
IN;
ZZ1;
RS39;
PA0,0,100;
SP0;
SF75.;
PA10000,10000,-200;
PA10000,15000,-200;
PA15000,15000,-200;
PA15000,10000,-200;
PA10000,10000,-200;
PA10000,10000,100;
PA7500,7500-400;
PA7500,17500,-400;
PA17500,17500,-400;
PA17500,7500,-400;
PA7500,7500,-400;
PA7500,7500,100;
PA0,0,100;
; Initialize command
; Set 3D mode
; Set machine resolution to be 1000 unit per inch
; Move all X and Y to current origin and Z to Z lift position
; Select tool 1
; Set feed rate at 75mm/s
59
Appendix C
ERROR MESSAGES (LCD Display), Possible causes, and Corrective action.
Error Message
1
2
Machine Error
Check Estop Switch
Recycle Power
X-Axis Error
Left Limit Switch
Enter to Restart
Possible Cause
Emergency Stop
Switch is engaged.
Corrective Action
1- Check Emergency Stop
Switch to make sure both
switches are released.
2- Contact APD Service
department for switch
replacement
- Turn power off and on
The left limit switch 3- Turn off router, check the
is triggered.
left limit switch.
4- Make sure there is nothing
can triggered limit switch
prematurely.
- If problem persist, call APD
technical support department
for further instructions
60
X-Axis Error
Right Limit Switch
Enter to Restart
The right limit
switch is triggered.
5- Turn off router, check the
right limit switch.
6- Make sure there is nothing
can triggered limit switch
prematurely.
- If problem persist, call APD
technical support department
for further instructions
4
Y-Axis Error
Forward Limit Switch
Enter to Restart
The forward (back)
limit switch is
triggered
7- Turn off router, check the
forward (back) limit switch.
8- Make sure there is nothing
can triggered limit switch
prematurely.
- If problem persist, call APD
technical support department
for further instructions
5
Y-Axis Error
Backward Limit Switch
Enter to Restart
The backward
(front) limit switch
is triggered
9- Turn off router, check the
backward (front) limit
switch.
10- Make sure there is nothing
can triggered limit switch
prematurely.
- If problem persist, call APD
technical support department
for further instructions
6
Z-Axis Error
Upward Limit Switch
Enter to Restart
The Upward limit
switch is triggered
11- Turn off router, check the
upward limit switch.
12- Make sure there is nothing
can triggered limit switch
prematurely.
- If problem persist, call APD
technical support department
for further instructions
3
61
7
Z-Axis Error
Dwnward Limit Switch
Enter to Restart
The Downward
limit switch is
triggered
13- Turn off router, check the
downward limit switch.
14- Make sure there is nothing
can triggered limit switch
prematurely.
- If problem persist, call APD
technical support department
for further instructions
8
X-Axis Error
Left Window Limit
Enter to Restart
The routing job is
larger than machine
physical window
15- Turn off router, check the
routing job; make sure it is
smaller or equal to the
physical window of the
machine (displayed on
remote control LCD).
- If problem persist, call APD
technical support department
for further instructions
9
X-Axis Error
Right Window Limit
Enter to Restart
The routing job is
larger than machine
physical window
16- Turn off router, check the
routing job; make sure it is
smaller or equal to the
physical window of the
machine .
- If problem persist, call APD
technical support department
for further instructions
10
Y-Axis Error
The routing job is
Forward Window Limit larger than machine
Enter to Restart
physical window
17- Turn off router, check the
routing job; make sure it is
smaller or equal to the
physical window of the
machine.
- If problem persist, call APD
technical support department
for further instructions
62
11
Y-Axis Error
The routing job is
Bckward Window Limit larger than machine
Enter to Restart
physical window
18- Turn off router, check the
routing job; make sure it is
smaller or equal to the
physical window of the
machine.
- If problem persist, call APD
technical support department
for further instructions
12
Z-Axis Error
Upward Window Limit
Enter to Restart
The Z travel is out
of the machine
physical window
19- Turn off router, check the Z
setting; make sure it is
smaller or equal to the
physical window of the
machine.
20- If problem persist, call
APD technical support
department for further
instructions
13
Z-Axis Error
Dwnwrd Window Limit
Enter to Restart
The Z travel is out
of the machine
physical window
21- Turn off router, check the Z
setting; make sure it is
smaller or equal to the
physical window of the
machine.
22- If problem persist, call
APD technical support
department for further
instructions
Possible caused by
invalid data from
host computer.
23- Turn off both router and
host computer, wait for 1
minute and turn both
24- If problem persist, call
APD technical support
department for further
instructions
14
Internal Error
Divided by Zero
Enter to Restart
63
15
X-Axis Error
Current Limiting
Enter to Restart
1- Machine hit
25- Check for any obstacle in
something solid.
the moving paths of
2- Machine is
machine.
commanded to
26- Check and adjust feed rate
move too fast for
for all axis.
the material and 27- Turn off router, wait for 1
router bit.
minute and turn on again
28- If problem persist, call
APD technical support
department for further
instructions
16
Y-Axis Error
Current Limiting
Enter to Restart
3- Machine hit
29- Check for any obstacle in
something solid.
the moving paths of
4- Machine is
machine.
commanded to
30- Check and adjust feed rate
move too fast for
for all axis.
the material and 31- Turn off router, wait for 1
router bit.
minute and turn on again
32- If problem persist, call
APD technical support
department for further
instructions
17
Z-Axis Error
Current Limiting
Enter to Restart
5- Machine hit
33- Check for any obstacle in
something solid.
the moving paths of
6- Machine is
machine.
commanded to
34- Check and adjust feed rate
move too fast for
for all axis.
the material and 35- Turn off router, wait for 1
router bit.
minute and turn on again
36- If problem persist, call
APD technical support
department for further
instructions
18
Machine Error
Invalid Data Receive
Enter to Restart
Possible caused by
invalid data from
host computer.
64
37- Turn off both router and
host computer, wait for 1
minute and turn both
38- If problem persist, call
APD technical support
department for further
instructions
19
Machine Error
Serial Port Fail
Enter to Restart
Possible caused by 39- Turn off both router and
wrong setting
host computer, wait for 1
between machine
minute and turn both
and host computer
40- Check the serial port
or the serial cable is
(RS232) setting both at
bad
machine and host computer.
41- Check the serial cable for
any damage.
42- If problem persist, call
APD technical support
department for further
instructions
20
Machine Error
System Memory Fail
Enter to Restart
Possible the main
PCB gone bad
21
Machine Error
Emergency Switch Off
Enter to Restart
The emergency stop 45- Release the emergency
switch is engage
switch.
46- Turn off both router and
host computer, wait for 1
minute and turn both
47- If problem persist, call
APD technical support
department for further
instructions
22
Internal Error
System Trace Error
Enter to Restart
Possible the main
PCB gone bad
65
43- Turn off both router and
host computer, wait for 1
minute and turn both
44- If problem persist, call
APD technical support
department for further
instructions
48- Turn off both router and
host computer, wait for 1
minute and turn both
49- If problem persist, call
APD technical support
department for further
instructions
23
Internal Error
System Break Error
Enter to Restart
Possible the main
PCB gone bad
50- Turn off both router and
host computer, wait for 1
minute and turn both
51- If problem persist, call
APD technical support
department for further
instructions
24
Internal Error
System Overflow Error
Enter to Restart
Possible the main
PCB gone bad
52- Turn off both router and
host computer, wait for 1
minute and turn both
53- If problem persist, call
APD technical support
department for further
instructions
25
Internal Error
System Array Error
Enter to Restart
Possible the main
PCB gone bad
54- Turn off both router and
host computer, wait for 1
minute and turn both
55- If problem persist, call
APD technical support
department for further
instructions
26
Internal Error
System Opcode Error
Enter to Restart
Possible the main
PCB gone bad
56- Turn off both router and
host computer, wait for 1
minute and turn both
57- If problem persist, call
APD technical support
department for further
instructions
27
Internal Error
System Escape Error
Enter to Restart
Possible the main
PCB gone bad
58- Turn off both router and
host computer, wait for 1
minute and turn both
59- If problem persist, call
APD technical support
department for further
instructions
66
28
Internal Error
Interrupt Type 8
Enter to Restart
Possible the main
PCB gone bad
60- Turn off both router and
host computer, wait for 1
minute and turn both
61- If problem persist, call
APD technical support
department for further
instructions
29
Internal Error
Interrupt Type 9
Enter to Restart
Possible the main
PCB gone bad
62- Turn off both router and
host computer, wait for 1
minute and turn both
63- If problem persist, call
APD technical support
department for further
instructions
30
Internal Error
Interrupt Type 10
Enter to Restart
Possible the main
PCB gone bad
1- Turn off both router and host
computer, wait for 1 minute
and turn both
2- If problem persist, call APD
technical support department
for further instructions
31
Internal Error
Interrupt Type 11
Enter to Restart
Possible the main
PCB gone bad
3- Turn off both router and host
computer, wait for 1 minute
and turn both
4- If problem persist, call APD
technical support department
for further instructions
32
Internal Error
Interrupt Type 12
Enter to Restart
Possible the main
PCB gone bad
5- Turn off both router and host
computer, wait for 1 minute
and turn both
6- If problem persist, call APD
technical support department
for further instructions
67
33
Internal Error
Interrupt Type 13
Enter to Restart
Possible the main
PCB gone bad
7- Turn off both router and host
computer, wait for 1 minute
and turn both
8- If problem persist, call APD
technical support department
for further instructions
34
Internal Error
Interrupt Type 14
Enter to Restart
Possible the main
PCB gone bad
9- Turn off both router and host
computer, wait for 1 minute
and turn both
10- If problem persist, call
APD technical support
department for further
instructions
35
Internal Error
Interrupt Type 15
Enter to Restart
Possible the main
PCB gone bad
1- Turn off both router and host
computer, wait for 1 minute
and turn both
2- If problem persist, call APD
technical support department
for further instructions
36
Internal Error
Interrupt Type 16
Enter to Restart
Possible the main
PCB gone bad
3- Turn off both router and host
computer, wait for 1 minute
and turn both
4- If problem persist, call APD
technical support department
for further instructions
37
Internal Error
Interrupt Type 17
Enter to Restart
Possible the main
PCB gone bad
5- Turn off both router and host
computer, wait for 1 minute
and turn both
6- If problem persist, call APD
technical support department
for further instructions
68
38
Internal Error
Interrupt Type 18
Enter to Restart
Possible the main
PCB gone bad
7- Turn off both router and host
computer, wait for 1 minute
and turn both
8- If problem persist, call APD
technical support department
for further instructions
39
Internal Error
Interrupt Type 19
Enter to Restart
Possible the main
PCB gone bad
9- Turn off both router and host
computer, wait for 1 minute
and turn both
10- If problem persist, call
APD technical support
department for further
instructions
40
Internal Error
Interrupt Type 20
Enter to Restart
Possible the main
PCB gone bad
1- Turn off both router and host
computer, wait for 1 minute
and turn both
2- If problem persist, call APD
technical support department
for further instructions
41
Internal Error
Interrupt Type 21
Enter to Restart
Possible the main
PCB gone bad
3- Turn off both router and host
computer, wait for 1 minute
and turn both
4- If problem persist, call APD
technical support department
for further instructions
42
Internal Error
Interrupt Type 22
Enter to Restart
Possible the main
PCB gone bad
5- Turn off both router and host
computer, wait for 1 minute
and turn both
6- If problem persist, call APD
technical support department
for further instructions
69
43
Internal Error
Interrupt Type 23
Enter to Restart
Possible the main
PCB gone bad
7- Turn off both router and host
computer, wait for 1 minute
and turn both
8- If problem persist, call APD
technical support department
for further instructions
44
Internal Error
Interrupt Type 24
Enter to Restart
Possible the main
PCB gone bad
9- Turn off both router and host
computer, wait for 1 minute
and turn both
10- If problem persist, call
APD technical support
department for further
instructions
45
Internal Error
Interrupt Type 25
Enter to Restart
Possible the main
PCB gone bad
1- Turn off both router and host
computer, wait for 1 minute
and turn both
2- If problem persist, call APD
technical support department
for further instructions
46
Internal Error
Interrupt Type 26
Enter to Restart
Possible the main
PCB gone bad
3- Turn off both router and host
computer, wait for 1 minute
and turn both
4- If problem persist, call APD
technical support department
for further instructions
47
Internal Error
Interrupt Type 27
Enter to Restart
Possible the main
PCB gone bad
5- Turn off both router and host
computer, wait for 1 minute
and turn both
6- If problem persist, call APD
technical support department
for further instructions
70
48
Internal Error
Interrupt Type 28
Enter to Restart
Possible the main
PCB gone bad
7- Turn off both router and host
computer, wait for 1 minute
and turn both
8- If problem persist, call APD
technical support department
for further instructions
49
Internal Error
Interrupt Type 29
Enter to Restart
Possible the main
PCB gone bad
9- Turn off both router and host
computer, wait for 1 minute
and turn both
10- If problem persist, call
APD technical support
department for further
instructions
50
Internal Error
Interrupt Type 30
Enter to Restart
Possible the main
PCB gone bad
1- Turn off both router and host
computer, wait for 1 minute
and turn both
2- If problem persist, call APD
technical support department
for further instructions
51
Internal Error
Interrupt Type 31
Enter to Restart
Possible the main
PCB gone bad
3- Turn off both router and host
computer, wait for 1 minute
and turn both
4- If problem persist, call APD
technical support department
for further instructions
52
Internal Error
Master Interrupt 0
Enter to Restart
Possible the main
PCB gone bad
5- Turn off both router and host
computer, wait for 1 minute
and turn both
6- If problem persist, call APD
technical support department
for further instructions
71
53
Internal Error
Master Interrupt 1
Enter to Restart
Possible the main
PCB gone bad
7- Turn off both router and host
computer, wait for 1 minute
and turn both
8- If problem persist, call APD
technical support department
for further instructions
54
Internal Error
Master Interrupt 2
Enter to Restart
Possible the main
PCB gone bad
9- Turn off both router and host
computer, wait for 1 minute
and turn both
10- If problem persist, call
APD technical support
department for further
instructions
55
Internal Error
Master Interrupt 3
Enter to Restart
Possible the main
PCB gone bad
1- Turn off both router and host
computer, wait for 1 minute
and turn both
2- If problem persist, call APD
technical support department
for further instructions
56
Internal Error
Master Interrupt 4
Enter to Restart
Possible the main
PCB gone bad
3- Turn off both router and host
computer, wait for 1 minute
and turn both
4- If problem persist, call APD
technical support department
for further instructions
57
Internal Error
Master Interrupt 5
Enter to Restart
Possible the main
PCB gone bad
5- Turn off both router and host
computer, wait for 1 minute
and turn both
6- If problem persist, call APD
technical support department
for further instructions
72
58
Internal Error
Master Interrupt 6
Enter to Restart
Possible the main
PCB gone bad
7- Turn off both router and host
computer, wait for 1 minute
and turn both
8- If problem persist, call APD
technical support department
for further instructions
59
Internal Error
Master Interrupt 7
Enter to Restart
Possible the main
PCB gone bad
9- Turn off both router and host
computer, wait for 1 minute
and turn both
10- If problem persist, call
APD technical support
department for further
instructions
60
Internal Error
System Timer 0 Int
Enter to Restart
Possible the main
PCB gone bad
1- Turn off both router and host
computer, wait for 1 minute
and turn both
2- If problem persist, call APD
technical support department
for further instructions
61
Internal Error
System Timer 1 Int
Enter to Restart
Possible the main
PCB gone bad
3- Turn off both router and host
computer, wait for 1 minute
and turn both
4- If problem persist, call APD
technical support department
for further instructions
62
Internal Error
System DMA 2 Int
Enter to Restart
Possible the main
PCB gone bad
5- Turn off both router and host
computer, wait for 1 minute
and turn both
6- If problem persist, call APD
technical support department
for further instructions
73
63
Internal Error
System DMA 3 Int
Enter to Restart
Possible the main
PCB gone bad
7- Turn off both router and host
computer, wait for 1 minute
and turn both
8- If problem persist, call APD
technical support department
for further instructions
64
Internal Error
Serial Port 0 RX Int
Enter to Restart
Possible the main
PCB gone bad
9- Turn off both router and host
computer, wait for 1 minute
and turn both
10- If problem persist, call
APD technical support
department for further
instructions
65
Internal Error
Serial Port 0 TX Int
Enter to Restart
Possible the main
PCB gone bad
1- Turn off both router and host
computer, wait for 1 minute
and turn both
2- If problem persist, call APD
technical support department
for further instructions
66
Internal Error
System Slave 7 Int
Enter to Restart
Possible the main
PCB gone bad
3- Turn off both router and host
computer, wait for 1 minute
and turn both
4- If problem persist, call APD
technical support department
for further instructions
67
Internal Error
Serial Port 1 Error
Enter to Restart
Possible the main
PCB gone bad
5- Turn off both router and host
computer, wait for 1 minute
and turn both
6- If problem persist, call APD
technical support department
for further instructions
74
68
Internal Error
Possible the main
System Unknown Error PCB gone bad
Enter to Restart
7- Turn off both router and host
computer, wait for 1 minute
and turn both
8- If problem persist, call APD
technical support department
for further instructions
69
Internal Error
System State Error
Enter to Restart
9- Turn off both router and host
computer, wait for 1 minute
and turn both
10- If problem persist, call
APD technical support
department for further
instructions
Possible the main
PCB gone bad
Appendix D
Routing Bits Feed Chart
Units = Inches
Feed Rate = Inche/second
Based on 20,000 RPM spindle speed and ¼” depth of cut
Bit Description: shank diameter X cutting diameter X cutting length
APD
P/N
Bit Description
Soft
Wood
Hard
Wood
Particle Plywoo
Board
d
MDF
Foam Plastic
Aluminum
PDR1001
B
Spiral Up Cut, 2 Flute,
1/8 X 1/16 X 3/16
0.80
0.80
0.80
0.80
0.80
4.00
1.00
0.20
PDR1002
B
Spiral Up Cut, 2 Flute,
1/8 X 1/8 X ½
2.50
1.75
2.50
2.50
2.30
5.50
1.50
0.40
PDR1003
B
Spiral Up Cut, 2 Flute,
1/4 X 3/16 X 5/8
2.75
2.50
2.75
2.50
3.00
6.00
2
0.50
PDR1004
B
Spiral Up Cut, 2 Flute,
1/4 X 1/4 X 3/4
3.00
2.75
5.00
5.00
3.25
6.50
2.5
0.65
75
PDR1005
B
Spiral Up Cut, 2 Flute,
1/8 X 1/8 X 1/4
2.50
2.00
2.50
2.50
2.00
7.00
1.50
0.40
PDR1006
B
Spiral Up Cut, 2 Flute,
1/4 X 3/16 X 3/8
2.50
2.50
3.50
3.50
3.00
7.00
2.20
0.50
PDR1007
B
Spiral Up Cut, 2 Flute,
1/4 X 1/4 X 3/8
3.30
2.90
5.0
5.0
3.30
7.00
3.00
0.90
PDR1008
B
Spiral Up Cut, 2 Flute,
1/4 X 3/16 X 1 1/8
2.90
2.00
2.50
2.50
3.00
6.70
2.50
0.50
PDR1009
B
Spiral Up Cut, 2 Flute,
1/4 X 1/4 X 1 ½
2.50
1.75
4.50
4.50
5.00
7.50
2.50
0.75
PDR1010
B
Spiral Up Cut, 2 Flute,
1/4 X 1/4 X 2 1/4
2.50
1.50
4.00
4.00
4.50
7.00
2.00
0.50
Feed rate, spindle RPM guide
Spindle Speed
Incorrect spindle speed is a common error in CNC machining. Generally, each material and cut
has an ideal tool profile and cutting speed. Larger diameter tools require slower speeds.
Smaller diameter tools require higher speeds. Spindle speed and feed rate for a given cut must
be balanced for best work quality, tool life and spindle life. Spindle speed is controlled by a
Variable Frequency Drive connected to the electric spindle. All APD electric spindles are 3phase induction type which allow infinitely variable speed from 0 to maximum rpm by
correctly programming your VFD to the spindle.
Chip Load
Material
Chip Load (Inches)
Minimum
Average
0.006
0.015
0.008
0.020
0.010
0.025
0.008
0.015
0.010
0.020
Solid Wood -dense
Solid Wood - soft
Particle Board
MDF
Rigid Plastic
76
Flexible Plastic
Aluminum
0.015
0.002
0.025
0.009
Formula = (feed speed in/min ÷ RPM) / ( Number of cutting edges) = chip load
Feed Rate
Feed rate must be balanced with spindle speed. Changing one influences the other. Feed rates
that are too slow decrease the tool life due to overheating and may leave burn marks on the
work-piece. Heat builds in the tool when not enough material is removed to cool the cut
interface. Often, determining the best feed rate can only come from trial and error. A general
Feed Rate Chart for different materials is shown as a starting point. Your cutting tool suppliers
can advise cutting data for various materials and cutter types.
Appendix E
Main Board Replacement for Trinity
Series
1- Step 1: Unplug main power cable
2- Step 2: Unplug Serial Cable (the one connected to computer) and unplug the RJ45 coiled cable (the one
connected to remote control) (Figure 1).
77
Serial Cable
RJ45 Coiled
Cable
Power
Cable
Controller
Box
Figure 1
78
3- Step 3: Using Phillip screw driver to unscrew all mounting screws(Figure 2).
Figure 2
Remove front cover. If the front cover has the digital read out keypad, uplug the ribbon cable from
the frequency inverter. (Figure 3).
79
Figure 3
4- Step 4:Remove Main Board
a. Unplug all Connectors(Figure 4).
1. X_Motor connector
2. Y_Motor connector
3. Z_Motor connector
4. E-Stop connector
5. Main board power connector
6. Fan connector
7. Encoder/Limit Switch (DB37) connector
8. Relay Signal connector
9. Z-Surface connector
10. Frequency Inverter connector if applicable
b. Using Phillip screw driver to unscrew all mounting screws.
5- Step 5: Install new Main Board and repeat Step 4 to Step 2.
80
Y_Motor
Connector
Z_Motor
Connector
X_Motor
Connector
Frequency Inverter
Connector
E_Stop
Connector
Fan Connector
Z_Surface
Connector
Screw 6-32
Main Board
Mainboard Power
Connector
Relay Signal
Connector
Encoder
Figure 4
Main Board Replacement for
Magnum Series
81
1- Step 1: Turn off main power
2- Step 2: Turn off all Circuit Breaker : POWER; SPINDLE; VACUUM; DUST
3- Step 3: Unplug Serial Cable (the one connected to computer) and unplug the RJ45 coiled cable
(the one connected to remote control) (Figure 1).
Controller Box
RJ45 Coil Cable
Serial Cable
Figure 1
4- Step 4: Remove Main Board
a. Unplug all Connectors(Figure 2).
1. X_Motor connector
2. Y_Motor connector
3. Z_Motor connector
4. E-Stop connector
5. Main board power connector
6. Fan connector
7. Encoder/Limit Switch (DB37) connector
8. Relay Signal connector
9. Z-Surface connector
10. Frequency Inverter connector if applicable
b. Using Phillip screw driver to unscrew all mounting screws.
5- Step 5: Install new Main Board and repeat Step 3 to Step 2.
82
Z_Motor
Connector
Y_Motor
Connector
X_Motor
Connector
Frequency Inverter
Connector
E_Stop
Connector
Fan Connector
Z_Surface
Connector
Screw 6-32
Main Board
Mainboard Power
Connector
Relay Signal
Connector
Encoder
Connector
Figure 2
83