1
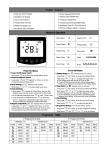
USER'S MANUAL
electronic
temperature
controller
solutions
for everyone
Congratulations on purchasing
the Elektra ELR-10 electronic
temperature controller. Thank
you for the trust you have
placed in our company. The
controller will be of use for
you and your family for many
years to come. It will significantly reduce your energy
expenses and will improve the
thermal comfort.
ELEKTRA ELR-10
Please read this manual carefully before
operating the controller.
2
TABLE OF CONTENTS
1.
2.
3.
4.
5.
6.
7.
8.
9.
Introduction
Classification
Installing the floor sensor
Installing the controller with built-in air sensor
Installing the controller with built-in air
or floor sensor and additional sensor
limiting floor temperature to +40°C
Technical specifications
Installing the controller
Switching on and adjustments
Warranty conditions
3
1. INTRODUCTION
The Elektra ELR-10 electronic temperature controller
manages the supply of power to heating elements so
that the required (optimal) temperature can be
acquired,
thus
ensuring
reduced
electricity
consumption. Elektra ELR-10 uses the three following
temperature measurement methods:
- air sensor,
- floor sensor,
- air and floor sensors.
Depending on the temperature measurement method
used, prepare the controller in advance by opening or
closing relevant connectors. The controller preparation
4
procedure is presented in the table below:
Tab. 1. Preparing the controller depending on the
temperature measurement method.
Temperature
measurement
method
1
air sensor
Preparing
the controller
connectors C-D open;
the controller uses the
built-in air temperature
sensor.
5
Temperature
measurement
method
6
Preparing
the controller
2
floor
sensor
remove the C-D jumper;
connect the floor sensor to
the A-D connector
3
air sensor
with floor
temperature
limited
to +40°C
connectors C-D closed;
the controller uses
the built-in air temperature
sensor. Connect the floor
sensor to connectors A-B
NOTE: Electricity supply shall be cut-off while
installing the controller!
1
A BCD
2
A BCD
3
A BCD
jumper
jumper
floor
sensor
floor
sensor
Fig.1 Preparing the controller depending on the
temperature measurement method used.
7
2. CLASSIFICATION
The product complies with the 2nd protection class
(reinforced insulation) and has to be wired in the
following manner:
connector N:
neutral wire
connector L:
phase wire
connectors N, L1: heating device (max. 3600W)
N N L1 L
Fig 2. Connection diagram
for the heating device and
controller power supply.
Heating device max. 3600 W
230V 50Hz
Heating device
max. 3600 W
8
230V/50Hz
3. INSTALLING
THE FLOOR SENSOR
The floor sensor must be installed in a blinded
installation pipe (e.g. a flexible PVC pipe) which
should be positioned in the upper layer of the floor
concrete, between heating cables. The sensor wire can
be extended up to 50m of length.
9
Plaster box
Temperature controller
Temperature sensor wire
Protection pipe (e.g. PVC)
Temperature
sensor
(even
distance
between
heating
cables)
Plug
Floor
Heating mat
Tile cement
Sand concrete
mortar
Insulation
Ceiling
Fig. 3. Installing the floor temperature sensor with
Elektra heating mats used.
10
4. INSTALLING THE CONTROLLER
WITH BUILT-IN AIR SENSOR
The controller should be positioned in a draught-free
location and cannot be exposed to direct sunlight or
another source of heat which could disturb proper
temperature measurements. The sensor should be
installed between 120 and160 cm above floor level.
11
120-160 cm
Fig. 4. Proper location for the controller.
12
5. INSTALLING THE CONTROLLER
WITH BUILT-IN AIR
OR FLOOR SENSOR AND ADDITIONAL
SENSOR LIMITING FLOOR
TEMPERATURE TO +40°C
In this configuration the floor sensor prevents the mats
and heating cables from overheating. Prepare the
controller according to the guidelines (see tab. 1;
fig. 4), and install the floor sensor (see fig. 3).
13
6. TECHNICAL SPECIFICATIONS
14
power supply voltage
power load at cos Ø=1
temperature adjustment range
sensitivity
230 VAC/50 Hz
max 3600 W (res.)
from +5°C to +35°C
£ 0,5°C (floor 1°C)
safety class
dimensions (h/w/l)
installation mode
control light
switch
IP 20
80 x 82 x 36 mm
on the plaster surface
LED
1 pole
7. INSTALLING THE CONTROLLER
Once the appropriate temperature measurement
method has been chosen and the proper controller
installation spot has been determined, the installation
process can begin. Follow the steps described below:
slacken the fixing screw
and remove the controller cover,
put all wires through the opening
in the bottom of the cover,
using two screws positioned vertically tighten
the controller to the installation box,
observing the diagram connect all wires
to the connection strip,
install the front cover and tighten the fixing screw.
15
8. SWITCHING THE CONTROLLER ON
AND ITS ADJUSTMENTS
The controller is switched on and off with the help of
the switch located on the left-hand side of its cover
(position "0" off, position "1" on) -(1). The desired
temperature is set with the knob -(2). The red LED
comes on when the heating circuit is powered -(3).
16
1
2
1
0
0
5C
0
0
3
Fig. 5. Electronic temperature controller Elektra ELR-10
17
Our offer
comprises:
Floor heating, heating mats and cables,
temperature controllers, self-adjusting heating cables,
frost protection systems, heating cables
dryers and heaters, thermal-storage heaters,
water heaters, heat-recovery ventilation systems,
central vacuum cleaning systems.
ESG (EN) 29 06/03 (1) a
for industrial applications, unit heaters, bathroom