Transcript
INSTRUCTIONS MANUAL
XA601
Controls
Remote control
The remote control uses 3 LR44
batteries ( included ). If the red
light on the remote control does
not come on when either the
‘ARM’ or ‘DISARM’ buttons are
pressed, then the batteries
need to be replaced. Diagram B
shows where the batteries are
located. Simply remove and
replace with fresh batteries.
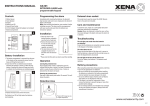
1. Motion Sensor
2. Siren
3. Infrared Remote Receiver
4. Battery Low Indicator LED
5. External Power Socket
6. Mounting Plate
7. Battery Compartment
CEILING MOUNTED INTRUDER
ALARM with remote control
Programming the alarm
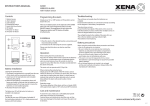
8. Arm Button
9. LED
10. Disarm Button
11. Battery Compartment
12. Programmable Switch
13. Battery Cover
Battery
installation
Alarm unit
1. The battery compartment is accessed from the rear
of the alarm unit by removing the screws from the
side and lifting the mounting plate C.
2. Insert four (4) ‘C’ size batteries ( not included )
following the polarity C.
3. When the last battery is inserted the alarm will
beep very loudly to indicate that the batteries are
installed properly.
4. Replace the back cover and fix with screw.
1. To set or change the security code of the remote
control, simply set the programmable switches 12 to
the desired code and remove the batteries from the
alarm unit. Then wait at least 30 seconds for the alarm
to reset.
2. Immediately after inserting the batteries point the
Remote Control at the alarm and press the ‘ARM’
button, the Alarm LED will flash once to indicate that it
has learnt the code of the remote control.
NOTE: The alarm must be re-programmed with the
remote control each time the batteries are removed or
replaced.
Installation
1. Place the alarm in the desired
location, preferably on the
ceiling in the center of the
area needing to be protected.
2. Remove the mounting plate
and fix it to the ceiling using
the screws and rawplugs
supplied D.
3. The alarm body can then
secured using the screws at
the sides.
Operation
Troubleshooting
When exiting from the protected area
Point the remote control at the alarm unit and press the
‘ARM’ button. A confirmation tone will indicate that the
alarm is armed and you have 30 seconds in which to
vacate the area. After this time, if motion is detected then
the alarm will sound.
The unit does not sound when the batteries are
installed
Ensure that the batteries are connected correctly
according to the diagram in the battery compartment.
When entering the protected area
Simply point the remote control at the alarm unit and
press the ‘DISARM’ button. Please note that on entering
the area, there is a short beep to indicate that motion has
been detected and a 4 second delay before the alarm will
sound to allow it to be disarmed.
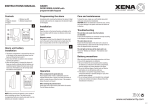
Detection range
The motion detector of the alarm unit has a detection
range of 360º.
Detection Area
The alarm does not arm
Ensure that the back plate of the alarm unit is secure
to hold the batteries in place and that the red light
comes on when the ‘ARM’ or DISARM’ buttons are
pressed.
The red light on the base of the alarm unit is on
This is the “Battery Low Indicator’. The batteries need
replacing.
The red light on the remote control does not light
up when the buttons are pressed
Remove the battery cover of the remote control and
replace the batteries as per the instructions listed
above.
Battery precautions
60º
*Tested at 25˚C (range may vary
at higher temperature).
Care and maintenance
To clean the case, simply use a soft slightly damp cloth
with water and wipe dry immediately.
CAUTION: Never use chemicals to clean the case, as they
may cause damage to the plastic and cause the alarm not
to function.
When using this product follow these precautions at all times.
• Use only the appropriate size batteries
• Be sure to follow the correct polarity when
installing the batteries as indicated in the battery
compartment. Incorrect polarity may cause damage
to the alarm.
• Do not mix different types of battery such as
Alkaline and Carbon-zinc or old batteries with new.
• If the alarm is not used for long periods of time,
remove the batteries to prevent damage or injury
from possible battery leakage.
• Do not recharge batteries not intended to be
recharged as they can overheat and rupture.
(Always follow the manufacturer’s directions.)
The Battery Low LED will Light when the batteries
need replacing.
www.xenasecurity.com
061107