1
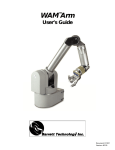
WAM Arm
TM
User’s Guide
®
Barrett Technology Inc.
Document: D1001
Version: AA.00
Table of Contents
Getting Started ........................................................................................................................................................ 2
Unpacking .............................................................................................................................................................................................2
System Setup.........................................................................................................................................................................................3
System Startup ......................................................................................................................................................................................7
Hardware................................................................................................................................................................. 8
WAM Arm ............................................................................................................................................................................................8
WAM Wrist: .......................................................................................................................................................................................11
PC & Control Software......................................................................................................................................... 12
Appendix A – Dimensions & Joint Ranges .......................................................................................................... 13
Appendix B - Kinematics...................................................................................................................................... 17
Motor-Joint Transformations ..............................................................................................................................................................17
WAM Kinematics ...............................................................................................................................................................................19
WAM and Gimbals Kinematics ..........................................................................................................................................................22
Appendix C - CAN Communication Spec............................................................................................................ 23
Appendix D - BarrettHand.................................................................................................................................... 26
Barrett Technology, Inc.
625 Mount Auburn Street
Cambridge, MA 02138
617-252-9000
[email protected]
© 2005 Barrett Technology®, Inc.
WAM™Arm – User’s Guide
Document: D1001, Version: AA.00
Page 1 of 26
Getting Started
This section is meant to help you develop a familiarity with the WAM™Arm system. Use this
Getting Started section as a supplement to the Quick Start Guide, included separately.
Unpacking
Figure 1 below illustrates everything that is shipped with a standard 4 degree-of-freedom WAM™Arm. Please
ensure that all components are accounted for. In addition to the components shipped, you will need a computer
monitor and keyboard to connect to the supplied PC.
WAM™Arm
Modular outer link
PC, Ethernet cord
and line cord
Network cable
DC power cord
Converter for AC mode
with line cord
Pendants
Maintenance Kit
User’s Manual,
software
Figure 1: WAM Arm components
© 2005 Barrett Technology®, Inc.
WAM™Arm – User’s Guide
Document: D1001, Version: AA.00
Page 2 of 26
Details
WAM Arm – Four degree-of-freedom robotic arm
WAM PC – Shuttle PC including CAN card, used
to communicate with the WAM
AC mode converter – For optional AC power, this
connects the WAM to 50-60 Hz, 100-240V outlet
power
Control Pendant – Used to activate and deactivate
the WAM, show the safety status of the system,
and has an emergency stop button
Display Pendant – Like the Control pendant, this
displays the safety status of the components and
has an emergency stop button, but cannot activate
the WAM Arm
WAM DC power cable (blue) – Connects the
WAM to DC power, or to the AC converter for
AC power
Network cable (purple) – for use in communication
between the PC and the WAM
Ethernet cable (for PC) – Standard Ethernet cable,
for use in connecting PC to a local network
Computer AC line cord (6’) – Standard AC line
cord, shorter and thinner of the two line cords
AC converter line cord (10’) – Standard heavygauge AC line cord, longer and thicker of the two
line cords
Maintenance kit – kit containing replacement
parts, maintenance tools, clamps for recabling,
and mounting hardware for the WAM
Documentation – Includes this manual, a cable
maintenance manual, a quick-start guide, and a 1year warranty
WAM Wrist (not shown, optional) – replaces the
Outer Link on the WAM, adds three additional
powered degrees-of-freedom
Passive Gimbals (not shown, optional) – replaces
the Outer Link on the WAM, adds three additional
un-powered degrees-of-freedom
System Setup
This section describes in detail the steps required to interconnect the components of the WAM system, power
up the system, and perform some routine system checks. Unless explicitly noted, all setup instructions
referencing the optional WAM Wrist can be ignored if the user is setting up only the 4-DOF WAM.
Power Source
The standard WAM system requires an input voltage of 18-90VDC. The Wattage requirements for both 4-DOF
and 7-DOF WAMs are summarized in Table 1. For AC operation, a converter for AC mode is supplied. The
converter requires 50-60 Hz single-phase 100-120 VAC @ 7A or 200-240 VAC @ 3.5A for proper operation
Table 1 - Power Requirements
4-DOF
7-DOF
Q: 18W
Typ: 28W
Peak: 600W
Q: 27W
Typ: 45W
Peak: 800W
(Q: Quiescent = powered up, no torques applied; Typ: Typical operation
with 2kg payload)
© 2005 Barrett Technology®, Inc.
WAM™Arm – User’s Guide
Document: D1001, Version: AA.00
Page 3 of 26
Mounting Requirements
The mounting-surface for the WAM should be designed to handle the large reaction forces generated at the base
of the arm during high-acceleration operation. The WAM can be fastened to the prepared mounting-surface via
the four bolt holes in the base plate. Use four M10
or 3/8” screws. The holes are located on the base of
the WAM according to Figure 2 and Figure 3.
Figure 3 – Screw-hole locations
Figure 2 – Mounting-Hole Locations
General Safety
Proper precautions should be taken when selecting the location and setup of your WAM system. DO NOT set
up the system such that any part of the robot’s workspace (resembling a sphere with a ~1m radius, Figure 4,
below) reaches into a pedestrian pathway in the lab space. The WAM is an unusually quiet mechanism thereby
providing very little intrinsic warning of its enabled state (i.e. little or no servo or transmission noise). Shown
below is a model of the WAM + tool workspace.
Figure 4 - WAM Workspace
© 2005 Barrett Technology®, Inc.
WAM™Arm – User’s Guide
Document: D1001, Version: AA.00
Page 4 of 26
Electrical Connections
There are three types of electrical cables shipped with the WAM in addition to the standard AC lines cords and
Ethernet cable.
DC Power cable (blue)
To: WAM
2.1 meters
To: Power
Plug this into a DC voltage source or into the AC Mode Converter.
Network cable (purple)
To: WAM
6 meters
To: PC
Plug the female end into the CAN card socket on the lower right side (viewed from back of computer). Plug the
male end into the WAM socket labeled “CAN”.
Two Pendant cables
To: WAM
6 meters
Of these two cables, connect the pendant box with three colored buttons and a red E-Stop to the socket on the
WAM marked “Pendant – Control”. Connect the other pendant box (with only a red E-Stop) to the socket on the
WAM marked “Pendant – Display”.
© 2005 Barrett Technology®, Inc.
WAM™Arm – User’s Guide
Document: D1001, Version: AA.00
Page 5 of 26
Installing the PC
Physical Installation:
Install the PC shipped with the WAM as you would any other. You
will need to add a monitor and keyboard while performing initial
setup of the PC. Afterwards, you may use the PC for development
or remove the monitor and use remote terminal software (such as
ssh) to operate the PC remotely.
Software installation:
The PC comes with the WAM software loaded. You will need to
edit /etc/network/interfaces to set an IP address that is compatible
with your network. We do not recommend using DHCP, as we
have found that periodic address renegotiation interferes with the
realtime operation of the WAM.
The Barrett Technology software library uses syslogd to log all
error messages to a file. It is highly recommended to make sure
that syslogd is running. Error messages may be found in the
/var/log/syslog text file.
Figure 5 - Shuttle PC
Connecting the WAM Wrist (optional)
Figure 7 shows that the outer link can be removed to accommodate the WAM Wrist (if the 7-DOF WAM is
purchased). To avoid damaging the WAM electronics, please make sure the WAM is powered off before
detaching or attaching any outer link. The WAM Wrist is connected after removing the outer link by aligning
the metal shells of the integrated D-sub connectors at its base with the mating connector’s shells on the end of
the WAM’s “elbow” and threading the quick-connect ring onto the wrist base. No special wrenches, fasteners,
or tools are required. This ring should only be hand-tightened. It is normal for there to be a small number of
threads left when fully tightened. This single operation also makes all electrical connections to the WAM
Wrist. Figure 6 shows the electrical connector at the end of the WAM.
Figure 6 – Wrist Connector
Figure 7 - Separating the Outer Link
© 2005 Barrett Technology®, Inc.
WAM™Arm – User’s Guide
Document: D1001, Version: AA.00
Page 6 of 26
Final Setup
Once all components are connected, your system should look as shown in Figure 8. Although the WAM is
intrinsically safer than other robotic systems, you may wish to integrate standard safety measures such as mats,
gates, light curtains, etc. into the lab space surrounding the WAM.
Blue DC Power cord from
WAM to power source (or
AC converter, as shown)
Purple Network cable
from computer to WAM
Black line cords from
AC converter and
from PC to power
Two pendants
to WAM
Figure 8: Typical system setup
System Startup
You are now ready to start controlling the motors in the robot. Before C code is written, the functionality of the
WAM should be verified. Refer to the QuickStart sheet for instructions on how to Use the btdiag application
located in /root/btclient/src/btdiag/ to confirm the WAM is properly set up and to demonstrate some of the basic
functionality of the software library.
© 2005 Barrett Technology®, Inc.
WAM™Arm – User’s Guide
Document: D1001, Version: AA.00
Page 7 of 26
Hardware
WAM Arm
Overview
The WAM Arm is a 4-degree-of-freedom (4-DOF) manipulator with human-like kinematics. With its aluminum
frame and advanced cable-drive systems, including a patented cabled differential, the WAM is lightweight with
no backlash, extremely low friction, and stiff transmissions. All of these characteristics contribute to its highbandwidth performance. The WAM Arm is the ideal platform for implementing Whole Arm Manipulation
(WAM), advanced force control techniques, and high precision trajectory control.
Various areas of the robot are user-accessible via the easy removal of a few protective covers. The motor and
the drive cables for the base motor are accessed by releasing the four draw latches on the Base Cover and
sliding the cover toward the front of the robot. Access to the mechanical cables for joints 2, 3, and 4 is achieved
by pulling off the plastic covers from the robot “shoulder”.
A quick-connect mechanism is located at the output of the “elbow” on the WAM Arm allowing the user to
make all electrical and mechanical connections with the optional 3-DOF WAM Wrist in a single step (see
Figure 6). This interface can also be made to accommodate a wide range of other powered or unpowered
components for attachment to the WAM Arm.
Safety System: Pendants
The WAM Arm system comes standard with two safety pendants, a control pendant and
a display pendant. Both pendants show the present safety status of the WAM Arm, with
status lights for the velocity, torque, voltage, and heartbeats of the robot. There is also a
7-segment LED single-character display which shows additional information related to
any existing errors. Each pendant has a large mushroom-type emergency stop button,
which can be reset (popped up) by rotating the button face clockwise. The control
pendant has three additional buttons: Shift, Idle, and Activate.
The WAM Arm has three safety states: E-STOP, IDLE, and ACTIVATED:
E-STOP means there is no motor bus voltage, in fact the motor bus power and ground
lines are tied together, resulting in a “resistive braking” effect on the joints of the WAM
Arm. The motor controllers are off line and do not keep track of their motor positions in
this state. E-STOP is achieved by pressing the E-STOP button on either pendant.
IDLE means there is voltage applied to the motor bus and the motor controllers are on
Figureleads
9 – Pendants
line and keeping track of their motor positions, but they are commanded to tie their motor phase
together
(also resulting in a braking effect), and they will ignore any command torque sent to them. To put the WAM
Arm into the IDLE state (which will also reset any existing faults), press and hold the Shift button on the
control pendant, then press the Reset/Idle button (yellow) and release both buttons. The yellow Idle button will
light up, indicating that the WAM Arm is now in the IDLE state. Make sure both E-STOP buttons are reset
(popped up) before attempting to change modes.
© 2005 Barrett Technology®, Inc.
WAM™Arm – User’s Guide
Document: D1001, Version: AA.00
Page 8 of 26
ACTIVATED means the motor controllers are actively applying any commanded torque they receive from the
control PC. To put the WAM into the ACTIVATED state, press and hold the Shift button on the control
pendant, then press the Activate button (green) and release both buttons. This state may only be reached when
all of the status lights are showing OK (green). All warnings or faults must be cleared before activating the
WAM. The green Activate button will light up, indicating that the WAM Arm is now in the ACTIVATED state.
Before the WAM Arm’s joint positions are initialized by the PC control software, the velocity status lights
indicate the state of the 4-DOF’s angular joint speed. By default, there is a yellow LED warning when any joint
exceeds 0.5 radians/sec and a red LED fault when any joint exceeds 2 radians/sec. The joint number responsible
for the warning/fault is indicated by the single-character display on each pendant. After the WAM Arm’s joint
positions are initialized, the safety system begins calculating and monitoring the 4-DOF elbow and endpoint
velocities in Cartesian space instead of monitoring individual joint velocities. By default, there is a warning
when either the elbow (single-character “E”) or arm endpoint (single-character “A”) exceeds 0.5 m/s and a fault
when either one exceeds 2 m/s. These defaults are modifiable in software.
The torque status lights indicate the state of the torque commands being received by the WAM Arm from the
PC control software. If the PC sends non-zero torques while the WAM is in the IDLE state (the yellow
Reset/Idle button is lit), the safety system will display a torque warning- prohibiting the WAM Arm from being
activated. If the WAM Arm is in the ACTIVATED state (the green Activate button is lit) and the PC sends
torques which exceed the default torque warning or fault levels, the torque warning or fault light will be lit- and
the offending motor number will be shown in the single-character display.
The voltage status lights indicate the state of the WAM Arm’s motor bus voltage. When the system is first
powered up, the bus is off (there is no motor power), and the safety system registers a voltage fault. This fault is
cleared by pressing Shift-Idle on the control pendant. Placing the WAM Arm into the IDLE state applies a DC
voltage (18-90V, depending on input voltage) on the motor bus and clears the fault. If the voltage approaches
the limits, the voltage warning light is lit. If the voltage exceeds the limits, the voltage fault light is lit.
The heartbeat status lights indicate the state of the communication between the PC and each motor controller in
the WAM Arm. If the WAM is in the IDLE state and no control loop is active between the PC and robot, the
pendants will display a heartbeat warning. If the WAM is in the ACTIVATED state and any controller or the
PC fails to issue any communication for at least 16ms, a heartbeat fault is registered.
REQUEST
ERROR
The “Other” status lights presently only indicate whether an E-STOP has occurred. If this is the case, the fault
light will be lit and the single-character display will show “E”.
Velocity exceeds VL1
Velocity exceeds VL2
Torque exceeds TL1
Torque exceeds TL2
Heartbeat missing
Voltage lower than VOLTL1
Voltage lower than VOLTL2
Voltage higher than VOLTH1
Voltage higher than VOLTH2
E-Stop pressed
NOTE: Warnings are cleared
E-STOP
RESET / IDLE
ACTIVATE
© 2005 Barrett Technology®, Inc.
Error occurs in state
E-STOP
IDLE
ACTIVE
No action
Warn
Warn
No action
Fault, E-STOP
Fault, IDLE, Wait 1/4s
Warn for non-zero
Warn for non-zero
Warn
Fault
Fault
Fault, IDLE
Warn
Warn
Fault, E-STOP
No action
Warn
Warn
Fault
Fault
Fault, IDLE
No action
Warn, Bleed voltage
Warn, Bleed voltage
No action
Fault, E-STOP
Fault, E-STOP
Fault, E-STOP
Fault, E-STOP
Fault, E-STOP
automatically, critical faults are cleared through a RESET
E-STOP
Request occurs in state
IDLE
ACTIVE
E-STOP
E-STOP
E-STOP
Clear faults, power up
bus, enumerate, IDLE
Clear faults
IDLE
No Action
If no warnings or faults,
ACTIVE
No Action
WAM™Arm – User’s Guide
Document: D1001, Version: AA.00
Page 9 of 26
AC Converter
Figure 10 - AC Power Converter
Covers
There may be occasions to remove one or more of the covers for maintenance or upgrades. Typical reasons
include for cover removal include: cable replacement or tensioning, firmware upgrades, and access to baseplate
mounting holes.
The base cover is removed by opening all four latches. If necessary, the hinged back door may be swung down
by removing the single M6 flat head screw in the upper left of the back door. To reinstall the base cover, first
make sure the hinged back door is in place and the screw is secure. Wrap the cover in place, swing the lower
two latch hooks away from the backplate, and place the upper two latch hooks in the grooves on each side of the
backplate. Hold the upper latches, one in each hand, and align the cover such that there is an equal gap between
the cover edges and the edge of the hinged door. With equal pressure, slowly close the two upper latches. They
should snap into place. Repeat with the upper two latches.
The plastic side covers or shoulder covers snap into place. To remove, wrap hands around the sides about
halfway down and lightly pull the sides apart. Pull the cover out and up to remove. To reinstall, pull the sides
out slightly and feed the sides through the gaps formed by the Joint 2 stop covers and the large vertical
aluminum plates.
To access the motor controller for Joint 1, the silver-colored disc on top of the upper base plate must be
removed. Use a flat-head screwdriver with a sharp tip and gently pry the cover off. To reinstall, ensure that all
electrical wires are away from the sides of the hole in the upper plate, align the silver-colored disc, and snap
into place.
© 2005 Barrett Technology®, Inc.
WAM™Arm – User’s Guide
Document: D1001, Version: AA.00
Page 10 of 26
WAM Wrist:
The servomotors for axes 4 & 5 (this discussion assumes the wrist is connected to the 4-DOF WAM) are
located at the base of the wrist to minimize their inertial effects on the host robot arm. The final roll joint in the
WAM Wrist, motor axis 6, is the only geared axis. Since cable circuits generally have a size versus torque
relationship that limits the minimum characteristic size of a transmission, gears were an appealing trade-off (in
this axis only) for the significant decrease in distance between the grasp-center of an attached end-effector and
the wrist-center.
The 1st and 2nd stage transmission cables for motor axes 4 & 5 are accessed by sliding the cover clamp off the
Transmission Cover and pulling the cover around the wrist. To access the final stage cables, the user is required
to remove 4 socket cap screws from each black nylon guard at the top of the wrist and then to pull off each
guard. Since the final cable stages for motor axes 4 & 5 require infrequent maintenance, removal of these
guards will rarely be necessary.
The threaded base of the WAM Wrist is fully compatible with the mechanical and electrical quick-connect
features on the WAM Arm.
Nylon guards
Removable transmission cover
Thread for
quick-connect to
WAM Arm
Figure 11 – WAM Wrist Components
© 2005 Barrett Technology®, Inc.
WAM™Arm – User’s Guide
Document: D1001, Version: AA.00
Page 11 of 26
PC & Control Software
PC Specs
Mainboard: Shuttle SK43G
Processor Type: AMD Duron Applebred x86 @ ~1.8GHz
Memory: 128MB (16MB of that is used as a video framebuffer).
Hard drive: 80GB, but only a fraction of that is partitioned and formatted
Optical: Standard CD-ROM
Kernel: Linux 2.6 and the Real-Time Application Interface (RTAI) patches
Distro: Zenwalk (slackware-based)
PCI: One slot, used by CAN network card
AGP: One slot, free
The Barrett Technology robot control client software (btclient) is divided into multiple parts:
examples/ - example source code for robot control software development
doc/ - source code documentation, Doxygen (HTML/RTF)
lib/ - location of library binaries
include/ - common include directory for libraries
src/btsystem/ - software library with general robot routines
src/btwam/ - software library with WAM-specific routines
src/btutil/ - utility for enumerating the motor controllers, restoring defaults, updating firmware
src/btdiag/ - a full-featured robot diagnostic application (and example program)
If you edit the btsystem or btwam libraries, the procedure to recompile is: make lib; make install
In the examples, the PC closes a 500Hz position/torque control loop with the WAM over the CAN bus. The PC
asks the motor controllers for their present positions, converts the received encoder counts into joint angles,
calculates the desired joint torques, converts these into motor torque commands, then sends out the calculated
torques to the motors. All force or position control is calculated on the PC and converted to motor torques as a
final step- the WAM itself is entirely motor torque controlled. For a source code example of this process, see
the WAMControlThread() function in src/btwam/btwam.c.
Please note that (as of Nov 2005) the CAN card driver used under LinuxRTAI is not realtime. If interrupts
occur while the CAN driver is processing data, the WAM may jitter slightly. Common sources of interrupts are
DHCP renegotiation, and XWindows GUI processing. To minimize the chance of jitter, please use only static IP
addressing, and run the PC in terminal mode- or log in via SSH.
When the WAM is first powered on, the motor controllers use hall effect sensors and six-step commutation for
control until an initial hall transition occurs. Then they switch to using the incremental encoders for smoother
commutation until the encoder index pulse is observed (once per motor revolution). Then they begin a factorycalibrated commutation loop for precise torque control.
© 2005 Barrett Technology®, Inc.
WAM™Arm – User’s Guide
Document: D1001, Version: AA.00
Page 12 of 26
Appendix A – Dimensions & Joint Ranges
© 2005 Barrett Technology®, Inc.
WAM™Arm – User’s Guide
Document: D1001, Version: AA.00
Page 13 of 26
Figure 12 – WAM Arm Joint 1 Frame and Limits
Figure 13 – WAM Arm Joint 2 Frame and Limits
© 2005 Barrett Technology®, Inc.
WAM™Arm – User’s Guide
Document: D1001, Version: AA.00
Page 14 of 26
Figure 14 – WAM Arm Joint 3 Frame and Limits
Figure 15 - WAM Arm Joint 4 Frame and Limits
© 2005 Barrett Technology®, Inc.
WAM™Arm – User’s Guide
Document: D1001, Version: AA.00
Page 15 of 26
Figure 16 - WAM Arm Joint 5 Frame and Limits
Figure 17 – WAM Arm Joint 6 Frame and Limits
Figure 18 – WAM Arm Joint 7 Frame and Limits
© 2005 Barrett Technology®, Inc.
WAM™Arm – User’s Guide
Document: D1001, Version: AA.00
Page 16 of 26
Appendix B - Kinematics
Motor-Joint Transformations
Motor-to-Joint Position Transformations
The following transformations show the change in joint positions as a function of motor positions. The input
transmission ratios and the differential transmission ratios are calculated from known pulley, pinion, and cable
diameters.
Table 2 - Arm Transmission Ratios
⎛ −1
⎜
⎜ N1
⎛ Jθ 1 ⎞ ⎜
⎟
⎜
0
⎜ Jθ 2 ⎟ ⎜
⎜ Jθ ⎟ = ⎜
⎜ 3⎟ ⎜ 0
⎜ Jθ ⎟ ⎜
⎝ 4⎠ ⎜
⎜⎜ 0
⎝
0
0
1
2N 2
− n3
2N 2
−1
2N 2
− n3
2N 2
0
0
Parameter
N1
N2
N3
Value
42.0
28.25
28.25
n3
1.68
N4
N5
18.0
10.27
N6
10.27
N7
14.93
n6
1
⎞
0 ⎟
⎟
⎟⎛ Mθ 1 ⎞⎟
0 ⎟⎜
⎜ Mθ 2 ⎟
⎟⎜
⎟
0 ⎟⎜ Mθ 3 ⎟
⎟⎜ Mθ ⎟
4⎠
⎝
1 ⎟
⎟
N 4 ⎟⎠
Equation 1 - WAM Motor-to-Joint position
transformations
⎛ 1
⎜
J
θ
⎛ 5 ⎞ ⎜ 2N 5
⎟ ⎜ − n6
⎜
⎜ Jθ 6 ⎟ = ⎜
⎜ Jθ ⎟ ⎜ 2 N 5
⎝ 7⎠ ⎜
⎜ 0
⎝
1
2N 5
n6
2N 5
0
⎞
0 ⎟
⎟⎛ Mθ 5 ⎞
⎟
⎟⎜
0 ⎟⎜ Mθ 6 ⎟
⎟
⎟⎜
− 1 ⎟⎝ Mθ 7 ⎠
N 7 ⎟⎠
Equation 2 - Wrist Motor-to-Joint position
transformations
The motor position can also be derived from joint space by taking the inverse of the multiplying matrix. For
convenience they are as follows:
© 2005 Barrett Technology®, Inc.
WAM™Arm – User’s Guide
Document: D1001, Version: AA.00
Page 17 of 26
0
⎛ − N1
⎛ Mθ1 ⎞ ⎜
⎜
⎟ ⎜ 0
N2
⎜ Mθ 2 ⎟ ⎜
⎜ Mθ ⎟ = ⎜
3
− N2
0
⎜
⎟
⎜ Mθ ⎟ ⎜⎜
⎝
4⎠
⎜ 0
0
⎝
0
− N2
n3
− N2
n3
0
0 ⎞
⎟⎛ Jθ1 ⎞
⎟
0 ⎟⎜
⎟⎜ Jθ 2 ⎟
⎟
⎟⎜
0 ⎟⎜ Jθ 3 ⎟
⎟⎟⎜⎝ Jθ 4 ⎟⎠
N4 ⎠
Equation 3: Arm Joint-to-Motor position
transformations
⎛
⎜ N5
⎜
M
θ
⎛
5⎞
⎜
⎟ ⎜
⎜ Mθ 6 ⎟ = ⎜ N 5
⎜ Mθ ⎟ ⎜
7⎠
⎝
⎜ 0
⎜
⎝
− N5
n6
N5
n6
0
⎞
0 ⎟
⎟⎛ Jθ 5 ⎞
⎟
⎟⎜
0 ⎟⎜ Jθ 6 ⎟
⎟
⎟⎜
− N 7 ⎟⎝ Jθ 7 ⎠
⎟
⎠
Equation 4: Wrist Joint-to-Motor position
transformation
Motor-to-Joint Torque Transformations
Similar to the position transformations the following equations determine the joint torque from the motor
torque:
⎛ Jτ 1 ⎞ ⎛⎜ − N1
⎜
⎟
0
⎜ Jτ 2 ⎟ ⎜
=
⎜
⎜ Jτ ⎟
0
⎜ 3⎟ ⎜
⎜ Jτ ⎟ ⎜
⎝ 4⎠ ⎝ 0
0
N2
− N2
n3
0
0
− N2
− N2
n3
0
⎞⎛ Mτ ⎞
1
⎟⎜
⎟
⎟⎜ Mτ 2 ⎟
⎟
0 ⎟⎜ Mτ 3 ⎟
⎜
⎟
⎟⎜ Mτ ⎟
4⎠
N 4 ⎠⎝
0
0
Equation 5: Arm Motor-to-Joint torque
transformation
⎛ Jτ 5 ⎞ ⎛⎜ N 5
⎜
⎟
− N5
⎜ Jτ 6 ⎟ = ⎜
⎜ Jτ ⎟ ⎜⎜ n6
⎝ 7⎠ ⎝ 0
N5
N5
n6
0
0 ⎞⎛ Mτ ⎞
5
⎟⎜
⎟
0 ⎟⎜ Mτ 6 ⎟
⎟⎜
⎟
− N 7 ⎟⎠⎝ Mτ 7 ⎠
Equation 6: Wrist Motor-to-Joint transformations
The following equations determine motor torque from the joint torque:
⎛ −1
⎜
⎜ N1
⎛ Mτ 1 ⎞ ⎜
⎟
⎜
0
⎜ Mτ 2 ⎟ ⎜
⎜ Mτ ⎟ = ⎜
3
⎟ ⎜ 0
⎜
⎜ Mτ ⎟ ⎜
4⎠
⎝
⎜
⎜ 0
⎝
0
0
1
2N2
−1
2N2
− n3
2N2
− n3
2N2
0
0
⎞
0 ⎟
⎟
⎟⎛ Jτ 1 ⎞⎟
0 ⎟⎜
⎜ Jτ 2 ⎟
⎟⎜
⎟
0 ⎟⎜ Jτ 3 ⎟
⎟⎜ Jτ ⎟
⎝ 4⎠
1 ⎟
⎟
N4 ⎠
⎛ 1
⎜
⎛ Mτ 5 ⎞ ⎜ 2 N 5
⎜
⎟ ⎜ 1
⎜ Mτ 6 ⎟ = ⎜
⎜ Mτ ⎟ ⎜ 2 N 5
⎝ 7⎠ ⎜
⎜ 0
⎝
− n6
2 N5
n6
2 N5
0
⎞
0 ⎟
⎟⎛ Jτ 5 ⎞
⎟
⎟⎜
0 ⎟⎜ Jτ 6 ⎟
⎟
⎟⎜
− 1 ⎟⎝ Jτ 7 ⎠
N 7 ⎟⎠
Equation 8 - Wrist Joint-to-Motor torque
transformations
Equation 7: Arm Joint-to-Motor torque
transformations
© 2005 Barrett Technology®, Inc.
WAM™Arm – User’s Guide
Document: D1001, Version: AA.00
Page 18 of 26
WAM Kinematics
Denavit-Hartenberg Frames for the WAM
Appendix A defines a standard set of coordinate frames to use while working with the WAM. A good
introduction the coordinate frames, transformations and kinematics is beyond the scope of this document. There
are several good introductory robotics books available. We recommend Spong,M.;Vidyasagar, M. Robot
Dynamics and Control ; 1989 John Wiley & Sons. We use the Denavit-Hartenberg (D-H) method to establish
the coordinate frames; particularly the variant used in Spong.
Figure 19 - Denavit-Hartenberg Frames – 7-DOF WAM
Figure 19 shows the entire 7-DOF WAM system in the zero position. A positive joint motion is based on the
right hand rule for each axis.
Equation 9 below gives the transform between two adjacent D-H coordinate frames. The D-H parameters that
were derived from Figure 19 are located in Table 3 below. Note that c and s stand for cos and sin respectively.
© 2005 Barrett Technology®, Inc.
WAM™Arm – User’s Guide
Document: D1001, Version: AA.00
Page 19 of 26
⎛ cθ i
⎜
⎜ sθ
i −1
Τi = ⎜ i
0
⎜
⎜ 0
⎝
- sθ i cα i
cθ i cα i
sθ i sα i
- cθ i sα i
sα i
0
cα i
0
a 1cθ i ⎞
⎟
a 1sθ i ⎟
di ⎟
⎟
1 ⎟⎠
Equation 9 - D-H Generalize transform matrix
Table 3 - WAM Link Parameters with units of meters and radians
i
ai
αi
di
θi
1
0
-π/2
0
θ1
2
0
π/2
0
θ2
3
0.045
-π/2
0.55
θ3
4 -0.045
π/2
0
θ4
5
0
-π/2
0.3
θ5
6
0
π/2
0
θ6
7
0
0
0.061 θ7
For example, to generate the transform from coordinate Frame 2 to coordinate Frame 1 (i.e. the position and
orientation of Frame 2 described in terms of Frame 1 which is also a rotation about joint 2), use the parameters
in the second row of Table 3 above as follows:
cos(θ 2 )
- sin(θ 2 )
⎛
⎜
⎜ sin(θ 2 )cos(-π / 2) cos(θ 2 )cos(-π / 2)
1
Τ2 = ⎜
sin(θ 2 )sin (-π / 2) cos(θ 2 )sin (-π / 2)
⎜
⎜
0
0
⎝
⎛ cos(θ 2 ) - sin(θ 2 )
⎜
0
0
⎜
=⎜
- sin(θ 2 ) - cos(θ 2 )
⎜
⎜
0
0
⎝
⎞
⎟
- sin (-π / 2) - sin (-π / 2)(0) ⎟
cos(-π / 2) cos(-π / 2)(0) ⎟
⎟
⎟
0
1
⎠
0 0⎞
⎟
1 0⎟
0 0⎟
⎟
0 1 ⎟⎠
0
0
Equation 10 - D-H Matrix Example
Each of the joints has a mechanical stop that limits the motion. Refer to Table 4 below for a complete listing of
the joint limits for each axis.
Table 4 – Joint Limits
Joint
Positive Joint
Limit (radians)
Negative Joint Limit (radians)
1
2
3
4
5
6
7
2.62
2.01
2.97
3.14
4.79
1.57
2.35
-2.62
-2.01
-2.97
-0.87
-1.27
-1.57
-2.35
© 2005 Barrett Technology®, Inc.
WAM™Arm – User’s Guide
Document: D1001, Version: AA.00
Page 20 of 26
Forward Kinematics for the 4-DOF WAM
The forward kinematics of the 4-DOF WAM system is used to determine the end tip location and orientation.
These transformations are generated using the parameters in Table 3 on page 20 and the matrix in Equation 9 on
page 20.
4
ΤTool
⎛ux
⎜
⎜u
=⎜ y
u
⎜ z
⎜0
⎝
vx
wx
vy
vz
0
wy
wz
0
px ⎞
⎟
py ⎟
pz ⎟
⎟
1 ⎟⎠
Equation 11: Tool frame matrix
You define the 4 ΤTool frame for your specific end affecter. The forward kinematics are determined for any
frame on the robot by mulitplying all of the transforms up to and including the final frame. To determine the
tool end tip location and orientation use the following equation:
0
ΤTool = 0 Τ11 Τ2 2 Τ3 3 Τ4 4 ΤTool
Equation 12: Tool end tip position and orientation equation for the 4-DOF WAM
Forward Kinematics for the 7-DOF WAM
As with the previous example, you define the 7 ΤTool frame for your specific end affecter. The forward
kinematics are determined for any frame on the robot by mulitplying all of the transforms up to and including
the final frame. To determine the end tip location and orientation use the following equation:
0
ΤTool = 0 Τ1 1 Τ2 2 Τ3 3 Τ4 4 Τ5 5 Τ6 6 Τ7 7 ΤTool
Equation 13: Tool end tip position and orientation equation for the 7-DOF WAM
© 2005 Barrett Technology®, Inc.
WAM™Arm – User’s Guide
Document: D1001, Version: AA.00
Page 21 of 26
WAM and Gimbals Kinematics
Denavit-Hartenberg Frames for the WAM Gimbals
Figure 20 - Denavit-Hartenberg Frames – Gimbals
Figure 20 shows the WAM Gimbals in the zero position. A positive joint motion is based on the right hand rule
for each axis. The D-H parameters that were derived from Figure 20 are located in Table 5 below.
Table 5 – 4-DOF WAM + Gimbals DH Parameters
i
ai
αi
di
θi
1
0
-π/2
0
θ1
2
0
π/2
0
θ2
0.55
θ3
3 0.045 -π/2
© 2005 Barrett Technology®, Inc.
4
0.4
-π/2
0
θ4
5
0
π/2
0
θ5-π/2
6
0
-π/2 0.1547 θ6-π/2
7
0
0
0
θ7
WAM™Arm – User’s Guide
Document: D1001, Version: AA.00
Page 22 of 26
Appendix C - CAN Communication Spec
1Mbaud CANbus
8 time quanta per bit
75% sampling point
Sync jump width = 1 time quanta (TQ)
11-bit MsgID (standard CAN)
Proprietary protocol, not DeviceNet or CANopen
Recommended reading: Controller Area Network by Konrad Etschberger
MsgID spec:
[GFFFFFTTTTT] (11 bits, binary)
G: Group, 0 = Directed message, 1 = Group broadcast
F: From ID, Host = 00000, Motor N = N
T: To ID or group
Examples MsgIDs:
00000000011 => Directed message from host to motor 3 (3 = 00011, binary)
10001100100 => Group broadcast from motor 3 to group 4
Motor IDs and Groups:
Each motor in the robot has a unique communication ID
Each motor listens and processes messages bound for its ID
There are 32 possible groups (0..31, 00000..11111)
Each motor may be assigned to be a part of any 3 groups
Each motor also listens and processes messages bound for any of those 3 groups
Motors 1-4 listen to groups 0, 1, and 4 by default
Motors 3-7 listen to groups 0, 2, and 5 by default
Host listens to groups 3 and 6 by default
0 = All actuators
1 = Lower arm torques (motors 1-4)
2 = Upper arm torques (motors 5-7)
3 = Position feedback
4 = Lower arm property
5 = Upper arm property
6 = Property feedback
CAN frame data payload:
CAN specifies a maximum of 8 bytes/frame
[APPPPPPP] [00000000] [LLLLLLLL] [mmmmmmmm] [MMMMMMMM] [HHHHHHHH]
A: Action, 0 = Get property, 1 = Set property
P: Property (128 possible values, 0..127, 0000000..1111111)
0: Second byte (almost) always set to zero, see exceptions below
L: Low byte of data value
m: mid-low byte of data value
M: Mid-high byte of data value
H: High byte of data value
If sending a single 16-bit integer value, only LLLLLLLL and mmmmmmmm are used
The CAN frame data length code (DLC) is set to the number of bytes being transmitted
Properties:
Each motor has several properties, see property list
Most of these properties may be read and written via "Get property" and "Set property" messages
© 2005 Barrett Technology®, Inc.
WAM™Arm – User’s Guide
Document: D1001, Version: AA.00
Page 23 of 26
Exceptions:
1) Actual Position property is a 22-bit, 2's complement number
It is packed into a 3-byte frame payload [00MMMMMM] [mmmmmmmm] [LLLLLLLL]
It is always sent to Group 3
2) Command torque is a set of 4 14-bit, 2's complement numbers
It is sent TO motors in 8 bytes (max):
0
1
2
3
4
5
6
7
APPPPPPP AAAAAAaa aaaaaaBB BBBBbbbb bbbbCCCC CCcccccc ccDDDDDD dddddddd
A = Action (0:Get 1:Set)
P = Property
A = Upper 6 bits of first value
a = Lower 8 bits of first value
B = Upper 6 bits of second value
b = Lower 8 bits of second value
Each motor has a property (PIDX) which tells it which torque to use from the set of 4
Full example:
3 motors with IDs 5, 6, and 7
Host with ID of zero
Host sends:
MsgID [10000000000] -> Group 0
Data [10000101] [00000000] [00000010] [0000000] -> Set property 5 (STAT) to 2 (STATUS_READY)
The motors start up with STAT = 0 (STATUS_RESET)
Setting STAT to READY gets the motors ready to receive additional data
Motors will only respond to STAT and VERS commands while in RESET (for safety)
Host sends:
MsgID [10000000000] -> Group 0
Data [10001000] [00000000] [00000010] [00000000] -> Set property 8 (MODE) to 2 (MODE_TORQUE)
The motors default to MODE = 0 (MODE_IDLE)
Setting MODE to MODE_TORQUE tells the motors to apply any torque sent to them
When MODE = MODE_IDLE, motors will ignore any torque commands sent and apply braking
Host sends:
MsgID [10000000000] -> Group 0
Data [00011010] -> Get property 26 (AP)
Motors send:
MsgID [10010100011] -> From ID 5 to Group 3
Data [00000000] [00000000] [0000010] -> My position is 2 encoder cts
MsgID [10011000011] -> From ID 6 to Group 3
Data [00000000] [00000000] [0000111] -> My position is 7 encoder cts
MsgID [10011100011] -> From ID 7 to Group 3
Data [00111111] [11111111] [11111110] -> My position is -2 encoder cts
Host uses these positions to calculate a torque, then sends:
MsgID [10000000010] -> Group 2
Data [10001010] [AAAAAAaa] [aaaaaaBB] [BBBBbbbb] [bbbbCCCC] [CCcccccc] [cc000000] [00000000]
-> Set torques to new values AAAAAAaaaaaaaa, etc
© 2005 Barrett Technology®, Inc.
WAM™Arm – User’s Guide
Document: D1001, Version: AA.00
Page 24 of 26
Parameter
ACCEL
ADDR
ANA0
ANA1
AP
AP2
B
BAUD
CT
CT2
CTS
CTS2
D
DEF
DIG0
DIG1
DP
DP2
DS
DUMP
E
EN
ERROR
GAIN1
GAIN2
GAIN3
GRPA
GRPB
GRPC
HSG
ID
IFAULT
IKCOR
IKI
IKP
ILOGIC
IMOTOR
IOFF
IOFST
IPNM
IVEL
JIDX
KD
KI
KP
LOAD
LOCK
LOG
LOG1
LOG2
LOG3
LOG4
LSG
MAXPW R
MCV
MD
MDS
MECH
MECH2
MODE
MOFST
MOV
MPE
MT
MV
OD
OFFSET1
OFFSET2
OFFSET3
OT
OT2
OTEMP
P
PEN
PIDX
PTEMP
PW R
RATIO
ROLE
SAFE
SAMPLE
SAVE
SG
SN
STAT
TEMP
TENSION
TENSO
TENST
THERM
TL1
TL2
TORQ
TSTOP
UNITS
UPSECS
V
VALUE
VBUS
VERS
VL1
VL2
VLOGIC
VNOM
VOLTH1
VOLTH2
VOLTL1
VOLTL2
ZERO
Description
Acceleration
Address to peek/poke
Analog input
Analog input
Actual position
Actual position
Brake
Baud rate
Close torque
Close torque
Counts per revolution
Counts per revolution
Duty cycle
Default command for CAN
Digital I/O
Digital I/O
Default position
Default position
Default step
Log dump mode: 0=Manual, 1=Auto
Endpoint target
Enable bitfield
Error
Gimbals gain 1 (Q4.12)
Gimbals gain 2 (Q4.12)
Gimbals gain 3 (Q4.12)
Comm group A
Comm group B
Comm group C
High strain gage
CANbus ID
Ignore fault count
Current sense correction factor
Current sense integral gain
Current sense proportional gain
Logic current
Motor current
Initialization offset
Current offset
CommandedCurrent / Nm (ratio)
Initialization velocity
Joint index
Differential gain
Integral gain
Proportional gain
Load command for CAN
Lock
Log status: 0=Off, 1=Once, 2=Continuous
Log variable address 1
Log variable address 2
Log variable address 3
Log variable address 4
Low strain gage
Max allowed power
Max close velocity
Max duty
Max duty sum
Mechanical angle
Mechanical angle
Mode of operation
Mechanical offset
Max open velocity
Max position error
Max torque
Max velocity
Odometer
Gimbals offset 1 (Q4.12)
Gimbals offset 2 (Q4.12)
Gimbals offset 3 (Q4.12)
Open torque
Open torque
Over temperature alarm
Position command
Pendant debug
Puck index for torque
Peak temperature recorded
Observed power
Output angle multiplier
Role
Safety debug
Sample time
Save command for CAN
Strain gage
Serial number
Status
Temperature
Tensioner output
Tension offset
Tension total
Thermistor
Torque warning level
Torque critical level
Torque command
Time until considered stopped
Units of input angle
Up seconds in operation
Velocity command
Value to poke/peeked
Bus voltage
Version
Velocity warning level (Q4.12)
Velocity critical level (Q4.12)
Logic voltage
Vnominal
Voltage high warning level
Voltage high critical level
Voltage low warning level
Voltage low critical level
Zeroed status
© 2005 Barrett Technology®, Inc.
Default
32
NONE
NONE
NONE
NONE
NONE
0
9600
NONE
NONE
4096
NONE
0
NONE
0
0
0
NONE
10
0
0
0x00EE
NONE
0x1000
0x1000
0x1000
NONE
NONE
NONE
255
NONE
0
NONE
NONE
NONE
NONE
NONE
NONE
NONE
NONE
20
NONE
0
0
4096
NONE
0
0
0
0
0
0
0
0
300
990
1650
NONE
NONE
0
NONE
300
5
750
300
NONE
0
0
0
NONE
NONE
72
NONE
NONE
NONE
NONE
NONE
NONE
NONE
NONE
1000
NONE
NONE
NONE
NONE
NONE
0
NONE
NONE
NONE
4731
5204
0
1000
DEG
NONE
0
NONE
NONE
NONE
0x0800
0x1000
NONE
48
54
57
36
30
0
R/W
R/W
R/W
R/R/R/W
-/R/W
R/W
R/W
-/R/W
R/W
R/W
-/W
R/W
R/W
R/W
-/R/W
R/W
R/W
R/W
R/R/W
R/W
R/W
R/W
R/W
R/W
R/W
R/W
R/W
R/W
R/W
R/W
R/R/R/W
R/W
R/W
R/W
R/W
R/W
R/W
R/W
-/W
-/W
R/W
R/W
R/W
R/W
R/W
R/W
R/W
R/W
R/W
R/W
R/-/R/W
R/W
R/W
R/W
R/W
R/W
R/W
R/W
R/W
R/W
R/W
-/R/W
R/W
R/W
R/W
R/W
R/R/W
R/W
R/W
R/W
-/W
R/R/W
R/W
R/R/W
R/W
R/W
R/R/W
R/W
R/W
R/W
R/W
R/W
R/W
R/W
R/R/W
R/W
R/W
R/R/W
R/W
R/W
R/W
R/W
R/W
WAM™Arm – User’s Guide
Document: D1001, Version: AA.00
Saved
Yes
No
No
No
Yes
No
No
No
Yes
No
Yes
No
No
No
No
No
Yes
No
Yes
No
No
Yes
No
Yes
Yes
Yes
Yes
Yes
Yes
Yes
Yes
No
Yes
Yes
Yes
No
No
Yes
Yes
Yes
Yes
Yes
Yes
Yes
Yes
No
No
No
No
No
No
No
Yes
No
Yes
No
Yes
No
No
No
Yes
Yes
Yes
Yes
Yes
Yes
Yes
Yes
Yes
Yes
No
No
No
No
Yes
Yes
No
Yes
Yes
No
Yes
No
No
Yes
No
No
No
Yes
Yes
No
No
No
No
Yes
Yes
Yes
No
No
No
No
No
No
No
No
No
No
No
No
No
Key
0
1
2
3
4
5
6
7
8
9
10
11
12
13
14
15
16
17
18
19
20
21
22
23
24
25
26
27
28
29
30
31
32
33
34
35
36
37
38
39
40
41
42
43
44
45
46
47
48
49
50
51
52
53
54
55
56
57
58
59
60
61
62
63
64
65
66
67
68
69
70
71
72
73
74
75
76
77
78
79
80
81
82
83
84
85
86
87
88
89
90
91
92
93
94
95
96
97
98
99
100
101
102
103
104
105
106
107
108
Parameter
VERS
ROLE
SN
ID
ERROR
STAT
ADDR
VALUE
MODE
D
TORQ
P
V
E
B
MD
MT
MV
MCV
MOV
MOFST
IOFST
PTEMP
UPSECS
OD
MDS
AP
AP2
MECH
MECH2
CTS
CTS2
DP
DP2
OT
OT2
CT
CT2
BAUD
TEMP
OTEMP
LOCK
DIG0
DIG1
ANA0
ANA1
THERM
VBUS
IMOTOR
VLOGIC
ILOGIC
GRPA
GRPB
GRPC
PIDX
JIDX
ZERO
IPNM
SG
HSG
LSG
DS
IVEL
IOFF
MPE
EN
TSTOP
KP
KD
KI
SAMPLE
ACCEL
TENSION
UNITS
RATIO
LOG
DUMP
LOG1
LOG2
LOG3
LOG4
GAIN1
GAIN2
GAIN3
OFFSET1
OFFSET2
OFFSET3
PEN
SAFE
SAVE
LOAD
DEF
VL1
VL2
TL1
TL2
VOLTL1
VOLTL2
VOLTH1
VOLTH2
MAXPW R
PW R
IFAULT
IKP
IKI
IKCOR
VNOM
TENST
TENSO
Page 25 of 26
Appendix D - BarrettHand
The BarrettHand can be readily integrated into the WAM system. There are two methods by which Hand
control can be integrated with Arm control. The first method allows the user to control the Hand from a separate
window while the Arm is running. The second method is integration of hand commands with Arm commands
within the same program. Both methods require the following setup procedure.
Setup:
• Turn power to entire system OFF
• Plug in hand connector that extends from the modular outer link or Wrist into base of Hand
• Align holes on Hand Base Ring with holes on connector strain relief plate
• Align pins on Tool Plate with holes on Hand Base Ring
• Attach Hand to modular outer link or Wrist by turning Tool Plate Attachment Ring clockwise
• The pins must engage completely for Hand to be securely attached to Wrist
• Plug ‘End Effector’ extension cable from base of Arm to rear of Hand Power Supply Box
• Plug power cord into Power Supply Box
• Attach a standard serial cable from COM port to rear of Hand Power Supply Box
The hand is attached and ready for operation. Read the BarrettHand User Manual before proceeding with Hand
operation.
Before operating both Hand and Arm together the Hand should be tested on the end of the Arm. Place Arm in a
configuration that allows the Hand to move through its full range of motion. Follow the procedures in the
BarrettHand User Manual for testing Hand operation. If Hand operation is successful, the system is ready for
use.
To operate the Hand separately from the Arm:
• Turn Hand Power Supply Box ON
• Open a serial terminal application (such as TeraTerm, HyperTerminal, minicom) and connect to the
COM port of the BarrettHand at 9600 baud, No parity, 8 bits, One stop bit, No flow control
• Put Arm in a configuration that allows for full joint motion of the Hand
• Initialize Hand (Type “HI”). The Hand is now ready for operation while executing Arm programs
• Execute desired Arm program
• While Arm program is running, switch to the serial terminal window
• Type Hand commands (see the Grasper Control Language section of the BarrettHand manual)
To operate Hand and Arm from the same program:
Integration of the Hand and the Arm in the same program requires opening and initializing the serial port from
within your WAM control application, then sending the desired Grasper Control Language (GCL) commands
from the application. See the directory of example code for details about how this is implemented.
© 2005 Barrett Technology®, Inc.
WAM™Arm – User’s Guide
Document: D1001, Version: AA.00
Page 26 of 26