Transcript
welcome to
Dear Proud Owner of a New ARCHOS player:
The instruction sheets that follow were designed to walk you through many of the most useful functions of
your ARCHOS player. These sheets are by no means definitive. They are intended as a quick reference
supplement to the full PDF user manual found on your ARCHOS device.
As you get to know your ARCHOS player, you will probably find your favorite ways to navigate screens
and perform the functions we describe here. It’s all part of the fun of getting to know the power and
versatility of your ARCHOS player.
Enjoy, and thanks for buying ARCHOS.
Press and hold the power button for two seconds to
start your ARCHOS. If nothing happens, you may
need to charge it with the included USB cable.
2
Next to the power button, you will find a TV/LCD
button. When the ARCHOS is connected to an
external monitor or TV (via the optional DVR station,
battery dock or mini-dock), simply press this button.
3
Navigation options vary by model. The 405 model
uses only the buttons on the right side of the device.
The 605 wifi has both buttons and touch-screen
capabilities.
10 You can adjust the volume on your ARCHOS with
the ‘Volume’ button (
) or by pressing the
up/down ‘Arrow’ buttons when you’re watching a movie
or listening to a song.
4
Look at the buttons on the right side of your ARCHOS
player. Each button performs two different functions
– one if you push the left side of the button and
another if you push the right.
11 To access your personal settings from the Home
Screen, press ‘Menu’ and select the Settings option.
5
Notice that the top button has an ‘X’ on the left side
and ‘OK’ on the right. That’s an important feature and
an ARCHOS distinction.
6
Pressing the ‘X’ side of the button will either stop what
you are playing (the song, the movie, etc.) or take you
back to the previous screen.
7
8
The ‘OK’ side of the button functions like ‘Enter’ on
your computer keyboard and is the button you press
when you want to start something – play a file, select
an icon, and so on. Note: Think of these buttons as
“start” (‘OK’) and “stop” (‘X’).
Next, press the ‘Menu’ side of the rocker button.
Some choices will appear on your screen. The choices
will be different depending on which screen you are
in. You can move from option to option with the ‘Arrow’
buttons. When you have highlighted your choice,
press ‘OK.’
9
12 Settings you can modify include options for Sound,
Display, Appearance, Language and Region, TV
control, Clock, Power, Firmware and Plug-ins and
System preferences.
13 When you connect your ARCHOS device to your
computer with the supplied USB cable (to transfer
music, movies, podcasts or photos), you will see a
screen that says “Enable USB?” Press ‘OK.’ Select
“Charge Only” if you don’t need to transfer media
and you just want to charge your ARCHOS device.
When connected in USB mode to transfer files,
the device’s battery will charge, but less quickly
(depending on the size of files being transferred,
how many files, etc.).
).
s
1
The left side of the button has the ‘Tab’ symbol (
Pushing ‘Tab’ allows you to switch back and forth
from one screen to another. For example, when
you are creating a playlist and have two folders
active, you can ‘Tab’ from one side to the other
) icon on the top
to make changes. The (
left of the screen will appear when there are tabs
to switch between. You will also see each tab on
the top of the screen.
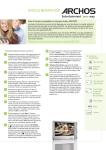
Here are a few basics to get you started.
BUTTON
FUNCTIONS
‘Stop’
‘Start’
Accelerate
Forward/
‘Up”
‘Left’/
‘Right’
‘Down’’/
Accelerate
Back
‘Tab’
‘Menu’
‘Volume’


