Download Round Module User Manual
Transcript
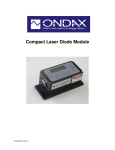
Round Module User Manual
115-80041-001 Rev 5
Round Module User Manual
Contents
1 Safety Precautions ..................................................................................................................................... 3
2 Application and Features ........................................................................................................................... 4
3 Specifications ............................................................................................................................................. 4
4 Operating Procedures ................................................................................................................................ 7
5 Maintenance ............................................................................................................................................... 8
6 Service ....................................................................................................................................................... 8
2
Round Module User Manual
1 Safety Precautions
This instruction manual explains how to use the Round Laser Diode Module.
Before use, please read this manual thoroughly. After reading, keep it together with the product for
reference when necessary. Please retain packaging material in the event the unit is stored or shipped in
the future.
Caution – use of controls or adjustments or performance of procedures other than those specified herein
may result in hazardous radiation exposure. Body of the unit contains labels specifying wavelength and
maximum emitted power.
Recommend following user requirements for Class 3B products according to latest ANSI Z136.1 Standard
for the Safe Use of Lasers. Use protective eyewear when engineering or other procedural and
administrative controls are inadequate to eliminate potential exposure in excess of the MPE.
Avoid un-intended reflections from mirror-like surfaces.
1.1 Explanation of Warning Symbols
The meaning of the symbols used in this manual and attached to the product follows.
Warning messages are intended to prevent accidents to operating personnel such as burns and electrical
shocks.
Some caution messages are intended to prevent damage to the module.
Precaution for handling electrostatic sensitive devices.
Visible and/or invisible Class 3B laser radiation. Avoid direct exposure to
beam. Wear suitable protective eyewear whenever laser is in operation.
Laser output location warning.
Warning
To prevent permanent damage, observe these precautions:
1. Protect against electrostatic discharge.
2. Avoid external damage to the enclosure.
3. Use supplied power supply or power supply meeting
specifications.
4. Do not drop the module or operate it at extreme
temperatures or humidity.
5. Beware of optical feedback from reflective surfaces.
Permanent damage to the laser diode is possible.
3
Round Module User Manual
2 Application and Features
2.1 Applications
This device is a Round Laser Diode Module with integrated laser diode current driver and temperature
control for high precision equipment and instrumentation. It plays a pivotal role in testing or
manufacturing, and can be used in various applications such as Raman Spectroscopy, Flow Cytometry,
Data Storage, metrology, graphic arts, bio-instrumentation, analytical instrumentation and sensing.
2.2 Standard Features
•
Plug & Play Operation
•
ESD Protection
•
Remote Key Switch with Remote Interlock (Optional for OEM customers)
•
Constant Current Driver
•
Temperature Stabilized
3 Specifications
OPTICAL
Power Stability (over 1 hr)
< 0.5%
Laser Noise ( 10 to 1Mhz) RMS
< 0.5%
Laser Class
Class 3B (Maximum power and wavelength
labeled on safety labels of the unit)
Laser Operation
CW
Spatial Mode
TEM00
Beam Divergence (full)
< 1 mrad Typical
Beam Size at Aperture (FWHM)
< 1 mm
Beam Pointing Stability
< ± 10 µrad
Polarization (typical)
> 100:1, vertical or horizontal
Warm-up Time
< 5 min
ELECTRICAL
Operating Voltage
3.3 V DC (5V DC for 405nm Modules)
Operating Current
1.5 A max
MECHANICAL
Laser Dimension
25.4 mm x 76.2 mm
Power Connector
2.1mm Power Jack
Weight
< 1 lb
Operating Temperature
+10ºC to +40°C
Storage Temperature
-40ºC to +80°C
4
Round Module User Manual
Supplied with connector with flying leads for TTL laser On/Off:
Default Open: Laser On
To Turn Laser Off: Connect TTL, white wire, to ground, black wire.
Figure 1: Mechanical Dimensions
Pins
1
2
3
4
5
Definition
GND
TEMP
TTL
Description
No Connection
No Connection
Ground
Temperature Reading (UNSUPPORTED)
TTL Modulation (Laser On/Off)
Note: Connector with flying leads is included.
2.1 x 5.5mm Center Positive Standard Jack for supplying operating voltage and current
GND
VCC
Figure 2 – Electrical Connections
5
Round Module User Manual
Remote Key Switch (Optional Only for OEM customers)
DB9 Connector to module. (Cable is included)
1. Power on/off key switch—Located on the front panel of the Remote Key Switch, this switch
enables users to power the unit on with the turn of a key. The unit is inoperable when key is
removed.
2. Emission indicator—This red LED, located to the upper right of the front panel, lights up
when the unit is on to warn of eminent laser emission.
3. 5-second activation delay—The unit does not apply power to the laser module until five
seconds after a user has turned the key switch to the “on” position.
4. Remote interlock & connector— This feature is located on the rear panel of the Key Switch.
The unit will not operate without the interlock intact. Interlock needs to be shorted for power to
be available for laser diode module.
6
Round Module User Manual
76mmLx45mmWx32mmT
Original Power Supply for Module: Not
connected when keyswitch is used.
~1.5m
135mmLx127mmWx65mmT
102mmLx65mmWx77mmT
~0.2m
~1.5m
~1.8m
Illustration of Module with Keyswitch
4 Operating Procedures
4.1 Standard CW Operation
.User Startup Procedure:
•
Properly mount laser module on a heat sink
•
Connect power connector to power adapter or Remote Key Switch power cable
•
Plug power adapter or Remote Key Switch to wall plug
Remote Key Switch Procedure:
•
Use key to activate and deactivate power to the laser module. A 5 second delay will begin
after key switch is turned to “on” position.
•
Emission warning light will light up
•
Laser system is “off” when key is in vertical position.
•
Interlock must be “shorted” for power to be applied to laser module
Laser Module Startup Process:
. Upon receiving power from either power supply or remote key switch:
•
LED will turn on which signal possible laser emission.
7
Round Module User Manual
•
Laser module will begin to temperature stabilize.
•
Laser diode will not emit light for 20 seconds after power has been applied.
•
Use of TTL line does not affect temperature control
5 Maintenance
5.1 Maintenance and Inspection
Routine maintenance is not required. If the unit appears to be operating incorrectly or with low output
power, check the following:
•
Inspect the enclosure for scratches, dings, dents, or other signs of damage due to handling.
•
Verify that the module enclosure has not been opened and the factory seal is intact.
•
Verify power source connections to the laser module.
•
Ensure that the operating environment is within specifications.
6 Service
6.1 Repair
There are no user-serviceable parts inside and do not attempt to open housing. Warranty would not be
valid if housing has been opened. If the module fails during use, check the items in section 5.1 before
requesting an RMA.
Defective modules that are beyond the warranty period will be repaired at cost, if possible. An RMA must
be requested before sending it to Ondax. When shipping, please use a box at least five times as large as
the module with enough packaging material to prevent any movement of the module within the box.
6.2 For Information or Enquiries
If you need information regarding purchase or repair, or for any other Sales related questions, please
contact the distributor or selling agent from whom the module was purchased.
6.3 Ondax Limited Warranty
TM
Ondax warrants that all SureLock integrated laser modules (RO, FCLM, LM) will be free from defects
in material and workmanship for 12 months from the date of shipment. This limited warranty covers only
those defects that arise as a result of normal use of the product, and does not cover any other problems,
including those that arise as a result of: (i) improper handling, maintenance or modification, (ii) operation
outside the product’s specifications; or (iii) unauthorized modification or misuse.
If Ondax receives, during the applicable warranty period, notice of a defect in any product which is
covered by this warranty, Ondax shall either repair or replace the product, at Ondax's option. Ondax shall
have no obligation to repair, replace or refund until the customer returns the defective product to Ondax.
Any replacement product may be either new or like-new, provided that it has functionality at least equal to
that of the product being replaced. Ondax products may contain remanufactured parts, components, or
materials equivalent to new in performance.
Limitations of Liability
1. TO THE EXTENT ALLOWED BY LOCAL LAW, NEITHER ONDAX NOR ITS THIRD PARTY
SUPPLIERS MAKES ANY OTHER WARRANTY OR CONDITION OF ANY KIND, WHETHER
EXPRESS OR IMPLIED WARRANTIES OR CONDITIONS OF MERCHANTABILITY,
SATISFACTORY QUALITY, AND FITNESS FOR A PARTICULAR PURPOSE.
8
Round Module User Manual
2. TO THE EXTENT ALLOWED BY LOCAL LAW, EXCEPT FOR THE OBLIGATIONS
SPECIFICALLY SET FORTH IN THIS WARRANTY STATEMENT, IN NO EVENT SHALL
ONDAX OR ITS THIRD PARTY SUPPLIERS BE LIABLE FOR DIRECT, INDIRECT, SPECIAL,
INCIDENTAL OR CONSEQUENTIAL DAMAGES, WHETHER BASED ON CONTRACT, TORT,
OR ANY OTHER LEGAL THEORY AND WHETHER ADVISED OF THE POSSIBILITY OF SUCH
DAMAGES.
3. To the extent allowed by local law, the remedies provided in this Limited Warranty Statement
are the customer’s sole and exclusive remedies.
6.4 Contacting Ondax
Ondax, Inc.
850 E. Duarte Rd.
Monrovia, CA 91016
Tel: 626-357-9600
Fax: 626-357-9321
Web: http://www.ondax.com
Email: [email protected]
9


