1
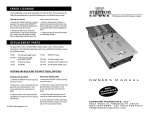
USER MANUAL
FINAL SCRATCH V1.0
PLEASE VISIT
www.final scratch.com/support.asp
FOR THE LATEST SOFTWARE UPDATES ON FINAL SCRATCH.
DUE TO THE NATURE OF THIS PRODUCT, YOU MAY ALSO FIND UPDATED
INFORMATION ONLINE ABOUT THIS PRODUCT THAT WAS NOT
INCLUDED IN THIS MANUAL.
Welcome to Final Scratch™...
The technology that is revolutionizing the world of DJ'ing.
Final Scratch™ is the ideal playback unit for both the current state of the music industry and its future too. Not only
does it give turntables access to the digital domain, but now
producers, both professional and at home, can play their
own music without burning CD’s or making costly acetates. Final Scratch™ finally balances
the ongoing debate of CD’s versus turntable culture. Most interestingly and exciting about
Final Scratch is that it is the perfect technology to allow people to play back music that is now
being offered by the new wave of digital distributors both independent and major. Simply buy
your music from the internet and play it back like you are used to... on a turntable.
Final Scratch is totally true to turntable and DJ culture. It doesn't ask you to throw away any
thing. It just takes everything you have and adds a digital dimension to it.
And we are just scratching the surface...
John Acquaviva
Note: Final Scratch™ is designed to work with electronic music files. It is firmly the position of
Stanton that all music must be acquired through retail channels. Stanton does not in any way
support the practice of acquiring music via unapproved channels. We believe that the core of this
industry is based upon the work of the artist and support artists in every way possible.
©2002, Stanton Magnetics, Inc. All rights reserved. Final Scratch and the Final Scratch logo are trademarks of N2IT Holding,
B.V. Registered in the USA and other countries. Licensed Exclusively to Stanton Magnetics, Inc.
CHAPTER 1
USING FINAL SCRATCH
1.1
BOOTING UP FINAL SCRATCH ........................................................
1
1.2
FINAL SCRATCH APPLICATION .......................................................
1
STARTING FINAL SCRATCH ..................................................
1
TURNTABLES AND SMALL SOUND STRIPES ......................
3
TIME INDICATORS ..................................................................
3
SONG INFO .............................................................................
4
MAIN SOUND STRIPES ..........................................................
4
EXPENDED MAIN SOUND STRIPES .....................................
4
PREFERENCES .......................................................................
4
SEARCHING FOR A SONG .....................................................
5
CHOOSING AND MAPPING A SONG .....................................
5
TURNTABLE ON/OFF AND RE-CALIBRATION ......................
5
RECORD BOXES ....................................................................
5
RECORD BOXING APPLICATION .....................................................
6
ADDING SONGS TO THE DATABASE ....................................
6
REMOVING SONGS FROM THE DATABASE ........................
8
EDITING SONG INFORMATION ............................................
8
MAKING SOUND STRIPES .....................................................
8
ORGANIZING YOUR RECORD BOXES .................................
8
IMPORTING / EXPORTING RECORD BOXES .......................
9
RECORD BOX PREFERENCES .............................................
9
1.3
CHAPTER 2
TECHNICAL SUPPORT
2.1
TROUBLESHOOTING ........................................................................
11
2.2
HOW TO REPORT A PROBLEM ........................................................
12
CHAPTER 3
APPENDIX
3.1
KEYBOARD SHORTCUTS .................................................................
13
3.2
RECORDING YOUR VINYL ................................................................
14
TABLE OF CONTENTS
FINAL SCRATCH USER MANUAL REV 1.0
CHAPTER 1 : USING FINAL SCRATCH
1.1 BOOTING UP FINAL SCRATCH
When starting up the computer, a boot menu will
appear, offering you the following choices:
1. WINDOWS
2. FINAL SCRATCH
Select FINAL SCRATCH, using the arrow keys
and press Enter. The FINAL SCRATCH desktop
will appear, showing a two icons at the top left
corner of the screen. Double-clicking an icon will
start the application. The top icon represents the
FINAL SCRATCH live application. The icon below
it represents the Record Box application (Section
1.3). When you right-click on the desktop, a start
menu will appear. You can choose:
• FINAL SCRATCH
• Record Box
• Update FS
• Maintenance Shell (only to be used for
maintenance and support when prompted
by a Support Technician)
• License information
• Shutdown
To close the start menu, click on the x on the top
right corner of the start menu. If you do not close
it, it will stay open on top of the application
window.
1.2 FINAL SCRATCH APPLICATION
Using FINAL SCRATCH is almost the same as
using your turntables normally. The notable
exception is that you will be using a special
record. The grooves on that record do not represent the music playing on close inspection.
Instead you are provided with a graphical representation of the sound, called a ‘sound stripe’ for
the track `mapped' or assigned to a turntable
using FINAL SCRATCH. You must also place the
mixer to line to hear the music signal. The phono
position is intended to be used for playing normal
PAGE 1
records. If an FS record is played as a regular
record, you will hear a modem-like tone. If a music
record is inadvertently used as an FS record the
result is unpredictable but there will be no
damage in either case.
Note: You will be most likely be using your FS
records more than any other records. Take good
care of them and replace them at the first sign of
trouble that can be directly linked to an FS record.
The FS records should last at least several
months, however, your mileage may vary.
Starting FINAL SCRATCH
There are two ways to open the application. Either
double click on the top icon on the FS desktop, or
right-click anywhere on the desktop to open the
start menu. Choose the FINAL SCRATCH tab.
Every time you open FINAL SCRATCH, each
turntable needs to be calibrated. This takes less
than a second, and is simply done by placing the
needles on the records and pressing start on the
turntables. The status of the turntables is displayed within the top sound stripe field.
The calibration may give the following messages:
<Not Connected>
Means that the FINAL SCRATCH software has
CHAPTER 1 : USING FINAL SCRATCH
not detected the Scratch amp. Make sure the
Scratch amp is properly connected. If either or
both of the turntables indicates <Not Connected>
for several seconds, press Alt-Q to quit the application, unplug the Scratch amp, wait a few seconds, reconnect and then restart the application.
Means your right and left channels are switched
for that turntable. It would be best if you switch the
turntable connections to the scratch amp and
double-click the ON button to re-calibrate.
You may also get:
<Waiting for Calibration>
Means the Scratch amp was detected by the software Play any part of the FS record. When
<calibrating> disappears in less than a second,
the system is ready for use. If <calibrating> persists or flashes, there is an error and the test has
failed. Start over. In most cases, it will only be
necessary to re-calibrate. If the problem persists,
quit the application and restart the computer.
<Phase problem (software fix)>
Which means either your cartridge is miss-wired
or the turntable is. (Fix or get a different turntable
or cartridge.) The last possible error is:
<Turntable Setup OK>
Means calibration was successful and FINAL
SCRATCH is ready.
<Phase problem & L/R swap (software fix)>
Which means you can at least get the left and
right corrected but should fix or replace the
turntable and/or cartridge. If you get any of these
messages, FINAL SCRATCH will work fine but
analogue records may sound wrong, particularly
with the bass and the stereo image. If you must
use the broken deck, beware of the consequences.
There is a special feature that automatically Caution: Please be absolutely certain the sound
detects and corrects mis-connected scratch amps from FINAL SCRATCH is clean and un-distorted,
by verifying it with an earphone. If this is not so,
or mis-wired turntables:
you can re-calibrate by clicking the ON button
associated with the offending turntable and click<L/R swapped (software fix)>
PAGE 2
CHAPTER 1 : USING FINAL SCRATCH
ing it again when it says: OFF. (See the trou- mum playing time of the scratch record, which is
bleshooting section for other possible causes of the maximum song length (currently up to 15 mindistorted sound.)
utes) that can be mapped to a turntable. When a
song is mapped to a turntable, the sound stripe of
Warning: Unplugging the scratch amp while the the entire song will be displayed in this field.
application is running, may cause some computers to freeze. It is best to first quit the application
and then reconnect. However, if the scratch amp Time indicators
is accidentally unplugged, you can try to recon- The first three seconds of the FINAL SCRATCH
Record are silent. The actual music starts at
nect it and the system will continue working.
00:03.00s. At the far right of each small sound
stripe are two time indicators; time elapsed,
Turntables and Small sound stripes
including the silent two seconds at the beginning
The top half of the main FINAL SCRATCH screen and the time remaining to the end of the song.
is divided into 2 sides: Turntable LEFT and This timer may speed up, slow down, stop or run
Turntable RIGHT. Each turntable has a full length backwards, depending on what you do with the
miniature sound stripe that represents the maxi- record. All representations of 'time' (sound stripes
PAGE 3
CHAPTER 1 : USING FINAL SCRATCH
and counter) are based on the record spinning at
its nominal (printed) speed.
RIGHT is highlighted and its extended sound
stripe is shown. Press the Tab key again and you
are back to the default display. Try this a few times
to get used to it.
Song info
Below each small sound stripe is some information about the song, such as artist, title, genre and
BPM, which you will enter and are able to edit
(See 1.3 Record Boxing Application). All information is optional. Only enough information must be
supplied to give each song a unique identity.
Song List
The bottom half of the screen contains the song
list. It shows several columns with information
about the songs. You can use the up and down
arrows, Pg Up and Pg Dn to move through this
list. When you click on a column heading (artist,
title, etc), the column will be sorted alphabetically
according to the header. If you click on the column
heading again, it will be sorted in reverse order.
When you move the mouse in between two column headings, you can change the size of the colMain sound stripes
umn by clicking and dragging. Which columns are
Below each information window is the large sound visible and in which order they are displayed can
stripe. It indicates between the red arrows what is be changed in the Preferences screen. The
currently playing. The sound stripe runs from right widths will be stored and used the next time you
to left (when the record is playing forward) and run FINAL SCRATCH.
allows you to see a few seconds of what has been
played and about 20 seconds of what is going to
be played. This is the equivalent of seeing or Preferences
watching the grove on a traditional record. A grey You can select the Preferences screen by pressbox at the beginning of each song's sound stripe ing Alt-P. At present there is only one category of
indicates you are at the beginning of a track. The preferences, which is
grey area represents three seconds and is the the Database preferences. It contains setdefault silence.
tings that apply to the
song list on the bottom
of the screen. The first
column has the fields
marked which are
shown in the song list.
The second column
has the fields marked
in which will be
Extended main sound stripe
searched for keyOnce a song is mapped (See ‘Choosing and map- words. For example, if
ping a song’ on page 5), press the Tab key once you only want to show
and note Turntable LEFT is highlighted and there Artist, Title and BPM,
is a single extended sound stripe below, which mark only those fields.
gives you more than twice the time to see a visu- The list of fields that
al representation of what is coming. Press the Tab are shown does not
key again to see the same, except Turntable have to be the same
PAGE 4
CHAPTER 1 : USING FINAL SCRATCH
as the list of fields to search on. You can change
the order of the display of the columns by using
the up and down arrows on the right hand side.
info field and to the right is an ON/OFF button,
use your mouse or trackpad to select and toggle
between OFF and ON. Switching a turntable to
OFF allow you to play a normal record without the
possibly unpredictable effects on the FINAL
SCRATCH application. When a turntable is OFF,
the FINAL SCRATCH system does not listen for
any signal. You will get silence at the line outputs
of the Scratch amp for that turntable. Note that the
turntable is re-calibrated each time it is turned to
ON, in other words, double clicking the ON button
forces a recalibration. Turning off a turntable is
especially recommended when playing analog
records with a lot of filtering and/or high frequency sweeps which may cause FINAL SCRATCH to
behave in an odd manner.
Searching for a song
The search field is located just above the song list
window. Just type some text and press Enter to
search for information containing that text. Any
matching text in the database is displayed,
according to the search preferences previously
set. You can search for fields that contain a number of specific words. For example to find all
entries that contain seventies and sex and fun,
type (without spaces) seventies,sex,fun in the
search box. Only the comma is not allowed to be
searched. Spaces require that there are actually
spaces in the field. Searches are not case sensitive and can all be typed in lower case letters. The
song information needs to be entered in advance
using the record boxing tool. Just pressing the
Enter key (without typing anything) will bring up Record boxes
all entries from the main database.
The Record boxes
are located at the
bottom right part of
Choosing and mapping a song
the
FINAL
Use “up” and “down” arrow keys to select the title SCRATCH screen.
you want to map to a turntable. Press Ctrl-F1 to There are 10 record
map a song to the left turntable, or Ctrl-F6 to map boxes, which are are
a song to the right turntable. Note: When holding accessible by pressthe Ctrl key only the F1 or F6 keys work. Holding ing the F1 through
down keys Ctrl-Shift and F1 or F6 unmaps the F10 (function) keys
song. (The separation of keys prevents mistakes.) respectively, or by
If you prefer the mouse or track pad, the map but- clicking
on
the
ton will map the song and the unmap button will desired record box
unmap the song. Likewise, you can use the with
the mouse.
mouse to select the songs or record boxes (Making and titling
(described to the right).
your own record
Turntable ON/OFF and Re-calibration
boxes is covered in
You may switch a turntable off or on. Under each the record boxing
PAGE 5
CHAPTER 1 : USING FINAL SCRATCH
by clicking on the record box buttons on the right
side of the screen or pressing the F1-F10 keys.
You can also search for songs, similar to the
FINAL SCRATCH live application. To do this, click
on the "Search Database" field and type in the
search terms. If you want to narrow the search
results, you can specify multiple keywords, sepaF12, like F11, is a special record box. It contains rated by a comma (without spaces). If the field is
the contents of any audio CD you may have in empty, every song in the database will be disyour CD-ROM drive. You can play from the CD played.
like you play from audio formats in the other
record boxes with some limitations: You will not If you click on the title bar, the songs will be sortsee track names, they are just labeled track01, ed in alphabetical order according to that column.
track02, and so on.. Up to 99 tracks are accessi- You can sort songs from the database (F11), but
ble from a CD in FINAL SCRATCH. It may take a not in a record box, because a record box has a
few seconds for the CD to spin up and be ready fixed order. If you change the width of the
and finally, you will probably only be able to play columns, the settings are saved for the next time
one track from the CD at once. There is no reason you will start record boxing. To change the width,
you cannot play different parts of the same CD move the mouse to the border of two columns in
using both turntables, but be sure you try this in a the title bar. The cursor will change to a double
totally private situation, as most machines, partic- arrow. You can then click and drag to change the
ularly laptops, are not up to this performance. column width.
Note: if you change CD’s, you have to press F12
again.
In the top-right corner of the screen, you will see
a few player controls. If your scratch amp is connected, you can preview your songs through your
sound system. The controls work similar to the
1.3 RECORD BOXING APPLICATION
ones of a CD-player. The slider below the controls
can be used to go to any position in a song. If you
The record boxing application can be started by have selected a song and the scratch amp is condouble clicking the record box icon on the FS nected, you can press the play button to hear the
desktop.
song play.
chapter.) Pressing F11 will display the entire
song database. (This is the same as pressing
Enter with nothing typed in the search box). As
well, when opening the FINAL SCRATCH application, the entire database is displayed in the song
list window.
The record boxing screen consists of several
sections. The bottom of the screen looks similar to
the Final scratch application itself and shows a list
of all the songs that are present in the song
database. On the right hand side are the buttons
to select different record boxes, the whole
database or an audio CD.
The top section of the screen is reserved to edit
the information about a certain song. You can
select a song by clicking on it in the list on the bottom, and the fields show up in the top section. You
can use the arrow keys, Pg Up and Pg Dn to
move through the list. You can select a record box
PAGE 6
Adding Songs to the Database
There are two ways to add songs to the song
database. The first way is to import music from an
Audio CD. From the record boxing application,
insert an audio CD in your CD-ROM drive. Click
the "Audio CD" button on the right or press F12 to
see the contents of the CD. It may take some time
while the CD is spinning up. Just above the list,
you will see a field called "Audio CD Name". In
this field, you can change the name of the CD. If
you enter it in the form: "Artist / Title", the artist
and the title will automatically be filled in for each
CD track. For example: "Plastikman / Orange" will
CHAPTER 1 : USING FINAL SCRATCH
fill in Plastikman as the artist, and Orange as the
album name. You can only do this if you have not
modified the information for an individual song on
the CD.
You can select a CD song and enter the information for it on the top section of the screen. For
details on how to do this, see the section "Editing
Song Information". Be sure to click on apply, prev
or next to make sure the entered information gets
stored.
Now, select the songs that you like to import by
clicking on them (use the control key or shift key
while clicking to select multiple songs). Then, click
on the "Import from CD" button and the songs will
be added to the song database. If you want to
store the songs into a record box as well, you can
drag the selected songs to a record box directly.
PAGE 7
See the section "Organizing Record boxes" for
details on how to do this.
The songs will be imported, converted to MP3 format, and placed in a folder called ‘fs_songs’. The
fs_songs folder is created automatically on the
disk on which Final scratch is installed when you
start FINAL SCRATCH for the first time. Once
songs are placed in the fs_songs folder, you can
move them into a subfolder. You can create subfolders within fs_songs as deep as you like.
Also, sound stripes will be generated for the
songs. You can change quality settings and other
parameter regarding importing in the preferences
screen (see "Preferences").
CHAPTER 1 : USING FINAL SCRATCH
If you already have your
music in a digital format that
is supported by Final
scratch, you can simply
store those files in the
fs_songs folder. Note: In
most cases this will be your
C: drive in Windows. Some
more advanced computer
users might change operating systems or the way their hard drives are setup). For example, if you legally download samples
or create your own music, you can store the audio
files in the fs_songs folder, or a subfolder in there.
song. You need to create the sound stripes in
advance in the record boxing application. To do
this, select the songs for which you want to generate the sound stripes and click the "Make
stripes" button. Songs that are already striped will
be skipped, unless you change this in the
Preferences screen (see the Preferences section). Making the sound stripes can take quite a
while (approximately a tenth of the playing time of
an MP3 file).
Organizing into Record boxes
You can organize your song collection into ‘virtual’ record boxes. You can use up to 10 record
boxes during a performance, but you can store
Removing Songs from the Database
In the main song list (F11), select the song(s) you many more. To select a record box, click on its
would like to remove and click the "Remove from button on the right hand side, or press the correDatabase" button. The songs will be removed sponding function key. For example to select
from the database and any record boxes in which record box 5, press F5. Just above the song list,
it occurred. To undo this, you can select "Revert" you will see a field called "Record box Name".
from the File menu. If you select Save from the file Here, you can change the name of the record box.
menu or save when you exit the program, the Be sure to press Enter after you typed the name,
changes will be applied. In this case, it means otherwise it will not be stored.
that the songs will be deleted from your hard
To add songs to the record box, first select the
drive.
whole database (F11) or another record box that
has songs. There, select a song and drag it onto
Editing Song Information
the record box button. The song is then added to
To change the information for a song, first select the record box. You can also select multiple
the song. In the top section of the screen, all the songs: Hold down the Shift key while selecting
information that you can edit will appear. You can several consecutive songs to select them. Once
click on any of these fields and change the text. To
store the changes, click the "Apply" button. To
restore the old values, click the "Cancel" button.
To move to another song, you can click on a song
in the list. You can also use the arrow keys to
move through the list. Be sure to hit "Apply", otherwise your changes will be lost.
There is however a quicker way to edit a
sequence of songs. When you have edited a
song, you can press "Next" or "Prev" to move to
the next or previous song. This time however, the
changes will be stored automatically.
Making Sound stripes
A sound stripe is a visual representation of a song
that can be used to see the beats and breaks of a
PAGE 8
CHAPTER 1 : USING FINAL SCRATCH
the songs are selected, hold down the Ctrl key
while clicking on the F key corresponding to the
record box in which you want to add the selected
songs.The application will not signal that anything
has happened, but if you press the F key again,
you can access the record box to verify the songs
are in there. If you drag songs from one record
box to another, the song will be copied into the
destination record box. If you hold the shift key
while dragging however, the song will be moved
to the destination record box. If you drag a song
to the song database itself (F11), it will be
removed from the record box. An alternative way
to remove songs from the record box is to select
the songs and click the "Remove from Record
box" button.
You can also change the order of the songs within a record box, for example in the order in which
you plan to play the songs. To do this, select one
or more songs, and drag them onto the song after
which you want to have them. If you want the
songs to be on top of the list, drag the songs to
the title bar of the list.
Importing / Exporting Record boxes
FS is limited to using 10 record boxes simultaneously. You can however save your record boxes
and reuse them later. To do this, activate the
record boxes that you wish to save. From the File
menu, select “Export Record box” or press Alt-X.
A file dialog will pop up where you can enter the
name of a file. (Example names are:march27.rbx,
or techno.rbx) The rbx extension is advised, so
that the file can be recognized as a record box.
Avoid default names (recordbox-01.rbx); they are
used for active record boxes. If you export to one
of these, you may lose everything in that record
box! To later import a record box, select the record
box in which you want to import your record box
file. Then from the File menu select “import record
box” or press Alt-I. A file dialog will pop up, from
which you can select a previously exported record
box. The current name and contents of the record
box will be overwritten.
PAGE 9
Record Box Preferences
You can select the Preferences screen from the
Settings menu, or press Alt-P. There are three
kinds of preferences, which you can select by
clicking on the tabs on the left hand side of the
preferences screen.
General - contains general settings. Here you can
choose if the program should ask you to stripe the
songs that were not striped when the program is
started. Also you can opt to stripe songs that were
already striped. This can be useful if a sound
stripe was generated incorrectly for some reason.
Database - contains settings that apply to the
song list on the bottom of the screen. The first column has the fields marked which are shown in the
song list. The second column has the fields
marked in which will be searched for keywords.
For example, if you only want to show Artist, Title
and BPM, mark only those fields. The list of fields
that are shown does not have to be the same as
the list of fields to search on. You can change the
order of the display of the columns by using the
up and down arrows on the right hand side.
Audio CD - contains settings that apply to importing CDs. The Ripping section allows you to
choose the quality that will be used when reading
from a CD. We do not recommend choosing 'No
Repair', because even on CDs that look absolute-
CHAPTER 1 : USING FINAL SCRATCH
ly perfect a perfect quality is not guaranteed.
'Repair' or even 'Extra Repair' will make sure that
the quality is high, but it takes a little longer. The
Encoding section applies to the MP3 conversion
process. You can unmark the checkbox 'Encode
to mp3' if you rather have .wav files than MP3
files. Furthermore you can choose the bit rate on
which to encode and the quality. Selecting High
quality and a bit rate of at least 192kBps will
produce MP3 files that are not worse than CD
quality (if the ripping parameters were good as
well). An MP3 file will be about a tenth of the original wav file's size.
PAGE 10
CHAPTER 1 : USING FINAL SCRATCH
CHAPTER 2 : TECHNICAL SUPPORT
2.1 TROUBLESHOOTING
PROBLEM: Software failed to detect Scratch
Amp
SOLUTION: Make sure the blue power LED is on.
If it isn't, check the USB connection. If it is on,
there may be an initialization problem. Unplug the
USB cable from either the Scratch amp or the
computer, quit the application, and reconnect the
Scratch amp to the computer after a few seconds.
Restart the application.
----------------------
PROBLEM: distorted sound (wavy, tremolo, etc,
artifacts that should not be there).
SOLUTION: Make sure the turntable ground
wires are connected to the mixer or Scratch Amp
or the mixer board. It may be necessary to connect the ground connectors of the mixer board
and the Scratch amp. (On the other hand, this
may well make the situation worse; it can cause a
ground loop. Use the connection that works best
in your setup.)
SOLUTION: Your record may be worn or dirty.
Make sure the record is clean and in good condition. If not, try another scratch record or just the
`flip side', if it is in good condition.
SOLUTION: Make sure your styli (needles) are
clean and in good condition.
PROBLEM: Can't play normal records.
SOLUTION: Make sure that the Scratch amp is
powered, either by the USB or power supply, and ---------------------the mixer is switched to `PHONO'.
PROBLEM: The computer freezes
SOLUTION: The USB cable was probably dis---------------------connected during playback. Make sure neither the
PROBLEM: No audio
power nor USB gets unplugged during operation.
SOLUTION: Verify your connections to make sure SOLUTION: Never power FINAL SCRATCH with
all cables are properly connected. Refer to the the laptop battery. Doing this may cause the
quick start sheet if necessary.
processor to run at a slower speed and seriously
affect the operation of FINAL SCRATCH.
SOLUTION: Immediately switch to normal vinyl
---------------------records, but keep the computer and Scratch amp
PROBLEM: Buzz in audio (phono)
turned on. However, if the situation allows you to
SOLUTION: There may be a ground loop. restart the program, just switch power off and on.
Remove all unnecessary connections one at a The system will reboot. (You may have to unplug
time. Determine which one was the offender. the Scratch amp, and reconnect it when the sysLeave it out! A clean, purposeful setup is less like- tem is ready again. This will un-power the Scratch
ly to have `ground loops'. As a last resort, use an amp if you are not using the Scratch Amp power
isolation transformer (readily available at many supply. You can't play any record through the
electronic shops or in any audio technician's Scratch amp if there is no power to the Scratch
toolkit) between mixer and amplifier. You may also amp. DO NOT DO THIS WHILE PERFORMING
try to connect or disconnect the Scratch Amp IF YOU DO NOT HAVE A BACKUP MUSIC
ground cable.
SOURCE! With the adapter you can reset or even
unplug the Scratch Amp without fear of interrupting the music. This also allows installing and
removing the (laptop) computer without introducing noise into the (analog) audio.
PAGE 11
CHAPTER 2 : TECHNICAL SUPPORT
2.2 GETTING HELP!
If your system is behaving weird or giving you cryptic messages, don’t panic. There are may ways to
get help.
Getting Help Online
All solutions to known problems and questions
are posted on the FINAL SCRATCH Support site.
The FS Knowledge Base is always up to date and
is the quickest and easiest way to find what you
need. The FINAL SCRATCH support site is located at:
• www.final scratch.com/support.asp
There you will find:
• FS Knowledge base
• FS software updates
• FS Manuals
Returns
In case you need to return your product, we have
included a shipping form for your convenience. All
returns must include a Return Authorization number, and will not be accepted without one. For
assistance with your product or the return
process, please contact FINAL SCRATCH tech
support (See “Need Further Assistance”).
Register your Product
For the warranty to be valid, please complete the
warranty registration card or fill out the online registration at www.stantonmagnetics.com. Doing so
will make sure you are entitled to technical support and kept aware of updates and other news
regarding FINAL SCRATCH.
Need Further Assistance
If all else fails, contact us via email at:
• fs_support@final scratch.com
All emails are answered within 24hrs. Please
make sure to include the following information in
your email:
• A description of the problem
• How to reproduce the problem
Warranty
The Scratch Amp has been designed and manufactured using quality components. Therefore, it is
warranted to be free from defects in materials,
and workmanship for a period of twelve (12)
months from the original purchase date. During
this period, all service and parts necessary to
repair a defect will be free of charge.
• What have already done to try to fix the problem
• A description of your setup, including all hardware (cartridge, turntables, mixers, etc).
• The model number and specs of your computer
• Describe how the setup is connected, especially
ground wires.
• Your serial Number (located on your registration
card and on the bottom of our scratch amp.
PAGE 12
CHAPTER 2 : TECHNICAL SUPPORT
CHAPTER 3 : APPENDIX
3.1 KEYBOARD SHORTCUTS
Shortcuts in FINAL SCRATCH application
Ctrl-F1
Map song to left turntable
Ctrl-F6
Map song to right turntable
Ctrl-Shift-F1
Unmap song from left turntable
Ctrl-Shift-F6
Unmap song from right turntable
Tab
Extended stripe modes
Alp-P
Open preferences screen
Alt-Q
Quit application
F1-F10
Record box 1-10
F11
Search All
F12
View audio CD
Shortcuts in FINAL SCRATCH application
Alt-F
Alt-S
Alt-I
Alt-X
Alt-E
Alt-M
Alt-V
Alt-N
Alt-P
Alt-A
Alt-Q
Ctrl-X
Ctrl-C
Ctrl-V
Ctrl-F1-F10
Ctrl-Shift-F1-10
Ctrl-F11
F1-F10
F11
F12
PAGE 13
Open File menu
Save
Import Record Box
Export Current Record Box
Open Edit menu
Make stripes
Open View menu
View New
Open Preferences screen
Select All
Quit application
Cut
Copy
Paste
Copy to record box
Move to record box
Remove from record box
Record box 1-10
Search All
View audio CD
CHAPTER 3 : APPENDIX
3.2 RECORDING YOUR VINYL
archive recording, but there are USB/RCA interfaces available on the market that bypass the line
Your ultimate goal is to have your vinyl recordings input connection on your sound card to produce
in a digital format that can be used by your com- lower background noise.
puter. There are many ways you can do this, and
they are all a matter of personal preference and The Scratch Amp can also be used as a USB
your budget.
sound card in Windows although it will use windows drivers so the sound quality is not guaranOne option is that you can record your vinyl direct- teed. In this case you do not need a preamplifier
ly to CD using a direct CD recorder. After you to connect your turntables. Windows will detect
have filled up a CD, you can then rip the song to the Scratch amp as a USB sound device and will
a .wav, .aiff or .mp3 format using ripping and prompt you to install the required Windows USB
encoding software of your choice. The Record audio driver. Since the Scratch Amp is a dual
Boxing Application will rip and encode MP3s sound card (for 2 turntables), Windows will
directly from a CD.
prompt you to install the driver twice.
The other option is to record your audio directly to
your computer hard drive. You need to connect
the source audio to the line-in on your computer's
sound card. Typically you will run your turntable
into your mixer, then connect the mixer output to
your sound card's input. Standard computer
sound cards are of varying quality and have varying signal to noise ratios. The better the ratio, the
better your recording will be. Laptop sound cards
are often too noisy to make a good permanent
PAGE 14
Make your recordings at CD quality (16 bit, 44Khz
sampling rate) using sound recording and editing
software. You can save your recordings directly to
MP3 (encoded at 192 Kbps or higher) or save
them as a .wav or .aiff file, and then encode them
to MP3. You can purchase professional production software to do this, or you can find simple
programs with all the features you need as freeware or shareware on the Internet.
CHAPTER 3 : APPENDIX