1
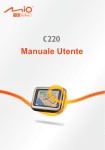
R01
Trademarks
All brand and product names are trademarks or registered trademarks of their
respective companies.
Disclaimer
Specifications and manuals are subject to change without notice. Mio Technology
assumes no liability for damage incurred directly or indirectly from errors,
omissions, or discrepancies between the device and the manuals.
Table of Contents
1
Getting Started..................................................................................5
1.1
1.2
1.3
1.4
1.5
2
Troubleshooting and Maintenance ...............................................13
2.1
2.2
2.3
3
Understanding Hardware Components................................................ 5
Front Components ............................................................................... 5
Back Components................................................................................ 6
Top Components.................................................................................. 6
Bottom Components ............................................................................ 7
Left-side Components .......................................................................... 7
Performing the Initial Start Up .............................................................. 8
Using Your Device in a Vehicle............................................................ 9
Using the Device Holder ...................................................................... 9
Connecting the Car Charger ................................................................ 9
Operating Basics................................................................................ 10
Turning On and Off ............................................................................ 10
Navigating on the Screen................................................................... 11
Inserting a SD/SDHC/MMC Card....................................................... 11
Reset Your System ............................................................................ 13
Troubleshooting ................................................................................. 14
Power Problems ................................................................................. 14
Screen Problems................................................................................ 14
Connection Problems......................................................................... 14
GPS Problems.................................................................................... 15
Maintaining Your Device .................................................................... 15
Regulatory Information ..................................................................17
3.1
3.2
Regulations Statements ..................................................................... 17
Class B Regulations........................................................................... 17
European Notice ................................................................................ 18
Safety Precautions ............................................................................. 19
About Charging .................................................................................. 19
About the Charger.............................................................................. 19
About the Battery ............................................................................... 20
i
Warnings and Notices
z
For your safety, do not operate the controls of the product while driving.
z
Use this product with caution. The product is a navigation aid. It does not
provide exact measurements of direction, distance, location or topography.
z
The calculated route is for reference only. Always follow the posted traffic
signs, speed limits and road restrictions.
z
When you leave your car, do not leave your device on the dashboard in direct
sunlight. This can cause the battery to overheat and malfunction.
z
The Global Positioning System (GPS) is operated by the United States
government, which is solely responsible for its performance. Any change to
the GPS system can affect the accuracy of all GPS equipment world-wide.
z
GPS satellite signals do not typically pass through solid materials such as
brick, concrete, or lead-coated safety glass. When inside a tunnel, building or
under-ground parking structures, GPS positioning will not typically be
available.
z
A minimum of 4 GPS satellite signals are typically needed to determine your
GPS position. Signal reception can be affected by dense overhead structures,
severe weather, geographic location or time of day.
z
Other wireless devices in the vehicle may interfere with the reception of
satellite signals and cause the reception to be unstable.
z
Your GPS device is always tracking your location (you are the green arrow)
when the navigation software is running and GPS signal is available. Your
GPS device is not designed to broadcast its location; therefore it can not be
tracked by anyone else.
iii
z
A device holder is needed when using the device in a car. Be sure to place the
device in an appropriate place, so as not to obstruct the driver’s view, or
deployment of airbags.
Do not mount where the driver’s
field of vision is blocked.
Do not mount in front of
airbag panels.
iv
Do not place on the
dashboard unsecured.
Do not mount in front of an
airbag field of deployment.
1
Getting Started
1.1 Understanding Hardware Components
NOTE: Depending upon the specific model purchased, the color of your device may not
exactly match the device shown in this manual.
Front Components
Ref
Component
n Touch Screen
Description
Displays the output of your device. Tap the screen with your
stylus to select menu commands or enter information.
o Charge Indicator Flashes bright amber to indicate that the battery is charging,
and turns green when the battery is fully charged.
5
Back Components
Ref
Component
Description
n ON/OFF Switch
The main power/battery cut off switch.
o Holder Connector
Connects to the holder.
p Speaker
Sends out music, sounds and voice.
Top Components
Ref
Component
n Power Button
6
Description
Turns on and off the device.
Bottom Components
Ref
Component
Description
n SD/MMC/SDHC(Class 2)
Slot
o Mini-USB Connector
Accepts an SD (Secure Digital) or SDHC (Secure
Digital High Capacity) or MMC (MultiMedia
Card) card for accessing data such as map data.
Connects to the USB cable (purchased separately)
or in-car power cable.
Left-side Components
Ref
Component
n External Antenna
Connector
Description
This connector (under rubber dust cover) allows use of an
optional external GPS antenna with magnetic mount, which
may be positioned on top of the car for better GPS signal
reception in areas with poor reception.
7
1.2 Performing the Initial Start Up
1
Slide the ON/OFF switch to the ON position.
CAUTION: Always leave the ON/OFF switch in the ON position for normal operation
2
Your device turns on.
3
Tap and hold the centre of the target. When the target moves to another
position, tap and hold the centre of the new target. Repeat each time to
complete the calibration process.
4
The “Change Language” screen appears. Tap the left/right arrow button to
button.
select the desired language. Then, tap the
5
The “Date&Time” screen appears. Tap the appropriate arrow button to select
the time zone, date, and time. Then, tap the
button.
6
MioMap program starts. You can now use your device.
8
1.3 Using Your Device in a Vehicle
Using the Device Holder
CAUTION:
z Select an appropriate location for the device holder. Never place the holder where the
driver’s field of vision is blocked.
z If the car’s windshield is tinted with a reflective coating, an external antenna (optional) may
be needed to route the antenna to the top of the car through a window. When closing the
car window, be careful not to pinch the antenna cable
Use the device holder to fix your device in a vehicle. Make sure that the GPS
antenna has a clear view of the sky.
Note: To remove your device from the holder, slightly push the tab of the holder to release it.
To release:
Connecting the Car Charger
The car charger supplies power and charges your device at the same time. If the
battery is fully charged, you can use the battery power without connecting the
charger. If you don’t want to drain the battery power, you can keep the charger
connected while in a vehicle.
CAUTION: To protect your device against sudden surges in current, connect the car charger
only after the car engine has been started.
9
1. Connect one end of the car
charger to the power connector
of your device.
2. Connect the other end to the
cigarette lighter in the car to
power and charge your device.
The indicator on the car
charger lights in green to
indicate that power is being
supplied to your device.
CAUTION: For optimal performance of the lithium battery, take note of the following:
z Do not charge the battery where the temperature is high (e.g. in direct sunlight).
z There is no need to fully discharge the battery before charging. You can charge the battery
before it is discharged.
z If you will not use the product for a long period of time, be sure to fully charge the
battery at least once every two weeks. Over discharge of the battery can affect the
charging performance.
NOTE: Your device can also be charged when it is connected to a desktop computer via the
USB cable (purchase separately). If you intend to charge your device in this way, turn off your
device so that it takes less time to charge the battery.
1.4 Operating Basics
Turning On and Off
For normal operation, turn off the device by briefly pressing the power button.
The device enters a suspended state.
When you next briefly press the power button, the system resumes. You will
either be back to where you left off or see the Home screen.
10
To
Navigating on the Screen
To operate your device, touch the screen with your fingertip. You can perform the
following actions:
z
Tap
Touch the screen once with your fingertip
to open items or select onscreen buttons or
options.
z
Drag
Hold your fingertip on the screen and drag
up/down/left/right or across the screen.
z
Tap and hold
Tap and hold your fingertip until an action
is complete, or a result or menu is shown.
1.5 Inserting a SD/SDHC/MMC Card
Your device has a slot where you can insert an optional SD/SDHC (Class2)
/MMC storage card.
To use a card, insert it into the slot, with the connector
pointing to the slot and its label facing the front of the
device.
To remove a card, first make sure that no application
is accessing the card, and then slightly push the top
edge of the card to release it and pull it out of the slot.
NOTE: Make sure that no foreign objects enter the slot.
11
2
Troubleshooting and
Troubleshooting and Maintenance
Maintenance
2.1 Reset Your System
Occasionally, you may need to reset your device. For example, you should reset
your system when it stops responding; or appears to be “frozen” or “locked up.”
You can use the following steps to perform a “hard reset.”
1
Disconnect all cables, including the charger, from your device.
2
Slide the ON/OFF switch to the OFF position.
3
Wait for 1 minute and then slide the switch back to the ON position.
13
2.2 Troubleshooting
NOTE: If you encounter a problem you cannot solve, contact an authorized service center for
assistance.
Power Problems
Power does not turn on when using battery power
z
The remaining battery power may be too low to run your device. Charge the
battery.
Screen Problems
Screen responds slowly
z
Make sure that your device is not running out of battery power. If the problem
still exists, reset your system.
Screen freezes
z
Reset your system.
Screen is hard to read
z
Make sure that the backlight of the display is on.
z
Move to a location with more light.
Inaccurate response to taps
z
Reset your system.
Connection Problems
Cable Connection Problems
z
14
Make sure that your device and your computer are both turned on before
trying to establish a connection.
z
Make sure that the cable is securely plugged into the USB port on your
computer and on the device. Connect the USB cable (purchase separately)
directly to your computer—do not run the cable through a USB hub.
z
Reset your device before connecting the cable. Always disconnect your
device before you restart your computer.
GPS Problems
z
When there are no valid signals available, consider the following:
z
Make sure that the GPS antenna has a clear view of the sky.
z
Note that the GPS reception can be affected by:
9 Bad weather
9
Dense overhead obstacles (e.g. trees and tall buildings)
9
Other wireless device in the car
9
Reflective car window tint
2.3 Maintaining Your Device
Taking good care of your device will ensure trouble-free operation and reduce the
risk of damage to your device.
z
Keep your device away from excessive moisture and extreme temperatures.
z
Avoid exposing your device to direct sunlight or strong ultraviolet light for
extended periods of time.
z
Do not place anything on top of your device or drop objects on your device.
z
Do not drop your device or subject it to severe shock.
z
Do not subject your device to sudden and severe temperature changes. This
could cause moisture condensation inside the unit, which could damage your
device. In the event of moisture condensation, allow the device to dry out
completely before use.
z
Take care not to sit on the device. We advise not to carry the device in one’s
back pocket for that reason.
15
z
The screen surface can easily be scratched. Avoid touching it with sharp
objects. Non-adhesive generic screen protectors designed specifically for use
on portable devices with LCD panels may be used to help protect the screen
from minor scratches.
z
Never clean your device with it powered on. Use a soft, lint-free cloth to wipe
the screen and the exterior of your device.
z
Do not use paper towels to clean the screen.
z
Never attempt to disassemble, repair or make any modifications to your
device. Disassembly, modification or any attempt at repair could cause
damage to your device and even bodily injury or property damage and will
void any warranty.
z
Do not store or carry flammable liquids, gases or explosive materials in the
same compartment as your device, its parts or accessories.
16
3
Regulatory Information
NOTE: Marking labels located on the exterior of your device indicate the regulations that
your model complies with. Please check the marking labels on your device and refer to the
corresponding statements in this chapter. Some notices apply to specific models only.
3.1 Regulations Statements
Class B Regulations
USA
Federal Communications Commission Radio Frequency Interference
Statement
NOTE:
This equipment has been tested and found to comply with the limits for a Class B
digital device pursuant to Part 15 of the FCC Rules. These limits are designed to
provide reasonable protection against harmful interference in a residential
installation. This equipment generates, uses, and can radiate radio frequency
energy and, if not installed and used in accordance with the instructions, may
cause harmful interference to radio communications. However, there is no
guarantee that interference will not occur in a particular installation. If this
equipment does cause harmful interference to radio or television reception, which
can be determined by turning the equipment off and on, the user is encouraged to
try to correct the interference by one or more of the following measures:
17
z
Reorient or relocate the receiving antenna.
z
Increase the separation between the equipment and receiver.
z
Connect the equipment into an outlet on a circuit different from that to which
the receiver is connected.
z
Consult the dealer or an experienced radio/TV technician for help.
Any changes or modifications not expressly approved by the manufacturer could
void the user’s authority to operate the equipment.
Please note:
The use of a non-shielded interface cable with this equipment is prohibited.
Canada
Canadian Department Of Communications
Radio Interference Regulations Class B Compliance Notice
This Class B digital apparatus meets all requirements of the Canada
Interference-Causing equipment regulations.
Cet appareil numérique de Classe B respecte toutes les exigences du Règlement
Canadien sur le matériel brouileur.
European Notice
Products with the CE marking comply with Radio & Telecommunication
Terminal Equipment Directive (R&TTE) (1999/5/EEC), the Electromagnetic
Compatibility Directive (89/336/EEC) and the Low Voltage Directive
(73/23/EEC) – as amended by Directive 93/68/ECC - issued by the Commission
of the European Community.
Compliance with these directives implies conformity to the following European
Standards:
EN301489-1: Electronic compatibility and Radio spectrum Matters (ERM),
ElectroMagnetic Compatibility (EMC) standard for radio equipment and services;
Part 1: Common technical requirements
EN301489-3: Electronic compatibility and Radio spectrum Matters (ERM),
ElectroMagnetic Compatibility (EMC) standard for radio equipment and services;
Part 3: Specific conditions for Short-Range Devices (SRD) operating on
frequencies between 9 kHz and 40 GHz
18
EN55022: Radio disturbance characteristics
EN55024: Immunity characteristics
EN6100-3-2: Limits for harmonic current emissions
EN6100-3-3: Limitation of voltage fluctuation and flicker in low-voltage supply
system
EN60950 / IEC 60950: Product Safety
The manufacturer cannot be held responsible for modifications made by the User
and the consequences thereof, which may alter the conformity of the product with
the CE Marking.
3.2 Safety Precautions
z
Prolonged listening of music in maximum volume can damage the ears.
z
The use of headphones other than those recommended/supplied can cause
hearing impairment due to excessive sound pressure.
About Charging
z
Use only the charger (UDID, G12PCL-535-B031) supplied with your device.
Use of another type of charger will result in malfunction and/or danger.
z
This product is intended to be supplied by a LISTED Power Unit marked with
“LPS”, “Limited Power Source” and output rated + 5 V dc / 1.0 A”.
z
Use a specified battery in the equipment.
About the Charger
z
Do not use the charger in a high moisture environment. Never touch the
charger when your hands or feet are wet.
z
Allow adequate ventilation around the charger when using it to operate the
device or charge the battery. Do not cover the charger with paper or other
objects that will reduce cooling. Do not use the charger while it is inside a
carrying case.
z
Connect the charger to a proper power source. The voltage requirements are
found on the product case and/or packaging.
z
Do not use the charger if the cord becomes damaged.
19
z
Do not attempt to service the unit. There are no serviceable parts inside.
Replace the unit if it is damaged or exposed to excess moisture.
About the Battery
z
Use a specified charger approved by the manufacturer.
CAUTION: This unit contains a non-replaceable internal Lithium Ion battery. The battery can
burst or explode, releasing hazardous chemicals. To reduce the risk of fire or burns, do not
disassemble, crush, puncture, or dispose of in fire or water.
z
20
Important instructions (for service personnel only)
9 Caution: Risk of explosion if battery is replaced by an incorrect type.
Dispose of used batteries according to the instructions.
9
Replace only with the same or equivalent type recommended by the
manufacturer.
9
The battery must be recycled or disposed of properly.
9
Use the battery only in the specified equipment.