1
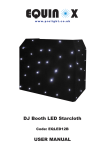
DJ Booth
White LED Starcloth
User Manual
Order code: EQLED12B
Safety advice
WARNING
FOR YOUR OWN SAFETY, PLEASE READ THIS USER MANUAL
CAREFULLY BEFORE YOUR INITIAL START-UP!
• Before your initial start-up, please make sure that there is no damage caused during transportation.
• Should there be any damage, consult your dealer and do not use the equipment.
• To maintain the equipment in good working condition and to ensure safe operation, it is necessary for the user to follow the safety instructions and warning notes written in this manual.
• Please note that damages caused by user modifications to this equipment are not subject to warranty.
CAUTION!
CAUTION!
KEEP THIS EQUIPMENT
AWAY FROM RAIN,
MOISTURE AND LIQUIDS
TAKE CARE USING
THIS EQUIPMENT!
HIGH VOLTAGE-RISK
OF ELECTRIC SHOCK!!
IMPORTANT:
The manufacturer will not accept liability for any resulting damages caused by the non-observance
of this manual or any unauthorised modification to the equipment.
• Never let the power cable come into contact with other
cables. Handle the power cable and all mains voltage connections with particular caution!
• Never remove warning or informative labels from the unit.
• Do not open the equipment and do not modify the unit.
• Do not connect this equipment to a dimmer pack.
• Do not switch the equipment on and off in short intervals,
as this will reduce the system’s life.
• Only use the equipment indoors.
• Do not expose to flammable sources, liquids or gases.
• Always disconnect the power from the mains when equipment is not in use or before cleaning! Only handle
the power-cable by the plug. Never pull out the plug by
pulling the power-cable.
• Make sure that the available mains supply voltage is
between 100~250V AC, 50/60Hz.
• Make sure that the power cable is never crimped or damaged. Check the equipment and the power cable
periodically.
• If the equipment is dropped or damaged, disconnect the
mains power supply immediately and have a qualified
engineer inspect the equipment before operating again.
• If the equipment has been exposed to drastic temperature fluctuation (e.g. after transportation), do not connect power or switch it on immediately. The arising condensation might damage the equipment.
Leave the equipment switched off until it has reached
room temperature.
• If your product fails to function correctly, stop use
immediately. Pack the unit securely (preferably in the original packing material), and return it to your Pro Light
dealer for service.
• Only use fuses of same type and rating.
• To clean the cloth, disconnect the mains power supply and
then wipe with a damp cloth. Do not immerse in liquid.
The cloth will require monthly cleaning. Do not use alcohol
or solvents. Connections and LEDs must be kept clean
and dry at all times.
• Repairs, servicing and power connection must only be carried out by a qualified technician. THIS UNIT CONTAINS
NO USER SERVICEABLE PARTS.
• WARRANTY: One year from date of purchase.
OPERATING DETERMINATIONS
If this equipment is operated in any other way, than those described in this manual, the product may suffer damage and the warranty becomes void. Incorrect operation may lead to danger e.g: short-circuit, burns and electric shocks etc.
Do not endanger your own safety and the safety of others!
Incorrect installation or use can cause serious damage to people and/or property.
www.prolight.co.uk
DJ Booth White LED Starcloth User Manual
2
Product overview & technical specifications
DJ Booth White LED Starcloth
Upgrade your Equinox DJ MICRON Booth with this black starcloth
featuring 72 x 5mm LEDs. The Starcloth is supplied complete with
a comprehensive controller featuring Auto, Sound Active and DMX
control options. Additionally you can create a white starcloth effect
when combining the white lycra supplied with the EQLED12L and
this black starcloth.
Cloth:
72 x 5mm white LEDs
Fast fixx velcro tabs
Low reflection, fire retardant material
Controller:
DMX channels: 5
Sound active, auto run and auto fade modes
IEC power in socket
3-pin XLR DMX in/out sockets
205mm
WHITE STARCLOTH
CONTROLLER
ESC
Controller
Power supply
100~240V, 50/60Hz
Fuse
T1A 250V
Dimensions
55 x 205 x 145mm
ESC
ENTER
UP
DOWN
145mm
WHITE STARCLOTH
CONTROLLER
WHITE STARCLOTH
CONTROLLER
Specifications
ENTER
ESC
ENTER
UP
DOWN
UP
DOWN
PUSH
PUSH
FUNCTION
MIC
DMX OUT
DMX IN
OUTPUT TO
STARCLOTH
145mm
FUNCTION
MIC
DMX OUT
DMX IN
OUTPUT TO
STARCLOTH
PUSH
ON
FUNCTION
MIC
DMX OUT
www.prolight.co.uk
OUTPUT
TO
STARCLOTH
DMX IN
POWER SUPPLY: 100-250V~50/60Hz
FUSE: T1A 250V
www.prolight.co.uk
55mm
ON
POWER SUPPLY: 100-250V~50/60Hz
FUSE: T1A 250V
OFF
OFF
ON
www.prolight.co.uk
POWER SUPPLY: 100-250V~50/60Hz
FUSE: T1A 250V
OFF
www.prolight.co.uk
DJ Booth White LED Starcloth User Manual
3
Technical specifications
WHITE STARCLOTH
CONTROLLER
ESC
ENTER
UP
DOWN
07
01
06
WHITE STARCLOTH
CONTROLLER
02
05
ESC
ENTER
UP
DOWN
WHITE STARCLOTH
CONTROLLER
ESC
ENTER
UP
DOWN
PUSH
FUNCTION
MIC
DMX OUT
DMX IN
OUTPUT TO
STARCLOTH
03
04
PUSH
PUSH
ON
www.prolight.co.uk
FUNCTION
POWER SUPPLY: 100-250V~50/60Hz
FUSE: T1A 250V
MIC
DMX OUT
DMX IN
OFF
FUNCTION
OUTPUT TO
STARCLOTH
MIC
DMX OUT
DMX IN
OUTPUT TO
STARCLOTH
15
16
ON
08
09
10
11
12
13
www.prolight.co.uk
14
ON
www.prolight.co.uk
01 - LED display
07POWER
- Power
13 - Microphone
SUPPLY:indicator
100-250V~50/60Hz
FUSE: T1A 250V
02 - Esc button
08 - Power in socket
14 - DMX out
OFF
POWER SUPPLY: 100-250V~50/60Hz
03 - Enter button
09 - Fuse T1A 250V
DMX in
FUSE:15
T1A -250V
04 - Up button
10 - Earth point
16 - Output to starcloth
05 - Down button
11 - On/off switch
06 - Signal indicator
12 - Function knob*
* Rotate to scroll through menu. Press to enter or press and hold to exit.
OFF
In the box: 1 x starcloth,
1 x power cable,
1 x controller &
1 x user manual
Fitting instructions:
This cloth is designed to be fitted to the Equinox DJ Booth.
Fit the cloth from one upper corner first by hanging the sewn in pockets onto the booth.
Carefully unfold the cloth and attach the opposite corner, again by the sewn in pocket.
Once attached, the cloth must be tensioned by the integral velcro straps.
www.prolight.co.uk
DJ Booth White LED Starcloth User Manual
4
Operating instructions
Auto mode
To access the auto mode, press the “UP/DOWN” buttons on the front of the unit to show “Auto” on the LED display. Now press the “ENTER” button and use the “UP” and “DOWN” buttons to set the auto mode you require. Press the “ENTER” button to confirm the setting. Now use the “UP” and
“DOWN” buttons to set the the speed required. Press the “ENTER” button to confirm the setting.
To exit out of any of the above options, press the “ESC” button.
Fade mode
To access the fade mode, press the “UP/DOWN” buttons on the front of the unit to show “FAde” on the LED display. Now press the “ENTER” button and use the “UP” and “DOWN” buttons to set the the speed required. Press the “ENTER” button to confirm the setting.
To exit out of any of the above options, press the “ESC” button.
Sound active mode
To access the sound active mode, press the “UP/DOWN” buttons on the front of the unit to show “Soud” on the LED display. Now press the “ENTER” button and use the “UP” and “DOWN” buttons to set the sound program you require. Press the “ENTER” button to confirm the setting. Now use the “UP” and “DOWN” buttons to set the the sound sensitivity (00: lowest, 31: highest). Press the “ENTER” button to confirm the setting.
To exit out of any of the above options, press the “ESC” button.
Pattern mode:
To access pattern mode, press the “UP/DOWN” buttons on the front of the unit to show “PAtt” on the LED display. Now press the “ENTER” button and use the “UP” and “DOWN” buttons to set the brightness of LED string 1. Press the “ENTER” button to confirm the setting. Repeat this step for
LED string 2 - 4. Press the “ENTER” button to confirm the setting. Now use the “UP” and “DOWN” buttons
to set the the flash speed required. Press the “ENTER” button to confirm the setting.
To exit out of any of the above options, press the “ESC” button.
Slave mode:
To access the slave mode, press the “UP/DOWN” buttons on the front of the unit to show “SLav” on the LED display. The unit is now in slave mode. Press the “ENTER” button to confirm the setting.
To exit out of any of the above options, press the “ESC” button.
DMX address:
To change the DMX address, press the “UP/DOWN” buttons on the front of the unit to show “Addr” on the LED display. Now press the “ENTER” button and use the “UP” and “DOWN” buttons to set the address you require. Press the “ENTER” button to confirm the setting. This is also the mode that needs to be used when controlling the starcloth via DMX.
To exit out of any of the above options, press the “ESC” button.
www.prolight.co.uk
DJ Booth White LED Starcloth User Manual
5
Operating instructions
Software version:
To view the software version of the controller use the “UP/DOWN” buttons on the front of the unit to
show “VEr ” on the LED display. Now press the “ENTER” button and the version will be displayed in the format “V---”.
To exit out of any of the above options, press the “ESC” button.
Static mode:
To access the static mode, press the “UP/DOWN” buttons on the front of the unit to show “StAt” on the LED display. Now press the “ENTER” button and use the “UP” and “DOWN” buttons to set the static mode you require between “S000 - S015”. S000
Blackout
S008
LED group 2 & 3 on
S001
LED group 1 on
S009
LED group 2 & 4 on
S002
LED group 2 on
S010
LED group 3 & 4 on
S003
LED group 3 on
S011
LED group 1, 2 & 3 on
S004
LED group 4 on
S012
LED group 1, 2 & 4 on
S005
LED group 1 & 2 on
S013
LED group 1, 3 & 4 on
S006
LED group 1 & 3 on
S014
LED group 2, 3 & 4 on
S007
LED group 1 & 4 on
S015
All LEDs on
Press the “ENTER” button to confirm the setting.
To exit out of any of the above options, press the “ESC” button.
5 channel mode:
Channel
Value
Function
1
0-20
LED group 1 blackout
21-230
LED group 1 flash speed
231-255
LED group 1 full on
0-20
LED group 2 blackout
21-230
LED group 2 flash speed
231-255
LED group 2 full on
0-20
LED group 3 blackout
21-230
LED group 3 flash speed
231-255
LED group 3 full on
0-20
LED group 4 blackout
21-230
LED group 4 flash speed
231-255
LED group 4 full on
0-100
All channels flash at speed set above
101-255
All channels full on
2
3
4
5
www.prolight.co.uk
DJ Booth White LED Starcloth User Manual
6
DMX setup
Setting the DMX address:
The DMX mode enables the use of a universal DMX controller. Each fixture requires a “start address”
from 1- 511. A fixture requiring one or more channels for control begins to read the data on the channel
indicated by the start address. For example, a fixture that occupies or uses 7 channels of DMX and was
addressed to start on DMX channel 100, would read data from channels: 100,101,102,103,104,105
and 106. Choose a start address so that the channels used do not overlap. E.g. the next unit in the
chain starts at 107.
DMX 512:
DMX (Digital Multiplex) is a universal protocol used as a form of communication between intelligent
fixtures and controllers. A DMX controller sends DMX data instructions form the controller to the fixture.
DMX data is sent as serial data that travels from fixture to fixture via the DATA “IN” and DATA “OUT” XLR terminals located on all DMX fixtures (most controllers only have a data “out” terminal).
DMX linking:
DMX is a language allowing all makes and models of different manufactures to be linked together and operate from a single controller, as long as all fixtures and the controller are DMX compliant. To ensure proper DMX data transmission, when using several DMX fixtures try to use the shortest cable path possible. The order in which fixtures are connected in a DMX line does not influence the DMX addressing. For example; a fixture assigned to a DMX address of 1 may be placed anywhere in a DMX line, at the beginning, at the end, or anywhere in the middle. When a fixture is assigned a DMX address of 1, the DMX controller knows to send DATA assigned to address 1 to that unit, no matter where it is located in the DMX chain.
DATA cable (DMX cable) requirements (for DMX operation):
This fixture can be controlled via DMX-512 protocol. The DMX address is set on the back of the unit.
Your unit and your DMX controller require a standard 3-pin XLR connector for data input/output, see image below.
Further DMX cables can be
purchased from all good sound
and lighting suppliers or Pro Light Concepts dealers.
Please quote:
CABL10 – 2m
CABL11 – 5m
CABL12 – 10m
Note: DMX cable must be daisy chained and cannot be split.
www.prolight.co.uk
DJ Booth White LED Starcloth User Manual
7
DMX setup
Notice:
Be sure to follow the diagrams below when making your own cables. Do not connect the cables shield conductor to the ground lug or allow the shield conductor to come in contact with the XLRs outer casing. Grounding the shield could cause a short circuit and erratic behaviour.
Special note:
Line termination:
When longer runs of cable are used, you may need to use a terminator on the last unit to avoid erratic behaviour.
Using a cable terminator will decrease
the possibilities of erratic behaviour.
(3-pin - Order code: CABL90, 5-pin - Order code: CABL89)
Termination reduces signal transmission
problems and interference. It is always
advisable to connect a DMX terminal,
(resistance 120 Ohm 1/4 W) between pin 2
(DMX-) and pin 3 (DMX+) of the last fixture.
5-pin XLR DMX connectors:
Some manufactures use 5-pin XLR connectors for data transmission in place of 3-pin. 5-pin XLR fixtures
may be implemented in a 3-pin XLR DMX line. When inserting standard 5-pin XLR connectors in to a
3-pin line a cable adaptor must be used. The diagram below details the correct cable conversion.
5-pin XLR (socket)
Pin 1: GND (screen)
Pin 2: Signal (-)
Pin 3: Signal (+)
Pin 4: N/C
Pin 5: N/C
3-pin XLR (socket)
Pin 1: GND (screen)
Pin 2: Signal (-)
Pin 3: Signal (+)
3-pin XLR (socket)
Pin 1: GND (screen)
Pin 2: Signal (-)
Pin 3: Signal (+)
5-pin XLR (socket)
Pin 1: GND (screen)
Pin 2: Signal (-)
Pin 3: Signal (+)
Pin 4: N/C
Pin 5: N/C
www.prolight.co.uk
DJ Booth White LED Starcloth User Manual
8
Related items
Please contact your local retailer to purchase these accessories.
Optional accessories
Order code
Overhead kit
EQLED12E
Black starcloth with tri-colour LEDs
EQLED12F
Black starcloth with white LEDs
EQLED12B
Black lycra
EQLED12A
Replacement white lycra
EQLED12C
Lightweight DJ Booth
EQLED12L
Optional Black Lycra
Order ref: EQLED12A
Lightweight DJ Booth
Order ref: EQLED12L
Optional Black Starcloth
with tri-colour LEDs and controller
Order ref: EQLED12F
Optional White Lycra available to purchase
should you need one in the future
Order ref: EQLED12C
You can also create a white starcloth effect
by covering the optional black starcloth
with the supplied white lycra
Optional Overhead kit - This allows the user to create a full light show
without the need to have separate lighting stands
Order ref: EQLED12E
www.prolight.co.uk
Overhead kit close-up
and how it connects
to the DJ Booth System
DJ Booth White LED Starcloth User Manual
9
WEEE notice
Correct Disposal of this Product
(Waste Electrical & Electronic Equipment)
(Applicable in the European Union and other European countries
with separate collection systems)
This marking shown on the product or its literature, indicates that it should not be disposed of
with other household wastes at the end of its working life. To prevent possible harm to the environment or human health from uncontrolled waste disposal, please separate this from other
types of wastes and recycle it responsibly to promote the sustainable reuse of material resources.
Household users should contact either the retailer where they purchased this product, or their
local government office, for details of where and how they can take this item for environmentally
safe recycling.
Business users should contact their supplier and check the terms and conditions of the purchase contract. This product should not be mixed with other commercial wastes for disposal.
www.prolight.co.uk
DJ Booth White LED Starcloth User Manual
10
www.prolight.co.uk
DJ Booth White LED Starcloth User Manual
11
www.prolight.co.uk
DJ Booth White LED Starcloth User Manual
12