1
Operation and Safety Manual
Medium Duty; Belt-driven; Manual Operation
OMAOG
Series
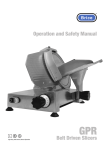
Belt Driven Slicers
DO NOT ATTEMPT TO OPERATE THIS MACHINE UNTIL YOU HAVE READ
AND UNDERSTOOD THIS OPERATION AND SAFETY MANUAL.
SAFETY ISSUES
1. NEVER touch this machine without training and
authorisation from your supervisor.
2.Machine MUST BE on solid, level bench/table.
3.Guards MUST BE in place before plugging in and turning
on machine.
4. ALWAYS use the three-pronged plug provided.
5. NEVER use your hand to hold food stuffs in place on the
meat table.
6. NEVER touch the slicer blade when it is rotating.
7. KEEP hands, arms, hair and loose clothing CLEAR
of all moving parts.
8. Should the slicer jam, SWITCH OFF AND UNPLUG before
removing the obstruction.
9. SWITCH OFF AND UNPLUG the machine from its power
source before cleaning, sanitizing or servicing.
10. USE ONLY the attachments provided by the manufacturer
and designed for this machine.
YOUR SAFETY IS OUR PRIMARY CONCERN
DECLARATION OF CONFORMITY
Slicer
Machine Model:
is built in conformity with the provisions of:
EEC 2006/42
EN1974
EN60204
89/109/EEC
Serial Number:
Dated:
Rule CEn.
1935-2004
2004/108/EEC
2006/95/EEC
2002/95/CE
Machinery Directive
Slicing machines safety and hygiene
specifications
Electrical equipment of machines;
part 1 general requirements
Directive for the materials and things
described destined to come into contact
with food
For the materials and things destined to
come into contact with food
Directive on Electromagnetic
Compatibility (EMC)
Directive on low voltage
(RoHS - Restriction of Hazardous
Substances).
Operation and Safety Manual
Introduction
™
Overview
This Operation and Safety Manual has been prepared to introduce you to the Brice Model
OMAOG Series slicers. It explains the operation, cleaning and maintenance of the slicer in simple,
clear terms and with an emphasis on your safety.
Throughout the Manual procedures are supported by illustrations showing the parts involved and
the recommended safe method of handling those parts.
A word to the wise
This Manual is really two sets of instructions in one – some sections are relevant to all Brice
slicers, while other sections only concern a particular slicer or range of slicers.
Make sure that you read this Manual carefully so that you are familiar with the features and
procedures that are unique to the slicer that came with it.
How this Manual is arranged
This Manual is made up of four sections:
•
Introduction - which explains the Manual itself, safety issues associated with using a slicer,
gives a brief introduction to the features and components of the slicer and steps you through
the installation of the machine;
• Operation – explains the use of the slicer;
• Cleaning – explains the procedures for keeping the slicer clean; and
• Maintenance – details those procedures that you can perform to ensure the trouble-free
operation of the slicer.
• Trouble-shooting – a quick reference chart to help you solve some of the problems you
might encounter with the Model OMAOG.
Conventions and Symbols used in this Manual
To reduce confusion, and to highlight important points and safety matters, we have established
some standard terms and symbols:
•
•
•
•
•
•
•
“slicer”
Whenever we talk about the slicer, we mean the slicer that is covered in this Manual.
“foodstuff”
We use the word “foodstuff” to refer to any kind of meat or other food that is usually sliced
on a slicer.
“meat table”
This is the table (usually on the right side of the slicer) on which you place the foodstuff to be
sliced. On gravity-feed slicers the meat table is steeply angled.
“meat grip”
The meat grip is the device that holds the foodstuff in position on the meat table. It is usually
attached to the meat table and moves with the foodstuff as it is sliced.
“Last Slice device”
This device (where fitted) is usually part of the meat grip and is used to hold small and hardto-handle stubs of processed foodstuffs (particularly meats) so that they can be sliced to the
last slice.
“thickness control”
This is the mechanism by which you control the slice thickness, and is usually a large rotary
control on the front of the machine. It may or may not be illuminated, depending on the
individual slicer.
“sharpener”
When we talk about the sharpener, we mean a blade sharpening or grinding device that has
a grinding stone and, optionally, a finishing stone.
Model OMAOG Series Belt Driven Gravity Slicers
3
Operation and Safety Manual
™
•
•
•
•
•
SAFETY
WARNINGS
The Special Note flag
This is an upside-down triangle with an exclamation mark inside it. It appears in the left
margin of the page, like this, whenever we want to draw your attention to an important point.
The “No Hands” warning flag
This is a circle with the outline of a hand and a black bar through the hand. It appears
wherever we want to warn you that either: you shouldn’t put your hands in or near a
particular component; or that you must wear steel mesh protective gloves to carry out a
particular procedure.
The “Power” warning flags
There are two power warning flags. The first, a lightning bolt inside an upside-down triangle,
is used whenever we want to remind and warn you that the slicer is connected to the mains
power supply. The second warning flag is a circle with the outline of a lighting bolt and a
black bar through the bolt. It appears to remind you that a particular procedure must be
carried out with the power to the slicer turned off at the powerpoint and the slicer’s power
plug disconnected from the powerpoint.
The “Water” warning flags
This is a circle with the a diagram of a water hose spraying: you should never hose down or
spray with water any component of this machine or its environment.
The “Water Immersion” warning flags
This is a circle with the diagram of a hand dropping a machine into water: you should never
immerse the machine into water.
This is an electrical device that uses mains (either single phase 240 Volt power. It uses a high
speed rotating blade that is extremely sharp. You must be careful in how you handle the slicer
at all times. The following special warnings must be complied with for your own safety and the
safety of others.
THERE ARE NO USER-SERVICEABLE ELECTRICAL COMPONENTS IN THIS SLICER. ALL
ELECTRICAL COMPONENTS ARE ELECTRICALLY ISOLATED TO EARTH AND ARE SEALED
FOR YOUR SAFETY. YOU MUST NOT ATTEMPT TO TOUCH ANY ELECTRICAL COMPONENTS
OR WIRES - YOU MAY EXPOSE YOURSELF TO THE RISK OF SERIOUS INJURY BY
ELECTROCUTION.
UNLESS OTHERWISE INDICATED, ANY CLEANING OR MAINTENANCE PROCEDURE MUST BE
PERFORMED WITH THE POWER TO THE SLICER SWITCHED OFF AND THE SLICER’S POWER
CORD DISCONNECTED FROM THE POWERPOINT. FAILURE TO TURN OFF AND DISCONNECT
POWER MAY RESULT IN SERIOUS INJURY CAUSED BY THE SLICER BEING ACCIDENTLY
TURNED ON DURING CLEANING OR MAINTENANCE.
Slicer blades are extremely sharp and can cut through fingers and hands just as easily as
products to be sliced.
WHENEVER YOU CARRY OUT ANY PROCEDURE THAT PLACES YOUR HANDS ON OR NEAR THE
SLICER BLADE YOU MUST WEAR SUITABLE PROTECTIVE HAND COVERINGS SUCH AS STEEL
MESH GLOVES TO PREVENT ACCIDENTAL INJURY FROM THE BLADE.
4
Model OMAOG Series Belt Driven Gravity Slicers
Operation and Safety Manual
The Brice Model
OMAOG Series
Slicers
™
The Brice Model OMAOG Series slicers have been designed for environments where a range
of different foodstuffs and slicing requirements must be met – from individual slices to large
batches (up to 50 slices per minute).
The Brice Model OMAOG Series slicers are available in three blade sizes; OG22E (220mm blade),
OG25E (250mm blade), OG30E (300mm blade). Along with the model range’s other features, this
makes the Model OMAOG Series one of the most versatile on the market.
•
•
•
•
•
•
Manufactured in anodised aluminium alloy with tempered chromium steel blade;
Constructed for easy cleaning;
Micrometric thickness control allows for cutting of slices from 0 to 14mm;
Last Slice device to minimise waste in slicing processed foodstuff stubs;
Integrated and removable sharpening and honing device;
Fully guarded for safety when disassembled.
Components of the model range
The following picture illustrates the main components of the slicer.
7
5
11
6
4
8
10
12
2
1
2
3
4
ON/OFF Switch
Slice thickness control
Product holder clamping handle
Meat table/carriage
Model OMAOG Series Belt Driven Gravity Slicers
3
1
5 Last slice device/meat grip
6 Blade cover
7Blade
8 Slice thickness plate
9
9 Slice deflector
10 Blade cover fastener handle
11 Integrated blade sharpener device
12Pusher
5
Operation and Safety Manual
™
Installing the
slicer
Positioning the slicer
No matter where you put the slicer, you must allow at least as much space as the overall
dimensions indicate. Allowing an additional minimum of 20cm either side of the slicer will make
access for cleaning and maintenance easier.
Make sure that the surface that you intend placing the slicer on is solid, flat, level, dry and
smooth. Ideally, the surface should be between 80cm and 90cm high.
Electrical connections
The slicer connects to a single phase 240 Volts power supply using the power cord supplied.
Simply connect the plug on the end of the power cord to the power point.
Cleaning and function check
Before you use the slicer, we recommend that you clean all exposed surfaces with a soft cloth
that has been placed in clean warm water and light detergent and squeezed dry. This will remove
any traces of machine oil, dirt or grit picked up during manufacture or storage.
Before you clean the machine, make sure that the thickness control is set to zero so that
the slicer blade edge is shielded, and make sure that the power is turned OFF.
You should never hose down or spray with water any component of this machine or its
environment.
You should never immerse the machine into water.
Once the slicer is clean you can check that it is functioning correctly.
1. Make sure that the slicer is switched off at the front of the machine.
2. Ensure that all the supplied guards and blade shields are correctly fitted.
3. Check that the meat table/carriage moves easily and that it does not stick at any point along
its travel.
If the carriage is difficult to move or seems to stick now and then refer to the Maintenance
section for instructions on lubrication.
4. Check that the last slice device/meat grip moves freely along the length of its travel.
If the last slice device/meat grip is difficult to move or seems to stick now and then refer to
the Maintenance section for instructions on lubrication.
5. Check that the thickness control operates smoothly. Be sure to return it to the zero mark
before proceeding.
6. Switch the slicer on at the front of the machine. Immediately the blade will spin in an anticlockwise direction.
7. Switch off the machine at the front of the machine.
Your slicer is now ready to use.
6
Model OMAOG Series Belt Driven Gravity Slicers
Operation and Safety Manual
™
7
Operating the
slicer
5
11
6
4
8
10
12
3
2
1
2
3
4
ON/OFF Switch
Slice thickness control
Product holder clamping handle
Meat table/carriage
1
5 Last slice device/meat grip
6 Blade cover
7Blade
8 Slice thickness plate
9
9 Slice deflector
10 Blade cover fastener handle
11 Integrated blade sharpener device
12Pusher
Things to keep in mind
1. The foodstuff should only be loaded onto the meat table with the thickness control set
to zero and the power switched off at the control panel.
Aside from being essential to your safety, these conditions keep the foodstuff to be
sliced (particularly if it is solid) from being accidently knocked against the cutting
edge of the blade, which could be damaged.
2. The recommended, and only safe way of moving the meat table during slicing
operations is with the pusher.
3. The slicing movement should be done with a speed that is constant and appropriate to
the density and/or hardness of the foodstuff to be sliced. The general rule-of-thumb is
that the harder the foodstuff, the slower the slicing.
Following this rule will result in a slice with a good, clean appearance, without putting
undue strain on either the cutting blade or the motor.
4. Sharpen the blade as soon as the sliced foodstuff begins to look ragged or roughened,
or when the effort required to slice increases significantly. Refer to the Maintenance
section for the correct procedure for blade sharpening.
Normal operation
Begin using the slicer by returning the thickness control (2) to zero and making sure that the
meat tray carriage is pulled to the front of the slicer.
1. Place the foodstuff on the meat table/carriage (4) with the side to be sliced touching the
thickness plate (8) and up against the meat table fence.
2. Swing the Last slice device/meat grip (5) over so that it rests on top of the foodstuff.
3. Set the desired thickness of slice using the thickness control (2).
4. Turn the slicer on at the front of the machine (1). Immediately the ON/OFF switch will light
up, showing power is on, and the blade will spin in an anti-clockwise direction.
5. Grasp the pusher (12) firmly and push the meat table away from you towards the back of the
slicer. Once the slice has been cut, pull the meat table back towards you.
6. Repeat step 5 as often as required to obtain the number of slices needed.
7. When you have finished slicing, make sure that the meat table/carriage is pulled to the front
of the slicer and switch off the power at the control panel (1).
Model OMAOG Series Belt Driven Gravity Slicers
7
™
Operation and Safety Manual
Using the Last Slice device/meat grip
Cleanly slicing the last 1 or 2 centimetres of foodstuffs on a slicer without wastage can be
difficult. This is particularly the case when slicing packaged foodstuffs with rounded-off ends
(or stubs). The last slice device/meat grip overcomes this problem.
1. When the foodstuff is sliced down to the last 1 or 2 centimetres, lift up the last slice device/
meat grip (5) and turn the foodstuff around so that the uncut end of the stub is pressed
against the thickness plate (8).
2. Position the last slice device/meat grip (5) behind the foodstuff so that the spikes of the last
slice device/meat grip presses into the cut face of the foodstuff.
3. Continue slicing until the remaining foodstuff has been cut.
8
Model OMAOG Series Belt Driven Gravity Slicers
Operation and Safety Manual
Cleaning the
Slicer
™
This section deals with cleaning your slicer, including blade cleaning.
We recommend that, before cleaning or maintenance tasks are undertaken, the machine
operator(s) receive some training from authorised Brice representatives, preferably during the
installation phase.
Before carrying out cleaning or maintenance tasks, it is very important that:
1. Power to the slicer is disconnected at the powerpoint; and
2. The thickness control is set to its “zero” position.
You should never hose down or spray with water any component of this machine or its
environment.
You should never immerse the machine into water.
Be very careful performing any cleaning or maintenance task that brings you close to,
or in contact with, the slicer blade. Always perform these tasks with the appropriate
protection - steel mesh safety gloves. The blade is very sharp and the risk of a cutting
injury without proper protection or due care is high.
General Cleaning
The slicer has been designed and built for efficient and speedy cleaning to ensure hygienic
operation.
Before using the slicer
1. Before the slicer is switched on for the first time each day, carefully wipe over all exposed
surfaces with a cloth that has been placed in warm water and squeezed dry. This removes
any dust or other matter that may have been deposited over night.
2. Before the start of each cutting operation, and with the slicer switched OFF at the power
switch on the front of the machine, wipe down the thickness plate, the meat tray and the
receiving tray to remove any residual material left from the last cutting operation.
At the end of the day
1. After the slicer has been used for the last time, turn the machine OFF at the ON/OFF switch
and at the powerpoint, and disconnect the power cord.
2. Make sure the slice thickness control is set to the "zero" position. Turn the product holder
clamping handle (3) anti-clockwise and slide the meat table/carriage assembly until it locks
in place enabling you to lift the meat table/carriage assembly off for cleaning.
NB: If the slice thickness control is not set to the "zero" position the meat table/
carriage assembly will not lock in place.
3. With a cloth that has been placed in warm water and mild detergent and squeezed dry, wipe
down all visible surfaces.
Cleaning the Blade
After the machine has been cleaned as described above, you can now clean the slicer blade,
itself.
You must wear appropriate hand protection, such as steel mesh safety gloves, for this
procedure as it involves uncovering and touching the blade. You risk serious injury if you
do not wear protective gloves.
Model OMAOG Series Belt Driven Gravity Slicers
9
Operation and Safety Manual
™
1. With the meat table/carriage assembly removed, undo the blade cover fastener handle (10)
and lift the blade cover (6) straight off the blade.
2. Turn the slice deflector (9) to expose the back of the blade.
3. Clean the centre plate with a warm damp cloth.
4. The blade is now completely exposed. Wearing steel mesh protective gloves, wipe down the
blade surfaces (front and back) using a warm, damp cloth.
5. Dry off the blade and lightly smear on some protective oil using the cloth supplied. Make
sure that you are still wearing the steel mesh glove.
6. Replace the blade cover so that the nut on the underside of the plate engages the blade
centre.
7. While pressing down on the centre of the plate push and turn the blade cover fastener
handle (10) to engage it in the blade cover. Tighten the handle.
8. Replace the meat table/carriage assembly and tighten the product holder clamping
handle (3) which will release the meat table/carriage.
Make sure that the edge of the meat table/carriage sits right up against the blade cover.
You may have to push the meat table/carriage back to the end of its travel to seat it correctly.
The slicer is now clean and ready for use.
Cleaning Schedule
How frequently the slicer is cleaned will depend on how heavily the machine is used.
However, we recommend that you adopt the following cleaning schedule as a MINIMUM
requirement to maintain hygiene.
Before
first use
The cleaning schedule
Wipe down slicing guide,
meat table & centre plate
Wipe down all exposed
surfaces (no disassembly)
Clean all surfices including
blade (disassemble machine)
10
After
every use
Every
half day
After
last use
✔
✔
✔
✔
✔
Model OMAOG Series Belt Driven Gravity Slicers
Operation and Safety Manual
Maintenance
™
This section deals with routine maintenance for your slicer, including blade sharpening.
We recommend that, before cleaning or maintenance tasks are undertaken, the machine
operator(s) receive some training from authorised Brice representatives, preferably during the
installation phase.
Before carrying out cleaning or maintenance tasks, it is very important that:
1. power to the slicer is disconnected at the powerpoint; and
2. the thickness control is set to its “zero” position.
Be very careful performing any cleaning or maintenance task that brings you close to,
or in contact with, the slicer blade. Always perform these tasks with the appropriate
protection - steel mesh safety gloves. The blade is very sharp and the risk of a cutting
injury without proper protection or due care is high.
Routine Maintenance
The robust design of the slicer means that there is very little required in the way of routine
maintenance. Generally, the only maintenance required is cleaning (discussed in the previous
section) and lubrication of the meat table and meat grip carriage bars. Blade sharpening is only
infrequently required, when the blade no longer slices cleanly.
Cleaning
Normal cleaning, as specified in the previous section and in accordance with the recommended
schedule, is all that is required to maintain the external surfaces of the slicer.
We recommend that you clean the machine prior to any other maintenance operation so that all
surfaces are free of and grease. This makes the machine easier and safer to handle.
Lubrication
1. Turn the slicer OFF at the powerpoint, and disconnect the power cord.
2. Make sure the slice thickness control is set to the "zero" position. Turn the product holder
clamping handle (3) anti-clockwise and slide the meat table/carriage assembly until it locks.
3. Lubricate the meat table/carriage bar located under the machine by placing a few drops of
food grade machine oil on your fingers and rubbing it along the bar. Slide the meat table/
carriage back and forward several times to spread the oil. This process only needs to be
undertaken if the meat table/carriage doesnt move freely.
4. Lubricate the guide bar of the last slice device/meat grip with 3-6 drops of food grade
machine oil. This should be undertaken at the end of each day.
Model OMAOG Series Belt Driven Gravity Slicers
11
Operation and Safety Manual
™
Blade sharpening
The self-contained blade sharpener (with its own grinding and finishing stones) makes blade
sharpening a simple task.
NB: You must clean the blade before sharpening, you must wear protective steel mesh
gloves during this operation.
Part of this operation requires the slicer to be switched ON with the blade rotating.
You should take the utmost care during that phase of the operation.
The slicer blade requires regular sharpening to work cleanly and efficiently. How often you
sharpen the blade will depend on the condition of the blade after use and the type of products
being sliced.
To keep the blade working efficiently, we recommend that you sharpen it at least once every day.
You should keep in mind the following things when sharpening the blade:
1. The blade should only be sharpened after the slicer has been cleaned as specified in the
previous section; and
2. The sharpener cannot function properly once the blade diameter has been reduced by more
than 10mm. Contact your authorised Brice technician to arrange for a replacement once the
blade wears to this point.
To sharpen the blade:
The self-containg sharpener
2
Positioning the sharpener
Lift (1) turn the sharpener 180° (2)
and lower (3) to engage the blade.
3
1
Using the sharpener
Press the Grinding Wheel button (1)
for ten seconds. Continue to hold the
Grinding Wheel button and press the
Finishing Wheel button (2) together for
five seconds.
12
1
2
1. Clean the blade, removing any greasy residue.
2. Turn the slicer OFF at the power switch.
3. Set the slice thickness control to the "zero"
position to make sure that the blade is covered by
the thickness plate.
4. Lift the sharpener device.
5. Rotate the device 180° and lower it over the
blade. See the illustration at the left for how to do
this. The sharpener is now correctly positioned.
6. Push the power switch to ON to start the machine.
The blade will begin turning.
7. Press the grinding wheel button to move the
grinding wheel against the spinning blade. Hold
the grinding wheel against the blade for about 10
seconds.
8. With the grinding wheel still pressed against the
blade, press the finishing wheel button to move
the finishing wheel against the blade. Hold both
wheels against the blade for a further 5 seconds.
AT THE SAME TIME release the two wheels.
9. Turn the slicer OFF by pressing the power switch.
10.Only AFTER the blade has stopped turning, return
the sharpener to its normal position.
Model OMAOG Series Belt Driven Gravity Slicers
Operation and Safety Manual
Troubleshooting
™
This section deals with the problems you may find when using the Model OMAOG Series, and
the methods and procedures for solving them quickly and easily.
Mechanical or electrical problems during operation
Indication
Problem
Solution
Machine does not operate
Poor/no electrical current
Fuse blown (if fitted)
Other parts fo machine
are defective
Notify Brice service
Replace fuse
Notify Brice service
Machine slices poorly
Blade is not sharp enough
Sharpen the blade
Meat table/carriage does
not run smoothly
Slide bar requires oiling
Clean and oil meat table/
carriage bar
The meat grip does not
slide smoothly
The meat grip is dirty or
requires oiling
Clean and oil meat grip
slide bar
Blade stops rotating whilst
slicing meat
Motor drive belt is loose or
broken
Notify Brice Service
Motor runs but blade does
not rotate
Motor drive belt is cracked
or broken
Notify Brice Service
Model OMAOG Series Belt Driven Gravity Slicers
13
Copyright Information
Copyright © 2013 Brice Australia Pty. Ltd.
This document may not be reproduced, in whole or in part, by any means without the prior express written permission of the copyright
owner.
Brice and the BRICE logotype are trademarks of Brice Australia Pty. Ltd.
Printed in Australia
BA178 OMAOG Series 4/13