1
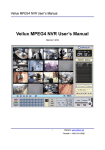
VEILUX NVR User’s Manual
Veilux NVR User’s Manual
(Version 1.0.18)
1
VEILUX NVR User’s Manual
Introduction
Thank you for purchasing Veilux’s NVR.
NVR program connects to network video servers (up to 16 channels) and enables you to record live video,
search through recorded files and play them. Moreover, NVR performs various control functions such as
camera PTZ, preset, and relay on/off. NVR is more enhanced system focused on live video transmission
on network. With NVR, you can use all functions of DVR wherever you are.
For more information or inquiry, please contact us to the followings;
Home Page
: www.veilux.net
e-mail
: [email protected]
Telephone
; 1-800-510-6528
Fax
: 1-928-437-6270
Address
: 3015 Eagle Dr100, Grand Prairie, TX 75052, USA.
Software, Server and service may be charged according to change of policy or may be stopped
without prior notification. Appearance, function and specification may be changed without prior
notification. Our company assumes no responsibility for visible or invisible loss resulted from
changes in policy or products.
2
VEILUX NVR User’s Manual
Feature
Monitoring
- 16 channel video inputs
- 4,6,8,9,16 screen display at user’s option
- Expanded & contracted views / Auto Change Screen Display
Recording
- Force Recording: Record whenever you want manually.
- Recording by sensor detection: Recorded automatically when sensor activates.
- Recording by motion detection: Recorded automatically when motion is detected.
- Recording by scheduling: Recorded automatically according to the one week scheduling time table
users set.
Searching
- Search through recorded files by date, time and recording method.
Playback
Camera Controlling
- Playback recorded files.
- Control camera Pan/Tilt/Zoom. (This feature is only available in some PTZ cameras.)
- Support pre-defined camera move.
Relay Controlling
- Control various electronic devices by relay output
3
VEILUX NVR User’s Manual
TABLE OF CONTENTS
1.
OVERVIEW ......................................................................................... 1
2.
PRIOR TO INSTALLATION ................................................................ 7
2.1.
3.
4.
6.
..................................................................................................
PROGRAM INSTALLATION. .............................................................. 9
3.1.
PROGRAM INSTALLATION ...............................................................................
1.1.
RUNNING NVR PROGRAM ...............................................................................
NVR USER INTERFACE................................................................... 12
4.1.
5.
GLOSSARY
NVR VIEWER ............................................................................................ 12
MENU DESCRIPTION ..........................................................................
5.1.
CONNECT MENU ...........................................................................................
5.2.
GENERAL SETUP MENU ..................................................................................
5.3.
SYSTEM MENU ......................................................................................... 17
5.4.
FILE MENU ............................................................................................... 19
5.5.
POP-UP MENU .......................................................................................... 20
HOW TO USE........................................................................................
6.1.
6.1.1.
6.1.2.
CONNECT AND DISCONNECT
..........................................................................
CONNECT ..............................................................................................................................
DISCONNECT ........................................................................................................................
6.2.
DISPLAY VIEW
.......................................................................................... 23
6.3.
AUTO CHANGE CHANNEL DISPLAY .................................................. 24
6.4.
I FRAME DISPLAY MODE .................................................................... 26
6.5.
PTZ & RELAY & PRESET & SENSOR CONTROL ................................ 27
6.6.
SCREEN CAPTURE ............................................................................. 28
6.7.
ACTIVATE EVENT BEEP SOUND ........................................................ 29
4
VEILUX NVR User’s Manual
7.
6.8.
RECORDING & CAPTURE DIRECTORY SETUP................................. 30
6.9.
FORCE RECORDING........................................................................... 31
6.10.
EVENT RECORDING ........................................................................... 31
6.11.
SCHEDULE RECORDING .................................................................... 32
6.12.
PLAY RECORDED FILES & VIEW CAPTURED FILES ......................... 34
6.13.
DISC SPACE SETTING ........................................................................ 35
6.14.
APPLY DISPLAY FILTER ...................................................................... 36
TROUBLESHOOTING ...................................................................... 37
7.1.
CANNOT RECORD ..................................................................................
7.2.
CANNOT FIND RECORDED FILES...................................................... 37
7.3.
CANNOT CONNECT CAMERA SERVER ............................................. 37
7.4.
DISPLAY VIEW DOES NOT FLASH AND BEEP DOES NOT SOUND
WHEN EVENTS OCCUR. .................................................................... 37
7.5.
8.
PICTURE FLICKERING. ....................................................................... 37
APPENDIX ........................................................................................ 38
8.1.
REQUIRED SYSTEM ........................................................................... 38
5
VEILUX NVR User’s Manual
1.
Overview
Veilux’s NVR software enhances the performance of camera server and enables users to use it in
an easier way. NVR optimizes DVR system to fit network environment. DVR focuses mainly on
storing video files in its storage so that its live videos and recorded files cannot be transmitted
appropriately on network. Veilux’s NVR eliminates such an inconvenient element as storage
space limitations. NVR provides multiple screen displays, 24 hour reliable record, playback and
advanced search by separating web server for network transmission from file storage. NVR is
video recording system based on network environment, thus, users can easily operate NVR
software once they first install web camera on network and have basic understandings on network
system.
NVR Program
computer
Internet
Camera Server
Camera Server
MAX
16 Channels
Home Automation
6
VEILUX NVR User’s Manual
2.
2.1.
Prior to Installation
Glossary
Network: Network is defined in various meanings, but used in three different
meanings here.
1. Network connected to Internet: You can connect to camera server not only by
IP address but also MAC address.
2. Closed private network or local network using IP share devices: You can
connect to camera server by IP address.
3. The case that camera server directly connects to monitoring computer: You
can connect to camera server by its default private IP address.
IP Address: An identifier for a computer or device on a TCP/IP network. Networks
using the TCP/IP protocol route messages based on the IP address of the
destination. The format of an IP address is a 32-bit numeric address written as four
numbers separated by periods. Each number can be zero to 255. For example,
1.160.10.240 could be an IP address.
MAC Address: In a local area network (LAN) or other network, the MAC (Media Access
Control) address is your computer's unique hardware number. When you're connected to the
Internet from your computer, a correspondence table relates your IP address to your
computer's physical (MAC) address on the LAN.
Port Number: A port number is a way to identify a specific process to which an Internet or
other network message is to be forwarded when it arrives at a server. Each program employs
port number. Defined port numbers are used for basic programs; Telnet 30, HTTP 80, etc.
Server: In the client/server programming model, a server is a program that awaits and fulfills
requests from client programs in the same or other computers. A given application in a
computer may function as a client with requests for services from other programs and also as
a server of requests from other programs.
Setup: Configuration of display, recording, schedule and directory of recorded files
can be set up on NVR
Recording: NVR records video in MPEG4 format transmitted from camera server.
Motion detection: NVR system automatically records the events when some
motion is detected.
Sensor detection: NVR system automatically records the events when sensors
7
VEILUX NVR User’s Manual
detect. Sensor is mainly used in security
system for its various kind and reliability.
Capture: NVR system capture a still image from video. Capturing is similar to
taking a picture.
Schedule: You can set up the schedule of force recording, sensor recording and
motion recording because you cannot always monitor. When the scheduled time is
up, video is automatically recorded.
Directory: Directory is the folder that store recorded files. Normally, recorded files
are stored in the hard disc of your computer that NVR is installed. You should
designate new directory if you add new hard disc in your computer to expand
storage space.
I Frame: Video compressed in MPEG-4 is composed of lots of frames. I Frame
represents a complete picture itself not referring to previous or next frame. You see
I Frame when you view a still view through searching function.
Relay:
Relay is used to control various electronic devices. It functions as a
switch to control ON/OFF on electronic devices.
Pan: Controlling camera movement horizontally. Panning angle range varies up to
360°
Tilt: Controlling camera movement vertically. Tilting angle range varies.
Zoom: Zooming camera enables you to view distant scene by magnifying. Zoom
control function is not applied to some models.
Preset: PTZ-capable cameras use preset position. You can set camera movement
to where you want to view. You don’t need to control camera PTZ manually.
Private IP: Private IP should not be used on the Internet. This is only used on
local network.
Universal IP: Universal IP having sole IP address is used on the Internet.
8
VEILUX NVR User’s Manual
3.
Program Installation
Run “Setup.exe” file to install NVR program.
3.1.
Program Installation
After you run “MPEG4 NVR.exe,” installation procedure starts as the figure above.
Click “Next” to move on to the next step
Click “Next” to continue to install the program.
9
VEILUX NVR User’s Manual
The program is being installed.
Click “Finish” to complete installation.
10
VEILUX NVR User’s Manual
1.1. Running NVR Program
When you complete installation, “MPEG4 NVR” icon is created on your desktop. Double-click the
icon to run the program.
You can also run the program under I Start I Program I VEILUX NVR I VEILUX NVR I
11
VEILUX NVR User’s Manual
4.
4.1.
NVR Viewer User Interface
NVR Viewer
12
VEILUX NVR User’s Manual
Indicate date and time of user’s system.
CH
Indicate channel number
Server Name Indicate server name
State
Indicate the name of connected server.
Click this button when you need one-way
audio connection.
Click this button when you need two-way
audio connection.
Check this checkbox when you control one
channel.
Check this checkbox when you control all
channel.
Control video file play.
Record video from connected server.
Play
Play 2X
Pause
Stop
Open file menu window.
Capture still images.
Connect server.
Disconnect server.
Open server list menu window.
Open general setup menu window.
To open system setup menu window.
To exit NVR program.
Record all channels.
Capture all channels.
Indicate selected channel number.
To use PTZ.
To use Relay.
To use Preset.
13
VEILUX NVR User’s Manual
To use Sensor
To control P/T of cameras (Pan/Tilt is
controlled just by clicking on Screen, or
clicking Direction Key on Keyboard)
Automatic Pan/Tilt
Control PTZ speed.
Zoom In, Zoom Out.
Focus Near, Focus Far.
To activate each relay name selected from
the list.
To deactivate each relay name selected from
the list.
Double-click each preset name from the list
to change camera view pre-defined by user.
Click “TOUR” button to see all the preset
camera views by turns at regular intervals.
Sensor Name List Box. When sensor
activated, “Sensoring” displays in the “State”
field.
4CH Screen Display.
6CH Screen Display.
8CH Screen Display.
9CH Screen Display.
16CH Screen Display.
Auto Change Screen Display
Ring the bell. (S-152)
To turn off beep sound.
14
VEILUX NVR User’s Manual
5.
5.1.
Menu Description
Connect Menu
NO
Description
1
To see the previous connect list.
2
To see the next connect list.
3
Connect List Name
4
Display connected server list.
5
Click this button to move from server list to connected server list.
6
To re-connect to a server in case of being disconnected.
7
To delete selected server list from connected server list.
8
To save connected server list.
9
To delete all the connected lists.
10
Display server list.
11
Display server name.
12
To address IP type.
13
To address MAC type.
14
Enter either IP or MAC address.
15
Enter port number for IP address or channel number for MAC address.
16
Audio Disable
15
VEILUX NVR User’s Manual
5.2.
17
One-way Audio
18
Two-way
19
Enter user ID.
20
Enter user password.
21
Check “Password save” checkbox to save password as file.
22
To create a new folder.
23
To add a new server
24
To delete a selected server or server.
25
To save configuration.
26
To apply configuration and close “Connection Menu” windows.
27
To cancel configuration and close “Connection Menu” windows.
General Setup Menu
NO
Description
1
Check desired checkboxes to see I frame mode display.
2
Check desired checkboxes to enable motion detection recording.
3
Check desired checkboxes to enable sensor detection recording.
16
VEILUX NVR User’s Manual
4
Check desired checkboxes to enable schedule recording.
5
To select a channel from the drop-down list Setup.
6
To appoint schedule recording time.
7
Click this button to set up schedule recording.
8
Click this button to schedule recording.
9
To save appointed schedule recording time.
10
To save schedule recording time on pop-up menu by right-clicking.
11
To see the previous connect server list.
12
Display connect list name.
13
To see the next connect server list.
14
To select motion recording time from the drop-down list.
15
To select sensor recording time from the drop-down list.
16
To select force recording time from the drop-down list.
17
5.3.
To check “Beep enable” checkbox to go off beep sound when events
occur.
18
To select beep sound time from the drop-down list
19
Check this check box to enable disc alarm message.
20
To select disk volume for disk alarm message from the drop-down list.
21
To select display filter from the drop-down list.
21
Apply and save configuration.
22
Close general setup menu window.
System Menu
17
VEILUX NVR User’s Manual
NO
Description
1
4 Channel Screen Display
2
6 Channel Screen Display
3
8 Channel Screen Display
4
9 Channel Screen Display
5
16 Channel Screen Display
6
Check this checkbox to enable auto change view
7
Check this checkbox to disable auto change view
8
To select auto change view time from the drop-down list.
9
Check this checkbox to select one channel audio change.
10
Check desired checkboxes to enable audio change.
11
Check this checkbox to select four channel auto changes.
12
Check desired checkboxes to enable four channel auto changes.
13
Click this button to designate a recording folder.
14
Display a recording directory.
15
Click this button to designate a capture folder.
16
Display a capture directory.
17
Enter IP server address for MAC address type.
18
Enter port number of IP server address.
19
Save configuration and close system menu window.
20
Cancel configuration and close system menu window.
18
VEILUX NVR User’s Manual
5.4.
File Menu
NO
Description
1
Select a directory that desired files are saved.
2
Check this checkbox to find recording files.
3
Check this checkbox to find capture files.
4
Check this checkbox to find force recording files.
5
Check this checkbox to find motion recording files.
6
Check this checkbox to find sensor recording files.
7
Check this checkbox to find schedule recording files.
8
Check this checkbox to find all recording files and capture files.
9
Check this checkbox to find files by date.
10
Select date when files are created.
11
Check this checkbox to find files by time.
12
Select time when files are created.
13
Check this checkbox to delete file list and to find new files.
14
15
Check this checkbox to find additional files and to add them to existing
file list.
Click to find files.
16
Display files.
17
Play a selected file.
18
Close file menu window.
19
VEILUX NVR User’s Manual
tkfkdgoTdjdy
5.5.
Pop-up Menu
NO
Description
1
Connect a selected server.
2
Disconnect a selected server.
3
Record or stop recording.
4
Open file menu window.
5
Capture a still image.
6
Full-sized View.
7
Open connection menu window.
8
Open general setup menu window.
9
Open system menu window.
10
Open administrator’s webpage.
20
VEILUX NVR User’s Manual
6.
How To Use
6.1.
Connect & Disconnect
6.1.1. Connect
Click “Server List” icon as in the above figure and connection menu window opens.
Click [NEW SERVER] button, add new server to the connect list and save the configuration.
Enter IP address for IP address type after checking “IP” radio button. Enter MAC address for MAC
address type after checking “MAC” radio button.
IP Address Type: Select when you use Universal IP. (You can use private IP when you connect to
local network)
MAC Address Type: Select when you use Private IP. (VEILUX server’s MAC address is used.)
Click “
” button and server list is added to Connect List. Click [LIST SAVE] and [OK] button.
21
VEILUX NVR User’s Manual
Click [Connect] button when you want to connect.
- [ONE CH MODE]: Connect one selected channel.
- [ALL CH MODE]: Connect all channels.
6.1.2. Disconnect
Click [DisConnect] button when you want to disconnect.
- [ONE CH MODE]: Disconnect one selected channel.
- [ALL CH MODE]: Disconnect all channels.
22
VEILUX NVR User’s Manual
6.2.
Display View
[16] Ch
[16] Channel Display View
23
VEILUX NVR User’s Manual
[6] Channel Display View
Selecting an area of the image by left-clicking and drag & drop.
6.3.
Auto Change Channel Display
Click [System Setup] button and system menu window opens.
24
VEILUX NVR User’s Manual
When you set up “Auto Chang View” shown in the figure above, each 2/ 3/ 6/11/13/15 channel
is shown on one screen display by turns at 5-second intervals.
Check [Four Channel] radio button when you want to use 4 screen display mode.
Set up as above and click [OK] button.
25
VEILUX NVR User’s Manual
Click “
” icon and the icon color turns red. You can each channel by turns on the display at
5-second intervals.
6.4.
I Frame Mode Display
Click [General Setup] button and general set up menu opens.
26
VEILUX NVR User’s Manual
Set up “I Frame Mode” shown in the figure above and click [OK] button.
(Set up each channel
as “I Frame mode” display to reduce the amount of processor power.
6.5.
PTZ / Relay / Preset / Sensor Control
Click [PTZ] to control camera PTZ.
You can also control camera PTZ by keyboard or Zoom In(+)/Zoom Out(-) and Focus
Near(N)/Focus Far(F) buttons.
Click [Relay] to control relay.
27
VEILUX NVR User’s Manual
Click [Preset] to apply user-predefined camera views.
When “Beep Enabled” checkbox is checked on general setup menu, “Sensoring” is displayed
on the “State” field. This informs you how many events occurred.
( Refer to 6.7 Activate Event Beep Sound)
6.6.
Screen Capture
Select channel you want to capture.
Capture completed when you click the icon shown in the above figure.
Screen is captured by the two modes; [ONE CH MODE] and [ALL CH MODE]
Checking [ONE CH MODE] radio button, you capture only one channel’s screen. When you
select [ALL CH MODE], you can capture all the connected channels you selected. (The
channels you select turn blue shown in the figure above.)
28
VEILUX NVR User’s Manual
6.7.
Activate Event Beep Sound
Click [General Setup] button and general set up menu opens as below.
Check [Beep Enable] checkbox, set beep time. Then, click [OK] to save and exit.
When sensor or motion detects, display view flashes and beep sounds
For sensor detection, display view flashes in yellow. For motion detection, flashes in white.
Click “
” button to stop beep sound.
29
VEILUX NVR User’s Manual
6.8.
Recording & Capture Directory Setup
Click [System Setup] button and system setup menu window opens as below.
.
[Recording Directory] and [Capture Directory] are designated for example as shown in the
figure above.
Click [OK] button to save and exit.
30
VEILUX NVR User’s Manual
6.9.
Force Recording
Select channels you want to record.
Recording starts when you click the icon and stops click it again shown in the above figure.
Video is recorded by the two modes; [ONE CH MODE] and [ALL CH MODE]
6.10.
Event Recording
Click [General Setup] button and general setup menu window opens as below.
31
VEILUX NVR User’s Manual
Set up [Motion Detection Recording Enable] & [Sensor Detection Recording Enable] as shown
in the figure above and Click [OK] to exit.
Set up recoding time on [Recording Time Setting].
The numbers of motion-detected channels turns red as shown in the figure above, recording
the channels’ videos. (On “force recording” mode, you can record for 20 minutes at one time.)
6.11.
Schedule Recording
Click [General Setup] button and general setup menu opens as below.
32
VEILUX NVR User’s Manual
Check [Schedule Recording Enable] checkboxes and click [SAVE].
Select a channel from the drop-down list and set recording time & day by mouse-point
dragging on the schedule table. Selected time & day fields turn red. And click [SAVE].
- [Schedule Setup] : Display recording time & day fields in red.
- [Schedule Erase] : Erase red color by deleting recording time & day fields.
- [SAVE AS…] : Apply current schedule recording to other channels in the same way.
Click [OK] button.
(Record processing status is shown in the figure above when No. 1 channel is selected and its
scheduled time is up.)
The number of selected channel turns red when their scheduled time is up. Recorded files are
saved by 20-minute length.
33
VEILUX NVR User’s Manual
6.12.
Play Recorded / Captured Files
Click the button as shown in the figure above, file menu window opens as below.
Check “Record File” radio button at [Search Option] box. Search files and select a file you want
to play. Click [OK] button to play the selected file.
Check “Capture File” radio button at [Search Option] box. Search files and select a file you
want to view. Click [OK] button to view the selected file.
34
VEILUX NVR User’s Manual
6.13.
Disc Space Setting
Click [General Setup] button and general set up window opens blow.
Check “Old File Delete Enable” checkbox
-
Old files are deleted when “Alter Disc Space” exceeds your empty hard disc space.
You can keep recording when there is little empty space in your hard disk by deleting old
files
Uncheck “Old File Delete Enable” checkbox
-
You cannot record when “Alter Disc Space” exceeds your empty hard disc space.
35
VEILUX NVR User’s Manual
6.14.
Apply Display Filter
Click [General Setup] button, and general setup menu window opens below.
Select “Display Filter” from the drop-down list when picture on the display has noise. (Applied
to only S-152)
36
VEILUX NVR User’s Manual
7.
Troubleshooting
7.1.
Cannot record
- Check “Recording Directory” on [System Setup] menu window.
- This happens when you uncheck “Old File Delete Enable” and “Alter Disc Space” exceeds
your empty hard disc space.
7.2.
Cannot find recorded files
- Recorded files are deleted when you check “Old File Delete Enable” checkbox on [General
Setup] and “Alter Disk Space” exceeds your empty hard disk space.
7.3.
Cannot connect camera server
-
When you fail to connect camera server, NVR keep trying to connect it for about 20
minutes.
7.4.
Click “DisConnect” button to disconnect server.
Display view does not flash and beep does not sound when
events occur.
- [Refer to 6.7 Activate Event Beep]
7.5.
Picture Flickering
- Picture flickers when your system is not efficient enough. Upgrade your system or replace
VGA card.
37
VEILUX NVR User’s Manual
Item
8.
Minimum Required System
Recommended System
CPU
Pentium Ⅳ 2.0G
Pentium Ⅳ 2.4G or higher
Main Memory
256MB
512MB or higher
O/S
Windows 2000/XP
Windows 2000/XP
Web Browser
I.E 5.0
I.E 5.0 or later
Resolution
1,024 * 768
1,152 * 864
Network
100 Base-T Ethernet
100 Base-T Ethernet
Appendix
8.1.
Required System
OS:
- Windows2000 Professional
- Windows2000 Server
- WindowsXP Home Adition
- WindowsXP Professional
Support Language
- (Korean, English, Japanese, and Chinese)
Network:
Leased line, Cable, xDSL, etc. (Recommended to use high-speed line for 16 channel screen display.)
Feature:
-
16 channel screen display.
-
Support 16 servers or more.
-
2-way audio, PTZ camera control, relay control, search through recorded files. 24 hour
38
VEILUX NVR User’s Manual
monitoring, recording
-
Two-way audio support, camera Pan/Tilt/Zoom, preset/relay control, recorded file search,
24-hour monitoring & recording.
Cautions
Processor resource changes according to frame rate per channel. NVR program cannot be run
normally if your system processor uses 100% resource. Select “ I Frame Mode” to low your
system resource.
39