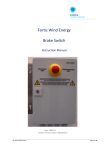
Download Manual_Overvoltage_Charge_Controller_48V
Transcript
Fortis Wind Energy
Overvoltage / Charge Controller
48V-100A
Instruction Manual
Type: IN 48V_100A
___________________________________________________________________________________________________________________
IM_Overvoltage Controller_48V-100A
Page 1 of 11
No part of this document may be reproduced or transmitted in any form or by any means, electronic or
mechanical, including photocopying and recording, for any purpose without the express written permission of
FORTIS WIND ENERGY.
FORTIS WIND ENERGY reserves the right to make changes to any and all parts of the documentation, at any time,
without obligation to notify any person or entity of such changes.
© Copyright 2008, FORTIS all rights reserved.
Fortis Wind Energy
9751 AC Haren
The Netherlands
___________________________________________________________________________________________________________________
IM_Overvoltage Controller_48V-100A
Page 2 of 11
§ Table of Contents §
Index:
Page
1
Introduction____________________________________________________________ 4
1.1 Health and Safety Information_____________________________________________ 4
2
3
4
4.1
5
6
7
8
Safety precautions_______________________________________________________ 5
Overview of functions____________________________________________________ 5
Installations____________________________________________________________ 6
Programming of the charging end voltage of the battery_________________________ 7
Operation and maintenance_______________________________________________ 8
Specification___________________________________________________________ 9
Scope of delivery________________________________________________________ 9
Wiring Diagram__________________________________________________________ 10
___________________________________________________________________________________________________________________
IM_Overvoltage Controller_48V-100A
Page 3 of 11
1. Introduction
Thank you for choosing FORTIS energy systems. Your choice means tried and tested reliability, no
maintenance costs and the convenience of a quiet, independent power supply. FORTIS wind turbines
are in operation all over the world and can withstand almost every environment imaginable. Even Arctic
expeditions have benefited from the reliable power the FORTIS wind turbine produces. FORTIS tests
their systems under the worst possible weather conditions. FORTIS turbines should only be installed by
trained and approved installers. A FORTIS-system is almost always composed of various components:
the wind turbine itself is only one component of this system. We can supply controllers for battery
charging and for grid connection. For hybrid systems, controllers are available to couple a photovoltaic
solar generator or to a diesel or petrol generator together to a FORTIS Wind turbine. In other words, the
possibilities with an FORTIS wind turbine are endless in the sense that they can be adapted to suit
almost every conceivable application.
1.1 Health and Safety Information
Please refer installation and servicing to qualified service personnel only. High currents
and forces are produced by this wind turbine system and incorrect installation or use may
result in
• risk of electric shock or fire
• mechanical damage
• injury or death
Health and Safety means having a positive and caring attitude and this should be
foremost in your mind in everything you do. The prevention of accidents, injury and
damage is a top priority.
Health and Safety work is not a matter to be left to someone else to deal with. Everyone
has a duty to other colleagues, the public and customers.
Important security notice
This Instruction Manual contains important operational guidelines and security considerations that
require your attention. Before installation, it is essential that the user first studies this user's manual in
detail and keeps in mind the safety matters that need attention. During user installation and operation
one must refer to this handbook's documentation. If you are unfamiliar with installation as shown
below, DO NOT CONTINUE and let a qualified Technical Engineer proceed with correct installation.
Failure to comply with the guidelines and instructions will void your warranty.
Electric risk symbol
This electric risk symbol is a sign of High Voltage.
___________________________________________________________________________________________________________________
IM_Overvoltage Controller_48V-100A
Page 4 of 11
2. Safety precautions
Please read this manual prior starting with the installation or commissioning.
This charge controller can only be used for the FORTIS-Montana wind turbine with the 48V generator
and 5 kW rated power.
The system for safe operation comprises of:
1] this charge controller
2] 4 pieces ballast resistor (1865W @ 56V each) that are delivered with the charge controller
properly connected (in parallel)
3] the 48V battery
4] the FORTIS-Montana wind turbine
Under no circumstances operate the wind turbine without charge controller or without connected
ballast resistors.
Wrongly dimensioned cables, improper connections, etc. bear a high risk of sparks and fire, injuries, or
damage of the wind turbine!
Please read this manual and the installation and operation manual of the wind turbine before starting
the installation.
Do not short circuit the “+” and “-“ or “R1” and “R2” terminals. For connection to the “R1” and “R2”
terminals only use the ballast resistors delivered with the wind turbine.
The internal capacitors may be charged, never short circuit the capacitor or ballast resistor “R1” and
“R2” terminals
External fuses for the battery are required, please use 125 A types suitable for DC current
3. Overview of functions
The charge controller has two main functions:
1] Rectifying the generator voltage for direct battery charging
2] Control of the external ballast resistors in case the battery is near its charging end voltage.
This controller puts additional load on the wind turbine to prevent overcharging of the
battery.
The two functional units are internally decoupled via separate rectifiers and do not interfere with each
other. The controller electronics incl. the display are supplied from the battery terminals, please do not
short circuit these terminals to make sure that the controller can work properly.
The ballast resistors are PWM controlled. If the voltage at the DC-output is below the programmed
value, there will be no load supplied to the ballast resistors. Above that voltage the power is supplied to
the ballast resistors.
The controller and the display are active whenever the voltage at the battery terminals is above 20V.
___________________________________________________________________________________________________________________
IM_Overvoltage Controller_48V-100A
Page 5 of 11
The display shows the rectified generator voltage, charging current, the rotor speed (rpm) and the
power supplied to the ballast resistor as a percentage of its rated power.
4. Installation
The charge controller is designed for wall mounting only. Screws and dowels are supplied with the
controller. Please use all 4 screws.
For sufficient cooling the outside air temperature has to stay below 35°C and the controller is not
exposed to direct sunlight. The casing is suitable for outdoor-installation (IP44).
Only use the original ballast resistors of the following rating supplied with the wind turbine:
1985W @ 56V (4 resistors connected in parallel)
The minimum cable cross section for each resistor is 4 mm². Shielded cables are recommended for
sensitive environments, the shielding shall be connected to the ground terminal next to the ballast
terminals.
The rated current is 100 A, please use appropriate cables with a minimum of 2 x 10 mm² or 1 x 25 mm²
cross section for each conductor for the battery connection and a minimum of 16 mm² for the generator
connection.
___________________________________________________________________________________________________________________
IM_Overvoltage Controller_48V-100A
Page 6 of 11
Connect the metal casing to ground, 2 free “PE” terminals are available
Connect the 4 ballast resistors in parallel and the cases and cable shielding to the “Ballast” terminals
“R1” (gray), R2” (gray), and “PE” (green/yellow)
Connect the battery to the terminals “+” (gray), “-“ (blue)
Connect the 3 phases of the generator to the terminals “L1” (gray), “L2” (gray), “L3” (gray)
4.1 Programming of the charging end voltage of the battery
Ensure that the charge controller is not connected to any power source and that the internal capacitors
have self discharged.
Inside the DIN-rail housing with the display there is a DIP-switch which allows programming the
maximum charging voltage for the battery. Remove the 2 small cross-drive screws and carefully open
the upper part of the case with the display.
The charging-end voltage of the battery can be programmed according to the battery type used:
___________________________________________________________________________________________________________________
IM_Overvoltage Controller_48V-100A
Page 7 of 11
DIP-switch
1: OFF 2: OFF
1: OFF 2: ON
1: ON
2: OFF
1: ON
2: ON
Charging-end voltage
(default) 55.2 V
56.4 V
57.6 V
58.8 V
5. Operation and maintenance
Inside the cabinet is a main switch for braking the generator via direct short circuit of all three phases.
The switch is not for active control of the wind turbine but only for maintenance of the electrical system
comprising of ballast resistors and battery.
If maintenance or works inside of the charge controller have to be made, please follow the procedure
below:
1] Stop the wind turbine as described in its operation manual, secure it against self
restarting
2] Open the cover
3] Move the lever of the internal “brake” switch to the position “ON” which means
that the brake will be activated.
4] Use a clamp current meter suitable for DC current to ensure that no current flows
to the battery
5] Disconnect the cables of the charge controller at the battery side or switch off
the external battery circuit breaker
6] Wait for 15 minutes until the internal capacitors are discharged
7] Measure the voltage at the capacitors to ensure that the remaining voltage is
low enough to start working on the inside of the controller box.
After finishing the work inside of the charge controller, switch off the “brake” switch, close the cover
and restart the wind turbine.
___________________________________________________________________________________________________________________
IM_Overvoltage Controller_48V-100A
Page 8 of 11
6.
Specification
Electrical
Minimum active supply voltage from the battery
Maximum supply voltage
Current consumption from battery
Rated battery voltage
Rated DC current
Rated generator power
Switch-in voltage for ballast resistor
DIP switch 00
DIP switch 01
DIP switch 10
DIP switch 11
Internal protection
Mechanical
Dimensions (width x height x depth)
Weight
Operating temperature range
20
65
approx. 15
48
100
5000
(2.30 V/cell) 55.2
(2.35 V/cell) 56.4
(2.40 V/cell) 57.6
(2.45 V/cell) 58.8
IP44
V
V
mA
V
A
W
V
V
V
V
360 x 340 x 210
15.0
-10 ... +40
mm³
kg
°C
Valid for: Serial numbers 0111008...
7. Scope of delivery
The controller
This manual
4 screws and 4 dowels 6 mm
Key for the cabinet
___________________________________________________________________________________________________________________
IM_Overvoltage Controller_48V-100A
Page 9 of 11
8.
Wiring Diagram
___________________________________________________________________________________________________________________
IM_Overvoltage Controller_48V-100A
Page 10 of 11
___________________________________________________________________________________________________________________
IM_Overvoltage Controller_48V-100A
Page 11 of 11


