Download Manual - Sparmax
Transcript
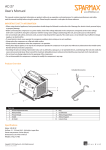
TC-610H
User’s Manual
www.SPARMAXair.com
This manual contains important information on product safety, set-up, operation, and maintenance. For optimum performance and safety,
read this manual carefully before using this product. Please keep this manual in a safe place for future reference.
IMPORTANT SAFETY INFORMATION
• When using electrical appliances, basic precautions should always be followed to reduce the risk of damage, fire, electric shock, personal injury
or property damage.
• Before connecting the compressor to a power outlet, check if the voltage indicated on the compressor corresponds to the mains voltage
(100-120 V or 220-240 V). Using the compressor with the wrong mains voltage could damage the unit, and could cause an electrical fire.
• Do not overload wall outlets, extension cords, or power strips beyond their capacity. This could cause a circuit breaker trip, insufficient voltage
supply, or an electrical fire.
• To avoid electric shock, never operate the compressor outdoors when raining, or in wet conditions.
• Always place the compressor on a flat and stable surface.
• Always remain in attendance when the compressor is in operation.
• Never place objects against, or on top of, the compressor. Operate the compressor in an open area without any obstructions that would restrict
the flow of fresh air into the compressor.
• Exceeding the pressure rating of pneumatic tools, such as airbrushes, spray guns, or air operated devices, could damage the tool and could also
cause serious personal injury. Never exceed the maximum allowable pressure rating recommended by your pneumatic tool’s manufacturer.
• Do not insert any foreign objects into the openings of the compressor.
• Do not disassemble the compressor or attempt to modify the compressor in any way.
Product Overview
Front view
Rear view
Included Accessories
1
14
7
2
3
8
4
9
13
16
17
5
20
12
6
10
11
Parts List
1
2
3
4
5
6
7
8
9
10
Handle
Steel Case
Compressor Motor
Air Tank Air Outlet
Air Tank
Air Tank Drain Valve
On/Off Switch
Fan Cover
Auto Stop Pressure Switch
Plug
Specifications
Motor: 1/6 HP AC
Air flow: 23 - 28 l/min (0.8 - 0.98 cfm) at open flow
Auto on/ off: 2.8/ 4.1 bar (40/ 60 psi)
Dimensions: L27 x W16 x H37 cm
Weight: 7.1 kg / 15.6 lbs
Copyright © 2014 Ding Hwa Co., Ltd. All rights reserved.
SP_MAN_TC610H_A4_20130412.1
18
15
11
12
13
14
15
16
17
18
19
20
Air Tank Safety Valve
Rubber Stands (4)
Moisture Trap
Pressure Regulator Knob
Outlet Cap
Moisture Trap Air Outlets (2)
Moisture Trap Drain Valve
Moisture Trap Air Inlet (Detachable Connector)
Pressure Gauge
Braided Air Hose
19
TC-610H
User’s Manual
www.SPARMAXair.com
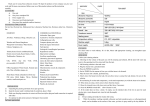
Product Set Up
1. First use: Carefully unpack the unit, verify that all parts listed in the “Parts List” are present, and visually inspect for damage. If there are any
signs of damage or if any parts are missing, do not use the product. Contact your retailer or supplier immediately.
2. Locate the compressor in a clean, dry, and well-ventilated area that has adequate air circulation.
3. Attach Moisture Trap to Air Tank Air Outlet.
4. Connect one end of the Curly Air Hose onto Moisture Trap Air Outlet, and the other end of the hose to your airbrush/air gun. (To connect to
two airbrushes, unscrew the Outlet Cap so another hose can also be connected to an Moisture Trap Air Outlet. Make sure all connections are
tight. NOTE: Different adaptors may be required for different airbrush or air gun brands and models. If your airbrush or air gun needs an
adapter, please contact your local retailer or supplier.
Product Operation
1. Plug the compressor into a power outlet. Turn the compressor on by pressing the On/Off Switch.
2.
0
100
To adjust air pressure, pull up on the black Regulator Knob until you hear
a “click.” Turn the knob clockwise to increase air pressure (“+” sign), or
counter-clockwise to decrease air pressure (“–” sign). When the desired
pressure is reached, push down on the knob to lock it in place.
NOTE: Adjust pressure only when the compressor is turned on and connected
to an airbrush/ air gun, with trigger/ handle depressed.
3. The Pressure Gauge connected to the Pressure Regulator/ Moisture Trap gives continuous, real-time readings of current air pressure delivery.
The Air Tank Pressure Gauge provides readings of Air Tank pressure.
4. When condensation forms in the Moisture Trap, push on the Moisture Trap Drain Valve to release built-up moisture. Perform this operation as
often as needed – with greater frequency the higher the humidity. SUGGESTION: When pushing on the drain valve, hold a paper towel under
the drain to collect water released from the drain.
With a dual-action airbrush attached, but not in use, the Auto Stop Pressure
5.
Switch automatically stops the compressor when the pressure reaches 60 psi,
and will automatically re-start the compressor when the airbrush trigger is
pushed down and the pressure drops to 40 psi. Do not attempt to remove the
Auto Stop Pressure Switch. In the rare instance that the switch malfunctions,
do not allow the compressor to operate above 80 psi.
6. Air Tank Maintenance: Drain the Air Tank of air and condensation after every use, or, for frequent users, at least once daily. To drain the Air Tank:
(1) Turn off the compressor. (2) Reach under the Air Tank and open the Air Tank Drain Valve. (3) Close the Air Tank Drain Valve when the Air Tank
Pressure Gauge reaches 0 psi. NOTE: The Air Tank is equipped with an Air Tank Safety Valve which will not allow tank pressure to exceed 100 psi.
7. Do not touch any exposed metal parts on the compressor during, or immediately after, operation. The compressor will remain hot for several
minutes after operation.
8. It is recommended that the compressor run continuously for no more than one hour. After one hour of continuous operation, use the On/Off
Switch to turn off the unit. Allow the unit to cool for 10 to 15 minutes before turning the compressor back on.
9. The compressor has a thermal safety switch which automatically ceases compressor operation when the compressor becomes too hot. If this
happens, use the On/Off Switch to turn off the compressor. Allow the unit to cool for 10 to 15 minutes before turning the compressor back on.
10. After each use, make sure the unit is turned off and unplugged. Also be sure to release any remaining air from the compressor by depressing
the airbrush trigger.
Troubleshooting
If airflow is not sufficient …
• Check for air leaks where air can be heard escaping, or apply a soap and water solution on all connections. Resulting bubbles indicate an air leak.
Tighten fittings where necessary.
• PTFE seal tape is recommended for all threaded connections.
• Replace the Air Hose if the hose is torn or damaged.
If compressor shuts off frequently, the motor fails to come up to full speed or becomes hotter than usual during operation …
• Disconnect other appliances that are using the same power outlet.
• Avoid using extension cords.
If problems arise which you cannot solve with the information provided above, please contact your retailer or supplier for assistance. Do not
attempt to fix the device yourself. Improper operation and/or dismantling of the device may damage the compressor. If any parts/accessories are
damaged, please contact your retailer or supplier for replacement or repair.
Copyright © 2014 Ding Hwa Co., Ltd. All rights reserved.
SP_MAN_TC610H_A4_20130412.1


