Download Pearl User Manual
Transcript
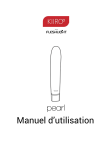
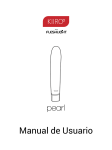
Pearl
User Manual
1
KIIROO Pearl User Manual
CONTENT
2
Overview
5
Product
6
Modes
7
Setup Guide
8
Preparation/Handling
14
Charging
15
Using Pearl
16
Help
21
Disclaimer
24
KIIROO Pearl User Manual
Please read the user manual carefully.
Follow the step-by-step instructions in the
setup guide below to get started.
This process should take no more than 10
minutes from start to finish.
If you need any assistance with your setup,
please go to :
https://kiiroo.zendesk.com
3
KIIROO Pearl User Manual
DISCLAIMER
We, KIIROO, make no medical claims with our devices. Our devices are not to be used by or on
minors (anyone under 18), or anyone who is unable or unwilling to express consent. Do not use
KIIROO devices on inflamed or irritated areas. Follow all directions as set forth by the manual, and
do not attempt to make any technical adjustments to your KIIROO device at home. KIIROO will not
be held responsible for any undesirable results of misuse.
Do NOT use your Pearl if:
•
There are exposed electronic elements
•
You are in a shower, tub, swimming pool, sauna, steam room etc.
•
It is excessively hot to the touch
Do not use Pearl anally.
4
KIIROO Pearl User Manual
OVERVIEW
Pearl is the most advanced sensitive touch vibrator allowing you
and a partner to control each other’s pleasure, no matter where
you are in the world. It’s a unique two-way device that can both
send and receive sensations remotely via the internet. KIIROO’s
technologically advanced haptic pleasure system lies deep within
the core of Pearl, enabling you, or a long distance partner, to regulate
the vibration speed.
The ergonomic shape is designed to target the g-spot, and the soft
hygiene silicone outer layer ensures total comfort. An exclusive
touch control feature allows users to control how and where
sensations are delivered based on where it makes contact with the
body, for targeted pleasure.
Pearl also works as a vibrator offline, to enhance foreplay in the
bedroom or for solo masturbation.This allows users to control how
and where sensations are delivered on the upper surface of the
shaft, based on where it makes contact with the body, for targeted
pleasure.
5
KIIROO Pearl User Manual
PRODUCT
1
2
3
14
12
4
6
5
16
17
18
7
15
8
9
10
6
13
11
1.
Tip
10.
Base
2.
Motor
11.
Front Logo
3.
G Spot Curve
12.
Shaft
4.
Hygienic Sillicone
13.
Back Handle
5.
Left Side
14.
Rings
6.
Right Side.
15.
Handle
7.
Multifunctional Button
16.
Cover Release
8.
Led Light
17.
Charging Port
9.
Red Line
18.
Charging Cover
KIIROO Pearl User Manual
MODES
1.)
One way control
2.)
Two way control
3.)
Sensitive Touch Vibration
4.)
One way control.
This intermediate step has been introduced
so girls feel that they can take back control
over device.
7
5.)
Slow vibration
6.)
Medium vibration
7.)
Fast vibration
8.)
Pattern 1 (also sending signals)
9.)
Pattern 2 (also sending signals)
KIIROO Pearl User Manual
SETUP GUIDE
8
Step 1
Make an account
Step 2
Register your device
Step 3
Download the platform
Step 4
Turn on KIIROO
Step 5
Connect with your partner
(See page 9)
(See page 10)
(See page 11)
(See page 12)
(See page 13)
KIIROO Pearl User Manual
SETUP GUIDE
Step 1
PREPARE TO SETUP
Remove your device, micro USB cable and
authenticity card from the box.
CHARGE YOUR DEVICE
Charge your device using the micro USB
cable supplied.
MAKE AN ACCOUNT
To begin the setup process, go to Kiiroo.
com and select ‘SIGN IN/ REGISTER’ in the
navigation menu, located in the top right of
the screen. Login to your Kiiroo account, or
make an account if you have not already
done so.
9
KIIROO Pearl User Manual
SETUP GUIDE
Step 2
REGISTER YOUR DEVICE
Once you are logged in, the next step will
be to register your device. Please have your
authenticity card ready.
AUTHENTICITY CODE
When prompted, please enter the 13 digit
code on the back of your authenticity card.
Make sure you enter it correctly. Next, tick
the box to accept the terms and conditions.
1 YEAR WARRANTY
Select the ‘REGISTER’ button to begin your
1 year warranty.
10
KIIROO Pearl User Manual
SETUP GUIDE
Step 3
DOWNLOAD PLATFORM
After registering your device, the platform
will be available to download. Select the
‘DOWNLOAD’ button to proceed. Check
here again in the future to see information
regarding the latest versions available.
OPERATING SYSTEM
On the download page, choose your
operating system and select the
‘DOWNLOAD’ button. Save the file to your
computer. See if your operating system is
compatible here.
INSTALLATION
Open the downloaded file and follow
the regular installation process for your
operating system.
Remember, Mac and Windows run different
11
KIIROO Pearl User Manual
SETUP GUIDE
Step 4
POWER ON
When your device is fully charged, remove
the micro USB cable. Then power on by
pressing the multifunctional button for 4
seconds. A solid red light will show and
Bluetooth will be active.
BLUETOOTH
Turn on your computer’s Bluetooth. A dongle
can be used if your computer does not have
in-built Bluetooth.
There is no need to pair your device
manually. The platform does this
automatically. If this does not happen please
do it manually and use 1234 as the code.
OPEN & RUN
Open the Kiiroo program. The platform will
appear and search for your device. If it does
not appear after 2 minutes, please visit
https://kiiroo.zendesk.com
12
KIIROO Pearl User Manual
SETUP GUIDE
Step 5
HOME SCREEN
When your device is successfully paired, the
home screen menu will show two options;
Invite partner and Join partner
JOIN OR INVITE?
You have two options to choose from, to
create a secure connection between you
and your partner.
The INVITE button generates a unique,
6-digit code to send to your partner.
The JOIN button allows you to enter a
unique, 6-digit code, recieved from your
partner.
Send and recive the unique codes via any
other private form of communication (SMS,
apps, email, phone call etc.) installation
processes.
13
KIIROO Pearl User Manual
PREPARATION
Always use lubrication.
The lifespan of your pearl will be greatly increased with proper maintenance and care. We suggest
that you use lubrication with your Pearl in order to have the most comfortable experience.
Always choose a water-based lubricant, as silicone lubricants can break down silicone toys. An
oil-based lubricant, which is specially made for the vagina, is also an acceptable choice. Never use
massage oil or hand cream as lubricants.
It is advised to have cleaning materials ready to clear any mess created, such as a towel or tissue.
HANDLING
We recommend that you hold Pearl by the black capped end, using the grip around the last inch of
white hygiene silicone (where Pearl’s button is located). Pearl is not a hands-free device.
Pearl is intended for vaginal use only.
14
KIIROO Pearl User Manual
CHARGING
Before charging, make sure the charging port is free from water or lubricant residue. This can be
cleaned with an antibacterial cloth.
1. Remove charging cover before charging.
2. Insert the MicroUSB into Pearl’s charging port.
3. Insert the other end into a USB port.
This can be a computer or charger (the charger should CE certified according to IEC 60335 norm).
Both will charge the device effectively.
4. Wait for the LED light to slowly blink. This indicates that Pearl is charging.
5. The LED light will glow solid when Pearl is fully charged.
6. When the battery is low, the LED indicator will prompt you to charge by flashing fast. You will
have 5 minutes before the Pearl disconnects from Bluetooth and turns off.
Only use original chargers provided by KIIROO.
Do not use the device whilst charging.
LED INDICATOR
Pearl has a single LED light located near the base of the device. It has four modes:
1. Solid light: Charged and Bluetooth active
2. Slow blinking: Charging and Bluetooth disabled
3. Fast blinking: Low battery (5 minutes left)
4. Intermediate blinking: An update is available or something went wrong. Connect to the platform.
15
KIIROO Pearl User Manual
USING PEARL
POWER
On / off is controlled by the button on the front of the device.
To turn on, click and hold for 4 seconds.
To turn off, click and hold for 4 seconds.
Pearl’s default is one-way mode, so once it’s on:
•
Click again to enter two-way remote control mode.
Three blinking lights will let you know you’re here.
•
Click again to enter touch-control.
•
Click again to return to one-way control, and scroll through vibration modes.
Bluetooth
To connect with Pearl, your computer must have Bluetooth. If it does not, a Bluetooth dongle
is required. Bluetooth is always active when Pearl is on. When Pearl is turned off, Bluetooth
immediately disconnects.
Touch Control
Pearl will respond intuitively to touch, its surface vibrating wherever it comes into contact with your
body. Move the upper surface of the device over your clitoris to enjoy precise sensations delivered
exactly where contact is made. Move Pearl deeper inside, and feel the entire shaft respond with
more widespread vibrations.
16
KIIROO Pearl User Manual
Modes
Pearl has five vibration modes: low, medium, high, slow pulse, and fast pulse. Cycle through by
repeatedly clicking the multifunctional button, until you reach the mode of your choice.
1.)
One way control
2.)
Two way control
3.)
Sensitive Touch Vibration
Pearl will respond intuitively to touch, its surface vibrating wherever it comes into
contact with your body. Move the upper surface of the device over your clitoris to
enjoy precise sensations delivered exactly where contact is made. Move Pearl
4.)
deeper inside, and feel the entire shaft respond with more widespread vibrations.
One way control.
This intermediate step has been introduced so girls feel that they can take back
control over the device.
5.)
Slow vibration
6.)
Medium vibration
7.)
Fast vibration
8.)
Pattern 1 (also sending signals)
9.)
Pattern 2 (also sending signals)
To stop any mode, simply click the button to continue moving through the cycle or hold for 4
seconds to turn the device off. If you’re in two-way mode, your partner can control the above
modes for you.
You can turn Pearl on before or after insertion, though it is easier to use Pearl’s multifunctional
button when Pearl is not inserted.
17
KIIROO Pearl User Manual
Aftercare
Always clean Pearl thoroughly after each use. Use warm water along with antibacterial soap, dish
soap, or a specialized toy cleaner. Hygiene Silicone is an easy material to clean and will last for
years when properly taken care of
Materials: POM, ABS, silicone
Finish:
Matte
Size:
190 x 30 x 30 mm
Weight: 123 grams
Battery:
LIPO 2200 mAh 3.7v 10C
Charging:
3 hours
User time:
1 hour
Avoid leaving your Pearl in direct sunlight and NEVER expose it to extreme heat. Store your device
in the dust bag provided and keep it away from non-silicone toys. Avoid submerging the device
below 2m or leaving in liquids for longer than 5 minutes. Never use cleansers containing alcohol,
petrol or acetone. Do not use heating appliances to dry the device. Do not use the pearl anally
The Bluetooth module is located in the handle. For personal safety and optimal reception, avoid
inserting the handle (only use the top 13cm).
WARNING!
Do NOT use your Pearl if:
18
•
There are exposed electronic elements
•
You are in a shower, tub, swimming pool, sauna, steam room etc.
•
It is excessively hot to the touch
KIIROO Pearl User Manual
DISPOSAL SPECIFICATIONS
While Pearl is made of eco-conscious materials, you should not dispose of Pearl in your waste bin.
Like any electronic with a rechargeable battery, there are disposal regulations. These vary by city
and local municipality. Be aware of how electronics are disposed of where you live. Kiiroo suggests
to ask at your local council center. Also consider that in your locality, Pearl may be considered biowaste because of its intimate nature.
19
KIIROO Pearl User Manual
HELP
How to make an account.
My device will not pair with my computer’s Bluetooth. What
Go to Kiiroo.com/my-account/. Enter your details in the
do I do now?
boxes provided. Select ‘Register’ to make your account. The
next page is your account, where you will find your devices,
Most importantly, the device must be charged and
downloads and personal details.
unplugged from the Micro USB cable. The device will
only pair with Bluetooth and allow access to the platform
Where do I find the Authenticity Code?
when unplugged. Open and run the program and then wait
The authenticity code is located on the reverse side of the
for 2 minutes. If it does not pair at all, turn everything off and
card supplied in the product box. It is 13 digits long.
repeat the process. There are help buttons to direct you to
customer support.
I registered the wrong device, how do I cancel it?
Contact our customer support team by email or phone or
Where do I buy a Bluetooth dongle?
Live Chat and we will easily remove the incorrect entry.
You can buy a dongle from any electronics store. We advise
a dongle with the possibility of Bluetooth 4.0. They cost
Which operating systems does Kiiroo work on?
around $20.
The platform works on OSX 10.8 or later, and Windows 7
or later. Previous software does not support the features of
The home screen menu does not appear.
the program.
Double check your Bluetooth and device are on, and paired
properly. If they are not, turn off the platform, device and
Can I use an external webcam?
Bluetooth, and then start the process again.
Yes, any webcam that is properly connected to your
computer will work with the platform.
I cannot connect with my partner using the 6-digit code.
First, check your connection with the internet and Bluetooth.
I do not know how to send my 6-digit code.
If these are not working consistently then this will cause an
If you have chosen to invite, then you will see a code. This
error. If the connections are poor, turn off the platform and
code can be sent to your partner using a reliable contact
device and start the process again.
method such as a phone call, SMS on mobile or email.
20
KIIROO Pearl User Manual
WINDOWS
What process do I need to follow to install on my PC?
The platform does not appear when I start the program.
Click to open the file, a window will appear called Setup.
This may take up to 2 minutes to load the first time. If it
Select the location you would like to save the program
does not load at all, press ctrl + alt + del and shut down the
and your desktop icon preference. Then click install. When
program fully. Restart the program from your start menu,
installation is finished, launch the Kiiroo program.
as normal.
When installing the platform for the first time, it is possible
that the following screen pops up:
Please click on allow access and continue the installation
process.
21
KIIROO Pearl User Manual
APPLE
What process do I need to follow to install on my Mac?
The platform does not appear when I start the program.
Open the file in your downloads. Drag the Kiiroo icon into
This may take up to 2 minutes to load the first time. If it
the applications icon. Next eject the Kiiroo disk, which
does not load at all, go to APPLICATIONS > UTILITIES >
should appear on your desktop. If a window for unidentified
ACTIVITY MONITOR. Find the Kiiroo program and select
developer appears, see the next page for help
“force quit”. Now, try to start the program again.
My Pearl is not connecting?
I see this window, now what do I do?
Please install:
Go the apple in the top left corner of the screen, select
https://support.apple.com/kb/DL1572?locale=en_US.
System Preferences and click on Security & Privacy.
After completing installation your Pearl should be
connecting.
Here you will be able to choose which applications to
allow. Temporarily allow KIIROO to install. You may need
your computer password handy
22
KIIROO Pearl User Manual
If you have any further problems with setup and installation or issues with using your device, do
not hesitate to contact our customer service team. Our technical team is there for your support, to
explain problems in detail make your online experience runs as smoothly as possible.
We try to answer all questions within 48 hours of receiving them.
Opening hours are Mon - Fri, 9AM - 5PM CST.
kiiroo.com
[email protected]
+31207371194
DISCLAIMER
We, KIIROO, make no medical claims with our devices. Our devices are not to be used by or on minors (anyone under 18), or anyone
who is unable or unwilling to express consent. Do not use KIIROO devices on inflamed or irritated areas. Follow all directions as
set forth by the manual, and do not attempt to make any technical adjustments to your KIIROO device at home. KIIROO will not be
held responsible for any undesirable results of misuse.
23
KIIROO Pearl User Manual


