1
After Firing
Microwave Kiln
• When desired results have been achieved, using heat resistant gloves, remove the whole
•
•
kiln from the microwave oven. Set on a heat resistant pad. The area around the
Fuseworks™ Microwave Kiln should be free of clutter and in a safe location. Do NOT allow
to cool under an overhead cabinet. Never block the opening at the top of the Fuseworks™
Microwave Kiln.
Do not remove lid at this time. Removing lid will cause thermal shock, resulting in breakage.
Allow your fused piece to anneal for a minimum of 30 minutes without removing kiln lid;
time could be longer depending on the thickness of the project. You will be tempted to
open the lid and look at your piece but do not, as this can be dangerous and will result in
cracked projects.
• Do not reuse the kiln until it has completely cooled for at least 30 minutes. Continuous
use without cooling can cause damage to the kiln.
• Your fused project must cool completely before removing from the kiln. This can take up
to 40-50 minutes. Once cooled, you can remove the fiber paper from the back of the
fused project by rubbing the surface with a wet paper towel or cleaning the project under
warm water.
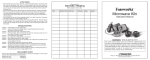
Fuseworks™ Firing Log
(make copies for future use.)
Time
Additional Time Total Time
Thickness
Glass
Results
Microwave Kiln
Instruction Manual
Troubleshooting
Problem: Cracked glass in the kiln during firing.
Solution: Clean and dry glass thoroughly. Make sure glass being used has the same Coefficient of Expansion(COE).
Problem: After glass project cools, fused project cracks
Solution: Cool more slowly. After removing the kiln form the microwave, leave the lid on
for at least 30 minutes in an area free of drafts. Problem: Fused project has sharp edges.
Solution: Use a glass file or fingernail file to remove burs.
Problem: Glass embeds itself into kiln walls or base.
Solution: Allow both glass and kiln to cool completely. Use a utility knife to carefully cut and
remove glass from the kiln.
Problem: Cracks, blisters and/or loss of interior kiln coating.
Solution: This should not impact the operation of the kiln. If large areas of the coating are damaged and the glass is heating unevenly, a replacement top is recommended.
replacement parts
Diamond Tech offers replacement parts should your kiln become damaged. To order contact
Diamond Tech (800)937-9593 or (813)806-2923.
Replacement Top.......................... FW849TOP
Replacement Base........................ FW849BASE
WARNING: THIS IS NOT A TOY!
The glass fused inside this kiln can reach temperatures of 1400-1600 °F and can resemble cold glass. It is capable of serious bodily harm and property damage if not handled properly. It is your responsibility and yours alone to use this kit correctly. Children under the age of 16 should not use this kit and its contents without strict adult supervision.
Tampa, FL • (800) 937-9593 • (813) 806-2923 • Fax: (800) 299-3313
www.DiamondTechCrafts.com THIS IS NOT A TOY!
CHILDREN UNDER THE AGE OF 16 SHOULD NOT USE THIS KILN AND ITS CONTENTS WITHOUT STRICT ADULT SUPERVISION
Carefully read all instructions before using the Fuseworks™ Microwave Kiln.
IMPORTANT SAFETY WARNINGS
• An 800 to 1200 WATT microwave oven is recommended for use with Fuseworks™
•
•
•
•
•
•
•
•
•
•
•
•
•
•
Microwave Kiln. Do NOT use microwave ovens with plastic interiors.
Follow ALL microwave manufacturers safety instructions, especially those referring to
ventilation and dedicated plug, etc.
Microwave needs to be free of food and other debris before use with the Fuseworks™
Microwave Kiln.
Clean the microwave thoroughly after each use with a household cleanser
recommended by the microwave oven manufacturer.
The interior of the Fuseworks™ Microwave Kiln and its contents can reach
temperatures of 1400ºF - 1600ºF which is extremely hot. Temperatures this high
can cause serious bodily harm and property damage if not handled properly. Keep
kiln away from children and pets while fusing and cooling.
Prolonged heating of Fuseworks™ Microwave Kiln can cause damage to the interior
of the kiln and microwave. Do not exceed 6 minutes of continuous fusing/heating time.
A minimum 3” clearance must be maintained between the ceiling of the microwave
and the top of the kiln.
If you do not have a turntable, it is recommended that a ceramic fiber blanket be used
under the kiln.
Remove Fuseworks™ Microwave Kiln immediately from the microwave oven when
heating is complete.
Always use heat resistant gloves/mitts when handling the hot kiln. Using two hands,
hold the base and the top together while removing kiln from the microwave oven.
Place hot kiln on a heat resistant and non-combustible surface such as fiber board,
ceramic tile or a trivet during the cooling stage. Any other surface could result in
melting or burning of the surface material or a fire. Keep your area clear from any
clutter. Do not place kiln to cool under a kitchen cabinet. KEEP OUT OF REACH OF
CHILDREN AND PETS.
When removing the lid from the base, place the lid upside down on a heat resistant
surface.
Only use the base provided with microwave kiln. Do NOT use kiln wash on the base
of the Fuseworks™ Microwave Kiln. Use kiln paper only.
Do not use the kiln to fire anything other than glass, i.e. metals or combustibles of
any kind.
Use at your own risk and follow all recommendations and common sense safety
precautions.
9/2008
First Firing – Kiln Preparation
Turn over the rotating tray inside the microwave. This should disable the tray from rotating. The
Fuseworks™ Microwave Kiln must be pre-fired before the first use. To pre-fire kiln, center the
empty kiln inside the microwave. Ensure lid is sitting on top of the kiln base. Close microwave
door and microwave for 3 minutes on high. Wearing heat resistant gloves or mitts, carefully
remove from microwave, place on a heat-resistant surface, and allow to cool for 30 minutes. Now
the Fuseworks™ Microwave Kiln is ready for use.
Glass Types
Fuseworks™ 90 COE (Coefficient of Expansion) fusible glass is
intended for use with the Fuseworks™ microwave kiln. Do not mix
Fuseworks™ fusible glass with other brands of fusible glass or
varying types of COE, as it will result in cracked or
shattered projects.
Basic Cutting Instructions
Do NOT use a self-lubricating style cutter with oil while cutting glass.
Oil of any kind on the surface of the glass may mar your glass or
cause breakage when fired. If you are not familiar with glass cutting
techniques, practice on an inexpensive piece of glass. Glass from
an old picture frame or windowpane works well until you get the
feel for glass cutting.
Straight Cuts
• Put on safety glasses.
• Place glass on a clean flat cutting surface with the smooth
side of the glass facing towards you.
• Start on an edge of the glass holding the cutter firmly in one hand. Keep the cutter perpendicular to the glass. Push the
cutter gently and evenly across the glass. Decrease pressure
slightly as you reach the opposite edge of the glass; lift the
cutter off the glass at the end.
• Breaking the score line can be done with breaking pliers. Hold
the glass in one hand, with the score facing up. With the other
hand, center the score line in the jaws of the breaking pliers
about a half inch onto the glass surface. Apply pressure to the
handles; you will hear a “pop” and the score will run, breaking the
glass into two pieces.
cut
Microwave Kiln. Place paper on the kiln base. Kiln paper is only
good for one firing.
• Layer cut glass on top of kiln paper. Leave at least a 5/8”
border around the glass and the edge of the kiln paper. Do
not allow the glass to touch the sides of the kiln wall or the
base of the kiln. Glass allowed to touch the kiln base or
walls will stick and can cause irreparable damage to the
kiln during the fusing process.
• Carefully place kiln base with glass in the center of microwave
oven. Place lid on top of the base. WARNING: Never leave
microwave or kiln unattended during the firing process.
• Set temperature for the microwave on high. Choose times for
firing from the chart below. PLEASE NOTE: Every microwave
oven and kiln will vary. The ranges found in the chart below
are average ranges. Actual times will vary depending upon
your microwave oven, the thickness of glass, as well as your
desired results.
Watts
Minutes
Glass Thickness
800
3 to 4
¼” (2 - 1/8” pcs.)
1100
2 to 3 ½
¼” (2 - 1/8” pcs.)
1200
2 to 3 ½
¼” (2 - 1/8” pcs.)
place in microwave
done
HOT TIP! Take good notes!
Use the Firing Log on back of this manual
to keep important information about fusing
projects. This information will help repeat
good projects and prevent bad ones.
• When microwave time has expired, use heat resistant gloves or mitts to carefully open
the lid. If your piece is not fused to your liking, return kiln lid and microwave at 30 second
intervals until piece is fused. Do not leave the lid off the kiln for extended periods of time
during this stage. Never touch the glass. Do not heat for more than 6 minutes.
clean
HOT TIP! HOT glass looks like COLD glass, BE CAREFUL!
• A good fuse indicator is to watch for a red glow to appear in the hole at the top of the kiln.
When it changes to a yellow/orange, this will indicate the glass has entered a full fuse stage.
At this stage glass corners will become rounded. When you see more of a yellow glow, the
piece should be fully fused.
HOT TIP! Do not rest or move your hands over the cutting
surface. Small pieces of glass can remain and will cut you. Obtain
more information on cutting glass curves, ovals and circles through
online searches, books and classes.
lint-free cloth. If using fusing glue to hold your glass project in
place, make sure the glue is completely dry before firing.
• Cut a square of kiln paper to fit the base of the Fuseworks™
break
• After cutting glass to the desired shape, clean and dry with a
Firing Glass
HOT TIP! To see the glow more readily, cover the microwave light by cutting a small
piece of cardboard to cover the light source and tape into place.
place pieces on kiln
• To have the most success with your fusing project, it will require some testing and noting
fusing times. Keep detailed firing log notes.