1
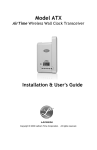
ATX Installation and User’s Guide Contact your distributer or visit www.lathem.com for more information Model ATX AirTime Wireless Wall Clock Transceiver Installation & User's Guide Copyright © 2009 Lathem Time Corporation. Page 22 All rights reserved. ATX Installation and User’s Guide Table of Contents Introduction ..................................................... 1 LCD Display – Time, Date, Time Zone and Indicators ... 1 Indicators on LCD Display..................................... 2 Mode Selection ................................................. 3 Other AirTime Products ATX6 6 Watt Transceiver capable of transmitting exact time in larger facilities/areas AT12RPS Solar Powered 12” Analog Wireless Wall Clock AT-ANTOD Outdoor Antenna for maximum coverage with the ATX6 or the AT20WT AT-MSX AirTime receiver that accepts the AirTime signals from an ATX, ATX6 or AT20WT and corrects Lathem RS485 devices or Intercom systems via a 12:00AM dry contact closure ) Start Here .................................................... 4 Master Mode..................................................... 4 Repeater Mode (Used in Multiple ATX Installations) .....10 Setup (Repeater Mode) ......................................10 Glossary of Definitions: ......................................12 Selection of Mode .............................................12 Operation of Master Mode ...................................12 Operation of Repeater Mode ................................12 Operation of Reset in Master Mode ........................12 How to access Setup Modes .................................13 Automatic Interference Prevention Function ...........14 Backup Function ..............................................14 WWVB Reception Off/On Function ........................14 Battery Life Indicator ........................................14 Power Requirements .........................................15 Troubleshooting ...............................................15 Performance ...................................................18 Page 21 ATX Installation and User’s Guide ATX Installation and User’s Guide One-Year Limited Warranty Lathem warrants the hardware products described in this guide against defects in material and workmanship for a period of one year from date of original purchase from Lathem or from an authorized Lathem reseller. The conditions of this warranty and the extent of the responsibility of Lathem Time Corporation (“Lathem”) under this warranty are listed below. 1. 2. 3. 4. 5. 6. 7. 8. 9. This warranty will become void when service performed by anyone other than an approved Lathem warranty service dealer results in damage to the product. This warranty does not apply to any product which has been subject to abuse, neglect, or accident, or which has had the serial number altered or removed, or which has been connected, installed, adjusted, or repaired other than in accordance with instructions furnished by Lathem. This warranty does not cover dealer labor cost for removing and reinstalling the machine for repair, or any expendable parts that are readily replaced due to normal use. The sole responsibility of Lathem under this warranty shall be limited to repair of this product, or replacement thereof, at the sole discretion of Lathem. If it becomes necessary to send the product or any defective part to Lathem or any authorized service dealer, the product must be shipped in its original carton or equivalent, fully insured with shipping charges prepaid. Lathem will not assume any responsibility for any loss or damage incurred in shipping. WARRANTY DISCLAIMER AND LIMITATION OF LIABILITY: Except only the limited express warranty set forth above, the products are sold with no expressed or implied warranties of any kind, and the implied warranties of merchantability and fitness for a particular purpose are hereby expressly disclaimed. No warranties are given with respect to products purchased other than from Lathem or an authorized Lathem reseller and any such products are purchased "as is, with all faults." In no event will Lathem be liable for any direct, indirect, special, incidental or consequential damages arising out of or in connection with the delivery, use or inability to use, or performance of this product. In the event any limited remedy given herein shall be deemed to have failed of its essential purpose, Lathem's maximum liability shall be to refund the purchase price upon return of the product. Proof of date of purchase from Lathem or an authorized Lathem reseller is required for warranty service on this product. This Warranty grants specific legal rights. Additional legal rights, which may vary by locale, may also apply. Should any difficulties arise with the performance of this product during warranty, or with any Lathem authorized service centers, contact Lathem Time at the address Introduction The ATX (AirTime Transceiver) is a user-installable, battery-operated radio-frequency unit that provides the wireless signal to keep AirTime wall clocks within its range synchronized to the second. The ATX can receive the WWVB signal from a radio station used by millions of people throughout North America and transmit the accurate time to 12” and 15” analog and 4” and 6” digital model AirTime wall clocks. The ATX can be operated using 2 – CR123A batteries rated with a five (5) year life or powered by an optional AC adapter. AirTime is an affordable time keeping solution for institutions such as schools, hospitals, offices or any environment that requires precise and consistent time from room-to-room. Should any problems arise with your ATX please contact Lathem Time at 800-241-4990. Function Labels LCD Display – Time, Date, Time Zone and Indicators below: Lathem Time 200 Selig Drive, SW Atlanta, GA 30336 800-241-4990 www.lathem.com Document Number: USG0074D Page 20 Page 1 ATX Installation and User’s Guide ATX Installation and User’s Guide Trademark / Copyright Indicators on LCD Display Transmitting “TRNS” When flashing, indicates the ATX is transmitting an AirTime signal Receiving “RECV” When flashing, indicates the ATX is in receiving mode listening for an AirTime signal. (used in Repeater mode) AirTime, Lathem and the Lathem logo are registered trademarks of Lathem Time Corporation. Other product names mentioned in this manual may be trademarks of their respective companies and are hereby acknowledged. WARNING: Changes or modifications to this product not expressly approved by the party responsible for compliance could void the user’s authority to operate this equipment. Copyright © 2009 Lathem Time Corporation. All rights reserved. Disclaimer The information within this document has been carefully checked and is believed to be entirely reliable. However, no responsibility is assumed for inaccuracies. Lathem Time Corp. reserves the right to make changes to any products herein to improve reliability, function, or design. Daylight Savings Time When illuminated, indicates that the ATX is in Daylight Savings Time. Reception strength In Master mode indicates the strength of the WWVB signal when receiving. In Repeater mode displays for 5 seconds indicating the strength of the signal from the Master when a signal is received. Low battery Indicates the batteries should be replaced. Link “LINK” Indicates data reception from another AirTime transmitter was successful within the last 24 hours. (Used in Repeater mode) WWVB receiving When steady, indicates successful reception of the WWVB signal. When scrolling, the ATX is listening for a WWVB signal. THIS EQUIPMENT COMPLIES WITH FCC CLASS-B REQUIREMENTS PURSUANT SUBPART J OF PART-15 This device complies with Part 15 of the FCC Rules. Operation is subject to the following two conditions: (1) this device may not cause harmful interference, and (2) this device must accept any interference received, including interference that may cause undesired operation. WARNING: Changes or modifications to this product not expressly approved by the party responsible for compliance could void the user’s authority to operate this equipment. NOTE: This equipment has been tested and found to comply with the limits for a Class B digital device, pursuant to Part 15 of the FCC Rules. These limits are designed to provide reasonable protection against harmful interference in a residential installation. This equipment generates, uses, and can radiate radio frequency energy and, if not installed and used in accordance with the instructions, may cause harmful interference to radio communications. However, there is no guarantee that interference will not occur in a particular installation. If this equipment does cause harmful interference to radio or television reception, which can be determined by turning the equipment off and on, the user is encouraged to try to correct the interference by one or more of the following measures: - Reorient or relocate the receiving antenna. - Increase the separation between the equipment and receiver. - Connect the equipment into an outlet on a circuit different from that to which the receiver is connected. - Consult the dealer or an experienced radio TV technician for help. This equipment complies with FCC radiation exposure limits set forth for an uncontrolled environment. This equipment should be installed and operated with minimum distance 20cm between the radiator and your body. This Transceiver must not be co-located or operating in conjunction with any other antenna or Transceiver. Other Indicator - Flashing Red LED This indicates that a Repeater ATX failed to receive the signal from a Master ATX Transceiver. Press the Reset button or move the ATX to a location that is closer to the Master ATX. Page 2 Page 19 ATX Installation and User’s Guide ATX Installation and User’s Guide Performance Accuracy Average monthly rate +/- 20 seconds Battery Life Approximately 5 years WWVB receiving sensitivity Less than 45dBuV/m Carrier frequency 452.3125 MHz RF reception Sensitivity Less than 35dBμV/m/ Channel filter band width 19.2kHz Intensity of electric wave emitted Less than 3nW (14~+122o) Usage temperature range LCD readable range (0 ~1.3’) Mode Selection The ATX can operate in either of two modes, Master or Repeater. The most common mode is “Master”. In Master mode, the ATX receives and synchronizes with the WWVB signal. It then transmits the signal to AirTime wall clocks and ATX Repeaters. The WWVB signal strength indicator indicates the strength of the WWVB signal being received. The ATX ideally should be placed near a window facing Boulder, Colorado or under a skylight with a clear view of the sky for best signal reception. In Master mode, the ATX can also be set manually if no WWVB signal is available. The accuracy of the ATX without the WWVB signal is +/- 5 minutes per year. Note: If the ATX (in Master Mode) does not receive the WWVB signal, the clocks will not function properly. Master Mode When using more than one AT Transceiver, you can set the ATX to operate in “Repeater” mode. See page 9 for setting the ATX as a Repeater. Page 18 Page 3 ATX Installation and User’s Guide ) Start Here ATX Installation and User’s Guide Q. When does the ATX listen for the WWVB radio signal? Master Mode !! IMPORTANT !! This AirTime System is designed to provide highly accurate and reliable time reference in your building. You must follow these instructions or your clocks will fail to operate properly. You must allow the transmitter to sit overnight and receive the WWVB signal before installing your wall clocks. A. The ATX listens for the WWVB radio signal 2 minutes and 40 seconds after every hour. The strength of the last signal reception can be determined by the signal strength indicator ( ) on the display. Q. How do I synchronize my AirTime wall clocks? A. Press the TRANS button on the ATX. You will see T – TR – TRN – TRNS flash on the display. At the wall clock, press the Reset button. If the wall clock does not correct within several minutes, then it may be out of the 150 foot range of the ATX. Relocate the wall clock closer to the ATX. FOLLOW THESE INSTRUCTIONS BEFORE INSTALLING THE WALL CLOCKS 1. Remove the back cover of ATX and slide the Mode Selection switch to the Master position. 2. Insert two (2) CR123A lithium batteries (provided) and replace the back cover or connect the optional 6VDC adapter. Note: You can not use both the batteries and the AC adapter at the same time. Q. Can I use more than one ATX? A. Yes. Secondary ATX units can be set to Repeater mode to increase coverage. All repeater ATX’s within the 150 foot range from the first ATX will re-broadcast the signal. As long as ATX Repeaters are within 150 foot range of each other there is virtually no limit to how many ATX’s you can install. (If the ATX looses power, replace the batteries or check the optional AC adapter and reset the clock starting at step 1 above) Q. If I manually set the Daylight Savings settings will the WWVB signal affect the ATX? A. No, the manual Daylight Savings settings override the automatic WWVB signal for Daylight Savings. Q. Why is the ATX changing for Daylight Savings in the wrong month or week? A. If you have manually set the Daylight Savings month and week they may be incorrect. Verify your settings by following the instructions on page 6. Page 4 Page 17 ATX Installation and User’s Guide Q. What do I do if the time does not correct on the ATX after WWVB reception indicator scrolls? A. Make sure you selected “Master” mode, then move the ATX closer to a window facing Boulder, Colorado or under a skylight with an unobstructed view of the sky. Allow 24 hours for reception. Reception is best at night when there are fewer radio interferences. Install the ATX in the same place where it finally received WWVB. ATX Installation and User’s Guide 3. Set Time Zone: Press and release the Set button for less than 1 second. The Time Zone will flash on the display. Use the Up or Down buttons to select the proper Time Zone (see list of zones below) and press Set. Q. Can I set the time on the ATX manually? A. If you manually set the time on the ATX, Daylight Savings changes will not occur unless you also set the Manual Spring and Fall Month and Week describes on pages 5-7. It is recommended that you install the ATX in a location that can receive the WWVB signal. Available Time Zones Time Zone Offset Atlantic Time -4Hrs Eastern Time -5Hrs A. No, the manual Daylight Savings settings override the automatic WWVB signal for Daylight Savings. Central Time -6Hrs Mountain Time -7Hrs Q. What do I do if my ATX does not update for Daylight Savings Time? Pacific Time -8Hrs A. Make sure the ATX has a clear view of the sky or faces toward Boulder, Colorado to insure it receives the WWVB signal. Alaska -9Hrs Hawaii -10Hrs Q. If I manually set the Daylight Savings settings will the WWVB signal affect the ATX? Q. When does the ATX transmit the time to the secondary wall clocks? A. The ATX transmits once per hour during the 58th minute between the 50th and 59th second. When the TRANS button is pressed, the ATX transmits every 10 seconds for one hour. Page 16 Page 5 Display ATX Installation and User’s Guide 4. Use the Up or Down buttons to Enable (EN) or Disable (DI) the ATX Installation and User’s Guide Power Requirements Daylight Savings Time function. If enabled, the time on the ATX Cylindrical lithium battery (2 batteries) or Optional AC adapter will automatically change when daylight saving time changes. This Specifications of optional AC adapter (Lathem part #VIE1800). setting affects both the automatic WWVB and manual Daylight ・Output voltage ・Rated current ・Ripple voltage ・Plug type ・Polarity Savings options. Press Set when done. : 6V DC : 200mA : max 500mVrms (200mA load) : EIAJ-2RA : Center plus(+) terminal Troubleshooting Q. What happens if batteries die before I replace them? 5. It is recommended to allow WWVB signals to control Daylight Savings changes by leaving the Spring month selection set to 00. If for some reason the ATX cannot receive WWVB signals, then you should manually set the month and week for Daylight Savings changes to occur. A. The ATX will stop working. When the batteries are replaced, press and release the RESET button on the ATX. It will automatically reset time when it receives the WWVB signal. (This may take 24 hours). The battery life is approximately 5 years. When the batteries become low the display will show a low battery indicator “ ”. 6. To manually set the Daylight Savings dates, use the Up or Down buttons to select the Spring Month. Press Set when done. If set to 00, pressing Set will skip steps 6-8 and return to normal display. Q. Do I need batteries if I use an AC adaptor? A. No, batteries are bypassed when an AC adapter is used. Q. What do I do if TRNS does not flash after I press TRNS button? A. Verify the ATX is not listening for the WWVB signal. The ATX will not transmit until the listening period ends. Q. How many Wall Clocks can an ATX correct? 7. (ONLY USED FOR MANUAL DAYLIGHT SAVINGS DATES) Use the Up or Down buttons to select what Spring Week Daylight Savings will A. As long as all Wall Clocks are in the range of the ATX, there is virtually no limit of the number of clocks it can correct. occur and press Set. Page 6 Page 15 ATX Installation and User’s Guide ATX Installation and User’s Guide Additional Definitions Automatic Interference Prevention Function Use this function to automatically change Transmit Channel to prevent interference if multiple Transceivers use the same Transmit Channel within reception area. (This automatic function requires no settings) 8. (ONLY USED FOR MANUAL DAYLIGHT SAVINGS DATES) Use the Up or Down buttons to select what Fall Month Daylight Savings will occur Backup Function and press Set. Time Zone and Daylight Savings Time are memorized in the ATX and will not be cleared after power failures or resets. WWVB Reception Off/On Function In Master mode, continuously pressing the RECEIVE button for 7 seconds or longer will turn OFF WWVB reception and the “ ” indicator is removed from the display. Continuously pressing the RECEIVE button for 7 seconds or longer with the “ ” indicator not displayed re-enables WWVB reception, and the “ 9. (ONLY USED FOR MANUAL DAYLIGHT SAVINGS DATES) Use the Up or Down buttons to select what Fall Week Daylight Savings will occur and press Set. The display will return to normal. ” indicator will appear. Battery Life Indicator When the battery capacity is low, the “ ” symbol starts to flash as warning that it is time to replace the battery. After 10 days, the “ symbol starts to flash and all segments except the “ ” ” symbol extinguishes and functions cease. Remove the back cover and replace the 2 CR123A batteries. Repeat the setup procedures for either Master or Repeater mode as described earlier. Page 14 Page 7 ATX Installation and User’s Guide ATX Installation and User’s Guide 10. Decide where to locate the ATX. Ideally it should be mounted in the center of area to be covered. The ATX can either be wall 1. Select the setup mode to enter by pressing the SET button for the mounted or sat on a shelf. If the ATX does not receive the WWVB signal in the next step, then consider installing it near a window facing Boulder Colorado or under a skylight with a clear view of the sky to receive the best signal from the WWVB. 11. Press and release the Reset button. The Display will blink once and the red LED will flash. The WWVB reception indicator How to access Setup Modes will scroll left to right indicating it is waiting for a signal. period of time defined in the table below. 2. When the mode changes to the selected setup mode, the functions of the selected mode will flash. 3. Change the values of the functions by pressing UP / DOWN button. 4. Press the SET button to enter selection. When the setup process is complete, it returns to a normal display. Normal operation resumes if no buttons are pressed for 5 minutes. SET button 2 seconds or shorter BE PATIENT!!! Because of other interfering radio transmissions, reception often takes 24 hours to occur If the ATX fails to receive the WWVB after 24 hours, press the RECV button for 4 seconds to begin WWVB reception again and move the ATX to another location with a clear line of site toward the sky. Once the ATX receives the WWVB signal do not change its location. Because it must continue receiving WWVB signals, the ATX must be Set item Set mode Master Time zone, D.S.T Time zone set Enabled/Disabled, mode mode. (Do not use this feature). Year, Month / Day, Year, Month / Day, Hour / Minute Hour / Minute Channel Status, 7 seconds or longer TX Channel Link set mode* Only display: WWVB Elapsed Time installed in the same area where WWVB signals are first received. Once the WWVB signal is received, the indicator will stop scrolling. (To verify the WWVB signal has been received in the past 24 hours press the RECV button for 2 seconds and release. The indicator will flash 4 times indicating the signal has been received or 5 times if no reception has occurred). Page 8 Invalid Manual D.S.T. Manual time set 2 – 7 seconds Repeater Channel Status, TX channel, RX Channel, Layer Only display: Linkage Elapsed Time, WWVB Elapsed Time *This is an advanced setting that will rarely be required. If you have multiple transceivers and are experiencing synchronization problems please review the document ID #888 – “Some clocks are not correcting to time signals” located on our Knowledge Base at http://www.lathem.com/support/knowledge-base.aspx. Search under Airtime Wireless | ATX Mini Transceiver. Page 13 ATX Installation and User’s Guide Glossary of Definitions: Selection of Mode Select the MASTER mode or REPEATER mode by using the MODE switch. ATX Installation and User’s Guide 12. Press and release the TRNS button on your Master ATX to begin transmitting to AirTime Wall clocks and other ATX devices. The TRNS flashing in the display confirms the transmissions. Operation of Master Mode WWVB is received once per hour. The time data begins automatically transmitting if the receiving is successful. Operation of Repeater Mode Time data is automatically received and transmitted once per hour. Operation of Reset in Master Mode Press and release the reset button to start receiving the WWVB. If the receiving is successful, time data is automatically transmitted. The symbol changes during the WWVB reception to show that it is receiving. The “TRNS” indicator flashes during the data transmission to show that it is transmitting. While transmitting, you will see T – TR – TRN – TRNS flashing in the display. The ATX will transmit for one hour, allowing you to setup and install your AirTime wall clocks and Repeaters. 13. Insert the batteries into your wall clocks and Repeater ATXs (if applicable). Press and release the reset button on the back of the AirTime wall clocks or the front of the Repeater ATXs to start receiving the signal from the Master ATX. 14. Install the Master ATX: Install the ATX in the same location where the WWVB signal was received. Mount the ATX Drill a 5/16" hole. Insert a wall anchor and tap flush to wall with a hammer. Insert a screw into the anchor leaving 1/8" exposed. Align the keyhole on case back and slide onto the screw. CONGRATULATIONS!!! Setup in Master mode is now complete Page 12 Page 9 ATX Installation and User’s Guide Repeater Mode (Used in Multiple ATX Installations) ATX Installation and User’s Guide 5. approximately 150 feet of the ATX Transceiver). In Repeater mode, the ATX receives time signals from another ATX transceiver, and rebroadcasts the signal to other ATX Repeaters or Install the Repeater ATX at the desired location (within 6. When the signal is received from the “Master”, the term “LINK” will display and the time and date will update to the Masters time. AirTime wall clocks. 7. The TRNS indicator will flash while the ATX Repeater transmits to AirTime wall clocks or other ATX Repeaters. The ATX will transmit for one hour, allowing you to setup and install your AirTime wall clocks and other ATX Repeaters. If the Repeater ATX fails to receive the signal from the Master ATX Setup (Repeater Mode) Transceiver (indicated by a LED flashing red or the display toggling 1. Remove the back cover and slide the Mode Selection switch to the Repeater position. between time and date and “E”), then press the Reset button or move the ATX to a location that is closer to the Master ATX. 2. Insert two (2) CR123A lithium batteries and replace the back cover or connect the optional 6VDC adapter if it will be used. 3. Press the Reset button. The display will appear with dashes and the RECV indicator will flash. MAKE CERTAIN THAT THE REPEATER ATX DISPLAYS “LINK”. Unless your Repeater ATX continuously receives signals from the Master ATX, then your clock system will not operate properly. The setup of the ATX in Repeater Mode is now complete. You can now synchronize and install your AirTime Wall Clocks using the instructions furnished with them. 4. Press the TRNS button on the ATX that is set to “Master” mode. Page 10 Page 11