1
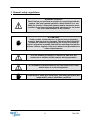
User Manual
NI IR6010
Thermal Imaging Camera
Supplier:
Specifications of the equipment:
Specifications of the manual:
Nieaf-Smitt B.V.
Vrieslantlaan 6
3526 AA Utrecht Holland
P.O. Box 7023 3502 KA Utrecht
Tel.
: 030 288 13 11 (general)
Fax.
: 030 289 88 16
Tel.
: 030-285 02 85 (helpdesk)
e-mail
: [email protected]
NI IR6010
Date
: 31-05-2011
Number
: 561144179
Version
: 001
© Copyright 2011
All rights reserved. Nothing from this edition may be multiplied, or made
public in any form or manner, either electronically, mechanically, by
photocopying, recording, or in any manner, without prior written consent
form Nieaf-Smitt bv.
Nieaf-Smitt bv reserves the right to change parts at any given moment,
without prior or direct notification to the client. The contents of this user
manual may also be changed without prior warning.
No part of this publication may be seen as part of a contract for the
equipment, unless specifically referenced and included in such contract.
This user manual is compiled with all possible care, but Nieaf-Smitt bv can
not accept any responsibility for possible errors in this user manual or any
consequences resulting from that.
2
Rev 001
Preface
This manual describes the NI IR6010. The information in this manual is
important for proper and safe functioning of the equipment. If you are not
familiar with operating this equipment then read this user manual from the
beginning to the end thoroughly. After that you can use this manual for
reference. You can find the information rapidly using the table of contents.
In this user manual, the following marking conventions are used to focus
attention on certain subjects or actions
TIP:
gives you suggestions and advice to perform certain tasks
easier or handier.
ATTENTION:
A remark with additional information; draws your attention to
possible problems.
CAUTION:
The camera may be damaged, if you do not carefully execute
the procedures.
WARNING FOR DANGER:
You can (seriously) hurt yourself or seriously damage the
product, if you do not carefully execute the procedures
Warranty
Nieaf-Smitt B.V. guarantees the tester for a period of 12 months. The period of
warranty will be effective at the day of delivery. The liability is recorded in the
terms of delivery (FME).
3
Rev 001
CONTENTS
1. General safety regulations ................................................................ 6 2. General ................................................................................................ 8 2.1 Intended use .................................................................................................... 8 2.2 Target group .................................................................................................... 9 2.3 Operation ......................................................................................................... 9 2.4 Specifications ................................................................................................ 10 2.5 Safety precautions ........................................................................................ 12 2.6 Certification ................................................................................................... 12 3. Contents of the case ........................................................................ 13 4. Getting started .................................................................................. 14 4.1 Charging the internal battery ....................................................................... 14 4.2 Changing the battery .................................................................................... 14 4.3 Switching the camera on/off ........................................................................ 14 4.4 Configuration of the camera ........................................................................ 15 4.4.1 Menu structure........................................................................................ 15 4.4.2 Infrared settings ..................................................................................... 16 4.4.3 Measurement options ............................................................................ 17 4.4.4 Camera settings...................................................................................... 20 4.4.5 Audio settings......................................................................................... 21 4.4.6 Image browser ........................................................................................ 22 4.4.7 Date & Time settings .............................................................................. 22 4.4.8 Language selection ................................................................................ 23 4.4.9 Display Settings...................................................................................... 23 4.5 Focussing ...................................................................................................... 24 4.6 Saving an image. ........................................................................................... 25 5. Getting started .................................................................................. 26 5.1 Temperature measurement .......................................................................... 26 5.2 Turning the visible image off and on........................................................... 26 5.3 Thermal and visible image blending ........................................................... 27 5.4 Manual control .............................................................................................. 28 The thermal image gain and offset are normally controlled automatically in
order to give a meaningful display on the screen. However, Hotkey 2 offers
the option of switching to manual control if desired: ...................................... 28 5.5 Light ............................................................................................................... 28 5.6 Image freeze .................................................................................................. 28 5.7 Image alignment ............................................................................................ 29 5.8 Menu............................................................................................................... 29 6. Adding captions when saving images ........................................... 30 6.1 Voice annotation ........................................................................................... 30 6.2 Text captions ................................................................................................. 31 7. Frequently asked questions ............................................................ 32 7.1 What Temperature Measurement Options are there? ................................ 32 7.2 . How do I select and move cursors? .......................................................... 32 7.3 What is area analysis?.................................................................................. 33 7.4 What is tracking? .......................................................................................... 34 7.5 What are Isotherms and how do I select them? ......................................... 35 7.6 Why use Auto/Manual temperature range and span adjustment?............ 36 4
Rev 001
7.7 What is a temperature profile?..................................................................... 37 7.8 How do I turn the visible camera on and off? ............................................. 38 7.9 How do I blend thermal and visible images (image fusion)? .................... 39 7.10 How do I align the thermal and visible images?....................................... 40 7.11 How does illumination work? .................................................................... 41 7.12 How do I save an image? ........................................................................... 42 7.13 How does the voice and text caption recording work? ........................... 43 7.14 How do I set alarms? .................................................................................. 46 7.15 How do I change the screen colours?....................................................... 48 7.16 What is emissivity? .................................................................................... 49 7.17 What is reflected Temperature?................................................................. 50 7.18 What is integration used for?..................................................................... 51 7.19 Do I need to turn Interpolation off? ........................................................... 52 7.20 Can I reduce camera battery power consumption? ................................. 53 7.21 What does Camera Reset do?.................................................................... 54 7.22 How do I automatically make multiple images? ....................................... 55 8. Maintenance ...................................................................................... 56 8.1 Calibration and Repair .................................................................................. 56 8.2 Cleaning the camera ..................................................................................... 56 8.3 Replacing the batteries................................................................................. 56 Bijlagen:
Appendix
Appendix
Appendix
Appendix
1 Emissivity table in the Camera.............................................................. 57 2 Complete iconlist .................................................................................. 58 3 Declaration of Conformity ..................................................................... 59 4 Accessories .......................................................................................... 60 5
Rev 001
1. General safety regulations
WARNING DANGER:
Read, before you perform any action in connection with the
camera, this user manual carefully. Nieaf-Smitt B.V. is not
liable for injuries, (financial) damage and/or excessive wear
resulting from incorrectly performed maintenance, incorrect
use of or modifications to the camera.
ATTENTION:
Under certain circumstances, in almost every electronic
memory data are lost or changed. Therefore Nieaf-Smitt BV
accepts no financial responsibility for losses or claims by
lost or otherwise unusable information resulting from abuse,
misuse, failure, neglect of the user manual and procedures or
other related causes.
It is not allowed to remove, to skirt or to tide over the
enclosure or safeties of the camera, during operation.
It’s forbidden to place and/or to use the camera in a room
where there is a risk of explosion.
If the tester is used by a third party, you being the owner are
responsible, unless otherwise specified.
6
Rev 001
ATTENTION:
Nieaf-Smitt B.V. reserves the right to, without prior notice ,
update the software in the camera, which is returned for
either reparation or other reasons.
Repair can only be done by Nieaf-Smitt BV.
WARNING DANGER:
It’s forbidden to execute measurements if strong electrostatic
or electromagnetic fields are present
ATTENTION:
Provide a clean and save workplace which has sufficient
lighting.
TIP:
Contact Nieaf-Smitt B.V. if you require information
concerning training for the camera. Training at Nieaf-Smitt or
at customers can be arranged
Nieaf-Smitt bv Vrieslantlaan 6
3526AA Utrecht Holland
Postbus 7023 3502KA Utrecht
Tel.: 0031 30 – 2881311 (general)
Tel.: 0031 30 – 2850285 (helpdesk)
7
Rev 001
2. General
Thermal imaging cameras visualize and measure the thermal heat, which is
issued by objects, in order to detect problems in a wide range of mechanical
and electrical systems on a fast, accurate and highly effective manner. They
identify sources of excessive friction, faulty switching, providing crucial
information for many applications, including measuring heat loss from buildings
and identify potential blockages in heating.
All this information is accessible without making contact with the measuring
object. Since "irregular" thermal issues can be an indication for potential
inefficiencies or errors, measurements can often be implemented in time for
production loss, equipment failure and fire prevention.
Nieaf-Smitt forefront in adapting of radiometry and thermal systems for many
more applications, so the technology can be used daily by inspectors and
maintenance engineers, as ordinary tools like a screwdriver.
2.1 Intended use
Nieaf-Smitt products and solutions are used in many industries, including retail,
banking, recreation, security, transportation and healthcare.
Many professionals in many industries, rely on the systems of daily Nieaf-Smitt
for a wide range of thermal requirements, including:
Electric
Checking for loose / tight connections
Congested components
Disproportionate stress distribution
Faulty / fatigued components
Mechanical
Monitoring the condition of bearings
Poor motor shaft alignment
Faulty electrical connections
Domestic and industrial plumbing and heating
Floor heating control, without an equal area to break.
Detect cracked pipes
Monitoring efficiency of boilers and radiators
Food production
Monitoring temperature of food production on a tape
Monitoring the optimal operation of storage
Medical / health
Scanning of individuals at a high temperature as an indicator of virus
Control of blood flow to limbs
Emergency / Security
Monitoring of heat traces of recently displaced vehicles
Body temperature in low visibility
8
Rev 001
2.2 Target group
The group which covers this manual are been technically competent
persons and competent persons.
People with certain knowledge and skills for the camera to operate in
sectors including the following:
-
Preventive maintenance, electrical and mechanical
Domestic and industrial controls
HVAC inspection and frozen
Troubleshooting and fault detection
2.3 Operation
Thermal cameras visualize the temperature radiated by the measured object.
This thermal image is shown through a display. There is also a normal image or
a combination of thermal and normal image (image fusion). The recordings can
be stored on a micro SD card. These images can be processed through a
computer.
9
Rev 001
2.4 Specifications
Performance
Temperature range
Field of view (FOV)
Spectral Response
Sensitivity
Detector
Frame rate
Focus Range
Minimum Focus
:
:
:
:
:
:
:
:
-10°C to +250°C
20°x 15°
8µm to 12 µm
≤0.08°C @ 23°C
160 x 160 pixel array
8Hz
0.3m to infinity
30 cm
Image storage
Number
Medium
:
:
Up to 1000 images on SD card supplied
Micro SD Card
Display
3½” colour LCD with LED Backlight. 8 colour palettes. Mixed thermal and
visible images. Digital zoom X2;X4
Laser pointer
A built in Class 2 laser is supplied to highlight the centre of the thermal image.
(Aligned at 2 metres)
Beam Divergence
: <0.2mrad
Maximum Output
: <1mW
Measurement
Temperature range:
Radiometry
:
:
-10°C to +250°C
Four moveable temperature measurement
cursors
Temperature difference measurement
User selectable 0.10 to 1.00 in steps of
0.01 with reflected ambient temperature
compensation
The greater of ±2°C or ±2% of reading in °C
For -15°C tot 45°C
Emissivity Correction
:
Accuracy
:
Imager power supply
Battery
Operation time
AC operation
:
:
:
Lithium-ion field rechargeable.
Up to 6 hours continuous operation
AC adaptor supplied, 12Vdc – 1,25A
Mechanical
Housing
:
Impact Resistant Plastic with over
moulded soft plastic .
130mmx95mmx220mm
0.80kg
Handheld & tripod mounting 1/4" BSW
Dimensions
Weight
Mounting
:
:
:
10
Rev 001
Settings and controls
- On/Off soft power control
- User selectable span control
- User selectable level control
- Auto adjust span and level
- Laser trigger switch
- Readout in °C or °F
- User selectable image integration
- User selectable emissivity setting
- User selectable reflected temperature
- Electronic zoom, x2 , x4.
- Four moveable temperature measurement cursors
- Area analysis
- X-Y profiles
- Isotherms
- Text annotation
- Voice annotation
- Image capture, time and date
- Visual/audio alarm high and low
Features
- Real-time image and temperature measurement display
- Four moveable temperature measurement cursors with individual emissivity
values and temperature difference between two points.
- Visible/thermal/mixed image fusion (100%, 75%, 50%, 25%, 0%)
- Picture In Picture (PIP)
- Simple operation
- Multiple temperature measurement
- Image browser
- Battery Charge indicator
- Lightweight
- Laser Pointer
- Auto hot/cold seeker
- Languages
Computer requirements (for PC software)
PC: IBM compatible PC with a minimum of: 300MHz processor, MS Windows
XP , Vista, or Win 7, 128MB RAM. 16 bit colour graphics with 1024x768
capability.
Environment
Temp. operating range
Humidity
Temp. storage range
CE Mark (Europe)
IP rating
Operating temp for stated accuracy
11
:
:
:
-15°C to +50°C
10% to 90% non condensing
-20°C to +70°C
:
:
IP54
23 ºC
Rev 001
2.5 Safety precautions
The equipment described in this document uses a Class 2 laser. Under no
account should anyone look directly into the laser beam or the laser beam exit
aperture, irreversible damage to the eye may occur. The laser should not be
operated when there are personnel in the imager’s field of view.
Caution – use of controls or adjustments or performance of procedures other
than those specified in this document may result in hazardous laser radiation
exposure.
2.6 Certification
The tester complies with the relevant European directives. During the design of
the camera directives have been taken into account, in order to comply to the
fundamental demands of the directives. On the basis of this data the CE-mark
has been mounted on the camera. The directives and the standards mentioned
are enumerated in the EC-Declaration of Conformity. (see appendix. 3)
12
Rev 001
3. Contents of the case
1.
6.
2.
4.
3.
1.
2.
3.
4.
5.
6.
5.
The carrying case
Camera
PSU and International adaptors.
CD – user manual and software.
USB cable (camera to PC).
Quick start guide, certificate of conformity, calibration card (full manual
added to CD).
13
Rev 001
4. Getting started
4.1
Charging the internal battery
NOTE:
When the camera is connected to a
PC via the USB cable the camera
will charge but extremely slowly.
The camera’s built in battery is charged via the charging port. A fully
charged battery will last approximately 6 hours. A green LED indicates
charging which turns to red when the battery is charged.
4.2 Changing the battery
Open the lock on the battery cover and remove the cover
-
4.3
Remove battery.
Insert new battery, ensuring the
terminal pads are towards the
front of the camera.
Replace and lock the cover
Switching the camera on/off
Press the on/off button to switch the camera on.
NOTE
Press and hold for a few seconds
to switch the camera off.
NOTE
It take a few seconds before the
camera is fully started up.
After switching on, it will take up to 30 seconds for the infrared image to appear.
The image will periodically freeze for one or two seconds while the camera recalibrates itself. This is normal operation, and the time between these
calibrations will increase as the operating temperature of the camera stabilizes..
14
Rev 001
4.4 Configuration of the camera
After switching the camera on for the first time it needs to be configurated. This
will be explained in the underlying paragraphs.
options chosen by the user. A yellow box around the icon for Hotkey1 or
Hotkey 2 indicates that this option is selected and this defines the operation of
the navigation and toggle buttons. In normal imaging mode, Hotkey 3 may be
used to freeze the image; pressing it again returns the camera to live operation.
Hotkey 4 is used to enter and exit the menu. See appendix 2 for a full icon list.
4.4.1 Menu structure
a. Select the menu
by pressing Hotkey 4
.
b. Navigate through the menu using the navigation buttons
and
press Hotkey 3
to select the required option. The highlighted
item will have a yellow box around it.
c. Use the up/down buttons
the required item.
to move in the selected list and select
d. Use the left/right buttons
to change values and options for the
specific item.
e. Press Hotkey 4
to exit or Hotkey 1
to go back to the
previous menu.
Centre toggle button
Up/Down, Left/Right
navigation buttons.
Hotkey 1 Hotkey 2 Hotkey 3 Hotkey 4
Fig 1.
15
Rev 001
4.4.2 Infrared settings
See chapter “frequently asked questions” for more details of each item.
•
Emissivity
Set the emissivity value between 0.10 and 1.00 using the left/right
navigation buttons. Pressing Hotkey 3 (ε Table) gives a table of emissivity
values of common materials from which a selection can be made.
•
Palette
Display in image using different colour palettes.
5.
High Contrast
1. Ironbow
2. Rainbow
6.
Rainbow 16
3. Isotherm Style
7.
Black Hot
4. Hot Metal
8.
White Hot
•
Reflected Temp
Usually set to the ambient temperature.
Applies only when emissivity of less than 1 is selected.
16
Rev 001
•
Temp units
Choose between °C and °F.
•
Integration
Choose an integration period from 1 (fast) to 9 (slow).
This determines the trade off between display speed and noise.
•
Interpolation
Choose Off or On.
This shows or hides the thermal image pixelation.
With this the interpolation of the thermal image can be switched on or off. If
this is switched off, the shown thermal image will be displayed with the
resolution of the thermal sensor.
4.4.3 Measurement options
This menu enables the selection of options for temperature
measurements. The symbols shown below indicate the icons shown for
Hotkey 1 when the various options are selected.
♦ Cursors
. Choose from one to four cursors. When more than one cursor is
selected, the temperatures of all the cursors are displayed in a table or are
tagged next to the cursors (see section 5.8). When two cursors are chosen,
the temperature difference between them is also displayed. When one of the
cursors is selected by Hotkey 1, it can be moved around on the display by the
navigation buttons.
If two or more cursors are selected then individual emissivity values can be
assigned to each cursor.
17
Rev 001
When an emissivity less than 1.00 is selected for a cursor, then that cursor
flashes on the screen.
Tabular temperature values
Tagged temperature values
• Cursor Tracking
Select “High”, “Low”, or “High & Low” in order to track and
measure the hottest point, the coldest point, or both hottest and
coldest points in the image.
• Area analysis
If this option is turned on, the highest, lowest, and average
temperatures within the designated area will be displayed. Three
different area size boxes can be selected via Hotkey 1.
NOTE:
The above three items are mutually exclusive, i.e. when
one is turned on the other two are disabled.
• Isotherm
Select “High”, “Low”, or “High & Low” in order to highlight
areas of the scene with temperatures within one or two temperature
bands. The temperature bands are adjustable by means of Hotkey 1
and the navigation keys.
Red isotherm
Blue isotherm
18
Combined isotherms
Rev 001
• Temperature profile
Select “Horizontal” or “Vertical” to enable a histogram of
temperature values along a horizontal or vertical cross section to be displayed
on the right hand side of the display. The position of the cross section is
indicated by small arrows at the left and right or top and bottom of the image
and can be adjusted by means of Hotkey 1 and the navigation buttons.
Vertical Profile
Horizontal profile
• Temperature alarms
Select “High”, “Low”, or “High & Low”. Visual and audio
alarms will be triggered if either cursor or a point within the designated
area is higher or lower than a set temperature. The high and low set
temperatures may be adjusted by means of Hotkey 1 and the
navigation buttons.
19
Rev 001
4.4.4 Camera settings
See chapter “frequently asked questions” for more details.
•
Caption mode
Select “On” to enable the addition of a text caption when saving an image.
Options will then be displayed when saving an image, to be selected by
means of Hotkey 2 and hotkey 3.
•
Auto off
Select “5 Mins”, “10 Mins”, “20 Mins” to allow the camera to switch itself off
after a defined period of inactivity in order to save power. There is also an
“Always On” option.
•
Camera reset
Select with Hotkey 3
to restore the factory settings.
•
Sequence Record
Select this to save a set of images of the scene. The images are saved to the
micro SD card and an be saved at intervals of 5 Sec, 10 Sec, 20 Sec, 30 Sec, 1
Min, 2 Min, 5 Min, 10 Min, 20 Min, 30 Min, 1 Hour and on Alarm. The alarm
setting works in conjunction with the high low alarm function. When the
temperature in the scene exceeds the user defined high alarm threshold
temperature an image is saved. Equally when the temperature in the scene goes
below the user defined low alarm threshold temperature an image is saved.
•
Sequence Capture
If sequence record is selected, then this option is switched on and allows the
user to define the number of images to be saved. Choices available are 10, 50,
100, 500 and 1000 images.
20
Rev 001
4.4.5 Audio settings
See chapter “frequently asked questions” for more details of each item.
•
Imager sounds
Select “Off” to mute all audible outputs.
•
Voice annotation
Select “Session”
to add a voice message at the start of a set of images
(A session ends when the imager is switched off).
Select “Individual”
to add a voice message to each saved image.
Select “Combined”
to add a common voice message at the start of a set of images
and add additional comments for each image.
•
Voice playback
Select “speaker” or “headset” for the desired method of audible outputs.
•
Volume
Select the volume of the audible outputs from 1 to 9.
If session is selected the voice message is recorded in the audio settings
by pressing Hotkey 3. Recording is stopped by pressing Hotkey 3 again.
Hotkey 1 can be used to play back the recorded message. Hotkey 3 can
be used to re-record if necessary.
21
Rev 001
4.4.6 Image browser
The saved images are shown on the screen with the most recently saved
image first.
Select the desired image by means of the navigation keys.
To display the selected image press Hotkey 3.
To delete the selected image press Hotkey 2, to confirm deletion press
Hotkey 3.
When a stored image is displayed, press Hotkey 3 to return to live imaging.
4.4.7 Date & Time settings
a) Use the left/right buttons
to navigate in this menu, the item that can
be changed is highlighted in red. In the picture above the day (DD) 14 is
highlighted.
b) Use the up/down buttons
to change the value.
c) The date formats can be changed by pressing Hotkey 2 to cycle through
DD-MM-YYYY, MM-DD-YYYY and YYYY-MM-DD options. Pressing
Hotkey 4 will select the option on the display.
22
Rev 001
4.4.8 Language selection
When the language is highlighted (shown by a yellow box around it) press
Hotkey 3
to select.
4.4.9 Display Settings
•
•
•
•
•
•
•
LCD brightness
Select from 1 (low) to 9 (high) to control the screen brightness to save battery
power. . .
Zoom
Allows the user to digitally zoom into the image. Options are X2 and X4 zoom.
Cursor Type
Select how the cursor temperature values are to be displayed on the screen.
The choice is between a tabular display or a tag next to the cursor.
ε
Choose whether or not to display the reflected temperature. Only applicable
when emissivity is selected to be less than 1.
Temp. Units.
Choose whether or not the temperature units (°C or °F) are displayed
Colour Scale.
Chose whether or not the colour scale is to be displayed.
Icon Timeout
The Icons above the 4 hotkeys can be displayed either continuously or for 10
seconds after a hotkey is pressed.
23
Rev 001
4.5 Focussing
Gently rotate the lens clockwise and anti-clockwise to focus the image.
.
NOTE:
Remember to remove the lens cap.
Focus bar
Out of focus
focused
When focusing a focus bar appears on the screen to assist in focusing the
image. It indicates the approximate distance in metres (in feet when °F is
selected) of a focussed target from the camera.
Hotkey buttons
Hotkey 1
Hotkey 2
Hotkey 3
Hotkey 4
The Hotkey functions are indicated by the icons or text displayed on the
screen above them. These functions vary according to the operating
24
Rev 001
4.6 Saving an image.
Save image button
Save image button
To save a live or frozen image, press the Save button once. If Caption
Mode or Voice Annotation has been turned on, a text caption or voice
annotation can be attached to the image (see section 6).
25
Rev 001
5. Getting started
5.1 Temperature measurement
Temperature readings are displayed at the top of the display. In the default
mode, a single temperature in °C is of the centre point of the cursor. The other
readings at the top of the display are emissivity settings and reflected
temperature setting. Two cursors or a measurement area can be selected from
the measurement options menu (see section 5). The temperature range within
the scene is indicated by a scale on the right hand side of the display
Temperature
difference between
cursors
Temperature range
for the scene.
one cursor
Two cursors
5.2 Turning the visible image off and on
Press Hotkey 2
to toggle to the Visible On icon
.
Press the centre toggle button
to toggle to Visible Off
Press the centre toggle button
again to toggle to Visible On
26
.
.
Rev 001
5.3 Thermal and visible image blending
The camera can show a thermal image, a visible image of the scene, a mixed blend
of both visible and thermal, a thermal picture in the visible picture (PiP) and a
blended version of the thermal image in the PiP.
100% thermal
25% visible 75% thermal
50% visible 50% thermal
75% visible 25% thermal
100% visible
Picture in Picture
1.
Press Hotkey 2
2.
press the centre toggle button
to toggle to Visible On
If off
.
Use the up/down navigation buttons to merge (blend) the visible and
thermal images. Repeatedly pressing the up button cycles through
the options 0%, 25%, 50%, 75%, 100%, PiP.
3.
4.
until the Visible On/Off icon appears
In the PiP mode the thermal image can also be blended using the
left/right navigation buttons..
27
Rev 001
5.4 Manual control
The thermal image gain and offset are normally controlled automatically in order to
give a meaningful display on the screen. However, Hotkey 2 offers the option of
switching to manual control if desired:
1. Press Hotkey 2
to toggle to the Auto icon
.
2. Press the centre toggle button
to toggle to Manual
or Persistent
If Persistent manual is selected, then the manual settings
manual.
are stored. When the camera is switched on again, and Manual
selected, the stored span and level settings are used.
3. Use the left/right navigation buttons to change the span of the displayed
temperature range.
4. Use the up/down navigation buttons to change the level of the
displayed temperature range
5. Press the centre toggle button again to revert to Auto.
5.5 Light
There is a visible illuminator for use in poor ambient lighting:
to toggle to the Light Off icon
4.6.1.
Press Hotkey 2
4.6.2.
Press the centre toggle button
4.6.3.
Press the centre toggle button again to turn the light off.
to toggle to Light On
.
.
It is advisable to turn the light on only when necessary in order to conserve battery
power.
5.6 Image freeze
Pressing Hotkey 3 freezes the both the infrared and the visible image. Pressing
again reverts to a live image. The image save facility works with either a live or a
frozen image, but once a frozen image has been saved the camera will revert to a
live image.
28
Rev 001
5.7 Image alignment
As the visible and thermal cameras are not co-axial the visible and thermal image
may need to be aligned. This is usually required when moving to view objects at
different distances.
4.2.1.
Press Hotkey 1
to toggle to the alignment icon
4.2.2.
Use the up/down and left/right navigation buttons
thermal and visible images.
.
to align the
Note The visible image is moved during alignment.
Examples of alignment.
Fully Aligned
Align left
Align right
Align up
Align down
Four pre-programmed alignment distances are included. These are at 0.5m, 1m,
2m and 4m ranges. With the alignment option selected by Hotkey1, pressing the
centre toggle button
once aligns at 2 metres. Pressing the toggle button
repeatedly cycles through to 4m, 0.5m, 1m, and 2m.
Note: These values appear in feet if °F is selected.
5.8 Menu
Hotkey 4 opens the menus. See section 5 for details of the menu structure
29
Rev 001
6. Adding captions when saving images
6.1 Voice annotation
When saving an image with Individual Voice Annotation turned on, there is
the option of saving a voice message with each image. The screen shots
below, describe the procedure:
a) Do you wish to attach a voice
message to this saved image?
Hotkey 2 for no .
Hotkey 3 for yes .
c) Stop Recording Hotkey 3
to stop.
e) If caption mode is selected this option
will now be offered to save a text
caption. (see 6.2)
b) Start voice recording?
Hotkey 3 for yes.
d) Option to Re-record the voice
message?
Hotkey 2 for Yes
Hotkey 3 for No
Hotkey 1 for play
f) Image with voice message is being
saved.
Playback
The voice recording can be played back when viewing saved images in the
browser.
NOTE:
The abort Icon
on Hotkey4.
Pressing Hotkey 4 at any stage aborts the saving process.
30
Rev 001
6.2 Text captions
When saving an image with Caption Mode turned on, there is the option of
attaching a text caption to each image. The screen shots below, describe
the procedure:
:
a) Do you wish to attach a text caption message to this image?
Hotkey 2 for No
Hotkey 3 for Yes
1. Use the up/down arrow buttons
to
cycle through letters and numbers until
the one required appears. The available
symbols are:
ABCDEFGHIJKLMNOPQRSTUVWXYZa
bcdefghijklmnopqrstuvwxyz0123456789
2. Use the left/right arrow buttons
to
move to the next space and repeat the
above step until the caption is completed.
b) start caption entry
3. Press Hotkey 2
whole message.
to clear the
to exit and save
4. Press Hotkey 4
the image and caption.
c) Example of a caption
NOTE:
Captions cannot be viewed with the saved images in the browser
due to display constraints. The captions can be viewed using the
PC software.
31
Rev 001
7. Frequently asked questions
7.1 What Temperature Measurement Options are there?
1.
2.
3.
4.
One
or two
measurement cursors. (see q 7.2).
Area analysis (see q 7.3).
Tracking Hot, or Cold, or both Hot and Cold (see q 7.4).
Isotherms (see q 7.5).
The first three options are mutually exclusive and only one of the options can be
selected at any one time.
7.2 . How do I select and move cursors?
or two
cursors. The temperature measurement
There is a choice of one.
value of the selected cursor(s) is shown at the top of the screen. When two
cursors are selected the temperature difference between them is also displayed.
See Fig 4.
Centre toggle button
Up/Down, Left/Right
navigation buttons.
Hotkey 1 Hotkey 2 Hotkey 3 Hotkey 4
Fig 1.
Selection of cursors
1. Select the cursor by pressing Hotkey 1
(Fig 1).
2. Move the cursor using the navigation buttons
. The cursor can be
moved in both live and frozen images.
3. To select between one
or two
cursors press Hotkey 4
to select
the menu (Fig 1).
4. Using the left/right navigation buttons
menu
move to the Measurement Options
(See Fig 2) and Press Hotkey 3
to select it (Fig 3).
5. The cursors option will be highlighted.
6. Use the left/right navigation buttons
7. Press Hotkey 4
to exit (Fig 4).
Fig. 2
Fig. 3
32
to toggle between one or two cursors.
Fig. 4
Rev 001
7.3 What is area analysis?
Area Analysis is used to measure the maximum, minimum, and average temperature
within a defined region of the scene. There are three area sizes to choose from.
Selecting area analyse
1. Press Hotkey 4
to select the menu (Fig 1).
2. Using the left/right navigation buttons
menu
move to the Measurement Options
(See Fig 2) and Press Hotkey 3
to select it (Fig 3).
3. Use the up/down navigation buttons
to move to the Area option.
4. Use the left/right navigation buttons
to toggle between On and Off.
5. Press Hotkey 4
6. Use Hotkey 1
to exit.
to toggle through until the area size icon appears
7. Use the navigation buttons
.
to select the different area sizes. (Figs 4 to 6).
Centre toggle button
Up/Down, Left/Right
navigation buttons.
Hotkey 1 Hotkey 2 Hotkey 3 Hotkey 4
Fig 1.
Fig. 2
Fig 3.
Fig. 4
Fig. 5
33
Fig. 6
Rev 001
7.4 What is tracking?
Tracking offers the choice to display the following:
- The hottest part in the area.
- The coldest part in the area.
- The hottest as well as the coldest part in the area.
How to set Tracking
?
Centre toggle button
Up/Down, Left/Right
navigation buttons.
Hotkey 1 Hotkey 2 Hotkey 3 Hotkey 4
Fig 1.
Fig 2.
Fig. 3
Fig. 2
Fig. 3
Fig. 4
Fig. 5
1. Press Hotkey 4
to select the menu (Fig 1).
2. Using the left/right navigation buttons
menu
move to the Measurement Options
(See Fig 2) and Press Hotkey 3
to select it (Fig 3).
3. Use the up/down navigation buttons
3).
to highlight the tracking option (Fig
4. Use the left/right navigation buttons
“Low”, and “High & Low” options.
to toggle between “Off”, “High”,
5. Press Hotkey 4
to exit (Fig 4).
34
Rev 001
7.5 What are Isotherms and how do I select them?
Isotherms are regions within the scene having the same temperature range
which are shown in the same colour. This is best seen using either the White
Hot or Black Hot palettes. For example it can be useful to see all electrical
connections in a electrical cabinet that are within the same, user defined,
temperature range. This could very easily identify all components that may
be overheating.
Centre toggle button
Up/Down, Left/Right
navigation buttons.
Hotkey 1 Hotkey 2 Hotkey 3 Hotkey 4
Fig 1.
Selecting Isotherms
1. Press Hotkey 4
to select the menu (Fig 1).
2. Use the left/right navigation buttons
Options menu
(Fig 3).
move to the Measurement
(See Fig 2) and Press Hotkey 3
3. Use the up/down navigation buttons
(Fig. 3).
to select it
move to the Isotherms option
to toggle through the Isotherms
4. Use the left/right navigation buttons
options-“High”, “Low”, “High & Low”, and “Off”.
to exit.
5. Press Hotkey 4
6. Press Hotkey 1
to toggle through until the isotherm icons appear.
7. Use the left/right navigation buttons
span (Fig 4).
Fig. 2
Fig. 3
35
to adjust the isotherm range and
Fig. 4
Rev 001
7.6 Why use Auto/Manual temperature range and span adjustment?
Auto.
Automatically adjusts the image to allow for the highest and lowest
temperature in the scene. Useful when starting the camera to be able to
view images quickly and to be able to view the full range of temperatures in
the scene.
Manual.
The user defines the range of temperatures to be displayed. Manual setting
is useful when the user wants to examine various pieces of similar
equipment, or to exclude high or low temperatures of no interest. By having
a fixed temperature range any anomalies or discrepancies can be
highlighted visually very easily.
Centre toggle button
Up/Down, Left/Right
navigation buttons.
Hotkey 1 Hotkey 2 Hotkey 3 Hotkey 4
Fig 1.
How to select and use Auto.
Toggle Hotkey 2
until either the auto icon
or the manual icon
to toggle between the
appears (Fig 1). Use the centre toggle button
auto and manual options. As previously stated the auto function will select
the correct temperature range for the scene that is viewed. (See Fig 2).
How to select and use Manual.
Toggle Hotkey 2
until either the auto icon
or the manual icon
appears (Fig 1). Use the centre toggle button
to toggle between the
function selected (Fig 3), use
auto and manual options. With the manual
the navigation keys
to adjust the temperature range
and span
.
Fig. 2
Fig. 3
36
Rev 001
7.7 What is a temperature profile?
A temperature profile is a histogram showing the temperature values
through a cross-section of the scene. The profile is displayed on the right
hand side of the screen. The user can choose to display either a profile of a
horizontal cross-section or a profile of a vertical cross-section.
How do I set a temperature profile?
Centre toggle button
Up/Down, Left/Right
navigation buttons.
Hotkey 1 Hotkey 2 Hotkey 3 Hotkey 4
Fig 1.
1. Press Hotkey 4
to select the menu (Fig 1).
2. Using the left/right navigation buttons
Options menu.
(Fig 3).
move to the Measurement
(See Fig 2) and Press Hotkey 3
to select it
3. Use the up/down navigation buttons
option (Fig 3).
to move to the Temp. Profile
4. Use the left/right navigation buttons
“Horizontal”, and “Vertical”.
to toggle between “Off”,
5. Press Hotkey 4
to exit (Fig 4).
6. Press Hotkey 1 to select
or
then use the navigation buttons to
move the position of the cross section within the image.
Fig. 2
Fig. 3
37
Fig. 4
Rev 001
7.8 How do I turn the visible camera on and off?
1. Press Hotkey 2
options
(Fig 1).
to toggle through to the visible camera on/off
2. Press the centre toggle button
visible on
(See Figs 2 & 3).
to toggle between visible off
and
Centre toggle button
Up/Down, Left/Right
navigation buttons.
Hotkey 1 Hotkey 2 Hotkey 3 Hotkey 4
Fig 1.
Fig. 2
Fig. 3
38
Rev 001
7.9 How do I blend thermal and visible images (image fusion)?
The user can select to view the scene in:
1. Thermal Only. This is the default when the camera is switched on (Fig 1).
2. Visible only (Fig 2).
3. Or a blend of both. A blend superimposes the thermal image on to a visible
image. The extent of the blend is adjustable (Fig 3).
In all of the above choices, all the temperature measurement options are available
.
Fig. 1
Fig. 2
Fig. 3
Centre toggle button
Up/Down, Left/Right
navigation buttons.
Hotkey 1 Hotkey 2 Hotkey 3 Hotkey 4
Fig 1.
Blending Thermal and Visible Images
1. Using Hotkey 2
toggle through until either the visible camera on
or visible camera off icon
appears. Use the centre toggle
icon
button
to toggle between visible off
and visible on
(Fig 4).
2. With the visible camera on, blend between the visible and thermal image
by using the navigation keys
.
3. This will blend the thermal and visible image on a percentage scale 0%,
25%, 50%, 75%, 100% and PIP.
39
Rev 001
7.10 How do I align the thermal and visible images?
As the thermal camera and visible camera are not co-axial, the alignment
controls allow the user to align the thermal and visible image. The
alignment controls move the visible image.
Align images
1. Using Hotkey 2
toggle through until either the visible camera
on icon
. See question 7.9
2. Use Hotkey 1
to toggle through until the alignment icon
.appears.
3. Use the navigation keys
(Fig 1).
to align the thermal and visible images
Centre toggle button
Up/Down, Left/Right
navigation buttons.
Hotkey 1 Hotkey 2 Hotkey 3 Hotkey 4
Fig 1.
Fig. 2 Fully aligned Fig.3 Align to the left
Fig. 5 Align up
Fig. 4 Align to the right
Fig. 6 Align down
Four pre-programmed alignment distances are included. These are at 0.5m,
1m, 2m and 4m ranges. With the alignment option selected by Hotkey1,
pressing the toggle button once aligns at 2 metres. Pressing the toggle button
again allows you to cycle through to 4m, 0.5m and 1m.
This function is only available after the visual camera has been switched on.
After pressing hotkey 1 this option will is not available anymore.
40
Rev 001
7.11 How does illumination work?
In poor lighting conditions the illuminator allows the user to see the scene with
the visible camera.
How to select the illumination (light)
option?
1. To turn the light on press Hotkey 2
to toggle through until
either the light on
(See Fig 2) or light off
icon appears (See Fig
1).
2. Use the centre toggle button
light on .
Fig. 1
Light off
to toggle between light off
Fig. 2
Light on
41
and
Fig. 3
Position of illumination
Rev 001
7.12 How do I save an image?
To save press
the Save
button.
Fig. 1
Fig. 2
To save either a live or frozen image, press the save button on the handle (See
Fig 1 and Fig 2).
If either individual voice annotation or text caption options are switched on, these
can be attached to the saved image. Default is text and voice on.
More details on voice annotation and text caption are in Q 13.
Images are saved on a micro-SD card and may be viewed using the Browser.
Saving images
1. Press Hotkey 4
to select the menu.
2. Using the up/down navigation buttons
to select it.
press Hotkey 3
to go to the Browser.
and
3. Use the navigation keys
to highlight the chosen image.
The following options are available
Press Hotkey 3
Press Hotkey 2
confirm deletion.
to select it.
to delete the image and press Hotkey 3
Press Hotkey 1
to exit from the browser.
Press Hotkey 4
to close the menu
42
to
Rev 001
7.13 How does the voice and text caption recording work?
A saved image can have the following attachments to provide further information
about it:
a. Voice message
b. Text caption
c. Both Voice and Text.
d. Nothing attached.
In addition, in the voice message attachment there are the following options:
i.
Add voice message per image (individual).
ii.
Add the same voice message to a set of images (session).
A session ends when the camera is switched off.
iii.
Add both individual and session voice messages.
Setting Voice Annotation
1. Press Hotkey 4
to select the menu.
2. Using the left/right navigation buttons
and press Hotkey 3
to select it.
move to the Audio Settings menu
3. Use the up/down navigation buttons
to move to “Voice Annotation” (Fig 3).
4. Use the left/right navigation buttons
“Session”.
to toggle through “Off”, “Individual” or
5. Select “Individual” to record a separate message for each saved image or
“Session” for a set of images.
6. Use the up/down navigation buttons
“Speaker”
or “Headset”.
to go to “Voice Playback” and select
Setting Caption Mode
1. Press Hotkey 4
to exit or Hotkey1
to go back to the main menu.
2. In the main menu using the left/right navigation buttons
settings menu
and press Hotkey 3
move to the camera
to select it.
3. Use the up/down navigation buttons
to move to “Caption Mode”. See Fig 9.
4. Use the left/right navigation buttons
to toggle between “On” and “Off”.
43
Rev 001
Voice and Text Caption entry
1. When saving an image, the option of adding a voice message is selected by
pressing Hotkey 3
for yes
or press Hotkey 2
for no . See
Fig. 4
2. If Yes is selected press hotkey 3
to start the recording. See Fig 5.
3. The message “Recording” appears. Stop recording by pressing hotkey 3
the recording, “Re-record” it and
again. Then there is the option to “Play”
then save the voice message. See Figs 6, 7 and 8.
4. After the Voice message recording is completed, there is the option to add a
for yes
or press Hotkey 2
Text Caption if selected. Press Hotkey 3
for no . See Fig 10.
5. Enter the text message using the up/down navigation buttons to select
characters and Use the left/right navigation buttons
to move to the next
character. See Fig 11 and 12
The available symbols are:
ABCDEFGHIJKLMNOPQRSTUVWXYZabcdefghijklmnopqrstuvwxyz0123456789
6. Press Hotkey2
to clear the whole text.
7. Press Hotkey 4
to exit or Hotkey1
to go back.
Fig. 2
Fig. 3
Fig. 4
Fig. 5
Fig. 6
Fig. 7
44
Rev 001
Fig. 8
Fig. 9
Fig. 11
Fig. 12
Fig. 10
TIP:
Pressing hotkey 4 at any point during the above, will abort
the process and revert to a live image.
45
Rev 001
7.14 How do I set alarms?
Centre toggle button
Up/Down, Left/Right
navigation buttons.
Hotkey 1 Hotkey 2 Hotkey 3 Hotkey 4
Fig 1.
Fig. 2
Fig. 3
Fig. 4
Setting alarms
1. Press Hotkey 4
to select menu (Fig 1).
2. Use the left/right navigation buttons
and Press Hotkey 3
to move the Measurement menu
to select it (Fig 2).
3. Use the up/down navigation buttons
option (see Fig 3).
to move to the temperature alarm
4. Use the left/right navigation buttons
to toggle through “Off”, “High”, “Low”
or “High & Low”. (In the example below we will select a high alarm).
5. Press Hotkey 4
6. Use Hotkey 1
(Fig 4).
to exit.
to toggle through until the high alarm icon
7. Use the up/down navigation buttons
appears
to select a higher limit temperature.
8. If the temperature at the cursor or within the measurement box is above the
upper limit value a message “Over Limit” will flash at the bottom of the screen.
46
Rev 001
9. In addition to the visible caption an audible alarm can also be set.
a. Press Hotkey 4
to select menu.
b. Use the left/right navigation buttons
and press the Hotkey 3 to select it.
to go to the Audio Settings menu
c. In Imager Sounds use the left/right navigation buttons
sound on.
d. Press Hotkey 4
to exit.
to toggle the
10. If the temperature at the cursor or within the measurement box is above the
upper limit an audible “Bleeping” will now be heard.
It is also be possible to set a low limit
or both the high & low limit together
TIP:
Default is sound on.
47
Rev 001
.
7.15 How do I change the screen colours?
Different colour palettes are useful in viewing objects and scenes for different
requirements. As a simple rule of thumb, palettes with a lot of different colours
are more helpful when looking for hot spots or cold spots, whereas palettes with
fewer and gradually changing colours are more useful in viewing changes of
temperatures in a scene or object.
Centre toggle button
Up/Down, Left/Right
navigation buttons.
Hotkey 1 Hotkey 2 Hotkey 3 Hotkey 4
Fig 1.
Change screencolours
to select the menu (Fig 1).
1. Press Hotkey 4
2. “Infrared Settings”
is highlighted press Hotkey 3
3. Use the up/down navigation buttons
to select it (Fig 2).
to move to the palette option (see Fig 3).
4. Use the left/right navigation buttons
to toggle through the palette
options which are, “Ironbow”, “Rainbow”, “Isotherm Style”, “Hot Metal”, “High
Contrast”, “Rainbow 16”, “Black Hot” and “White Hot”. (Please see
examples below).
5. Press hotkey 4
to exit.
Fig. 2
1
1.
2.
3.
4.
2
Ironbow
Rainbow
Isotherm Style
Hot Metal
Fig. 3
3
4
5
6
7
8
5. High Contrast
6. Rainbow 16
7. Black Hot
8. White hot
48
Rev 001
7.16 What is emissivity?
The amount of infrared radiation emitted by a surface depends on both its
temperature and its emissivity. Surfaces that are good reflectors (e.g. polished
metal) are poor emitters, and surfaces that are good emitters (e.g. human skin)
are poor reflectors. A black body is defined as an object that absorbs all
radiation falling on it; and it is a perfect emitter of radiation.
The emissivity of a surface (usually written ε) is the ratio of energy radiated by
that surface to energy radiated by a black body at the same temperature. For
accurate temperature measurements, the emissivity of the surface being
measured must be entered into the camera. This is done by entering a number
in the range 0.10 (for polished chromium) to 1.00 (for a black body). An
emissivity lookup table is provided, which lists the emissivities of a range of
common materials.
It is not recommended that temperature measurements be attempted when
emissivity values lower than 0.70 are required, because large errors are likely
due to reflected radiation from surrounding objects.
How do I set emissivity?
Centre toggle button
Up/Down, Left/Right
navigation buttons.
Hotkey 1 Hotkey 2 Hotkey 3 Hotkey 4
Fig 1.
1. Press Hotkey 4
to select the menu (Fig 1).
.will be highlighted. Press Hotkey 3
to select it.
2. “Infrared Settings”
3. Emissivity is the first item in the “Infrared Settings” menu, and will be
highlighted. See Fig 2.
4. Use the left/right navigation buttons
to change the emissivity value.
5. Or select the emissivity table by pressing Hotkey 3
up/down navigation buttons
6. Press Hotkey 4
, and use the
to highlight the desired value/surface.
to exit.
Fig 2.
49
Rev 001
7.17 What is reflected Temperature?
This is only applicable if an emissivity of less than 1 is selected.
Some of the infrared energy seen by the camera from a surface with an
emissivity of less than 1.00 is reflected background energy. If there is a hot
object in the background, this can have a significant effect on the temperature
measured. By entering a reflected temperature value, the camera can correct
for the effect of this reflected background energy.
How to set Relected Temperature?
Centre toggle button
Up/Down, Left/Right
navigation buttons.
Hotkey 1 Hotkey 2 Hotkey 3 Hotkey 4
Fig 1.
1. Press Hotkey 4
to select the menu (Fig 1).
2. “Infrared Settings”
it.
.will be highlighted. Press Hotkey 3
to select
3. Use the up/down navigation buttons
to move to the Reflected Temp. option.
4. Use the left/right navigation buttons
to change the value.
5. Press Hotkey 4
to exit.
Fig. 2
TIP:
A good method to determine the reflected temperature in a
room or setting is to set the emissivity to 1.00, turn 180
degrees from the object being measured, and take an
average temperature measurement, using area mode (see
7.3), of the background or of any hot object.
50
Rev 001
7.18 What is integration used for?
The camera normally operates at a frame rate of 8Hz (i.e. the image is updated
8 times per second). For viewing scenes in which there is very little temperature
variation, however, the image may be improved by integrating over several
frames to reduce the noise.
How do I set the Integration?
Centre toggle button
Up/Down, Left/Right
navigation buttons.
Hotkey 1 Hotkey 2 Hotkey 3 Hotkey 4
Fig 1.
1. Press Hotkey 4
.
2. “Infrared Settings”
to select the menu (Fig 1).
is highlighted. Press Hotkey 3
to select it.
3. Use the up/down navigation buttons
to move to the Integration option.
4. Use the left/right navigation buttons
to change the value.
5. Press Hotkey 4
to exit.
TIP:
The image update rate is slower when integration is
increased, so the camera must be held still or moved very
slowly when high integration numbers are used.
51
Rev 001
7.19 Do I need to turn Interpolation off?
Interpolation is on by default as it smoothes the image to provide a better
visual image. Turning it off gives a more pixelated image. Some users may
wish to observe the scene with the actual resolution of the detector.
Interpolation off
Interpolation on
Fig 1
Fig 2
How do I set Interpolation
1. Press Hotkey 4
to select the menu (Fig 3).
2. Infrared Settings”
is highlighted. Press Hotkey 3
to select it
3. Use the up/down navigation buttons
(Fig 4).
to highlight the Interpolation option
4. Use the left/right navigation buttons
to toggle between on and off.
5. Press Hotkey 4
to exit.
Centre toggle button
Up/Down, Left/Right
navigation buttons.
Hotkey 1 Hotkey 2 Hotkey 3 Hotkey 4
Fig 1.
Fig. 4
52
Rev 001
7.20 Can I reduce camera battery power consumption?
Battery power consumption can be reduced by either or both of the following:
a Reducing the LCD display brightness
b Setting the camera to switch off automatically if not used for a period of time.
The switch off time is defined from the last press of a button.
Setting energy saving
1. Press Hotkey 4
to select menu (Fig 1).
2. Use the left/right navigation buttons to move to the Display Settings
to select.
and press Hotkey 3
3. The LCD Brightness option will be highlighted (Fig 2).
4. Use the left/right navigation buttons
to adjust the LCD brightness level.
Higher numbers indicate a brighter LCD. The Brightness numbers range
from 1 to 9.
5. Go bachk to the main menu and use the left/right navigation buttons to move
to the Camera Settings (fig.3.) and press Hotkey 3
to select.
6. Use the up/down navigation buttons
4).
to highlight the Auto Off option (Fig
7. Use the left/right navigation buttons
to select the automatic turn off
time. The options are “5 Mins”, “10 Mins”, “20 Mins” and “Always On”.
These are the times after the last button press for which the camera will stay
on, before turning itself off.
to exit.
8. Press Hotkey 4
Centre toggle button
Up/Down, Left/Right
navigation buttons.
Hotkey 1 Hotkey 2 Hotkey 3 Hotkey 4
Fig 1.
Fig 2
Fig 3.
53
Fig. 4
Rev 001
7.21 What does Camera Reset do?
Camera Reset changes the following values to the factory default setting:
Infrared Settings
Emissivity
Palettte
Reflected Temp.
Temp. Units
Integration
Interpolation
1.00
Ironbow
22
°C
1
Aan
Measurement Options
Cursors
1
Tracking
Off
Area
Off
Isotherms
Off
Temp. Profile
Off
Temp. Alarm
Off
Camera Settings
LCD Brightness
Caption Mode
Auto Off
6
On
20 min.
Audio Settings
Camera Sounds
Voice Annotation
Voice playback
Volume
On
Individual
Speaker
9
Date & Time Settings
Date format
DD-MM-YYYY
Language Selection
Engels
Camera Reset does not change the date.
ATTENTION:
bold items above are also reset on switching off the camera.
How to reset the camera.
Centre toggle button
Up/Down, Left/Right
navigation buttons.
Hotkey 1 Hotkey 2 Hotkey 3 Hotkey 4
Fig 1.
1. Press Hotkey 4
to select menu (Fig 1).
2. Use the left/right navigation buttons to move to the Camera Settings
(See Fig 3) and press Hotkey 3
to select it.
3. Use the up/down navigation buttons
4. Press Hotkey 3
to move to the Camera reset option. (Fig 4)
to select and activate the camera reset function.
Fig 2
Fig 3
54
Fig 4
Rev 001
7.22 How do I automatically make multiple images?
The camera can be set to make multiple images based on a time delay or an
alarm overrun. It can be set when an image must be created and how often it
should be repeated. This option can be used for viewing a temperature curve
over a longer period. Or as detection of the time a temperature alarm occurred.
Making multiple images
1. Press hotkey 4
to select the menu (Fig. 1)
2. Use the left/right navigation buttons
to move to the Camera Settings
(See Fig 2) and press Hotkey 3
3. Use the up/down navigation buttons
(Fig 3)
to select it.
to move to the “Sequence record” option.
4. Use the left/right navigation buttons
to toggle between: 10 sec, 20 sec, 30
sec, 1min, 2min, 5 min, 10 min, 20 min, 30 min, 1 hour, Alarm.
5. Use the up/down navigation buttons
option. (Fig. 4)
6. Use the left/right navigation buttons
of 1000.
7. Press hotkey 4
to select “Sequence Captures”
to toggle between: 10, 50, 100, 500,
to exit menu.
8. If an image is made with the camera now, the abovementioned series of
images will be started.
Centre toggle button
Up/Down, Left/Right
navigation buttons.
Hotkey 1 Hotkey 2 Hotkey 3 Hotkey 4
Fig 1.
Fig 2
Fig 3
55
Fig 4
Rev 001
8. Maintenance
8.1 Calibration and Repair
Repairs may only be executed by Nieaf-Smitt B.V.
Don’t replace parts yourself but call technical
qualified persons
TIP:
If the camera is used for tracable measurements it is
advisable to calibrate the camera periodically.
Nieaf-Smitt advises to calibrate the camera once per two years.
There are no user replaceable parts in the instrument. For calibration and/or
service you can send your tester post-paid to
Nieaf-Smitt B.V..
Technical Support
Vrieslantlaan 6
3526 AA Utrecht
Tel.
Tel. Helpdesk
Fax.
E-mail
Website
:
:
:
:
:
0031 (0)30 288 13 11
0031 (0)30 285 02 85
0031 (0)30 289 88 16
[email protected]
www.nieaf-smitt.nl
www.nieaf-instruments.com
8.2 Cleaning the camera
Do not use liquids based on petrol or solvent!
Do not let the Camera get in contact with detergents!
.
Use soft patch moister by water or alcohol, and leave the camera to dry totally
after the cleaning.
8.3 Replacing the batteries
It is not possible to replace the batteries.
56
Rev 001
Appendix 1 Emissivity table in the Camera
1.00
0.98 = Human skin
0.95
0.94 = Paint, oil
0.93 = Brick red
0.92 = Concrete
0.90 = Planed Oak Wood
0.85
0.80
0.79 = Oxidized steel
0.78 = Oxidized Copper
0.76 = Sand
0.75
0.70 = Red Rust
0.67 = Water
0.65
0.64 = Oxidized Cast Iron
General Emissivity table
0.98 = Carbon filed surface
0.98 = Frost crystals
0.98 = Human skin
0.97 = Slate
0.96 = Water distilled
0.96 = Ice smooth
0.95 = Soil saturated with water
0.95 = Carbon candle soot
0.94 = Glass polished plate
0.94 = Paint, oil
0.93 = Brick red
0.93 = Paper white bond
0.92 = Concrete
0.92 = Soil dry
0.91 = Plaster rough coat
0.90 = Wood planed oak
0.90 = Glazed earthenware
0.89 = Snow, granular
0.88 = Glazed Silica
0.87 = Cuprous Oxide at 38°C
0.86 = Emery Corundum
0.85 = Snow
0.85 = Stainless oxidized at 800°C
0.84 = Oxidised Iron at 500°C
0.83 = Cuprous Oxide at 260°C
0.82 = Snow, fine particles
0.81 = Brass, unoxidised
0.80 = Glass, convex D
0.79 = Steel oxidised
0.78 = Copper heavily oxidised
0.77 = Cotton cloth
0.76 = Sand
0.75 = Unglazed silica
0.74 = Oxidised iron at 100°C
0.73 = Coating No. C20A
0.72 = Basalt
0.71 = Graphitised carbon at 500°C
0.70 = Red Rust
0.69 = Iron sheet heavily rusted
0.67 = Water
0.66 = Black Loam
0.65 = White cement
0.64 = Iron cast oxidised
0.63 = Lead oxidised at 1100°F
0.62 = Zirconia on inconel
0.61 = Cu-Zn, brass oxidised
0.58 = Inconel sheet at 760°C
0.56 = Smooth white marble
0.55 = Al anodised chromic acid
0.21 = Iron cast polished
0.20 = Brass rubbed 80 grit emery
0.16 = Stainless steel 18-8 buffed
0.09 = Aluminium as received
0.07 = Steel polished
0.05 = Aluminium polished sheet
0.05 = Copper polished
0.03 = Brass highly polished
57
Rev 001
Appendix 2 Complete iconlist
Hotkey one
Cursor one.
Isotherm low.
Cursor two.
Profile horizontal.
Alignment.
Profile vertical.
Tracking.
Alarm high.
Area.
Alarm low.
Isotherm high.
Playback
Hotkey two
Camera off.
Light off.
Camera on.
Light on.
Auto temperature range.
No.
Manual temperature range.
Yes.
Hotkey three
.
Live.
No.
Freeze.
Yes
Hotkey Four
Abort
Menus.
Other Icons
Span Out
Level Down
Span In
Level Up
Span Maximum
Level Maximum
Span Minimum
Level Minimum
Persistand Manual
No Memory Card
58
Rev 001
Appendix 3 Declaration of Conformity
Declaration of conformity of the product with the valid directives.
EU-DECLARATION OF CONFORMITY
Product:
Thermal Imaging Camera
Identification of the measuring system:
Trademark :
Model/Type :
Nieaf-Smitt B.V.
IR6010
Nieaf-Smitt herewith declares, that the instrument which this declaration refers to is in
conformity with the following standards and according to the conditions of following
Directives:
(2006/95/EG) as last amended
(2004/108/EG) as last amended
Place and date
Name and signature of authorised person.
.
59
Rev 001
Appendix 4 Accessories
Description
12V car charger
Light shade
Power supply
External charger
Spare Battery
USB cable
Carrying case
Handle
Partnumber
6260010XX
626001042
6260010XX
6260010XX
6260010XX
626001045
626001046
626001047
60
Rev 001