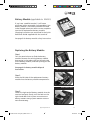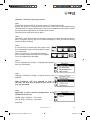
1
UKCA Standard 70
User Manual
T/M4200 Family
© Spire Payments Ltd. 2012
21465-09 x42xx user guide_PRINT 3.indd 1
22/03/2012 14:50
Accessories available
R3210 Contactless Reader
(Available for T4200 only)
S9-PCI PIN Pad
(Available for T4200 only)
D4200 Charging Dock
(Available for M4200 only)
Replacement Battery Module
(Available for M4200 only)
Privacy Shield
To find out more information about these accessories and how to obtain them, please
contact your leasing company. Additional accessories such as mounting poles may
also be available from third party suppliers.
© Spire Payments Ltd. 2012
21465-09 x42xx user guide_PRINT 3.indd 2
22/03/2012 14:50
Introduction
Thank you for choosing your new Spire Payments terminal that combines a small
footprint and the ability to perform fast payment transactions. Please read
through this guide, which contains important information you will need in order
to install, use, and maintain your payment terminal.
This User Manual is for use with Spire T/M4200 payment terminal family that
incorporates the UK Cards Association (UKCA) Standard 70 protocols for the
real-time authorisation and capture of payment transactions. This standard is
often referred to by its former “APACS40” name.
If you requested any additional services such as Mobile Top-Up with your
terminal, then there will be additional documentation supplied with your
terminal containing the user instructions for these additional services.
Copyright © by Spire Payments Ltd. 2012
This publication is proprietary to Spire Payments Ltd. and is intended solely for contractual
use by Spire customers and merchants.
This publication may not be reproduced or distributed for any purpose without the written
permission of Spire Payments Ltd.
PLEASE NOTE:
Spire Payments Ltd. reserves the right to make changes to specifications at any time and without notice. The
information furnished by Spire Payments Ltd. in this publication is accurate at the time of print; however, no
responsibility is assumed by Spire Payments Ltd. for its use. No licence is granted under any patents or patent rights
owned by Spire Payments Ltd.
© Spire Payments Ltd. 2012
21465-09 x42xx user guide_PRINT 3.indd 3
1
22/03/2012 14:50
T/M4200 family models
The T4210, T4220 and T4230 countertop terminals are designed to be placed on
a desk or countertop and are powered by a supplied mains Power Supply. These
terminal models can be used with the S9-PCI separate PIN-Pad or the R3210
Contactless card reader device.
T4210
T4220
T4230
Power supply: Mains Power Supply
Communication method: Dial
Power supply: Mains Power Supply
Communication method: Network & Dial
Power supply: Mains Power Supply
Communication method: Wireless (GPRS)
The M4230 and M4240 mobile terminals are designed as portable terminals and
are powered by a battery module. The battery module is charged using a supplied
mains Power Supply, or via an optional Charging Dock station.
Battery module with mains
Power supply: Power Supply (optional
Docking Station available)
M4230
Communication method: Wireless (GPRS)
Power supply:
M4240
Battery module with mains
Power Supply
(optional Docking Station
available)
Dial (with AP100)
Communication method: Network (with AP110 )
Network & Dial (with AP210 )
Communication with Access
Bluetooth
Point:
2
21465-09 x42xx user guide_PRINT 3.indd 4
© Spire Payments Ltd. 2012
22/03/2012 14:50
Safety information
••
••
••
••
••
••
••
••
Do not use if visibly damaged.
Do not apply power/operate below 0°C and above 40°C.
Do not store in an unpowered state below –20°C and above 60°C.
Do not expose to moisture and do not store or operate in high humidity environments
Do not disassemble.
Do not incinerate or crush.
This product is not suitable for use in hazardous environments such as petrol
stations,chemical depots etc.
Keep out of reach of children and pets
Battery Module safety for the M4200
••
••
••
••
••
••
••
••
••
••
••
Recharge the battery module only with the Spire Payments supplied Power Supply or
Charging Dock
Do not short circuit battery module contacts
Use only batteries supplied by Spire Payments as a replacement.
Do not drop or impact
Do not disassemble, puncture or breach
Do not leave in direct sunlight
Do not moisten or throw into water
Keep any spare batteries in a cool, dark, dry place such as a refrigerator.
Do not expose to fire or incinerate
Never expose to temperatures less than –20°C or greater than 60°C
You must dispose used or faulty batteries using either your local battery disposal
facility in accordance with local laws, or by return to Spire Payments. Do not discard
with general waste and do not incinerate. Insulate the battery module contacts with
electrical tape prior to disposal. This battery module is a lithium-ion battery.
Battery Module Guarantee
••
••
Unless the terms & conditions of your terminal supply differ, the battery module is
excluded from the any Spire Payments terminal warranty and is guaranteed for one
year. If your battery module fails after this period, you must purchase a replacement
battery module from Spire Payments
Battery module performance does degrade over time and you will need to purchase a
replacement when the battery module performance becomes unacceptable.
© Spire Payments Ltd. 2012
21465-09 x42xx user guide_PRINT 3.indd 5
3
22/03/2012 14:50
How to clean your terminal
WARNING: DO NOT USE UNDILUTED AMMONIA OR ABRASIVE CLEANERS
Switch off and unplug the mains Power Supply units from the Terminal and
AP100/110/210 Access Point and D4200 Charging Dock station if applicable.
Carefully note how all the cables are connected and then disconnect all cables
before cleaning.
Apply denatured alcohol (methylated spirits) to a clean, soft, non-abrasive,
low-lint cloth. Carefully wipe the entire Terminal and Access Point.
Use an air duster (compressed air) to clean in and around the printer mechanism.
4
21465-09 x42xx user guide_PRINT 3.indd 6
© Spire Payments Ltd. 2012
22/03/2012 14:50
Additional services available for your terminal
Card types accepted
The terminal is configured as standard to Support Visa and Mastercard scheme
credit and debit cards. For some merchant categories, credit card support may not
be allowable.
The terminal can support American Express, Diners Club, JCB, and Duet scheme
cards depending upon your merchant bank agreements with these schemes.
Sale (Purchase) with Cashback
The terminal can be configured to offer Sale with Cashback.
Tipping
The terminal can be configured for a Tipping service.
Note that Cashback and Tipping may not be available on the same terminal. Please contact your helpdesk
or leasing company for advice on availability of a combined facility.
Hotel & Rental
The terminal can be configured for Pre-Authorisations and Completion transaction
types that are used in the Hotel and Rental business sectors.
Force Authorisations
The terminal can be configured to accept Force Authorisations. This feature is
used to capture any paper based transactions for submission. This feature is only
available if permitted by your merchant bank.
Invoice numbers
This feature adds ‘Invoice Numbers’ to your receipts. It is used to keep track of your
orders and accounts.
Mobile phone Top Up
Your terminal can be upgraded to include a Mobile Phone Top Up service that
offers your customers a valuable service and generates revenue for your business.
Please contact your leasing company if you require any of the above additional
services.
© Spire Payments Ltd. 2012
21465-09 x42xx user guide_PRINT 3.indd 7
5
22/03/2012 14:50
6
21465-09 x42xx user guide_PRINT 3.indd 8
© Spire Payments Ltd. 2012
22/03/2012 14:50
Table of Contents
Important information........................................................8
Understanding your equipment.......................................14
Communications infomation
Dial-Up Connections.................................................................21
Network Connections................................................................22
GPRS Connections.....................................................................22
Installation..........................................................................23
Using your Terminal
Terminal Operating Concepts.....................................................25
Training Mode...........................................................................30
Setting the Merchant Password.................................................32
Transactions..............................................................................33
Sale......................................................................................36
Sale + Cash..........................................................................43
Tipping................................................................................45
Hotel Operations..................................................................48
Refund.................................................................................52
Force Authorisation..............................................................55
Settlement................................................................................56
Reports.....................................................................................58
Reviewing transactions/Reprinting a receipt...............................60
Troubleshooting
Error messages..........................................................................61
Terminal problems.....................................................................63
Communication problems.........................................................66
Appendices.........................................................................71
Glossary..............................................................................85
© Spire Payments Ltd. 2012
21465-09 x42xx user guide_PRINT 3.indd 9
7
22/03/2012 14:50
Important information
Please take note of the following before using your terminal:
Terminal Identification Number (TID)
Each terminal contains an electronically programmed eight digit Terminal
Identification (TID) Number. This number is printed in full on the Merchant Copy
of all transaction receipts.
Merchant Number (MID)
Your merchant bank will have issued you with a Merchant Number, which will
have been supplied to you in a separate documentation pack received direct from
your bank. If you don’t know this number, please contact your bank.
Before taking transactions, you should confirm that the Merchant Number printed
on your Terminal Parameters Report (see page 23) matches the Merchant Number
issued by your bank. If not, please contact your terminal helpdesk.
Please write your TID and MID on the cover or sleeve of this User Manual for ease
of reference. You may be asked to identify yourself by quoting these numbers
when you call the helpdesk; you may not receive certain services if you do not
have these numbers ready.
MIDs vary in length so may not fill all the boxes. There may also be leading zero/s
that you must include.
You may have separate Merchant Numbers for American Express, Diners Club, JCB,
and Duet card schemes and the Top-up service, if you have requested these.
Merchant Password
Your terminal contains a merchant password that you are encouraged to change
from the default value (see page 32 for more information)
Settlement
At the end of each business day, the Settlement procedure must be performed
on the terminal. For the totals to display correctly, this must be done during the
‘Banking Window’ time set by your Acquirer. If you do not know your window,
please contact your bank (the terminal helpdesk will not know your banking
window).
If you do not complete this procedure you may experience delays in funds being
transferred into your bank account.
(See page 56 for more information)
8
21465-09 x42xx user guide_PRINT 3.indd 10
© Spire Payments Ltd. 2012
22/03/2012 14:50
Important information (continued)
Cash Register Interface
If you have a T4200 integrated with your cash register/till system, then many of
the functions of the terminal will be carried out by cash register functions.
Certain functions described in this user manual may not be available via the Cash
Register interface.
You should have been provided with separate instructions provided by your head
office or cash register supplier regarding how to operate the terminal from the
cash register.
Updates
Once a month, your terminal will connect to the Spire Payments Terminal
Management System to download any new software and any important
configuration changes. This update will typically occur during the night. For this
reason, Spire Payments suggests you leave your terminal powered on at all times.
In the event of it being switched off when the update tried to take place, your
terminal will notify you that it has failed to update. Please leave your terminal on
the following night to ensure that an upgrade takes place, or call the helpdesk for
assistance.
If your terminal is using a dial-up connection method, these calls will be charged.
© Spire Payments Ltd. 2012
21465-09 x42xx user guide_PRINT 3.indd 11
9
22/03/2012 14:50
Important information (continued)
Payment Council Industry
Data Security Standard (PCI DSS) advice
The Spire Payments T/M4200 terminal family contains a Payment Application
that stores, processes, and transmits cardholder data. It therefore falls within the
scope of the Payment Card Industry Data Security Standards (PCI DSS), specifically
a compliance program known as Payment Application Data Security Standard or
PA-DSS.
The objective of PA-DSS is to help terminal software vendors such as Spire Payments
to develop secure payment applications that do not store prohibited data, such
as full magnetic stripe, CVV2 or PIN data, and ensure their payment applications
support compliance with the PCI DSS.
It is important to note that PA-DSS validated payment applications alone do not
guarantee PCI DSS compliance and that the validated payment application must
be implemented in a PCI DSS compliant environment.
Who is mandating the security review and approval of payment applications?
The PCI Security Standards Council (PCI SSC) has established the guidelines and the
Card Schemes (Visa Europe and MasterCard) serve as the source of enforcement.
Processors, Acquirers and manufacturers are the mechanisms by which the
regulations will be implemented.
What protection does a PA-DSS application provide?
Applications that have successfully completed a PA-DSS audit are certified to not
retain or compromise what is considered to be secure elements of the card’s track
data (full magnetic stripe data), card validation codes and values, PINs and PIN
blocks. A PA-DSS certified application also facilitates your own PCI DSS needs:
Benefits of using PA-DSS software include:
••
Prevents storage of sensitive cardholder data
••
Reduces opportunities for compromise and misuse
••
Ensures payment solutions meet the highest levels of security
10
21465-09 x42xx user guide_PRINT 3.indd 12
© Spire Payments Ltd. 2012
22/03/2012 14:50
Storing merchant receipts and reports
Please note that it is the responsibility of the merchant to ensure the Merchant
Copies of receipts and reports showing cardholder details are securely stored
for the period of time specified by your Acquirer. Also please ensure they are
disposed of in a secure manner. Failing to do so may result in charge-backs or
fraudulent activity.
What does PA-DSS Compliance involve?
PA-DSS ensures that the payment software is compliant with specific requirements
(similar to PCI DSS). You should read though this section carefully, taking note of
your responsibilities to protect cardholder data. The PA-DSS requirements are:
1. Do not retain full magnetic stripe, card validation code or PIN block data
The payment application within the Spire Payments T/M4200 family terminal
does not retain such data. You need take no further action to ensure your PCI
DSS compliant environment meets this specific requirement.
2. Protect stored cardholder data
The payment application within the Spire Payments T/M4200 family terminal
protects stored cardholder data in a secure manner.
You must ensure that you give the correct copy of the receipt to the
Cardholder (clearly marked CARDHOLDER COPY) and retain the merchant
receipts in a secure area with limited access to authorised staff. The merchant
receipts must be destroyed by incineration or by cross shredding when they
become obsolete. Your merchant bank will advise on the period necessary for
retention of receipts.
You should perform a settlement every day, and must settle at least one a
week to purge the payment application of cardholder data. Your terminal
may be configured to automatically settle every day; if you are unsure how
your terminal is configured, please contact helpdesk.
3. Provide secure authentication features
The payment application operates in the T/M4200 hardware environment
and does not require username or password access. You need take no further
action to ensure your PCI DSS compliant environment meets this specific
requirement.
continued...
© Spire Payments Ltd. 2012
21465-09 x42xx user guide_PRINT 3.indd 13
11
22/03/2012 14:50
4. Develop secure payment applications
The Spire Payments terminal and its software applications have been designed
in line with PCI DSS and Industry best practices. You need take no further
action to ensure your PCI DSS compliant environment meets this specific
requirement.
5. Protect wireless transmissions
The Spire Payments T/M4200 range does not use Wi-Fi wireless transmissions.
If you use Wi-Fi technology in your own network installation, you must
implement it in accordance with PCI DSS and industry best practices.
6. Test payment applications to address vulnerabilities
Spire Payments have a process to identify newly discovered security
vulnerabilities and have timely development and deployment of security
patches and upgrades. You need take no further action to ensure your PCI
DSS compliant environment meets this specific requirement.
8. Facilitate secure network implementation
The payment application operates in the T/M4200 hardware environment and
does not need to log application activity.
9. Cardholder data must never be stored on a server connected to the Internet
If you are using the Spire Payments T/M4200 device on a Local Area Network
for the payment transaction interface, and you are using a local server to store
and forward the transaction data, then you must take steps to protect the
transaction data in accordance with DSS requirements.
10. Facilitate secure remote software updates
When your terminal needs a software update, this will be carried out by the
Spire Payments software downloading system; this system ensures that only
authenticated payment software is loaded onto your terminal.
11. Facilitate secure remote access to payment application
There is no remote access to the payment application.
continued...
12
21465-09 x42xx user guide_PRINT 3.indd 14
© Spire Payments Ltd. 2012
22/03/2012 14:50
12. Encrypt sensitive traffic over public networks
Transactions sent over network connections are always encrypted by the
payment application using Secure Socket Layer (SSL) technology.
You may engage your business with 3rd party agents that provide services that
are part of your overall payment process e.g. shopping cart providers, web
design firms (often referred to as Common Points of Service or CPS). Agents
acting as a CPS must be compliant with PCI DSS and must be registered with
the Card Schemes. Refer to www.cpsregistration.org for more information
about CPS registration.
You must never communicate sensitive cardholder data by any means unless it
is encrypted. Spire Payments will never request such data from you. Sensitive
cardholder data means:
the Card Number (often known as Primary Account Number or PAN),
the Cardholder Name, the card Expiration Date,
the card CV2 number (the last three digits printed on the card signature
strip, or for American Express, the four digit value printed on the
front of the card),
The Spire Payments helpdesk may request the first six digits of a card number
from you to assist with troubleshooting a problem, and you should provide
the first six digits and the card issuer when requested; this allows the Spire
Payments helpdesk to assist troubleshooting any problem.
13. Encrypt all non-console administrative access
This is not applicable to the Spire Payments payment application
14. Maintain instructional documentation/training programs for customers,
resellers, and integrators
As well as the information in this user manual, Spire Payments will make
available to you via its website www.spirepayments.com further information
regarding PCI DSS compliance.
© Spire Payments Ltd. 2012
21465-09 x42xx user guide_PRINT 3.indd 15
13
22/03/2012 14:50
Understanding your equipment
Terminal overview
Paper roll compartment
More information about
your printer and how
to load a paper roll can
be found in the Quick
Reference Guide
Swipe card reader
Use when the cardholder
presents a debit or credit
card without a chip on the
front or if prompted by
the terminal.
Chip Card reader
Use when the cardholder
presents a Chip Card.
14
21465-09 x42xx user guide_PRINT 3.indd 16
© Spire Payments Ltd. 2012
22/03/2012 14:50
PIN-Pad model S9-PCI
The S9-PCI external PIN-Pad can be used
with the T4200 models and is useful is
you prefer the cardholder to insert their
card and enter their PIN on a separate
device, e.g. this can ease operations
if you wish to avoid handover of the
T4200 to the cardholder for card
insertion and PIN entry.
Contactless Reader model R3210
The R3210 is a clip on device that replaces
the printer lid cover on the T4200 products
and allows the terminal to accept contactless
card transactions. Please contact your leasing
company for availability.
© Spire Payments Ltd. 2012
21465-09 x42xx user guide_PRINT 3.indd 17
15
22/03/2012 14:50
Privacy Shield
The PCI Security Standards Council specifies International Standard ISO9564 for
protection against fraudulent observation of the PIN during PIN entry.
To comply with this standard, your terminal may be supplied with either a
pre-fitted Privacy Shield, or as an optional accessory for you to choose to fit
yourself.

You must have a Privacy Shield fitted to the terminal unless one of the statements
below is true:
•• You only perform keyed transactions, e.g. in a mail-order business
•• Cardholders enter their PIN into the separate S9-PCI PIN Pad
•• Cardholders can enter their PIN while holding the terminal in their hand (as
with the M4200; a privacy shield is not supplied as standard with the M4200)
16
21465-09 x42xx user guide_PRINT 3.indd 18
© Spire Payments Ltd. 2012
22/03/2012 14:50
Battery Module (applicable to M4200)
If you have a mobile terminal, it will come
pre-fitted with a removable, rechargeable Li-Ion
battery module. The battery module will need
to be charged when you receive a new complete
terminal or replacement battery module.
Charging instructions are contained in the Quick
Reference Guide supplied with the terminal.
See page 3 for battery module safety instructions
Replacing the Battery Module
Step 1
Turn the terminal over to find the battery
module. Remove the existing battery module
by pressing in the release clip on the right side
of the battery module, and then pulling out the
battery module.
See page 3 for battery module disposal
instructions.
Rotate into compartment
Step 2
Place the left side of the replacement battery
module into the battery module compartment.
Push until it clicks
Step 3
Lower the right end of battery module into the
terminal and push firmly until the latch on the
right hand side clicks in place. Ensure that the
battery module is firmly in place and flush with the
main terminal body.
© Spire Payments Ltd. 2012
21465-09 x42xx user guide_PRINT 3.indd 19
17
22/03/2012 14:50
Charging Dock model D4200 (M4230 & M4240 only)
Mobile terminals may come with an optional D4200 Charging Dock station (this
depends on the product configuration agreed with the leasing company).
When the terminal is placed on a powered Charging Dock, it will charge the
terminal’s battery module.
The Charging Dock also allows an M4240 Bluetooth terminal to be paired with
an Access Point. See Appendix F for details of the M4240 to Access Point pairing
procedure.
Always ensure that the M4200 is replaced properly onto the Charging Dock.
18
21465-09 x42xx user guide_PRINT 3.indd 20
© Spire Payments Ltd. 2012
22/03/2012 14:50
Access Points (M4240 only)
M4240 terminals are provided with an Access Point. The terminal connects to the
Access Point using Bluetooth wireless technology. The Access Point then connects
the bank acquiring systems and Spire Payments management system using a dialup or network connection.
Your M4240 terminal will come pre-configured to operate with the Access Point
provided.
Should the terminal or Access Point be replaced or the link between the terminal
and Access Point fail, reconfiguration may be needed. See Appendix F for details
of the M4240 to Access Point pairing procedure.
The design of the Access Point allows it to be placed on a counter or shelf, or
mounted on a wall using the supplied fixings (recommended for best range).
There are three models of Access Point available:
AP100: Dial-up version for connecting
to a telephone line
AP100
AP110: Ethernet (10/100) version for
connecting to a network connection)
AP110
AP210: Dual Dial-up and Ethernet
(10/100) version for connecting to
either a telephone line, network
connection or both.
AP210
continued...
© Spire Payments Ltd. 2012
21465-09 x42xx user guide_PRINT 3.indd 21
19
22/03/2012 14:50
Access Points (M4240 only, continued)
The M4240 can communicate one Access Point only, and an Access Point can
communicate with one terminal only. If you have more than one M4240 terminal,
you will be provided with a separate Access Point for each terminal.
Please keep the following guidelines in mind when choosing an installation location for the
Access Point:
•• Do select a location close to an electrical power outlet.
•• Do select a location close to a telephone wall socket and/or network connection
point as required by your Access Point model.
•• Do select a location where there will be no physical obstructions between the
Access Point and the M4240 operating area
•• Do not install or place the Access Point on a metal or metallised material
surface.
•• It is best practice to mount the Access Point high on a wall, but you may need to
commission the installation of new power and telephone/network connection
points.
20
21465-09 x42xx user guide_PRINT 3.indd 22
© Spire Payments Ltd. 2012
22/03/2012 14:50
Communications information
Dial-Up Connections
The T4210 and M4240/AP100 use a dial-up connection to connect to the bank
acquiring systems and to the Spire Payments terminal management system.
The T4220 and M4240/AP210 can use a dial-up connection to connect to the
bank acquiring systems and to the Spire Payments terminal management system,
depending upon the configuration requested by the leasing company (these
models are usually configured to perform transaction over a network connection,
with a dial backup mechanism in case of network failure and for connection
to the Spire Payments terminal management system; however they can be
configured as network only, or dial-up only).
The following points must be observed:
••
••
••
••
Terminals using dial-up connections are designed for use on analogue telephone lines
such as provided by the Public Switched Telephone Network (PSTN) and some Private
Branch Exchanges (PBX/PABX). These terminals will not operate on proprietary digital
telephone extension lines typically found in medium and large businesses.
Using double adaptors, extension cables and/or telephone cables not supplied by Spire
Payments may cause communication problems.
Installing the terminal on a line using a third party call service may cause communication
problems.
If your line requires a prefix number to dial externally the terminal will need to be
configured to dial this prefix (See Appendix D).
Broadband Internet Access compatibility
If you have a Broadband Internet Access service using Digital Subscriber Line (DSL)
technology on your telephone line, then you must observe the following:
••
••
Ensure that all used wall sockets on the telephone line are fitted with DSL filters
(usually provided by your broadband service provider) i.e. not just the wall socket
where computer equipment using the Broadband service is connected.
Ensure that the terminal is connected to the Telephone port of a DSL filter, not the
Computer port.
Incorrect installation may cause communication problems. For assistance, please call the
helpdesk.
continued...
© Spire Payments Ltd. 2012
21465-09 x42xx user guide_PRINT 3.indd 23
21
22/03/2012 14:50
Communications information (continued)
Network Connections
The T4220, M4240/AP110, and M4240/AP210 terminals can connect over a network
connection via a local area network.
The T4220 connection is on the back of the terminal (white NET port).
The M4240 connection is on the front panel of the AP110/210 Access Point (white
NET port).
The following points should be noted:
•• Your terminal will be pre-configured for use on standard networks featuring DHCP
(automatic allocation of IP addresses). In the unlikely event that your network does not
have this feature, please call the helpdesk for assistance.
•• Any security features (such as MAC address filtering in your router) need to have the
terminal added to their list of allowable MAC addresses. The MAC address for the T4220
is found on a label on the underside of the terminal, and that for the AP110 and AP210
on the underside of the access point.
•• Please ensure the specific IP addresses and TCP Ports provided by your terminal supplier
are not blocked by a network firewall.
GPRS Connections
The T4230 and M4230 communicate through the mobile telephone network using
a GPRS connection. A Subscriber Identity Module (SIM) is pre-installed into the
terminal by Spire Payments to control this connection.
The following points should be noted:
••
••
Do not remove the SIM unless instructed by the helpdesk, or by an official notification
to do so from Spire Payments Ltd., e.g. upon receipt of a replacement SIM. Unauthorised
removal of the SIM may render your terminal inoperable and/or may result in late/nonpayment of funds into your account.
Spire Payments reserves the right to charge for unauthorised use of your SIM. Spire
Payments may charge an administration fee for misuse or replacement of a lost or
blocked SIM.
22
21465-09 x42xx user guide_PRINT 3.indd 24
© Spire Payments Ltd. 2012
22/03/2012 14:50
Installation
Please read and follow the separate Quick Reference Guide received with your terminal.
The Quick Reference Guide contains instructions on how to:
••
Connect the cables and accessories e.g. PIN-Pad
••
Install the paper roll
••
Charge the battery module (M4200)
••
Switch on your terminal
If you have received an R3210 Contactless Reader, then you will need to fit this to the
T4200 terminal before switching it on.
After switching on, the terminal may ask you to enter your Merchant Number.
It will then print out a TERMINAL PARAMETERS REPORT. Check that the Merchant
Number printed on the report matches the Merchant Number assigned to you by
your acquirer/s.
Ter mina l Pa ra met ers Rep ort
TERMINAL PARAMETERS
REPORT
Da te a nd time
DATE, TIME
COMPANY NAME
TOWN
THANK YOU
Termina l ID
TERMINAL ID: 12345678 (9)
SOFTWARE RELEASE
M ercha nt na me a nd tow n
: AT42UK000X
CARD ACQUIRER DATA
Prima ry Acquire r
M ercha nt Number
ACQUIRER NAME
TERMINAL ID
MER CHANT ID
NUA 1
: 00
NUA 2
: 00
HOST PRIMARY PHONE No.
HOST SECOND. PHONE No.
MODEM MODE
SETTLE PRIMARY P HONE No.
SETTLE SECOND. P HONE No.
MODEM MODE
: ACQUIRE R 1
: 12345678
: 12345678901
: 08001234567
: 08001234567
: 00
: 08001234567
: 08001234567
: 00
Prima ry A cquirer Section
(Fu r th er A cq u ir er sect ion s will pr in t
u n d er n eath if m or e t h an on e A cq uir er
is set up on th e t er min al)
continued...
© Spire Payments Ltd. 2012
21465-09 x42xx user guide_PRINT 3.indd 25
23
22/03/2012 14:50
Installation (continued)
Your terminal may then attempt to connect to your acquirer/s and print out a
LOG-ON REPORT indicating if the logon was successful or not.
The report should read for each acquirer:
ACQUIRER NAME:
ENABLED
Log-o n repo rt

COMPANY NAME
TOWN
THANK YOU
TERMINAL ID:
12345678
LOG-ON REPORT
DATE, TIME
...... .... .... ... .... .... .... .... .... ..
M ercha nt na me a nd tow n
Termina l ID
Da te a nd time
Acquirer L og-o n sta tus
ACQUIRER 1
ACQUIRER 2
E NABLE D
DISABLE D (03)
24
21465-09 x42xx user guide_PRINT 3.indd 26
(If d isabled , th is will sh o w an err o r co d e
in br acket s. Please con t act t h e h elpd esk
an d q uo t e t h is err o r co d e)
© Spire Payments Ltd. 2012
22/03/2012 14:50
Using Your Terminal
Terminal Operating Concepts
This section provides a general overview of how to use your terminal.
Payment application software version AT42UK511A and onwards introduce
the option to use the R3210 Contactless Reader. The instructions in this user
manual refer to AT42UK511A and onwards; if your terminal has an older version
of software, then it cannot support the R3210 and operation may be slightly
different to that described in this manual.
To find out the software version of the payment application, use Function 91
Navigation Buttons
In order to select an item on the screen, press the corresponding Navigation
Button alongside the left and right edges of the screen.
In the example, pressing the top left button would select the top left item on the
screen, in this case SALE.
SWIPE/INSERT CARD
SALE
REFUND
MORE TRANS
LAST TRANS
UPDATE
MAIN MENU
© Spire Payments Ltd. 2012
21465-09 x42xx user guide_PRINT 3.indd 27
25
22/03/2012 14:50
Keypad buttons
Home Returns to the Desktop screen*
Settle Starts the Settlement procedure
when on the idle screen**.
See page 56 for more information
Reports Displays the Reports menu
when on the idle screen**.
See page 58 for more information
Function & ON/OFF
All models: The function button allows you enter terminal functions when on the
idle screen** and start the Application Manager when on the Desktop screen*.
See Appendix C for information about terminal functions
M4230 & M4240 only: To turn the terminal on or off, hold down the function button
for eight seconds until terminal powers down.
*
(Paper Feed) Feeds the paper by 1cm when on the idle screen**
Enter Press to accept on-screen options or prompts.
Clear Deletes editable information on the screen and can be used instead of
pressing NO to on-screen options or prompts.
Cancel Terminates current action and returns to the Idle Screen. If a transaction
is being cancelled, then you may need to respond to display prompts to confirm
the action to cancel. **
*See page 27 for information about the Desktop Screen
**See page 28 for information about the Idle Screen
Clearing entered information
To clear the whole value to zero at once, press the Clear button on the keypad.
To clear one digit at a time, press the Navigation Button next to back arrow on
the screen.
26
21465-09 x42xx user guide_PRINT 3.indd 28
© Spire Payments Ltd. 2012
22/03/2012 14:50
Desktop screen
••
The Desktop will show icons for each application .
that is loaded in your terminal.
••
To access applications, press the Navigation Button .
next to the relevant icon. The main application for .
taking transactions has a “Card” icon.
Application Manager
The operating system for your terminal is called the Application Manager. The
Application Manager contains all the terminal’s communication settings and
controls the connection to the Spire Payments Terminal Management System.
•• To access the Application Manager’s main screen (“Maintenance” menu) from
the Desktop, press the blue FUNCTION button on the
keypad.
•• To return to the Desktop, keep pressing the Cancel
button on the keypad until the Desktop shows.
Screensaver
Depending on your leasing company requirements,
your terminal may feature a screensaver, usually containing the leasing company
or bank’s logo.
The screensaver will show after approximately thirty seconds of inactivity and will
typically show your bank or leasing company’s logo.
To return to the idle screen, press the Cancel button on the keypad.
© Spire Payments Ltd. 2012
21465-09 x42xx user guide_PRINT 3.indd 29
27
22/03/2012 14:50
Idle Screen
This will be your main screen for general use of the payment application.
All T/M4200 models feature the same general style for this screen, but different
icons are shown at the right hand side., as shown below.
The selection items may vary from those shown below on your specific terminal
configuration.
T4210/T4220
SWIPE/INSERT CARD
T4230
SWIPE/INSERT CARD
SALE
REFUND
SALE
REFUND
MORE TRANS
LAST TRANS
MORE TRANS
LAST TRANS
UPDATE
MAIN MENU
UPDATE
MAIN MENU
M4230
M4240
SWIPE/INSERT CARD
SWIPE/INSERT CARD
SALE
REFUND
SALE
REFUND
MORE TRANS
LAST TRANS
MORE TRANS
LAST TRANS
UPDATE
MAIN MENU
UPDATE
MAIN MENU
Icons
A moving card icon indicates that this is a Countertop
terminal (T4210/T4220 only)
This icon displays the GPRS signal strength (T4230/
M4230 only). If there is no signal, it will display “n/a”.
This icon indicates that this is a Bluetooth terminal
(M4240 only)
This icon displays the battery module charge status of
your mobile terminal (M4230/M4240 only)
28
21465-09 x42xx user guide_PRINT 3.indd 30
© Spire Payments Ltd. 2012
22/03/2012 14:50
Idle Screen menu items
SALE
Selecting SALE initiates a Sale transaction, although you will normally initiate a
Sale transaction by commencing to key in the amount, or by inserting or swiping
the payment card.
REFUND
Selecting REFUND initiates a Refund transaction.
MORE TRANS
Selecting MORE TRANS opens a full menu of available transaction types on your
terminal, including a repeat of SALE and REFUND. If you have Pre-Authorisation,
Completion, or Forced Authorisations enabled, they will appear here.
CL RECEIPT
Selecting CL RECEIPT prints a Cardholder receipt. This should only be used to print
the cardholder copy of a receipt of a transaction that has used a contactless card
reader when the card holder requests a receipt.
UPDATE
Selecting UPDATE initiates the software update procedure.
Do not select UPDATE unless instructed by the helpdesk.
For more information about updates, see page 9.
MAIN MENU
Selecting MAIN MENU gives you options for viewing/reprinting transactions and
reports, changing settings and performing tests. You may see NEXT and BACK
items to see the complete list of Main Menu items.
© Spire Payments Ltd. 2012
21465-09 x42xx user guide_PRINT 3.indd 31
29
22/03/2012 14:50
Training Mode
Your terminal allows the operator to conduct training sessions for contact card
initiated transactions by switching to Training Mode. You will need a Training
Card; please contact your helpdesk if you need a Training card.
How to switch to Training Mode
••
••
••
••
Press MAIN MENU > TERM > TRAIN
Type in the local password (default is 0000) and press Enter
The screen will display SWITCH TO TRAIN MODE
Press YES/Enter
Once in Training Mode, the top of the screen will cycle
between SWIPE/INSERT CARD, the date and time and
***TRAINING MODE***.
Using Training Mode
You are able to perform SALE and REFUND transactions using the Training Card
supplied.
PLEASE NOTE: The Training Card PIN is 1234
Different amounts on each training transaction will prompt various responses
from the terminal, for example:
••
••
••
••
••
0.01 to 100 will result in the transaction being approved.
200 will display REJECTED.
300 will display DECLINED BY CARD.
400 will display PICK UP CARD.
Any other amount will display INVALID AMOUNT.
continued...
30
21465-09 x42xx user guide_PRINT 3.indd 32
© Spire Payments Ltd. 2012
22/03/2012 14:50
How to leave Training Mode
••
••
••
••
Press MAIN MENU > TERM > TRAIN
Type in the local password (default is 0000) and press Enter
The screen will display LEAVE TRAINING MODE
Press YES/Enter
After you have completed the above procedure, please
ensure the top of the screen no longer displays
***TRAINING MODE***.
PLEASE NOTE: Ensure you do not attempt live
transactions in Training Mode as the funds will not be
transferred into your bank account.
© Spire Payments Ltd. 2012
21465-09 x42xx user guide_PRINT 3.indd 33
31
22/03/2012 14:50
Setting the Merchant Password
You should change the merchant password to protect against potential fraudulent
usage of the terminal. Depending upon your terminal configuration, you may be
asked to enter this password to perform certain terminal functions.
To change the merchant password, from the Idle screen press:
MAIN MENU
SETUP (you may need to press NEXT to get to the SETUP item)
PASSWD
CHANGE
Then enter the existing password (which for a new terminal will be 0000), and
then your own password; you will be requested to re-enter this password to check
the entry.
It is recommended that you change this password to a new value every three
months.
If you forget your merchant password, please contact your helpdesk. Please have
your Terminal ID and Merchant ID available
32
21465-09 x42xx user guide_PRINT 3.indd 34
© Spire Payments Ltd. 2012
22/03/2012 14:50
Transactions
Your terminal is able to provide the following transaction types:
•• Sale
•• Refund
•• Sale with Cashback
•• Sale with Tip
•• Pre-Authorisation
•• Completion
•• Force Authorisation
N.B. Unless you have requested otherwise from your leasing company, your
terminal is configured for standard Sale and Refund transactions only. Please
contact your leasing company if you require other transaction types listed above.
Pre-Authorisations and Completion transaction types are used in the Hotel/
Rentals businesses.
Force Authorisation (used for the capture of paper authorisations) is only available
if permitted by the acquiring bank. If think you need this feature, please contact
your leasing company or bank for advice.
Additional data Entry
Some terminal configurations may require additional data to be entered during
a transaction, e.g. a contract number, or a cashier number. Follow the on screen
prompts if this is requested.
Cancellation & Reversal
Transactions can be cancelled using the Cancel keypad button up to the point
where an authorisation code is received or generated (offline transactions) by
the terminal.
A Transaction can also be Reversed for up to thirty seconds after the transaction.
Refer to Appendix C for details of the Reversal function.
© Spire Payments Ltd. 2012
21465-09 x42xx user guide_PRINT 3.indd 35
33
22/03/2012 14:50
Chip Cards
Most payment cards issued in the United Kingdom and Ireland are Integrated
Chip Cards (ICC), and hence you need to use the ICC reader on your terminal or
Pin-Pad to perform a transaction. For this User Manual, the term Chip Card is
used to describe ICC cards.
Contactless Chip cards are designed to communicate with the terminal via
wireless technology. If you have the R3210 Contactless Reader, then you will be
able to perform a contactless transaction with these cards as well as using the
contact reader. A contactless card read will only be offered by the terminal if it
has an R3210 fitted and configured for use, and if the transaction value is below
a low limit value set by your bank. Contactless cards will also occasionally force a
contact read as a security measure.
For the majority of transactions, you will need to insert a Chip Card and the
customer will need to enter their PIN (Personal Identification Number) on the
terminal keypad or optional PIN Pad.
Inserting a Chip Card
If the card has a chip on the front, insert the card
with the chip facing up and towards the terminal.
If you are using the S9-PCI PIN-Pad, the card
is inserted vertically into the slot on the top
of the PIN-Pad
When the card is inserted correctly,
you should feel some resistance and
hear a soft ‘click’ sound.
34
21465-09 x42xx user guide_PRINT 3.indd 36
© Spire Payments Ltd. 2012
22/03/2012 14:50
Magnetic Swipe Cards
Some cards issued on the UK and Ireland and cards issued from other countries may only
be issued as Magnetic Swipe cards.
All chip cards also have a magnetic stripe. If your terminal cannot read the chip
when it is inserted, you may be given the option to swipe the card and to enter the
last four digits of the card number. If a Chip Card is swiped to start a transaction,
the terminal will prompt to insert it into the Chip Reader.
How to swipe a card
Swipe the card with the magnetic strip facing down and towards the terminal.
Swipe the card quickly in either direction.
© Spire Payments Ltd. 2012
21465-09 x42xx user guide_PRINT 3.indd 37
35
22/03/2012 14:50
Sale
Step 1
•• From the Idle screen, type a numeric key that is the first digit of the Sale
amount; the screen will automatically show the Amount entry screen with the
digit entered shown
N.B. On some software versions, and configurations, typing a numeric key from the Idle screen will commence entry of a card number; in this case the
order of data entry will differ from that described below)
•• OR, select SALE from the Idle screen
•• OR, Insert a Chip Card into the terminal’s Chip Card reader or into the optional
PIN Pad
•• OR, Swipe a Magnetic Swipe Card in the terminal’s magnetic swipe reader.
If you have the R3210 Contactless Reader, then use one of the first two methods described
above; if you insert or swipe a contactless chip card, then you will not have an opportunity
to do a contactless transaction.
Step 2
Type in the complete SALE AMOUNT in your currency
minor denomination e.g. pence in UK, or cents in
ROI) and press Enter.
E.g. Entering 1000 equates to a value of £10.00
(€10.00 in ROI).
If you make en error with the amount:
To clear the whole value to zero at once, press the Clear button on the keypad.
To clear one digit at a time, press the Navigation Button next to back arrow on
the screen.
PLEASE NOTE: This applies to all screens that ask you to enter information except
the ENTER PIN screen
continued...
36
21465-09 x42xx user guide_PRINT 3.indd 38
© Spire Payments Ltd. 2012
22/03/2012 14:50
Sale (continued)
Step 3
If not done already at Step 1, present the Card or key enter the card details. This can be
done in a number of ways depending upon the card type being used:
••
Chip card with contactless capability. Applicable if you have the R3210 Contactless
Reader. The cardholder must briefly hold their card with the chip part immediately
above the Radio Wave icon on the R3210. There will be indicator activity and a short
beep to signify that the card has been read. You will briefly see the card name on
the screen.
••
Chip card with or without contactless capability.
Insert the card into the chip reader on the terminal or
optional PIN Pad. You will briefly see the card name
on the screen.
••
Magnetic swipe card. Swipe the card in the terminal’s
magnetic swipe reader. If the card is a Chip card it will
probably request that you use the chip card reader.
••
Keyed Entry. Keyed Entry should only be used if the Cardholder is not present, or if
a Chip or Magnetic Stripe card is unreadable. Please refer to Refer to Key Entered
Transaction section of this manual on Page 39.
continued...
© Spire Payments Ltd. 2012
21465-09 x42xx user guide_PRINT 3.indd 39
37
22/03/2012 14:50
Sale (continued)
Step 4
For chip card transactions (except contactless),
the cardholder must enter their PIN (Personal
Identification Number) on the terminal keypad or
the optional PIN Pad. After the PIN has been typed
in, the customer must press Enter
The terminal may now attempt to connect to your Acquirer. See page 66 for
troubleshooting communication problems.
The terminal will then display a response. If the transaction
is approved, the Approval Code will then be displayed and
the terminal will print the Merchant Copy of the receipt.
See Appendix A for possible transaction responses.
Step 5
The terminal may request a cardholder signature on the Merchant Copy of the receipt; this
can apply to chip card transactions as well as magnetic swipe and keyed transactions.. You
must request that the cardholder signs the receipt and
then you must check the signature to the signature on
the card signature strip; respond to the screen prompts
correctly.
Remove a chip card when prompted and tear off the
Merchant Copy of the receipt and press OK/Enter.
Step 6
The terminal will print the Cardholder Copy of the receipt and display the response
again. Note that Contactless transactions do not print a Cardholder Copy, but if one is
requested by the cardholder, you must print one for them by selecting CL RECEIPT from the
Idle screen.
Tear off the Customer Copy and hand it to the cardholder. Please ensure that the
Cardholder has their card returned. Press Enter to return to the Idle screen.
38
21465-09 x42xx user guide_PRINT 3.indd 40
© Spire Payments Ltd. 2012
22/03/2012 14:50
Key Entered Transactions
If the terminal cannot read the chip or the magnetic strip on the card, or you are
operating in a Mail Order Telephone Order (MOTO) environment you can key enter
the card number for most card types. The terminal will then prompt for additional
information depending such as Start and Expiry Dates, Issue number, Card Holder
Verification Code and Address Verification data. This will vary depending upon
card type.
From the Idle screen, select the required transaction type, and then follow the
on screen prompts. At the prompt to capture the card details, you must enter the
card number as shown on the card. The order of data entry will depend upon the
configuration of your terminal.
On some configurations you may be able to enter a numeric key directly from
the Idle screen to bypass selecting SALE; this method is only applicable to Sale
transaction types.
The terminal will also request whether the cardholder
is present or not. You must answer this correctly; if
you respond incorrectly, then you may incur chargebacks in the case of fraudulent transactions.
Cardholder Verification Code and Address Verification
Service
The Cardholder Verification Code is a three digit code at
the right hand end of the signature strip for most cards,
the exception being American Express where it is a four
digit code printed on the front of the card.
You must enter this code when prompted.
The Address Verification Service allows you to enter
numeric digits related to the Cardholders address,
and you may enter these when prompted.
Type in the numbers from the Post Code of the
cardholder’s registered address and press Enter.
Example: TD15 9EN
the Post Code as 159
In this case you would enter
Then type in the house/building number of the card’s registered address and
press Enter.
continued...
© Spire Payments Ltd. 2012
21465-09 x42xx user guide_PRINT 3.indd 41
39
22/03/2012 14:50
Card details Key Entry (continued)
For international cards or cards where the address doesn’t have a house number,
the Address Verification data entry can be skipped by pressing Enter. For cards
where the address is unknown, this can also be skipped.
After the terminal has communicated with the acquirer (all keyed entry transaction are
online to the acquirer), it will show a response indicating of the Cardholder Verification and
Address Verification data entered was correct.
If it is correct, then it shows that the Data Matched, and you can choose whether to
capture the transaction or not.
Other possible responses are listed in Appendix B.
If you do not capture the transaction, the terminal
reverse the transaction and shows displays and receipts
indicating this.
40
21465-09 x42xx user guide_PRINT 3.indd 42
© Spire Payments Ltd. 2012
22/03/2012 14:50
What happens if the cardholder has forgotten their PIN?
The cardholder usually has three attempts to enter their PIN correctly.
If they enter it incorrectly three successive times (this can be on different days on
different payment terminals), the card will be blocked and the cardholder must
contact their card issuer for unblocking instructions.
If the cardholder forgets their PIN and does not want to continue, you can cancel
the transaction by pressing Cancel on the ENTER PIN screen.
Alternatively, you may be allowed to continue and ‘bypass’ the PIN.
If this option is offered, and you select BYPASS, the
terminal may request that the cardholder signs the
Merchant Copy of the receipt which you will be
asked to verify.
Signature verification is not as secure as Chip and PIN and you may incur chargebacks from your Acquirer if you bypass PIN entry.
© Spire Payments Ltd. 2012
21465-09 x42xx user guide_PRINT 3.indd 43
41
22/03/2012 14:50
Example of a Sale receipt
Receipt details are subject to change. For a contactless transaction, only a
merchant copy receipt is printed out automatically.

M ercha nt Copy
M erchant name
and tow n
Terminal ID
M erchant Number
COMPANY NAME
TOWN
THANK YOU
TERMINAL ID:
12345678
MER CHANT ID:
Card type
Card number
Expiration date
Issue number
1234123450001234
AID: 0001110000
EXP.: 01/09
ISSUE NUM.: 00
Transaction type
SALE
Transaction amount
AMOUNT
Transaction used
Chip and PIN
A uthorisation Co de
Time and date
Transaction Number
123456789012
MASTERCARD
ICC
£10.00
VERIFIED BY PIN
TC: 1234123412341234
AUTH NO: 123456
17:12 10/10/08
TXN 0002
Cust omer Copy
COMPANY NAME
TOWN
THANK YOU
TERMINAL ID:
MER CHANT ID:
Card number
starred out.
12345678
Pay ment method:
ICC - Ch ip Card w as inserted
SWIPED - Card w as sw iped
KEY ED - Keyed entry
123456789012
MASTERCARD
************1234
AID: 0001110000
ISSUE NUM.: 00
ICC
SALE
AMOUNT
Customer Copy
indication
£10.00
***CUSTOMER COPY***
PLEASE KEEP T HIS RECEIPT
FOR YOUR RE COR DS
VERIFIED BY PIN
TC: 1234123412341234
AUTH NO: 123456
17:12 10/10/08
TXN 0002
42
21465-09 x42xx user guide_PRINT 3.indd 44
© Spire Payments Ltd. 2012
22/03/2012 14:50
Sale + Cashback
This is similar to a regular sale transaction with the added ability of putting in an
extra amount, which is then given to the customer as Cashback.
PLEASE NOTE: This is a service that must be requested from your leasing company.
Cashback is usually only available for domestic Debit Cards (Debit cards issued in
merchant’s country).
If you have a cashback arrangement, and the card
supports cashback, then the terminal will prompt
for a cashback amount. If the cardholder does
not require cashback, then press Enter before any
amount.
Note that cashback amount entry is always after the card details have been
captured, so this prompt may not occur immediately after the Sale amount entry.
You will also be prompted to check the total amount (Sale + Cash) is correct . If you select
No, the transaction is terminated, and you must restart it.
If you do a contactless transaction, then cashback will not
be offered regardless of your facility and the card type.
© Spire Payments Ltd. 2012
21465-09 x42xx user guide_PRINT 3.indd 45
43
22/03/2012 14:50
Example of a Sale + Cashback receipt
Receipt details are subject to change
M ercha nt Copy
M ercha nt na me
a nd tow n
Termina l ID
M ercha nt Number
Ca rd type
Ca rd number
Expira tion da te
Issue number
Tra nsa ction type
Sa le a mount
Ca shba ck a mount
TOTA L a mount
Tra nsa ction used
Chip a nd PIN
A uthorisa tion Co de
Time a nd da te
Tra nsa ction Number
COMPANY NAME
TOWN
THANK YOU
TERMINAL ID:
12345678
MER CHANT ID:
123456789012
VISA DEBIT
1234123450001234
AID: 0001110000
EXP.: 01/09
ISSUE NUM.: 00
ICC
SALE+CASH
SALE AMT
CASHBACK
£10.00
£10.00
____ __ _
TOTAL
£20.00
VERIFIED BY PIN
TC: 1234123412341234
AUTH NO: 123456
17:12 10/10/08
TXN 0002
Cust omer Copy
COMPANY NAME
TOWN
THANK YOU
TERMINAL ID:
MER CHANT ID:
Ca rd number
sta rred out.
123456789012
VISA DEBIT
************1234
AID: 0001110000
ISSUE NUM.: 00
SALE+CASH
SALE AMT
CASHBACK
Customer Copy
indica tion
12345678
TOTAL
Pay ment method:
ICC - Ch ip Ca rd w a s inserted
SWIPED - Ca rd w a s sw iped
KEY ED - Keyed entry
ICC
£10.00
£10.00
____ __ _
£20.00
***CUSTOMER COPY***
PLEASE KEEP T HIS RECEIPT
FOR YOUR RE COR DS
VERIFIED BY PIN
TC: 1234123412341234
AUTH NO: 123456
17:12 10/10/08
TXN 0002
44
21465-09 x42xx user guide_PRINT 3.indd 46
© Spire Payments Ltd. 2012
22/03/2012 14:50
Tipping
Your terminal can be independently configured to accept a Tip on Sale transactions
and on Completion transactions (as used in Hotel and Rental environments. Refer
to Page 48 for usage in Hotel and Rental environments.
PLEASE NOTE: You must request the tipping service for Sales and/or for Completion
transactions from your leasing agent.
The terminal can configured in two different methods for Tipping:
Tip Amount Entry: In this method, the terminal prompts for an optional Tip
amount which as then automatically added to the Sale/Completion amount by
the terminal. This is the default method and unless you specify otherwise, your
terminal will be configured with this method.
Final Amount Entry: In this method, the terminal prompts for an optional Final
amount, i.e. you are prompted to enter the total of Sale/Completion amount plus
Tip. You must request this method from your leasing agent if preferred.
Differences when Entering a Tip:
The Sale/Completion amount is prompted as a “Base” amount, but is entered in
same way as a normal amount entry
The terminal is then handed to the cardholder for
Tip Entry, who responds to the prompt to enter a
Tip with No or Yes response
continued...
© Spire Payments Ltd. 2012
21465-09 x42xx user guide_PRINT 3.indd 47
45
22/03/2012 14:50
If user selects a Tip, they should type in the TIP
AMOUNT and press Enter. Alternatively, for method
2, the prompt may be for the Final amount.
The customer should check that the TOTAL is correct
and press YES/Enter to confirm or NO/Clear to change
the amounts or Cancel to cancel the transaction.
If the Tip entry method is set to Final Entry, then the user
prompts will vary.
Warnings may be shown if large Tips are entered; this prevents against keying of errors of
incorrect Tips
46
21465-09 x42xx user guide_PRINT 3.indd 48
© Spire Payments Ltd. 2012
22/03/2012 14:50
Example of a Sale + Tip receipt
Receipt details are subject to change. For a contactless transaction, only a
merchant copy receipt is printed out automatically.

M ercha nt Copy
M ercha nt na me
a nd tow n
Termina l ID
M ercha nt Number
Ca rd type
Ca rd number
Expira tion da te
Issue number
COMPANY NAME
TOWN
THANK YOU
TERMINAL ID:
MASTERCARD
BASE
TIP
TOTA L a mount
TOTAL
A uthorisa tion Co de
Time a nd da te
Tra nsa ction Number
123456789012
1234123450001234
AID: 0001110000
EXP.: 01/09
ISSUE NUM.: 00
Tra nsa ction type
Ba se a mount
Tip a mount
Tra nsa ction used
Chip a nd PIN
12345678
MER CHANT ID:
ICC
SALE
£10.00
£1.00
____ __ _
£11.00
VERIFIED BY PIN
TC: 1234123412341234
AUTH NO: 123456
17:12 10/10/08
TXN 0002
Cust omer Copy
COMPANY NAME
TOWN
THANK YOU
TERMINAL ID:
MER CHANT ID:
Ca rd number
sta rred out.
123456789012
MASTERCARD
************1234
AID: 0001110000
ISSUE NUM.: 00
SALE
BASE
TIP
ICC
£10.00
£1.00
____ __ _
TOTAL
Customer Copy
indica tion
12345678
Pay ment method:
ICC - Ch ip Ca rd w a s inserted
SWIPED - Ca rd w a s sw iped
KEY ED - Keyed entry
£11.00
***CUSTOMER COPY***
PLEASE KEEP T HIS RECEIPT
FOR YOUR RE COR DS
VERIFIED BY PIN
TC: 1234123412341234
AUTH NO: 123456
17:12 10/10/08
TXN 0002
© Spire Payments Ltd. 2012
21465-09 x42xx user guide_PRINT 3.indd 49
47
22/03/2012 14:50
Hotel Operations
The T/M4200 family products allow transaction types for use in the hotel industry.
These transaction types are also relevant for other merchant categories such as
Car Rentals.
The transaction is performed into two parts: a “Pre-Authorisation” and a
confirming “Completion”.
The Pre-Authorisation allocates cardholder funds ensuring that when a
completion transaction is performed that these funds are available.
The Pre-Authorisation and Completion transaction types are only available on
your terminal if you have requested them from your bank.
The optional Express Check-Out feature (that allows Customer Not Present
checkout) and Tipping features are not available unless requested and agreed
with your bank.
Check-In
A Pre-authorisation transaction is performed when a customer arrives at checkin. For rental, this will when the vehicle rental commences. The purpose of the
Pre-authorisation is to check that the card and cardholder are genuine and to
allocate card-holder funds so that these are available at completion time.
Step 1
To perform the Pre-authorisation, press the “More Trans” button the main screen
then choose “PRE-AUTH”
Step 2
The terminal will then prompt for the amount and the card details as for a Sale
transaction. For the amount, an estimate of the final invoice amount should be
used unless your bank advises a different policy. It is recommended that you do
not show this amount to the cardholder. For example, if the price of a room is
£/€100 per night and the guest is staying for five nights, the amount entered
should be £/€500.
continued...
48
21465-09 x42xx user guide_PRINT 3.indd 50
© Spire Payments Ltd. 2012
22/03/2012 14:50
Hotel Check In (continued)
Step 3
The terminal will then contact the host and authorise the transaction. A
merchant copy receipt will be printed. The terminal will then prompt to ask if the
receipt was printed correctly; select No if the receipt is not legible for any reason.
The authorisation code on the receipt must be used at Completion time, so the
receipt must be correctly printed and securely retained.
IMPORTANT
The Pre-Authorisation receipt containing the authorisation code must be retained to be
used for checkout. Please retain Pre-Authorisation receipts in accordance with your data
security standards for cardholder data.
Pre-Authorisation transactions will affect the cardholder’s available credit, but does not
debit the cardholder’s account. A Completion transaction must be performed to debit the
card holder’s account.
Extended Stay or Higher than Estimated Spending
If the estimated amount used for Pre-authorisation is no longer adequate to
cover the estimated final bill, incremental authorisation should be performed,
e.g. for an extended stay. This may also be required if the pre-authorisation
expires (your bank must advise on how long pre-authorisations remain valid).
An incremental Pre-authorisation is performed in exactly the same way as a
Pre-authorisation above.
Check-Out
A Completion transaction is performed at the end of a stay to debit funds
from the card holder. For a rental environment, this will be when the vehicle
is returned. In order to perform a Completion transaction, a Pre-authorisation
must have been previously performed using the same card. You will need the
authorisation code from the most recent Pre-authorisation receipt relating to
this transaction.
Step 1
A completion transaction is selected from the “More Trans” menu. Press
“COMPLETION” to start the transaction.
continued...
© Spire Payments Ltd. 2012
21465-09 x42xx user guide_PRINT 3.indd 51
49
22/03/2012 14:50
Hotel Check Out (continued)
Step 2
The terminal will prompt for a card. Either insert the card or for Express
Checkout key the card number.
Step 3
If the card number is keyed the terminal will prompt “Customer Present” Yes/No.
For an Express Checkout select No at the Customer Present prompt. Customer
Not Present operation is allowed only if you have requested Express Checkout
and have agreement from your bank.
Step 4
The terminal will now prompt for the total Pre-Authorisation amount performed
for this card. i.e. if an incremental pre-authorisation has been performed, then
the sum total of all incremental and the original pre-authorisation amount is
required.
Step 5
The terminal now prompts for the total final transaction amount. This must be
the total amount to be charged to the customer
The terminal asks for confirmation that the transaction amount is correct.
Pressing No returns to the pre-auth amount entry screen.
Step 6
Lastly the terminal will prompt for the Authorisation code from the most recent
Pre-Authorisation transaction. Key this into the terminal and press Enter.
The terminal may then contact the host to obtain additional authorisation. Once
complete the receipts will be printed. A cardholder copy receipt is produced
and must be supplied to the customer (For an Express Checkout or No-Show, you
must mail this to the cardholder).
Express Check-Out
Express Check-Out is performed in the same way as a normal Completion
transaction documented above, selecting No at the Customer Present prompt.
Note that you will require agreement from your leasing company to perform
Express Checkout transactions.
continued...
50
21465-09 x42xx user guide_PRINT 3.indd 52
© Spire Payments Ltd. 2012
22/03/2012 14:50
Hotel Check Out (continued)
Additional Charge after check-out & No-Show
Any additional charges identified after Check-Out or charges arising from
a No-Show situation should be processed as separate card not present Sale
transactions
Tipping
It is possible to activate tipping at checkout. In this case the terminal will prompt
for a Base Amount then a Tip Amount before confirming the transaction. Please
contact your leasing company if you require the tipping feature.
An Example Transaction
A hotel charges £100 per night for a room.
A customer arrives at the hotel and indicates that they will be staying for five
nights. A Pre-Authorisation is performed for £500.
Before checkout the customer indicates that they will be staying for an
additional two nights. Because this is a significant portion of the original bill the
hotel chooses to perform a top-up authorisation. This is for £200 for the extra
two nights.
Whilst at the hotel the customer spends £10 in the bar each night bringing the
total bill to £770
The Completion transaction is performed with the Pre-Authorisation amount of
£700 (the sum total of the previous authorisations) and the authorisation code
from the second pre-authorisation. The final amount entered in the transaction
is £770.
© Spire Payments Ltd. 2012
21465-09 x42xx user guide_PRINT 3.indd 53
51
22/03/2012 14:50
Refund Transactions
You must only use the original card that was used for the Sale transaction when
performing a Refund transaction.
Step 1
Press REFUND on the idle screen and swipe the
Supervisor Card when prompted.
Step 2
Press OK/Enter to acknowledge that the terminal has
accepted the Supervisor Card.
You may be requested to enter the Merchant
Password at this point.
Step 4
Type in the REFUND AMOUNT in minor denomination
(pence or cents) and press Enter.
On some software versions and configurations,
the card details entry and amount entry may be
reversed.
Example:
Typing in 1000 would equate to a value of £10.00 (€10.00 in ROI).
Step 3
Insert the customer’s Chip Card into the terminal’s
Chip Card reader or into the optional PIN Pad.
For a Magnetic Swipe only card, swipe the card
through the terminal’s magnetic swipe reader.
The terminal will read the card details and display the card
type.
continued...
52
21465-09 x42xx user guide_PRINT 3.indd 54
© Spire Payments Ltd. 2012
22/03/2012 14:50
Refund Transactions (continued)
The terminal will now attempt to connect to your Acquirer.
See page 66 for troubleshooting communication problems
The terminal will then display a response.
If the transaction is approved the terminal will display REFUND ACCEPTED and the
terminal will print the Merchant Copy of the receipt.
See Appendix A for possible transaction responses
Step 5
Remove the card and the Merchant Copy of the
receipt.
Step 6
A signature must be obtained and written on the
Merchant Copy of the receipt. Please see your bank
procedure documentation to determine if you are
required to use your own merchant signature, or
to obtain the Cardholder’s signature on a Refund
receipt.
You will be prompted to confirm that the signature
is correct (if you bank requests a merchant signature, then you always select YES).
If you press YES/Enter to confirm, it will print the Cardholder Copy of the receipt
and display REFUND ACCEPTED.
Press Enter to return to the idle screen.
If you press NO/Clear, the terminal will print out the
Refund Reversal Copy of the receipt and connect to
your Acquirer to reverse the transaction. If successful
the terminal will display REFUND REVERSAL
ACCEPTED.
Press Enter to return to the idle screen.
© Spire Payments Ltd. 2012
21465-09 x42xx user guide_PRINT 3.indd 55
53
22/03/2012 14:50
Example of a Refund receipt
N.B. Receipt details are subject to change

M ercha nt Copy
M ercha nt na me
a nd tow n
COMPANY NAME
TOWN
THANK YOU
Termina l ID
M ercha nt Number
TERMINAL ID:
12345678
Ca rd type
Ca rd number
Expira tion da te
MASTERCARD
Tra nsa ction type
REFUND
Ref und a mount
AMOUNT
MER CHANT ID:
123456789012
1234123450001234
EXP.: 01/09
S WIPED
- £10.00
SIGN BELOW
Spa ce f or customer’s
Signa ture
A cquirer response
Time a nd da te
Tra nsa ction Number
X_ _ _ _ _ _ _ _ _ _ _ _ _ _ _ _ _ _ _ _ _ _ _ _ _
PLEASE CRE DIT MY ACCOUNT
REFUND ACCEPTE D
17:12 10/10/08
TXN 0002
Cust omer Copy
COMPANY NAME
TOWN
THANK YOU
TERMINAL ID:
MER CHANT ID:
Ca rd number
sta rred out.
MASTERCARD
************1234
12345678
Pay ment method:
ICC - Ch ip Ca rd w a s inserted
SWIPED - Ca rd w a s sw iped
KEY ED - Keyed entry
123456789012
S WIPED
REFUND
Customer Copy
indica tion
AMOUNT
- £10.00
***CUSTOMER COPY***
PLEASE KEEP T HIS RECEIPT
FOR YOUR RE COR DS
REFUND ACCEPTE D
17:12 10/10/08
TXN 0002
54
21465-09 x42xx user guide_PRINT 3.indd 56
© Spire Payments Ltd. 2012
22/03/2012 14:50
Force Authorisation
Force Authorisation is a transaction type that may be available on your terminal
if permitted by your bank. This transaction type allows you to capture and
submit transaction that have been previously authorised using paper vouchers.
You can capture both Sale and Refund paper voucher transactions. Force
Authorisation must only be used if the transaction has already been authorised
on a paper voucher, and you must continue to keep the original paper voucher
for the period specified by your bank.
Some card types do not support Force Authorisation (at time of publication, Visa
Electron, Maestro, American Express, Diners Club, and JCB do not support); if not
the transaction will automatically terminate after entry of the card number.
Step 1
To perform the Force Authorisation, press the “More Trans” button the main
screen then choose “FORCE”.
Step 2
Select “SALE” or “REFUND” as required to capture the original authorisation.
Step 3
You will now be prompted to swipe the Supervisor card. Press OK/Enter to
acknowledge that the terminal has accepted the Supervisor Card.
You may be requested to enter the Merchant Password at this point.
Step 4
The terminal will then prompt for the entry of data from the paper authorisation
receipt, including card number, expiry date (this is not checked by the terminal
as transaction may have occurred in the past), card issue number, authorisation
code, and whether the cardholder was present or not at the time of the original
transaction. You will not be asked for Cardholder Security (CSC) data or Address
Verification (AVS) data, since the cardholder will no longer be available to supply
this information when capturing data from a paper voucher (please note you
must not under any circumstances write down CSC or AVS data as this is a breach
of Data Security Standard requirements.
Step 5
The terminal will print out a merchant copy receipt acknowledging the capture
of the data. Keep with the original paper voucher for your records. The
transaction data will be submitted by the terminal when it next goes online to
the acquirer.
© Spire Payments Ltd. 2012
21465-09 x42xx user guide_PRINT 3.indd 57
55
22/03/2012 14:50
Settlement
At the end of each business day, the Settlement procedure must be performed on
the terminal unless set to automatically settle at a particular time of day (if you
unsure whether your terminal settles automatically, please contact your helpdesk).
For the totals to display correctly, this must be done during the ‘Banking Window’
time set by your Acquirer. During a Settlement, the terminal will connect to your
acquirer/s and ensure that all transactions processed on the terminal have been
received by them.
The terminal may contain stored transactions for a number of reasons such as
low-risk transactions, contactless transactions. If any transactions are stored in the
terminal, a successful Settlement will automatically send them to your acquirers.
Procedure
Step 1
Ensure the idle screen is displayed. Then press
the SETTLE button on the keypad.
Step 2
When the screen displays SWIPE SUPERVISOR CARD, swipe the Supervisor Card.
Step 3
If your terminal is configured with multiple Acquirers, select the Acquirer you
want to settle (ALL HOSTS is recommended).
The terminal will connect to the selected Acquirer(s) and
print out the Settlement report(s). The Settlement totals
will then be reset to zero.
If you do not complete this procedure, it may result in your terminal failing to
automatically update and may expose you to the risk of charge-backs.
56
21465-09 x42xx user guide_PRINT 3.indd 58
© Spire Payments Ltd. 2012
22/03/2012 14:50
Settlement (continued)
Responses
Totals Agree
Everything was received by your Acquirer(s) and
the totals in the terminal match their totals.
Totals Disagree
There has been a discrepancy in the total value of
the transactions that the Acquirer has and those
in the terminal (i.e. the totals are out of balance).
The terminal will print the error code ‘73’ on the
receipt of each transaction after the discrepancy
occurred. This will require you to review the
receipts for that day’s transactions to find the one
that caused the error, and you will need to contact
your Acquirer.
PLEASE NOTE: Manual program updates will reset
the totals and may cause this response.
Totals Unconfirmed
The terminal was unable to connect to
your Acquirer(s) (See page 68 for help with
troubleshooting communication problems or call
the helpdesk).
Cannot Confirm
The terminal was unable to connect to your
Acquirer(s). This is only displayed when the
terminal has previously attempted a Settlement
that had a Totals Unconfirmed response.
PLEASE NOTE: If you are unsure of any aspect
relating to the Settlement procedure, please
contact your Acquirer or the helpdesk.
© Spire Payments Ltd. 2012
21465-09 x42xx user guide_PRINT 3.indd 59
57
22/03/2012 14:50
Reports
There are a number of different reports that can be produced by the terminal,
each with a different purpose.
To access the reports menu, ensure the Idle screen is displayed.
Then press the REPORTS button on the keypad.
PLEASE NOTE: The Supervisor Card and/or the
Merchant password (factory default 0000. but should be changed at least every
three months to your preferred value) is required to access these reports.
X Totals
This is a running report that can be printed off at
any point during the day. It displays the total number
and total value of transactions performed for each
Acquirer since the last Z report was done, but does
not reset the totals.
Z Totals
This report can be done at the end of each business
day or working week. It performs the same function
as an X Totals Report but then resets the reports
totals in the terminal back to zero.
58
21465-09 x42xx user guide_PRINT 3.indd 60
© Spire Payments Ltd. 2012
22/03/2012 14:50
Reports (continued)
Audit
Performing an Audit on the terminal will print out a report of each transaction
that has been put through the terminal since the last Settlement. This can be used
in the unlikely event of a Settlement error to allow you to check transactions in the
terminal’s Batch against the Merchant Copy of your receipts.
There are two versions of this report: Limited View and Full View. Both views show
transaction type, card type and amount.
Limited View shows only the last four digits of each card number.
Full View shows the full card number.
PLEASE NOTE: For compliance with the PCI Data Security Standard, you must
contact the helpdesk to access Full View.
Summary
Performing a Summary on the terminal will print out a report of the amount and
totals of each type of transaction performed for each Acquirer.
Reprint
This allows you to quickly reprint a copy of the last transaction receipt.
There are two versions of a reprinted receipt: Limited View and Full View.
Limited View shows only the last four digits of each card number.
Full View shows the full card number.
PLEASE NOTE: For compliance with the PCI Data Security Standard, you must
contact the helpdesk to access Full View.
Info
This report prints out a receipt displaying the settings in the terminal and may be
used if you need to contact the helpdesk.
PLEASE NOTE: The reports in this section are for optional usage and only designed
to help you keep track of your orders and accounts. These reports are not a
substitute for the Settlement procedure.
© Spire Payments Ltd. 2012
21465-09 x42xx user guide_PRINT 3.indd 61
59
22/03/2012 14:50
Reviewing transactions/Reprinting a receipt
T/M4200 family terminals maintain a Batch record of all transaction information
since the last successful Settlement was performed. It is possible to review the
Batch, find the appropriate transaction and, if required, reprint the receipt.
There are two versions of this feature: Limited View and Full View.
Limited View shows only the last four digits of each card number.
Full View shows the full card number.
PLEASE NOTE: For compliance with the PCI Data Security Standard, you must
contact the helpdesk to access Full View.
Step 1
Press MAIN MENU > BATCH > REVIEW > LIMITED VIEW
Step 2
The last transaction is displayed on the screen. You
have the option to scroll through the available
transactions using the corresponding Navigation
Buttons next to the arrows on the screen.
Reprint
To reprint the transaction, press the Navigation
Button next to ‘sel’ and the arrow on the right will
change to REPR. Press this and the terminal will print
out a Duplicate Copy of the receipt. This process can
also be used for reprinting refund receipts.
PLEASE NOTE: The Duplicate Copy will only show the last four digits of the card
number in Limited View mode. To access Full View, please contact the helpdesk.
60
21465-09 x42xx user guide_PRINT 3.indd 62
© Spire Payments Ltd. 2012
22/03/2012 14:50
Troubleshooting
Error messages
(When inserting/swiping a card or keying in the card number)
When a Chip Card is inserted, swiped or the long card number is typed in, the
terminal will check against a number of parameters downloaded from the Spire
Payments system. If the terminal rejects the card, it will display one of the following
messages:

ACQUIRER DISABLED
The terminal has become logged off from your Acquirer/s.
Please contact the helpdesk to have your terminal logged on
again.
CARD ERROR
The magnetic strip could not be read when the card was
swiped. Check that it was swiped the correct way round and
try again or try a different card.
If problems persist, please contact the helpdesk.
PLEASE REMOVE CARD
The chip could not be read when the card was inserted. Check
that it was inserted the correct way round or try a different
card and press YES/Enter to the prompt. If problems persist,
please contact the helpdesk.
EXPIRED CARD
The card inserted is past its expiration date or the date on the
terminal is incorrect.
(See page 75 for instructions on how to change the date and
time)
© Spire Payments Ltd. 2012
21465-09 x42xx user guide_PRINT 3.indd 63
61
22/03/2012 14:50
INVALID CARD
The check digit (last digit) of the card number entered
is incorrect. Double check that you have the correct
number and try re-typing the number carefully.
MAN ENT NOT ALLOWED
Typing in the number of this type of card is not allowed
by the Card Issuer. You must only insert or swipe it.
SETTLEMENT REQUIRED
If the Settlement procedure is not completed on a
regular basis, the terminal’s Batch record of totals will
become full. The Settlement procedure must be performed before you can resume taking transactions.
(See page 58 for more information)
STORE FULL
If the terminal cannot connect to your Acquirer, it will
ask you to call the Authorisation Centre and type in
the Authorisation Code manually. The terminal then
stores the transaction until it next successfully connects
to your Acquirer. To prevent delays in funds reaching
your bank account, the terminal will only store a limited number of transactions (usually five, or ten if you
have the R3210 Contactless Reader) before displaying
this message.
Please contact the helpdesk immediately.
That card number is not allowed to be used on the
terminal.
PLEASE NOTE: This message is usually the result of
typing in the card number incorrectly. Double check
that you have the correct number and try re-typing
the number carefully. If problems persist, please contact the helpdesk.
UNSUPPORTED CARD
62
21465-09 x42xx user guide_PRINT 3.indd 64
© Spire Payments Ltd. 2012
22/03/2012 14:50
Terminal problems
Terminal screen is blank
Countertop models (T4210/T4220/T4230)
••
••
••
Check that the Power Supply or mains cable is
plugged into a working electrical wall socket and
that any switch is on the on position. If an extension cable is being used, it may be fused, so check
the fuse.
If you have a Power Supply with a separate electrical mains cable, check that mains cable is firmly
plugged into the Power Supply.
Check that the Power Supply is connected and
locked into the red socket on the back of the terminal labelled POWER.
Mobile models (M4230/M4240)
••
••
Ensure a battery module is fitted.
Hold down the blue FUNCTION button on the terminal keypad for eight seconds.
If the terminal does not beep and turn on:
••
Connect the Power Supply into the red socket on
the terminal labelled POWER, or place on a powered Charging Dock.
••
Hold down the blue FUNCTION button on the terminal keypad for eight seconds.
If the terminal still does not beep and turn on:
••
Check that the Power Supply or mains cable is
plugged into a working electrical wall socket and
that any switch is on the on position. If an extension cable is being used, it may be fused, so check
the fuse.
••
If you have a Power Supply with a separate electrical mains cable, check that mains cable is firmly
plugged into the Power Supply.
••
Hold down the blue FUNCTION button on the terminal keypad for eight seconds.
PLEASE NOTE: If problems persist, please call the helpdesk.
© Spire Payments Ltd. 2012
21465-09 x42xx user guide_PRINT 3.indd 65
63
22/03/2012 14:50
Battery Module not charging
(M4230/M4240 only)
If the battery module is not charging:
•• Check that the Power Supply or mains cable is
plugged into a working electrical wall socket and
that any switch is on the on position. If an extension cable is being used, it may be fused, so check
the fuse.
•• If you have a Power Supply with a separate electrical mains cable, check that mains cable is firmly
plugged into the Power Supply.
•• Check that the Power Supply is plugged into the
red socket on the underside of the Charging Dock
or Terminal, labelled POWER.
Access Point doesn’t turn on
(M4240 only)
If the Access Point power indicator light doesn’t turn on
when the Access Point is plugged in:
•• Check that the Power Supply or mains cable is
plugged into a working electrical wall socket and
that any switch is on the on position. If an extension cable is being used, it may be fused, so check
the fuse.
•• If you have a Power Supply with a separate electrical mains cable, check that mains cable is firmly
plugged into the Power Supply.
•• Check that the Power Supply is plugged into the
red socket on the front panel of the Access Point,
labelled POWER.
PIN Pad screen is blank
If you have connected up the optional PIN Pad and the
screen appears blank:
•• Check that it is securely connected into the yellow
socket on the back of the main terminal labelled
PIN PAD.
•• Turn the main terminal off and back on again by
switching it off or unplugging it at the electrical
wall socket.
64
21465-09 x42xx user guide_PRINT 3.indd 66
© Spire Payments Ltd. 2012
22/03/2012 14:50
Receipts print out blank
Your terminal uses thermal paper rolls to print
receipts. This paper will only print on one side.
If the paper is feeding through but appears blank:
•• When the rolls supplied with the terminal are used up, you must obtain paper
rolls from the supplier recommended by
your leasing company. Check your paper
rolls
•• Check that the roll is loaded the correct
way round. See Quick Reference Guide
for more information.
Screen appears frozen
OR
Terminal does not react to inserting
a card
If the screen appears frozen and doesn’t react to
key presses or inserting a card:
•• Switch off the power by unplugging at
the wall electrical power socket.
•• Leave the terminal off for ten seconds
•• Restore the electrical supply and wait for
the terminal to complete rebooting and
return to the idle screen.
R3210 Contactless Reader not working
•• Check that the left hand green indicator
on the R3210 is pulsing. If not check the
short connecting cable is fully in place between reader (left hand connector when
looking from underneath) and the terminal green SERIAL port.
PLEASE NOTE: If the above suggestions do not resolve the problem, please contact the helpdesk.
© Spire Payments Ltd. 2012
21465-09 x42xx user guide_PRINT 3.indd 67
65
22/03/2012 14:50
Communication problems
T4210/ T4220 (dial only)
The normal sequence of messages displayed during a transaction using a dial
connection is:
DIALING NOW,
CONNECTION MADE, PROCESSING NOW,
APPROVAL XXXXXX
CONNECTION MADE, PROCESSING NOW
This message indicates that the terminal has connected successfully.
In this case, the following response displayed will be from your Acquirer.
See Appendix A for common transaction responses.
If the terminal fails to connect on the first try, it will make a further two attempts
to connect before voiding the transaction. The screen will display:
DIALING NOW, ATTEMPT #2
DIALING NOW, ATTEMPT #3
One of the following error messages may also be displayed:
LINE IDLE
The terminal has detected the presence of a line and attempted to dial but is
experiencing a problem connecting properly.
••
••
••
••
The line may require a prefix number to dial out on, for example a 9.
The number the terminal dials may not be working on your phone line.
The terminal may be connected to a broadband line without a DSL filter.
A third party call service may be in use on the line.
*LINE BUSY, WAIT*
The terminal is not detecting normal dial tone on the telephone line.
••
••
••
The line may be in use, dead or faulty.
A telephone cable or adaptor may be faulty.
The terminal may not be connected or the connection to the line is loose.
PLEASE NOTE: Please ensure you are using the telephone cable supplied with the terminal.
Other telephone cables may not be compatible.
66
21465-09 x42xx user guide_PRINT 3.indd 68
© Spire Payments Ltd. 2012
22/03/2012 14:50
T4220 (IP with dial backup)
The normal sequence of messages displayed during a transaction using an IP/
Ethernet connection is:
CONNECTING VIA IP,
CONNECTION MADE, PROCESSING NOW,
APPROVAL XXXXXX
CONNECTION MADE, PROCESSING NOW
This message indicates that the terminal has connected successfully.
In this case, the following response displayed will be from your Acquirer.
See Appendix A for common transaction responses.
If the terminal fails to connect on the first try, it will make a further two attempts
to connect before reverting to dial backup. The screen will display:
CONNECTING VIA IP, ATTEMPT #2
CONNECTING VIA IP, ATTEMPT #3
One of the following error messages may also be displayed:
LINE IDLE
The terminal cannot make a connection.
The Ethernet cable may not be connected.
••
••
Your router or LAN (Local Area Network) may not be working properly.
Your ISP (Internet Service Provider) may be experiencing problems.
CONNECTING VIA DIAL
The terminal has failed to connect 3 times using IP and has reverted to dial backup.
The terminal will try a maximum of 3 times to connect via dial and then void the
transaction if it cannot connect.
If this happens, please call the helpdesk as soon as possible to ensure that your
terminal operates at its optimum speed.
© Spire Payments Ltd. 2012
21465-09 x42xx user guide_PRINT 3.indd 69
67
22/03/2012 14:50
T4230/M4230 (GPRS , with dial backup for T4230)
The normal sequence of messages displayed during a transaction using a GPRS
connection is:
CONNECTING VIA IP,
CONNECTION MADE, PROCESSING NOW,
APPROVAL XXXXXX
CONNECTION MADE, PROCESSING NOW
This message indicates that the terminal has connected successfully.
In this case, the following response displayed will be from your Acquirer.
(See A61for common transaction responses)
If the terminal fails to connect on the first try, it will make a further two attempts
to connect before voiding the transaction (or reverting to dial backup if T4230).
The screen will display:
CONNECTING VIA IP, ATTEMPT #2
CONNECTING VIA IP, ATTEMPT #3
One of the following error messages may also be displayed:
LINE IDLE
The terminal cannot make a connection.
••
••
There may be low/no GPRS signal.
There may be no SIM card installed
PLEASE NOTE: GPRS terminals come with a SIM card pre-installed by Spire
Payments. If there is no SIM card installed, a warning will display at power up. If
this happens, please call the helpdesk.
CONNECTING VIA DIAL
A T4230 has failed to connect 3 times using GPRS and has reverted to dial backup.
The terminal will try a maximum of 3 times to connect via dial and then void the
transaction if it cannot connect.
If this happens, please call the helpdesk as soon as possible to ensure that your terminal
operates at its optimum speed.
68
21465-09 x42xx user guide_PRINT 3.indd 70
© Spire Payments Ltd. 2012
22/03/2012 14:50
M4240 (Bluetooth and dial)
The normal sequence of messages displayed during a transaction using a Bluetooth
and dial connection is:
DIALING NOW,
CONNECTION MADE, PROCESSING NOW,
APPROVAL XXXXXX
CONNECTION MADE, PROCESSING NOW
This message indicates that the terminal has connected successfully.
In this case, the following response displayed will be from your Acquirer.
See Appendix A for common transaction responses.
If the terminal fails to connect on the first try, it will make a further two attempts
to connect before voiding the transaction. The screen will display:
DIALING NOW, ATTEMPT #2
DIALING NOW, ATTEMPT #3
If the terminal fails to connect, check the following (in this order):
••
••
••
••
••
The terminal may be out of the Bluetooth range of the Access Point. If
possible, move the terminal closer to the Access Point.
Check that the Access Point is turned on/plugged in (the green light on top
of the Access Point will be illuminated if it is getting power).
Ensure the supplied telephone cable is connected to the blue LINE port on
the Access Point and to a working telephone wall socket.
Test the line by connecting an analogue telephone to the phone line that the
terminal is using. Make sure there is a normal dial tone.
The terminal may not be properly configured to the Access Point.
See Appendix F for information on how to configure your terminal and
Access Point.
© Spire Payments Ltd. 2012
21465-09 x42xx user guide_PRINT 3.indd 71
69
22/03/2012 14:50
M4240 (Bluetooth and IP/Ethernet)
The normal sequence of messages displayed during a transaction using a Bluetooth
and IP/Ethernet connection is:
DIALING NOW,
CONNECTING…,
APPROVAL XXXXXX
CONNECTING…
This message indicates that the terminal has connected successfully.
In this case, the following response displayed will be from your Acquirer.
See Appendix A for common transaction responses.
If the terminal fails to connect on the first try, it will make a further two attempts
to connect before voiding the transaction. The screen will display:
DIALING NOW, ATTEMPT #2
DIALING NOW, ATTEMPT #3
If the terminal fails to connect, check the following (in this order):
••
••
••
••
••
The terminal may be out of the Bluetooth range of the Access Point. If
possible, move the terminal closer to the Access Point.
Check that the Access Point is turned on/plugged in (the green light on top
of the Access Point will be illuminated if it is getting power).
Ensure the Ethernet cable is connected to the white NET port on the Access
Point and to a working network port.
If your terminal shares the same network as your internet, check that the
internet connection is working.
The terminal may not be properly configured to the Access Point.
See Appendix F for information on how to configure your terminal and
Access Point.
70
21465-09 x42xx user guide_PRINT 3.indd 72
© Spire Payments Ltd. 2012
22/03/2012 14:50
Appendices
Appendix A: Transaction responses
APPROVAL
The word APPROVAL, plus a 2 to 6 digit Approval Code indicates that that the transaction was approved by the Card
Issuer.
CARD BLOCKED
The Card Issuer has blocked the card from use.
CALL AUTH CENTRE
A call to the Authorisation Centre is required to complete
the transaction.
PLEASE NOTE: If this happens on successive transactions,
please call the helpdesk.
The transaction has been declined by your Acquirer or the
Card Issuer.
DECLINED
DECLINED BY CARD
The chip on the card decided to decline the transaction.
PLEASE NOTE: The card makes the final decision on whether to approve a transaction. If this happens on successive
transactions, please call the helpdesk.
INVALID TRANSACTION
The attempted type of transaction is not allowed on the
terminal.
© Spire Payments Ltd. 2012
21465-09 x42xx user guide_PRINT 3.indd 73
71
22/03/2012 14:50
Appendix B:
CVV2 and AVS responses
DATA MATCHED
The address, Post Code and CVV2 code data
supplied have all matched the data held by the
Card Issuer.
DATA NOT MATCHED
The CVV2 code and one or both of the address
details did not match the data held by the Card
Issuer.
DATA NOT CHECKED
Your Acquirer has not checked the address
data that has been typed in.
SEC. CODE MATCH ONLY
The CVV2 code typed in has matched the data
held by the Card Issuer but one or both of the
address details did not.
AVS MATCH ONLY
The address details typed in have matched the
data held by the Card Issuer but the CVV2 code
did not.
72
21465-09 x42xx user guide_PRINT 3.indd 74
© Spire Payments Ltd. 2012
22/03/2012 14:50
Appendix C: Terminal functions
Set/Change
Local Password
MAIN MENU > SETUP > PASSWD
By default, the local password is set to ‘0000’.
Use this option to set your own password.
Keypad Lock
FUNCTION > 4 > Enter
Allows the user to lock the keypad to stop accidental
or unauthorised use. The screen shows CLOSED at the
top.
Typing in the Merchant password (factory default is
0000) unlocks the keypad.
MAIN MENU > NEXT > REPRINT > LAST > LIMITED VIEW
Allows the user to reprint a receipt of the last
transaction in the current Batch.
See page 59 for an alternative procedure
Reprint
Training Mode
MAIN MENU > TERM > TRAIN
Allows the user to conduct training sessions by
switching to Training Mode.
See page 30 for more information
Change
Date and Time
MAIN MENU > SETUP > DAT/TIM
Allows the user to change the current date and time.
PLEASE NOTE: Enter the date in format (MMDDYY).
Printer Test
MAIN MENU > NEXT > TESTS > PRINTER > RECEIPT
Allows the user to test the printer.
Paper Feed
Press the * Button (only if on the Idle Screen)
OR
MAIN MENU > SETUP > PRINTER > PAPER FEED
Feeds the paper by 10mm
© Spire Payments Ltd. 2012
21465-09 x42xx user guide_PRINT 3.indd 75
73
22/03/2012 14:50
Appendix C: Terminal functions (continued)
Transaction Reversal
LAST TRANS > LIMITED VIEW
Available for 30s after a
transaction
Then enter the merchant password (default 0000),
and then swipe the Supervisor card.
Confirm that the transaction details shown refer
to the required transaction, and then select VOID.
A reversal receipt is printed.
Press CANCEL key to return to the Idle Screen
74
21465-09 x42xx user guide_PRINT 3.indd 76
© Spire Payments Ltd. 2012
22/03/2012 14:50
Appendix D: Set a PABX digit(s)
Terminals with a dial connection come pre-configured with the option to dial a 9
prefix digit before dialling out. By default, this option is “bypassed” and therefore
not active. To remove the bypass and activate the prefix, follow the procedure
below.
PLEASE NOTE: If you require a digit(s) other than 9, please call the helpdesk.
Step 1
If your terminal is showing the idle screen, press
on the keypad to return to the Desktop.
When the terminal is showing the Desktop,
press the blue FUNCTION button on the keypad
to run the Application Manager.
the white HOME button
Step 2
Use the Navigation Buttons to highlight
“Terminal Maintenance..” and press Enter on the keypad.
Step 3
Highlight “Terminal Settings...” and press Enter on
the keypad.
© Spire Payments Ltd. 2012
21465-09 x42xx user guide_PRINT 3.indd 77
75
22/03/2012 14:50
Step 4
Highlight “Set Modem Conf...” and press Enter on
the keypad.
Step 5
Highlight “Set PABX” and press Enter on the keypad.
PLEASE NOTE: The option number varies depending
on terminal model. Use the left side Navigation
Buttons to scroll down if needed.
Step 6
Highlight “Set PABX Bypass” and press Enter on the
keypad.
Step 7
By default, PABX bypass is set to “On”.
To remove the bypass and activate the 9 prefix digit,
ensure “Off” is highlighted and press Enter on the
keypad.
The screen will return to the “Set PABX” menu.
76
21465-09 x42xx user guide_PRINT 3.indd 78
© Spire Payments Ltd. 2012
22/03/2012 14:50
Returning to the Desktop
Step 1
To exit the “Set PABX” menu, press the white
HOME button on the keypad.
Step 2
If any settings were changed, you will be asked if you
want to save changes. Press Enter on the keypad to
select “Yes”.
Step 3
The screen will return to the “Maintenance” menu.
Press Cancel on the keypad to return to the Desktop.
Step 4
Either: Press the Navigation Button next to the
“Card” icon to return to the idle screen.
© Spire Payments Ltd. 2012
21465-09 x42xx user guide_PRINT 3.indd 79
77
22/03/2012 14:50
Appendix E: Power settings
Only applicable to M42xx
Step 1
If your terminal is showing the idle screen, press
the white HOME button on the keypad to return
to the Desktop.
When the terminal is showing the Desktop,
press the blue FUNCTION button on the keypad
to run the Application Manager.
Step 2
Use the Navigation Buttons to highlight
“Terminal Maintenance..” and press Enter on the
keypad.
Step 3
Highlight “Terminal Settings...” and press Enter on the
keypad.
Step 4
Highlight “Power Settings...” and press Enter on the
keypad.
78
21465-09 x42xx user guide_PRINT 3.indd 80
© Spire Payments Ltd. 2012
22/03/2012 14:50
Set Inactive Power Off
This option determines how many minutes of inactivity the terminal waits before
automatically shutting down. The default value is 60 minutes.
Step 1
Highlight “Set Inactive Power Off” and press Enter
on the keypad.
Step 2
Type in the number of minutes desired and press
Enter on the keypad.
The screen will return to the “Power Settings” menu.
Set LCD Backlight
This option determines how many seconds of inactivity the terminal waits before
the LCD backlight turns off. The default value is 90 seconds.
Step 1
Highlight “Set LCD Backlight” and press Enter on the
keypad.
Step 2
Type in the number of seconds desired and press
Enter on the keypad.
The screen will return to the “Power Settings” menu.
© Spire Payments Ltd. 2012
21465-09 x42xx user guide_PRINT 3.indd 81
79
22/03/2012 14:50
Returning to the Desktop
Step 1
To exit the “Power Settings” menu, press the
white HOME button on the keypad.
Step 2
If any settings were changed, you will be asked if you
want to save changes. Press Enter on the keypad to
select “Yes”.
Step 3
The screen will return to the “Maintenance” menu.
Press Cancel on the keypad to return to the Desktop.
Step 4
Either: Press the Navigation Button next to the
“Card” icon to return to the idle screen.
80
21465-09 x42xx user guide_PRINT 3.indd 82
© Spire Payments Ltd. 2012
22/03/2012 14:50
Appendix F: Bluetooth pairing procedure
Step 1
Disconnect power lead from the access point (if already powered)
Ensure the terminal is connected to the Access Point with the provided pairing
cable between the green SERIAL ports. Ensure that telephone and network cables
are connected as required for the access point model.
Connect power lead to the access point.
Step 2
AP210 only: Press and release the “Pairing” button on the front panel of the Access
Point. The green LED on top of the AP210 will begin to flash to indicate pairing
mode has been enabled.
Step 3
If your terminal is showing the idle screen, press
the white HOME button on the keypad to return
to the Desktop.
When the terminal is showing the Desktop,
press the blue FUNCTION button on the keypad
to run the Application Manager.
Step 4
Ensure “Deployment Config.” Is highlighted and press
Enter on the keypad.
Step 5
Highlight “Bluetooth Config.” and press Enter on the
keypad.
Most procedures will now proceed at Step 8,
However, you may have to perform Steps 6 and 7 if
they are presented.
Step 6
Applicable to some terminal configurations using
AP100 and AP110 only
AP100: Select “Modem” , then Enter
AP110: Select “Ethernet”, then Enter
continued…
© Spire Payments Ltd. 2012
21465-09 x42xx user guide_PRINT 3.indd 83
81
22/03/2012 14:50
Step 7
Applicable to some terminal configurations using
AP100 and AP110 only.
Ensure “Yes” Is highlighted and press Enter on the
keypad.
Step 8
When the display shows “OK” and the module
address, press Enter on the keypad.
The address shown is the Bluetooth address of the terminal and
will correspond with the number on a label on the underside of
the Terminal.
Step 9
When the display shows “OK” and the router
address, press Enter on the keypad to start the
pairing process.
The address shown is the Bluetooth address of the Access Point and
will correspond with the number on a label on the underside of the
Access Point.
PLEASE NOTE: If this step fails, see note below
Step 10
When the display shows “PAIRING COMPLETED”,
press Enter on the keypad.
PLEASE NOTE: If the display shows “Router Module
Detect Failed” or “PAIRING FAILED”, press Enter. Power off the Access Point and
power it back on again. Ensure the terminal is connected to the Access Point with
the provided serial cable using the SERIAL ports. Go back to Step 1 to re-try the
pairing process.
Step 11
This step is applicable to most procedures. If it not
shown, proceed at step 12.
When the router type is shown, press Enter on the
keypad.
The router type will be shown as MDM V90, ETH or Dual comm.
,depending on the access point model.
continued…
82
21465-09 x42xx user guide_PRINT 3.indd 84
© Spire Payments Ltd. 2012
22/03/2012 14:50
Step 12
Check that the bottom line of text shows “BT gate
v90, Country Code B4” (57 for Republic of Ireland).
This bottom line of text is shown for AP100 and
AP210 only.
Press Enter on the keypad.
PLEASE NOTE: If country code is incorrect, select “No” and press Enter on the
keypad. Call the helpdesk for further assistance.
Step 13
AP110 only.
Ensure “Yes” Is highlighted and press Enter on the
keypad.
PLEASE NOTE: If your network does not use DHCP, do not attempt this procedure
yourself. Please call the helpdesk for assistance.
Step 14
The terminal will upload its settings to the Access
Point.
The Access Point will sound an audible alert three
times.
Step 15
AP110 only. If DHCP is enabled, the display will show
this. Press Enter on the keypad
Step 16
Highlight “No” and press Enter on the keypad.
The terminal will return to the “Deployment
Config.” screen.
© Spire Payments Ltd. 2012
21465-09 x42xx user guide_PRINT 3.indd 85
83
22/03/2012 14:50
Returning to the idle screen
Step 1
To exit the “Deployment Config.” menu, press Cancel
on the keypad two times. This will return you to the
Desktop.
Step 2
Either: Press the Navigation Button next to the
“Card” icon to return to the idle screen.
84
21465-09 x42xx user guide_PRINT 3.indd 86
© Spire Payments Ltd. 2012
22/03/2012 14:50
Glossary
Terminal operation
AVS
Address Verification System. A security method used for Customer Not Present
keyed transactions to help reduce fraud. This method confirms the house number
and numbers from the post code of the cardholder’s registered address.
Batch
The store of transaction totals in the terminal.
CVV2
Card Security Code (also known as CVV, CV2, CVC, CVVC and CSC). This is usually
used for keyed transactions to reduce fraud. The CVV2 code is a 3 digit number
found on the signature strip, or for American Express a four digit code on the front
of the card.
Cashback
A value-add service which allows you to debit a customers debit card and hand
over the equivalent value in cash.
Merchant Number
A 7-16 digit number assigned by your bank to identify a merchant. Often
abbreviated to MID. Additional card schemes may have separate Merchant
Numbers
PIN
Personal Identification Number. This is usually a 4 digit number entered at the
point of sale to validate the cardholder.
Settlement
The procedure whereby the terminal checks the totals it has stored in its Batch
with the totals stored at your Acquirer.
Terminal ID (TID)
A unique 8-digit number assigned to each terminal.
UKCA
UK Cards Association. The organisation defining the rules and standard for the
operation of most Point of Sales equipment in the United Kingdom and Ireland.
Formerly known as Association for Payment Clearing Services (APACS).
© Spire Payments Ltd. 2012
21465-09 x42xx user guide_PRINT 3.indd 87
85
22/03/2012 14:50
Communications
Access Point
A device that allows a Bluetooth terminal to connect to a host or Acquirer.
The Access Point can communicate with an external network either via dial or
network communications.
Bluetooth
A wireless method of short range communication usually found in mobile phones
and other handheld devices.
Bluetooth pairing
Before Bluetooth devices can communicate they need undergo a process called
pairing.
See Appendix F for details of the Spire Payments pairing process used with the
M4240 and Access Points.
Broadband
A means of connecting to the internet. Broadband systems are typified by being
“always on” and having faster connection speeds than dial-up. The most popular
kinds of broadband include ADSL (Asymmetric Digital Subscriber Line) and Cable.
Dial backup
The ability of a terminal to revert to the dial mode of communication in the event
of an IP/Ethernet connection being unavailable.
DHCP
Dynamic Host Control Protocol. This is a system whereby IP Addresses are assigned
to networked equipment automatically.
DSL filter
A device that improves the quality of an ADSL (broadband) enabled telephone line
by separating data and voice signal frequencies.
Ethernet
A standard used to physically connect devices together. Networking protocols such
as IP can be used over Ethernet connected equipment.
GPRS
General Packet Radio Service. This is a method of communicating data via the
mobile phone network.
86
21465-09 x42xx user guide_PRINT 3.indd 88
© Spire Payments Ltd. 2012
22/03/2012 14:50
IP
Internet Protocol. This is the method whereby data is transmitted over networks
such as the Internet (may also be expressed as TCP/IP).
IP address
A number represented in the form XXX.XXX.XXX.XXX which identifies a device
on the Internet (for example: 193.129.71.130). These numbers are the networking
equivalent of telephone numbers.
MAC address
Media Access Control address. An individual address given to every piece
of Ethernet networking equipment. This address is always marked on Spire
Payments equipment containing such an address. Do not confuse with Message
Authentication Certificate; a certificate used in the UKCA Standard 70 message
protocol.
PABX
Private Automatic Branch eXchange. This is usually found as part of a larger
telephone system, which requires the user to press a number on their telephone
to make an external call.
TCP port
A number representing a service at a particular IP address.
© Spire Payments Ltd. 2012
21465-09 x42xx user guide_PRINT 3.indd 89
87
22/03/2012 14:50
88
21465-09 x42xx user guide_PRINT 3.indd 90
© Spire Payments Ltd. 2012
22/03/2012 14:50
Terminal ID
Merchant ID
© Spire Payments Ltd. 2012
21465-09 x42xx user guide_PRINT 3.indd 91
89
22/03/2012 14:50
www.spirepayments.com
21465-09
© Spire Payments Ltd. 2012
21465-09 x42xx user guide_PRINT 3.indd 92
22/03/2012 14:50