1
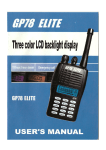
VX-245M
USER MANUAL
http://www.tccom.co.th
THANK YOU
We are grateful you decided to purchase this
SPENDER VX-245M FM transceiver. This series of handhelds
was developed to satisfy the requirement for a compact and simple
to operate yet contains multiple new features.
SPENDER VX-245M believes that the compact size, coupled
with reasonable cost, will meet your satisfaction.
VX-245M
USER MANUAL
http://www.tccom.co.th
Contents
Product Investigation
Charging the Battery
Remaining Battery Capacity
Insert Battery
Installing/Removing the battery pack
Installing/Removing belt clip
Getting Acquainted
Key Controls The Working of VX-245M
LCD Symbol & Meaning
Control Working System Command
ON/OFF VX-245M
Select Channel
Channel Scan
Voice Control
Setting Power Output
Squelch Control
Setting Background Light
Setting ON/OFF Beep Sound
Setting Lock of Working system
Setting Time Out Time
To change the scan resume method
Duplex Control
Setting ON/OFF Tone Scale As a Receiving
Setting ON/OFF Tone Scale As a Transmitter
ON/OFF Duplex Control
Setting Memory 118 Channel
1
2
2
3
3
4
5
5
7
8
8
8
8
8
9
9
9
10
10
10
10
11
11
11
12
12
Recalling Memory Channel
14
Ctcss Tone Frequency Chart
Codes Digital (DCS)
15
16
VX-245M
USER MANUAL
http://www.tccom.co.th
Product Investigation
Thank you for using our SPENDER VX-245M. You should investigate your product carefully
before using it. If you are still have any problem about product. You should contact with the
distributor immediately. Confirm your product again in order to have a certainty and accuracy.
Product Instrument
Tool
Amount
SPENDER VX-245M
Adapter
Charger (with Adaptor)
Battery Pack
Belt Clip
Tie
Earphone
User@s Manual
1
1
1
1
1
1
1
1
1
VX-245M
USER MANUAL
http://www.tccom.co.th
Charging the Battery
Using the Battery Charger
SPENDER VX-245M needs power from 3 pieces of battery AA size(electromotive force 3.6
Volt/1300 Mill ampere).
1. Battery Charger together with
SPENDER VX-245M. Bring SPENDER
VX-245M and battery attached SPENDER
VX-245M lay down on the charger base
in vertical to charge.
2. Battery Pack Charger in piece.
Bring 3 pieces of battery pack or
charger. Lay it down on the charger
base to charge.
PIC
Remaining Battery Capacity
High battery power
Medium battery power
Low battery power
Recharge or replace the batteries.
2
VX-245M
USER MANUAL
http://www.tccom.co.th
Insert Battery
Installing/Removing Battery Pack
Battery pack not electrifrified when it@s produce. Please electrify it before using it (Please read the
instructions of the fast charger).
Slip the battery cover backward at
the back of the interphone, and then
get it from the body of the interphone.
According to the picture, install the
battery, when you want to take out
the battery, draw the silk band which
The lock tock tongue of the battery
cover aims at the lock groove, and
then Make it tight at the right position.
Installing/Removing the battery pack
You can use 3 sections AA type batteries to replace the usage of
battery pack. Please use the high quality alkaline battery, and you@ll
acquire longer usage usage time.
3
VX-245M
USER MANUAL
http://www.tccom.co.th
Slip the battery cover backward at the back
of the interphone, and then get it from the
body of the interphone.
Install or get out 3 section AA style battery Make
sure that they aim at the mark of polarity on the
interphone.
The lock tongue of the battery cover aims at the
lock cannel of the interphone, and then makes it
tight at right position
Installing/Removing belt clip
According to the necessary, makescrews,which
are attached To install belt pinch fix eat the pinch
fixed at back of interphone.
4
VX-245M
USER MANUAL
http://www.tccom.co.th
Getting Acquainted
Key Controls The Working of VX-245M
1. Antenna
2. On/Off key and true the volume level. (Power Switch/Volume)
Turn this key in turn the volume level is DClickE sound to switch on.
Turn this key in a counter clockwise direction to switch off while it is
working. We can turn this key to increase or decrease the volume.
3. Menu [ Menu Key]
Pressing the key can carry out every kind of function. Press the key
for another 3 seconds it will close the keyboard just for another
3 seconds it will open the keyboard
4. CALL [Call Key]
Press call key to send signal.
5
VX-245M
USER MANUAL
http://www.tccom.co.th
5. MON Key [Monitoring Key]
Press Mon key you receive the signal directly when using Tone Scale
(CTCSS/DCS)
6. UP [ ▲] DOWN [ ]
Use for selecting signal or turn menu style.
7. Microphone
For speaking by holding VX-245M away form mouth for few inches.
Then speak messages slowly and accurately.
8. Speaker/Mic Jack
For speaking by holding VX-245M away from mouth for few inches
inches then speak slowly accurately.
9. PTT Key [Push-to-talk]
Press this key for a while to send signal toward receiver and release
it to wait for the answering signal. You need to speak message
slowly and accurately when the conversation finished. You have to
release to listen the answering message. When pressing PTT key,
do not speak immediately because you may miss the message at
the beginning.
10. SP/MIC Plug
6
VX-245M
USER MANUAL
http://www.tccom.co.th
LCD Symbol & Meaning
1. This symbol appears when we set the keys lock of the working system.
2. This symbol appears when VX-245M received the signal. LCD shows the symbol of receiving
signal (S-Meter) and press PTT key to connect. LCD shows sending symbol.
3. This symbol appears when selecting the capacity of sending in 3 levels.
4. This symbol appears when pressing the Menu key.
5. This symbol appears when getting into Duplex working condition.
6. This symbol appears when using Analog Tone command.
7. This symbol appears when setting the prompt level for receiving.
8. Number D88.8.8.8.8E indicates the frequency and tone scale frequency and major signal channels.
9. This symbol appears when there is a Call sound.
10. This symbol appears when sending broadcast signal without press PTT key.
11. This symbol appears when using Save command.
12. Low battery indicator. You will know the battery level.
13. Number D88E indicates major signal and minor signal (CTTSS).
14. This symbol appears when pressing MON key to receive signal directly.
15. This symbol appears when using scan Memory scanner command.
7
VX-245M
USER MANUAL
http://www.tccom.co.th
Control Working System Command
ON/OFF VX-245M
Turn Power to on/off VX-245M and turn to increase or decrease volume level.
On : Turn key to open VX-245M / Volume in a clockwise direction.
Off : Turn key to open VX-245M / Volume in a counter clockwise direction.
Select Channel
Press [] or [] key and turn to select the frequency as need (245.0000-245.9875 MHz).
Channel Scan
Frequency Scan is a frequency scan of major signal channel that
are 245.0000-245.9875 MHz. Steps of Scan
1. Press [MENU] key. The screen will show [SCAN ? 01].
2. Press [PTT] key. VX-245M will automatically scan by itself.
3. Press [PTT] key. Stop scanning.
Voice Control
1. Press [MENU]+[ or] key to select command [VOX ? 02].
2. Press [PTT] key. VX-245M will select speed level to instruct by voice. OFF 1-9 levels
[VOX OFF ] Close the instruction by voice.
[VOX 1 ] Lowest speed.
[VOX 5 ] Middle speed.
[VOX 9 ] Highest speed.
3. Press [PTT] key to confirm.
4. Press [MON] key 1 time to do next step press 2 times to quit the menu.
8
VX-245M
USER MANUAL
http://www.tccom.co.th
Setting Power Output
1. Press [MENU]+[or] key to select [POW ? 03] command.
2. Press [PTT]+[ or] key to select power output level 3 levels
that are Low Mid Hi.
3. Press [PTT] key to confirm.
4. Press [MON] key 1 time to do next step press 2 times to quit the menu.
Squelch Control
1. Press [MENU]+[ or] key to select [SQL ? 04] command.
2. Press [PTT]+[ or] key to select speed level of receiving signal.
There are 0-9 level 0 The best level of receiving signal.
5 The middle level of receiving signal.
9 The lowest level of receiving signal.
3. Press [PTT] key to confirm.
4. Press [MON] key 1 time to do next step press 2 times to quit the menu.
Setting Background Light
1. Press [MENU]+[ or] key to select [LED ? 05] command.
2. Press [PTT]+[ or] key to select background light level.
There are 3 levels AUTO On/Off automatically.
ON Open.
OFF Close.
3. Press [PTT] key to confirm.
4. Press [MON] key 1 time to do next step press 2 times to quit the menu
Setting ON/OFF Beep Sound
1. Press [MENU]+[ or] key to select [BEEP ? 06] command.
2. Press [PTT]+[ or] key to select [ON] or [OFF].
3. Press [PTT] key to confirm.
4. Press [MON] key 1 time to do next step press 2 times to quit the menu.
9
VX-245M
USER MANUAL
http://www.tccom.co.th
Setting Lock of Working System
1. Press [MENU]+[ or] key to select [KEYBO ? 07] command.
2. Press [PTT]+[ or] key to select [AUTO] or [OFF].
3. Press [PTT] key to confirm.
4. Press [MON] key 1 time to do next step press 2 times to quit the menu.
Setting Time Out Time
1. Press [MENU]+[ or] key to select [TOT ? 08] command.
2. Press [PTT]+[ or] key to prevent the stuck key. There are 9 levels.
OT? OFF,30,60,90,120,150,180,210,240,270 seconds.
3. Press [PTT] key to confirm.
4. Press [MON] key 1 time to do next step press 2 times to quit the menu.
To change the scan resume method.
1. Press [MENU] key
2. Press[or]key to select Menu [09? SCN].
3. Press [PTT] switch to enter scanning resume method setting
Display appears currently scanning mode
4. Press [or] key to change scanning resume method.
5. Press [PTT] switch to store new setting, otherwise, press [PTT]
key to cannel.
6. Press [MON] key to return to MENU mode.
7. Press [or] key to set other Menu continuously.
8. Press [MON] key to exit MENU mode.
10
VX-245M
USER MANUAL
http://www.tccom.co.th
Duplex Control
1. Press [MENU]+[ or] key to select [dIFFR ? 10] command.
2. Press [PTT]+[ or] key to select Duplex [00.0000] N [99.9875].
3. Press [PTT] key to confirm.
4. Press [MENU]+[ or] key to select [S-d ? 12] command.
**Running Duplex Press [CAL] to confirm + [PTT].
**Working Duplex Press [CAL] to confirm + [PTT].
Setting ON/OFF Tone Scale As a Receiving
(CTCSS + DCS Setup)
1. Press [MENU]+[ or] key to select [R+CdC ? 11] command.
2. Press [PTT]+[ or] key to select tone scale frequency (Analog).
OFF Close, [67.0 1] to [254.1 50] open tone scale
3. Press [CAL] key to confirm.
4. Press [MENU]+[ or] key to select [T-CdC ? 11] command.
5. Press [MENU]+[PTT] key to select tone scale frequency (Digital)
OFF Close, [67.0 1] to [254.1 50] open tone scale
6. Press [CALL] key to confirm
** Subject 1 to 3 function control with CTCSS 50 channel (Transmitters)
Subject 1 to 3 function control with DCS 105 channel (Transmitters)
Setting ON/OFF Tone Scale As a Transmitters
(CTCSS + DCS Setup)
1. Press [MENU]+[ or] key to select [T+CdC ? 12] command.
2. Press [PTT]+[ or] key to select tone scale frequency (Analog).
OFF Close, [67.0 1] to [254.1 50] open tone scale
3. Press [CAL] key to confirm.
4. Press [MENU]+[ or] key to select [T-CdC ? 12] command.
5. Press [MENU]+[PTT] key to select tone scale frequency (Digital)
OFF Close, [67.0 1] to [254.1 50] open tone scale
11
VX-245M
USER MANUAL
http://www.tccom.co.th
6. Press [CALL] key to confirm
** Subject 1 to 3 function control with CTCSS 50 channel (Receiver)
Subject 1 to 3 function control with DCS 105 channel (Receiver)
ON/OFF Duplex Control
1. Press [MENU]+[ /] key to select [S-d ? 13] command.
2. Press [PTT] 1st time to open Duplex +
3. Press [MENU]+[ /] key to select [S-d ? 13] command.
4. Press [PTT] 2nd time to open Duplex 5. Press [MENU]+[ /] key to select [S-d ? 13] command.
6. Press [PTT] 3rd time to close Duplex (There is not +,- sign)
**Every step needs to do continuously.
Setting Memory 118 Channel
1. Press [PTT]+[MENU] key promptly. Power ON VX-245M for 3 seconds.The screen will show
[SELF]. There are 8 steps of memory.
Step 1. Press [MENU] key. The screen will show [CH-01 1].
Press [/] key to select memory channel.
Step 2. Setting receiving frequency and press [PTT] key. The screen
will show [------ 2].
Press [MON] or [/] key to select the frequency as needed.
***Press [CAL] key to select Step 6.25 KHz or 12.5 KHz.
Step 3. Setting ON/OFF Tone Scale As a Receiving
(CTCSS + DCS Setup)
Press [PTT] key. The screen will show [OFF 3].
Press [MENU] key 1st time+[/] key to select digital tone
frequency (DCS).
Press [MENU] key 2nd time+[/] key to select analog
tone frequency (CTCSS).
Press [CAL] key to cancel frequency control [OFF 3].
12
VX-245M
USER MANUAL
http://www.tccom.co.th
Step 4. Setting Sending Frequency. Press [PTT] key. The screen
will show [------ 4].
Press [MON] or [p or q] key to select the frequency as needed.
***Press [CAL] key to select Step 6.25 KHz or 12.5 KHz.
Step 5. Setting ON/OFF Tone Scale As a Sending (CTCSS + DCS Setup)
Press [PTT] key. The screen will show [OFF 5].
Press [MENU] key 1st time+[/] key to select digital tone
frequency (DCS).
Press [MENU] key 2nd time+[/] key to select analog
tone frequency (CTCSS).
Press [CAL] key to cancel frequency control [OFF 5].
Step 6. Setting prohibit pressing the sending key cross the receiving
signal (BLC)
Press [PTT] key. The screen will show [OFF 6].
Press [/] key to change 1 or 2 command.
**Notes : 1. Use while there is a signal in normal channel.
2. Use while there is a signal in small channel (CTCSS/DCS).
Step 7. Setting Scan Command. Scan ADD/Del
(Add-scan, Del-scan skip)
Press [PTT] key. The screen will show [dEL 7].
Press [/] key to select (Add-scan, Del-scan skip)
***Notes : Select Add Use scanning to search signal channel.
DEL Use scanning command to ignore the unwanted channel.
Step 8. Setting Power Output [Hi/Low]
Press [PTT] key. The screen will show [L 8].
Press [/] key to select [Hi/Low].
Press [PTT] key to start new memory channel.
13
VX-245M
USER MANUAL
http://www.tccom.co.th
Recalling Memory Channel
1. Press [MENU] key for a while then power on VX-245M. The screen
will show memory channel [CH-01].
2. If you need to change the frequency number. Press [MENU] for
a while and then power on VX-245M.
14
VX-245M
USER MANUAL
http://www.tccom.co.th
CTCSS TONE FREQUENCY CHART
CH.
1
2
3
4
5
6
7
8
9
10
11
12
13
14
15
16
17
FRE.(Hz)
67.0
69.3
71.9
74.4
77.0
79.7
82.5
85.4
88.5
91.5
94.8
97.4
100.0
103.5
107.2
110.9
114.8
CH.
18
19
20
21
22
23
24
25
26
27
28
29
30
31
32
33
34
FRE.(Hz)
118.8
123.0
127.3
131.8
136.5
141.3
146.2
151.4
156.7
159.8
162.2
165.5
167.9
171.3
173.8
177.3
179.9
15
CH.
35
36
37
38
39
40
41
42
43
44
45
46
47
48
49
50
FRE.(Hz)
183.5
186.2
189.9
192.8
196.6
199.6
203.5
206.5
210.7
218.1
225.7
229.1
233.6
241.8
250.3
254.1
VX-245M
USER MANUAL
http://www.tccom.co.th
CODES DIGITAL (DCS)
ITEM
1
2
3
4
5
6
7
8
9
10
11
12
13
14
15
16
17
18
19
20
21
22
23
24
25
CODE
023
025
026
031
032
036
043
047
050
051
053
054
065
071
072
073
074
114
115
116
122
125
131
132
134
ITEM
26
27
28
29
30
31
32
33
34
35
36
37
38
39
40
41
42
43
44
45
46
47
48
49
50
CODE
143
145
152
155
156
162
165
172
174
205
212
223
225
226
243
244
245
246
251
252
255
261
263
265
266
ITEM
51
52
53
54
55
56
57
58
59
60
61
62
63
64
65
66
67
68
69
70
71
72
73
74
75
16
CODE
271
274
306
311
315
325
331
332
343
346
351
356
364
365
371
411
412
413
423
431
432
445
446
452
454
ITEM
76
77
78
79
80
81
82
83
84
85
86
87
88
89
90
91
92
93
94
95
96
97
98
99
CODE
455
462
464
465
466
503
506
516
523
526
532
546
565
606
612
624
627
631
632
654
662
664
703
712