1
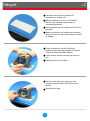
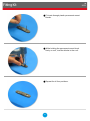
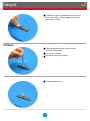
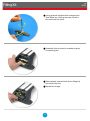
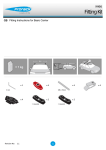
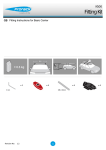
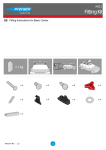
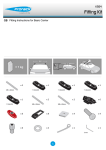
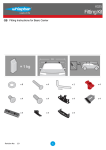
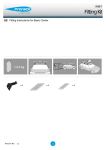
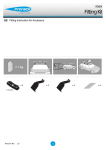
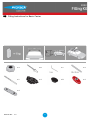
K323
Fitting Kit
GB Fitting Instructions for Basic Carrier
x4
x8
x1
x4
x1
x4
x8
x4
x4
Revision No:
1.2
1
GB
Fitting Kit
K323
First Time Installation
Remove parts from packaging and check
contents. Contact your Prorack dealer if parts
are missing or damaged.
This kit fits type A, B, C and D.
These instructions show type A crossbar
fitted. They also apply to type B, C and D.
Use keys to remove covers.
2
GB
Fitting Kit
K323
Use hex screwdriver to reverse adjusting
screw 10 turns.
Remove clamp block by pressing backwards.
Fit rubber pad (supplied with crossbar) to foot.
Make sure the pad fits into the holes
underneath the foot.
3
GB
Fitting Kit
K323
Carefully select desired position for
crossbars on vehicle roof.
Adjust crossbar in or out to suit vehicle.
Refer to the crossbar instructions for
crossbar adjustment.
Apply masking tape to vehicle roof in all four
positions.
Make sure there is no interference between
what you intend to carry with aerials, sunroof
or tailgate.
Place crossbar on vehicle. Minimum
recommended spacing between the bars is
700mm (unless otherwise stated).
Trace around rubber pad using a pencil or
pen.
Repeat for all four positions.
Remove both pins from each leg (use
spanner located inside left hand cover to
assist).
Repeat for all legs.
4
GB
Fitting Kit
K323
While holding foot, detach crossbar from foot.
Drill through the two holes in the foot while
holding foot tight on roof in marked position.
Remove masking tape and place silicon
sealant around drilled holes on roof for all
four positions.
5
GB
Fitting Kit
K323
Fit rivets through plastic permanent mount
blocks.
While holding the permanent mount block
firmly on roof, rivet the blocks to the roof.
Repeat for all four positions.
6
GB
Fitting Kit
K323
Fit plastic plugs to permanent mount blocks
over rivet heads. If they appear very loose,
glue them in place.
Fitment
Select grubscrews and screw into the
vehicle's fixed points.
Do not over tighten.
Repeat for all four positions.
Fit nut to grubscrew.
7
GB
Fitting Kit
K323
Using spanner supplied with crossbar and
3mm Allen key, back grubscrew off half a
turn and lock nut down.
Assemble foot and pad to crossbar legs by
re-inserting pins.
Select plastic internal block (from fitting kit)
and insert into foot.
Repeat for all legs.
8
GB
Fitting Kit
K323
Place crossbar foot over grubscrews.
Tighten the red plastic knob.
Ensure the red plastic knob is in the position
shown when fully tightened.
9
GB
Fitting Kit
K323
Tighten adjusting screw to 5 Nm.
Check crossbar is securely attached to the
vehicle.
Use keys to fit and lock covers
CAUTION: Regularly check screws are tight
10