1
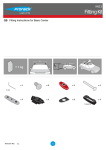
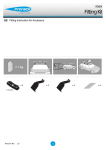
K564
Fitting Kit
GB Fitting Instructions for Basic Carrier
x2
x1
x1
x1
x1
x2
x2
x6
x6
x8
x4
x4
x6
x4
x1
x1
1
x1
2
GB
Fitting Kit
K564
First Time Installation
Remove parts from packaging and check
contents. Contact your Prorack dealer if parts
are missing or damaged.
This kit fits type D only.
Use keys to remove covers.
4
GB
Fitting Kit
K564
Remove Hex Key from right hand cover.
Front and rear crossbars only:
Use the Hex Key to remove the endcap
screw.
Remove the endcap by pulling on the
endcap pin and pushing on the top of the
endcap. Use a side to side motion to assist.
Repeat on other crossbar.
5
GB
Fitting Kit
K564
Use hex screwdriver to reverse adjusting
screw 10 turns.
Press adjusting screw and slide the leg
completely off the crossbar.
Use the Hex Key to fully undo the adjusting
screw.
6
GB
Fitting Kit
K564
Remove the adjusting screw and store in a
safe place.
Repeat on both leg assemblies.
Use the Hex Key to lift the toggle assembly.
Remove the complete toggle assembly.
7
GB
Fitting Kit
K564
Store items away in a safe place.
Place two packers on each leg.
Repeat on both leg assemblies.
Insert the capscrew and washer together
through the back of the leg.
8
GB
Fitting Kit
K564
Assemble the nut onto the capscrew. Do Not
Fully Tighten.
Place leg assembly back onto crossbar.
Ensure the nut goes into the bottom slot of
the crossbar.
Repeat on other crossbar.
Carefully hold the endcap assembly and
reinsert back onto the crossbar.
Use the Hex Key to secure the endcap screw
back into place.
9
GB
Fitting Kit
K564
Fitment
Attaches to factory-fitted mounting points
Open or remove fixed-point covers.
Install adaptor onto vehicle.
Repeat for all six positions.
It is important to put the grubscrews in the
correct position on the vehicle.
Use the following grubscrew lengths:
A = M6 x 40mm
B = M6 x 50mm
C = M6 x 60mm
10
GB
Fitting Kit
K564
Screw grubscrew into adaptor using hex key.
Tighten firmly.
Repeat for all six positions.
Refer to the underside of the pad for the part
number.
It is important to put the pads in the correct
position on the vehicle.
Letters refer to the pad part numbers and
position.
Pad Part Number:
Supplied with crossbars:
A = 11-04-216
Supplied in fitting kit box:
B = 11-04-229
C = 11-04-230
D = 11-04-233
E = 11-04-234
11
GB
Fitting Kit
K564
Place pad over grubscrew.
Repeat for all six positions.
Please check the rear of this manual for
information relating specifically to your
vehicle.
Adjust crossbar in or out to suit vehicle.
Refer to the crossbar instructions for
crossbar adjustment.
Front and rear crossbars only:
Ensure each end of the crossbar is adjusted
equally.
12
GB
Fitting Kit
K564
Using 5mm Hex Key supplied with this kit,
fully tighten to 5Nm.
Centre crossbars only:
Use the Hex Key to fully undo the adjusting
screw.
Press adjusting screw and pull crossbar legs
out. Refer to the crossbar instructions for
crossbar adjustment.
Ensure each end of the crossbar is adjusted
equally.
13
GB
Fitting Kit
K564
Tighten adjusting screw to 5 Nm.
All Crossbars:
Remove clamp block by pressing backwards.
Select plastic internal block (from fitting kit)
and insert into foot.
14
GB
Fitting Kit
K564
Place crossbars on pads ensuring the pads
fit into the holes underneath the foot and the
grubscrew pass through the hole in the foot.
Tighten the red plastic knob.
Ensure the red plastic knob is in the position
shown when fully tightened.
Repeat for all six positions.
15
GB
Fitting Kit
K564
Check crossbar is securely attached to the
vehicle.
Use keys to fit and lock covers
CAUTION:
Recheck all fasteners immediately after a load is
applied to the crossbars.
Regularly check screws are tight.
16